Dataset
Dataset storage enables you to sequentially save and retrieve data. A unique dataset is automatically created and assigned to each Actor run when the first item is stored.
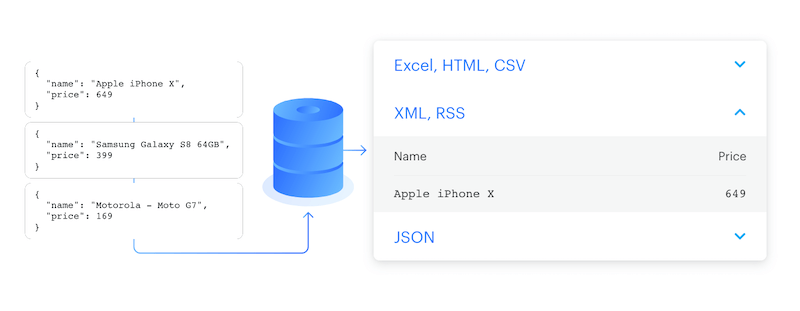
Typically, datasets comprise results from web scraping, crawling, and data processing jobs. You can visualize this data in a table, where each object is forming a row and its attributes are represented as columns. You have the option to export data in various formats, including JSON, CSV, XML, Excel, HTML Table, RSS or JSONL.
Named datasets are retained indefinitely. Unnamed datasets expire after 7 days unless otherwise specified. Learn more
Dataset storage is append-only - data can only be added and cannot be modified or deleted once stored.
Dataset schema
Actors can define a dataset schema that describes the structure of each dataset item and controls how data appears in the Output tab. The schema has two components:
fields- JSON Schema describing each item's structure, enabling validation and providing metadata for AI agentsviews- Display configurations that control field ordering, formatting, and presentation in the Console
Dataset schemas are defined in the Actor's .actor folder and apply to the Actor's default dataset.
Basic usage
You can access your datasets in several ways:
- Apify Console - provides an easy-to-understand interface.
- Apify API - to access your datasets programmatically.
- Apify API client - to access your datasets from any Node.js/Python application.
- Apify SDKs - when building your own JavaScript/Python Actor.
Apify Console
In Apify Console, you can view your datasets in the Storage section under the Datasets tab.
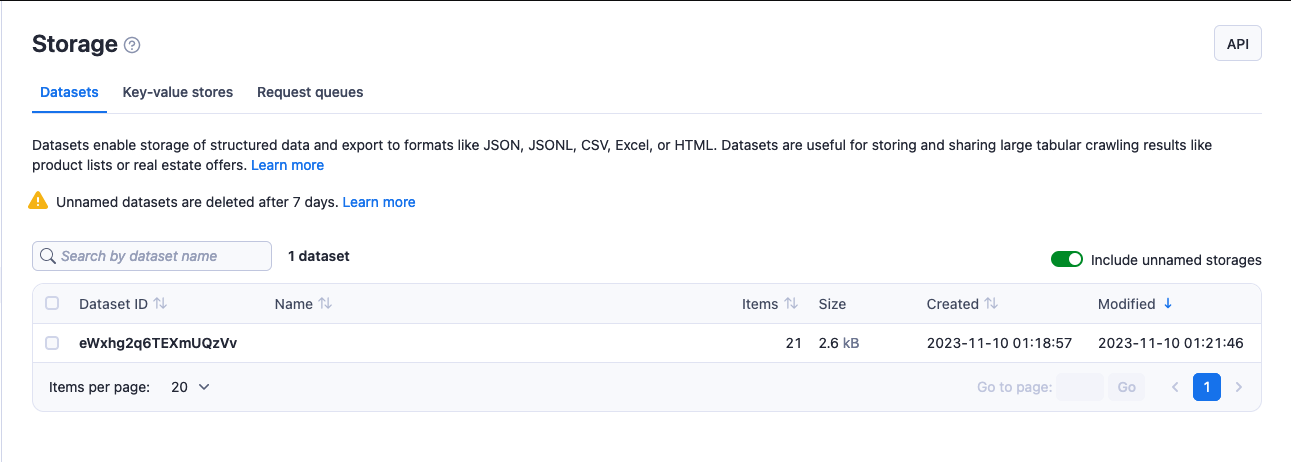
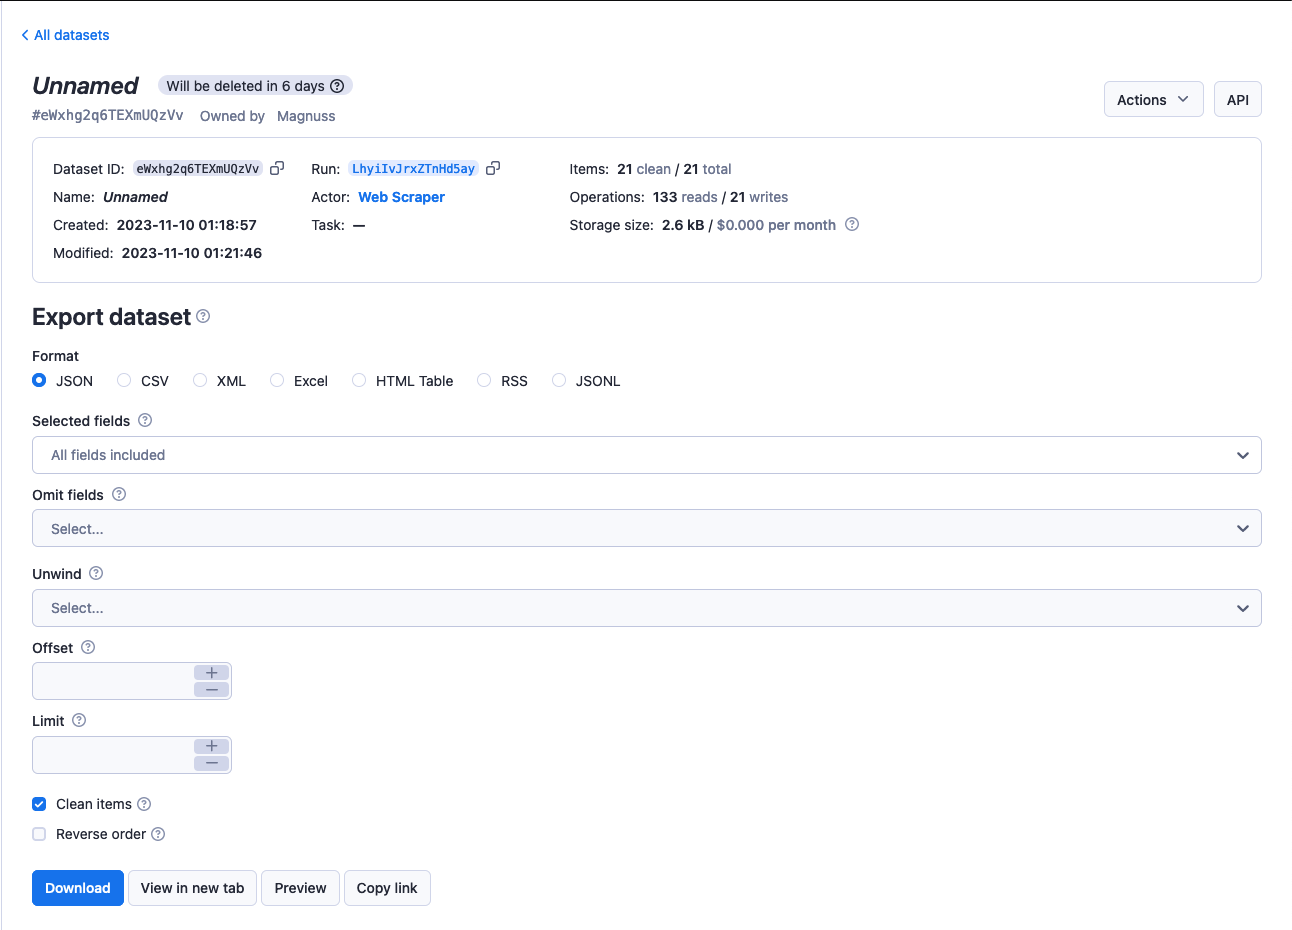
To view or download a dataset:
- Click on its Dataset ID to open the dataset detail page.
- Browse the data in Table or JSON view.
- Click Export to download the data in your preferred format.
Utilize the Actions menu to modify the dataset's name, which also affects its retention period, and to adjust access rights. The API button allows you to explore and test the dataset's API endpoints.
Apify API
The Apify API enables you programmatic access to your datasets using HTTP requests.
If you are accessing your datasets using the username~store-name store ID format, you will need to use your secret API token. You can find the token (and your user ID) on the API & Integrations tab of Settings page of your Apify account.
When providing your API authentication token, we recommend using the request's Authorization header, rather than the URL. More info.
To retrieve a list of your datasets, send a GET request to the Get list of datasets endpoint.
https://api.apify.com/v2/datasets
To get information about a dataset such as its creation time and item count, send a GET request to the Get dataset endpoint.
https://api.apify.com/v2/datasets/{DATASET_ID}
To view a dataset's data, send a GET request to the Get dataset items Apify API endpoint.
https://api.apify.com/v2/datasets/{DATASET_ID}/items
Control the data export by appending a comma-separated list of fields to the fields query parameter. Likewise, you can also omit certain fields using the omit parameter.
omit takes precedenceIf you fill both omit and field parameters with the same value, then omit parameter will take precedence and the field is excluded from the results.
In addition, you can set the format in which you retrieve the data using the ?format= parameter. The available formats are json, jsonl, csv, html, xlsx, xml and rss. The default value is json.
To retrieve the hotel and cafe fields, you would send your GET request to the URL below.
https://api.apify.com/v2/datasets/{DATASET_ID}/items?format=json&fields=hotel%2Ccafe
Use %2C instead of commas for URL encoding, as %2C represents a comma. For more on URL encoding, see this page.
To add data to a dataset, issue a POST request to the Put items endpoint with the data as a JSON object payload.
https://api.apify.com/v2/datasets/{DATASET_ID}/items
API data push to a dataset is capped at 400 requests per second to avoid overloading the servers.
Example payload:
[
    {
        "foo": "bar"
    },
    {
        "foo": "hotel"
    },
    {
        "foo": "cafe"
    }
]
For further details and a breakdown of each storage API endpoint, refer to the API documentation.
Apify API Clients
JavaScript API client
The JavaScript API client (apify-client) enables you access to your datasets from any Node.js application, whether hosted on the Apify platform or externally.
After importing and initiating the client, you can save each dataset to a variable for easier access.
const myDatasetClient = apifyClient.dataset('jane-doe/my-dataset');
You can then use that variable to access the dataset's items and manage it.
omit takes precedenceWhen using the .listItems() method, if you fill both omit and field parameters with the same value, then omit parameter will take precedence and the field is excluded from the results.
Check out the JavaScript API client documentation for help with setup and more details.
Python API client
The Python API client (apify-client) enables you access to your datasets from any Python application, whether it is running on the Apify platform or externally.
After importing and initiating the client, you can save each dataset to a variable for easier access.
my_dataset_client = apify_client.dataset('jane-doe/my-dataset')
You can then use that variable to access the dataset's items and manage it.
omit takes precedenceWhen using the .list_items() method, if you fill both omit and field parameters with the same value, then omit parameter will take precedence and the field is excluded from the results.
Check out the Python API client documentation for help with setup and more details.
Apify SDKs
JavaScript SDK
When working with a JavaScript Actor, the JavaScript SDK is an essential tool, especially for dataset management. It simplifies the tasks of storing and retrieving data, seamlessly integrating with the Actor's workflow. Key features of the SDK include the ability to append data, retrieve what is stored, and manage dataset properties effectively. Central to this functionality is the Dataset class. This class allows you to determine where your data is stored - locally or in the Apify cloud. To add data to your chosen datasets, use the pushData() method.
Additionally the SDK offers other methods like getData(), map(), and reduce(). For practical applications of these methods, refer to the example section.
If you have chosen to store your dataset locally, you can find it in the location below.
{APIFY_LOCAL_STORAGE_DIR}/datasets/{DATASET_ID}/{INDEX}.json
DATASET_ID refers to the dataset's name or ID. The default dataset will be stored in the default directory.
To add data to the default dataset, you can use the example below:
// Import the JavaScript SDK into your project
import { Actor } from 'apify';

await Actor.init();
// ...

// Add one item to the default dataset
await Actor.pushData({ foo: 'bar' });

// Add multiple items to the default dataset
await Actor.pushData([{ foo: 'hotel' }, { foo: 'cafe' }]);

// ...
await Actor.exit();
It's crucial to use the await keyword when calling pushData(), to ensure data storage completes before the Actor process terminates.
If you want to use something other than the default dataset, e.g. a dataset that you share between Actors or between Actor runs, you can use the Actor.openDataset() method.
import { Actor } from 'apify';

await Actor.init();
// ...

// Save a named dataset to a variable
const dataset = await Actor.openDataset('some-name');

// Add data to the named dataset
await dataset.pushData({ foo: 'bar' });

// ...
await Actor.exit();
Utilize the fields option in the getData() method to specify which data fields to retrieve. This option accepts an array of fields names (string) to include in your results.
import { Actor } from 'apify';

await Actor.init();
// ...

const dataset = await Actor.openDataset();

// Only get the 'hotel' and 'cafe' fields
const hotelAndCafeData = await dataset.getData({
    fields: ['hotel', 'cafe'],
});

// ...
await Actor.exit();
Check out the JavaScript SDK documentation and the Dataset class's API reference for details on managing datasets with the JavaScript SDK.
Python SDK
For Python Actors, the Python SDK is essential. The dataset is represented by a Dataset class. You can use this class to specify whether your data is stored locally or in the Apify cloud and push data to the datasets of your choice using the push_data() method. For further data manipulation you could also use other methods such as get_data(), map() and reduce().
For datasets stored locally, the data is located at the following path:
{APIFY_LOCAL_STORAGE_DIR}/datasets/{DATASET_ID}/{INDEX}.json
The DATASET_ID refers to the dataset's name or ID. The default dataset will be stored in the default directory.
To add data to the default dataset, you can use the example below:
from apify import Actor

async def main():
    async with Actor:
        # Add one item to the default dataset
        await Actor.push_data({'foo': 'bar'})

        # Add multiple items to the default dataset
        await Actor.push_data([{'foo': 'hotel'}, {'foo': 'cafe'}])
If you want to use something other than the default dataset, e.g. a dataset that you share between Actors or between Actor runs, you can use the Actor.open_dataset() method.
from apify import Actor

async def main():
    async with Actor:
        # Save a named dataset to a variable
        dataset = await Actor.open_dataset(name='some-name')

        # Add data to the named dataset
        await dataset.push_data({'foo': 'bar'})
Utilize the fields option in the get_data() method to specify which data fields to retrieve. This option accepts an array of fields names (string) to include in your results.
from apify import Actor

async def main():
    async with Actor:
        dataset = await Actor.open_dataset()

        # Only get the 'hotel' and 'cafe' fields
        hotel_and_cafe_data = await dataset.get_data(fields=['hotel', 'cafe'])
For more information, visit the Python SDK documentation and the Dataset class's API reference for details on managing datasets with the Python SDK.
Hidden fields
Fields in a dataset that begin with a # are treated as hidden. You can exclude these fields when downloading data by using either skipHidden=1 or clean=1 in your query parameters. This feature is useful for excluding debug information from the final dataset output.
The following example demonstrates a dataset record with hidden fields, including HTTP response and error details.
{
    "url": "https://example.com",
    "title": "Example page",
    "data": {
        "foo": "bar"
    },
    "#error": null,
    "#response": {
        "statusCode": 201
    }
}
Data excluding hidden fields, termed as "clean" data, can be downloaded from the Apify Console using the Clean items option. Alternatively, you can download it via API by applying clean=true or clean=1 as URL parameters.
XML format extension
In XML and RSS export formats, object property name are converted into XML tags, and their corresponding values are represented as children of these tags.
For example, the JavaScript object:
{
    name: 'Rashida Jones',
    address: [
        {
            type: 'home',
            street: '21st',
            city: 'Chicago',
        },
        {
            type: 'office',
            street: null,
            city: null,
        },
    ],
}
becomes the following XML snippet:
<name>Rashida Jones</name>
<address>
    <type>home</type>
    <street>21st</street>
    <city>Chicago</city>
</address>
<address>
    <type>office</type>
    <street/>
    <city/>
</address>
In a JavaScript object, if a property is named @, its sub-properties are exported as attributes of the corresponding parent XML element. Additionally, when the parent XML element lacks child elements, its value is sourced from a property named # in the JavaScript Object.
For example, the following JavaScript object:
{
    address: [
        {
            '@': {
                type: 'home',
            },
            street: '21st',
            city: 'Chicago',
        },
        {
            '@': {
                type: 'office',
            },
            '#': 'unknown',
        },
    ],
}
will be transformed to the following XML snippet:
<address type="home">
    <street>21st</street>
    <city>Chicago</city>
</address>
<address type="office">unknown</address>
This feature is also useful when customizing your RSS feeds generated for various websites.
By default, the whole result is wrapped in an <items/> element, while each page object is contained in an <item/> element. You can change this using the xmlRoot and xmlRow URL parameters when retrieving your data with a GET request.
Share
You can grant access rights to your dataset through the Share button under the Actions menu. For more details, check the full list of permissions.
You can also share datasets by link using their ID or name, depending on your account or resource-level general access setting. Learn how link-based access works in General resource access.
For one-off sharing of specific records when access is restricted, you can generate time-limited pre-signed URLs. See Sharing restricted resources with pre-signed URLs.
Share datasets between runs
You can access a dataset from any Actor or task run as long as you know its name or ID.
To access a dataset from another run using the Apify SDK, open it using the same method as you would with any other dataset.
- JavaScript
- Python
import { Actor } from 'apify';

await Actor.init();

const otherDataset = await Actor.openDataset('old-dataset');
// ...

await Actor.exit();
from apify import Actor

async def main():
    async with Actor:
        other_dataset = await Actor.open_dataset(name='old-dataset')
        # ...
In the JavaScript API client as well as in Python API client , you can access a dataset using its client. Once you've opened the dataset, you can read its contents and add new data in the same manner as you would for a dataset from your current run.
- JavaScript
- Python
const otherDatasetClient = apifyClient.dataset('jane-doe/old-dataset');
other_dataset_client = apify_client.dataset('jane-doe/old-dataset')
The same applies for the Apify API - you can use the same endpoints as you would normally do.
See the Storage overview for details on sharing storages between runs.
Limits
-
Data storage formats that use tabulation (like HTML, CSV, and Excel) are limited to a maximum of 2000 columns. Data exceeding this limit will not be retrieved.
-
The
pushData()method is constrained by the receiving API's size limit. It accepts objects with JSON size under 9MB. While individual objects within an array must not exceed 9MB, the overall size has no restriction. -
The maximum length for dataset names is 63 characters.
Rate limiting
The rate limit for pushing data to a dataset through the API is capped at 400 requests per second for each dataset, a measure to prevent overloading Apify servers.
For all other dataset API endpoints , the rate limit is 60 requests per second for each dataset.
Check out the API documentation for more information and guidance on actions to take if you exceed these rate limits.