Windmill integration
Windmill is an open-source automation platform for building scripts and flows that connect your tools and data. With the Apify integration for Windmill, you can run Actors and tasks, scrape websites, extract data from storage, and trigger workflows based on Apify events.
This guide shows you how to install the Apify package, set up authentication, and create automated workflows that integrate with Apify.
This integration uses a third-party service. If you find outdated content, please submit an issue on GitHub.
Prerequisites
Before you begin, make sure you have:
- An Apify account
- A Windmill instance (self-hosted or cloud)
Install the Apify integration
The Apify integration provides scripts, flows, and resources that will be available through the Windmill Hub.
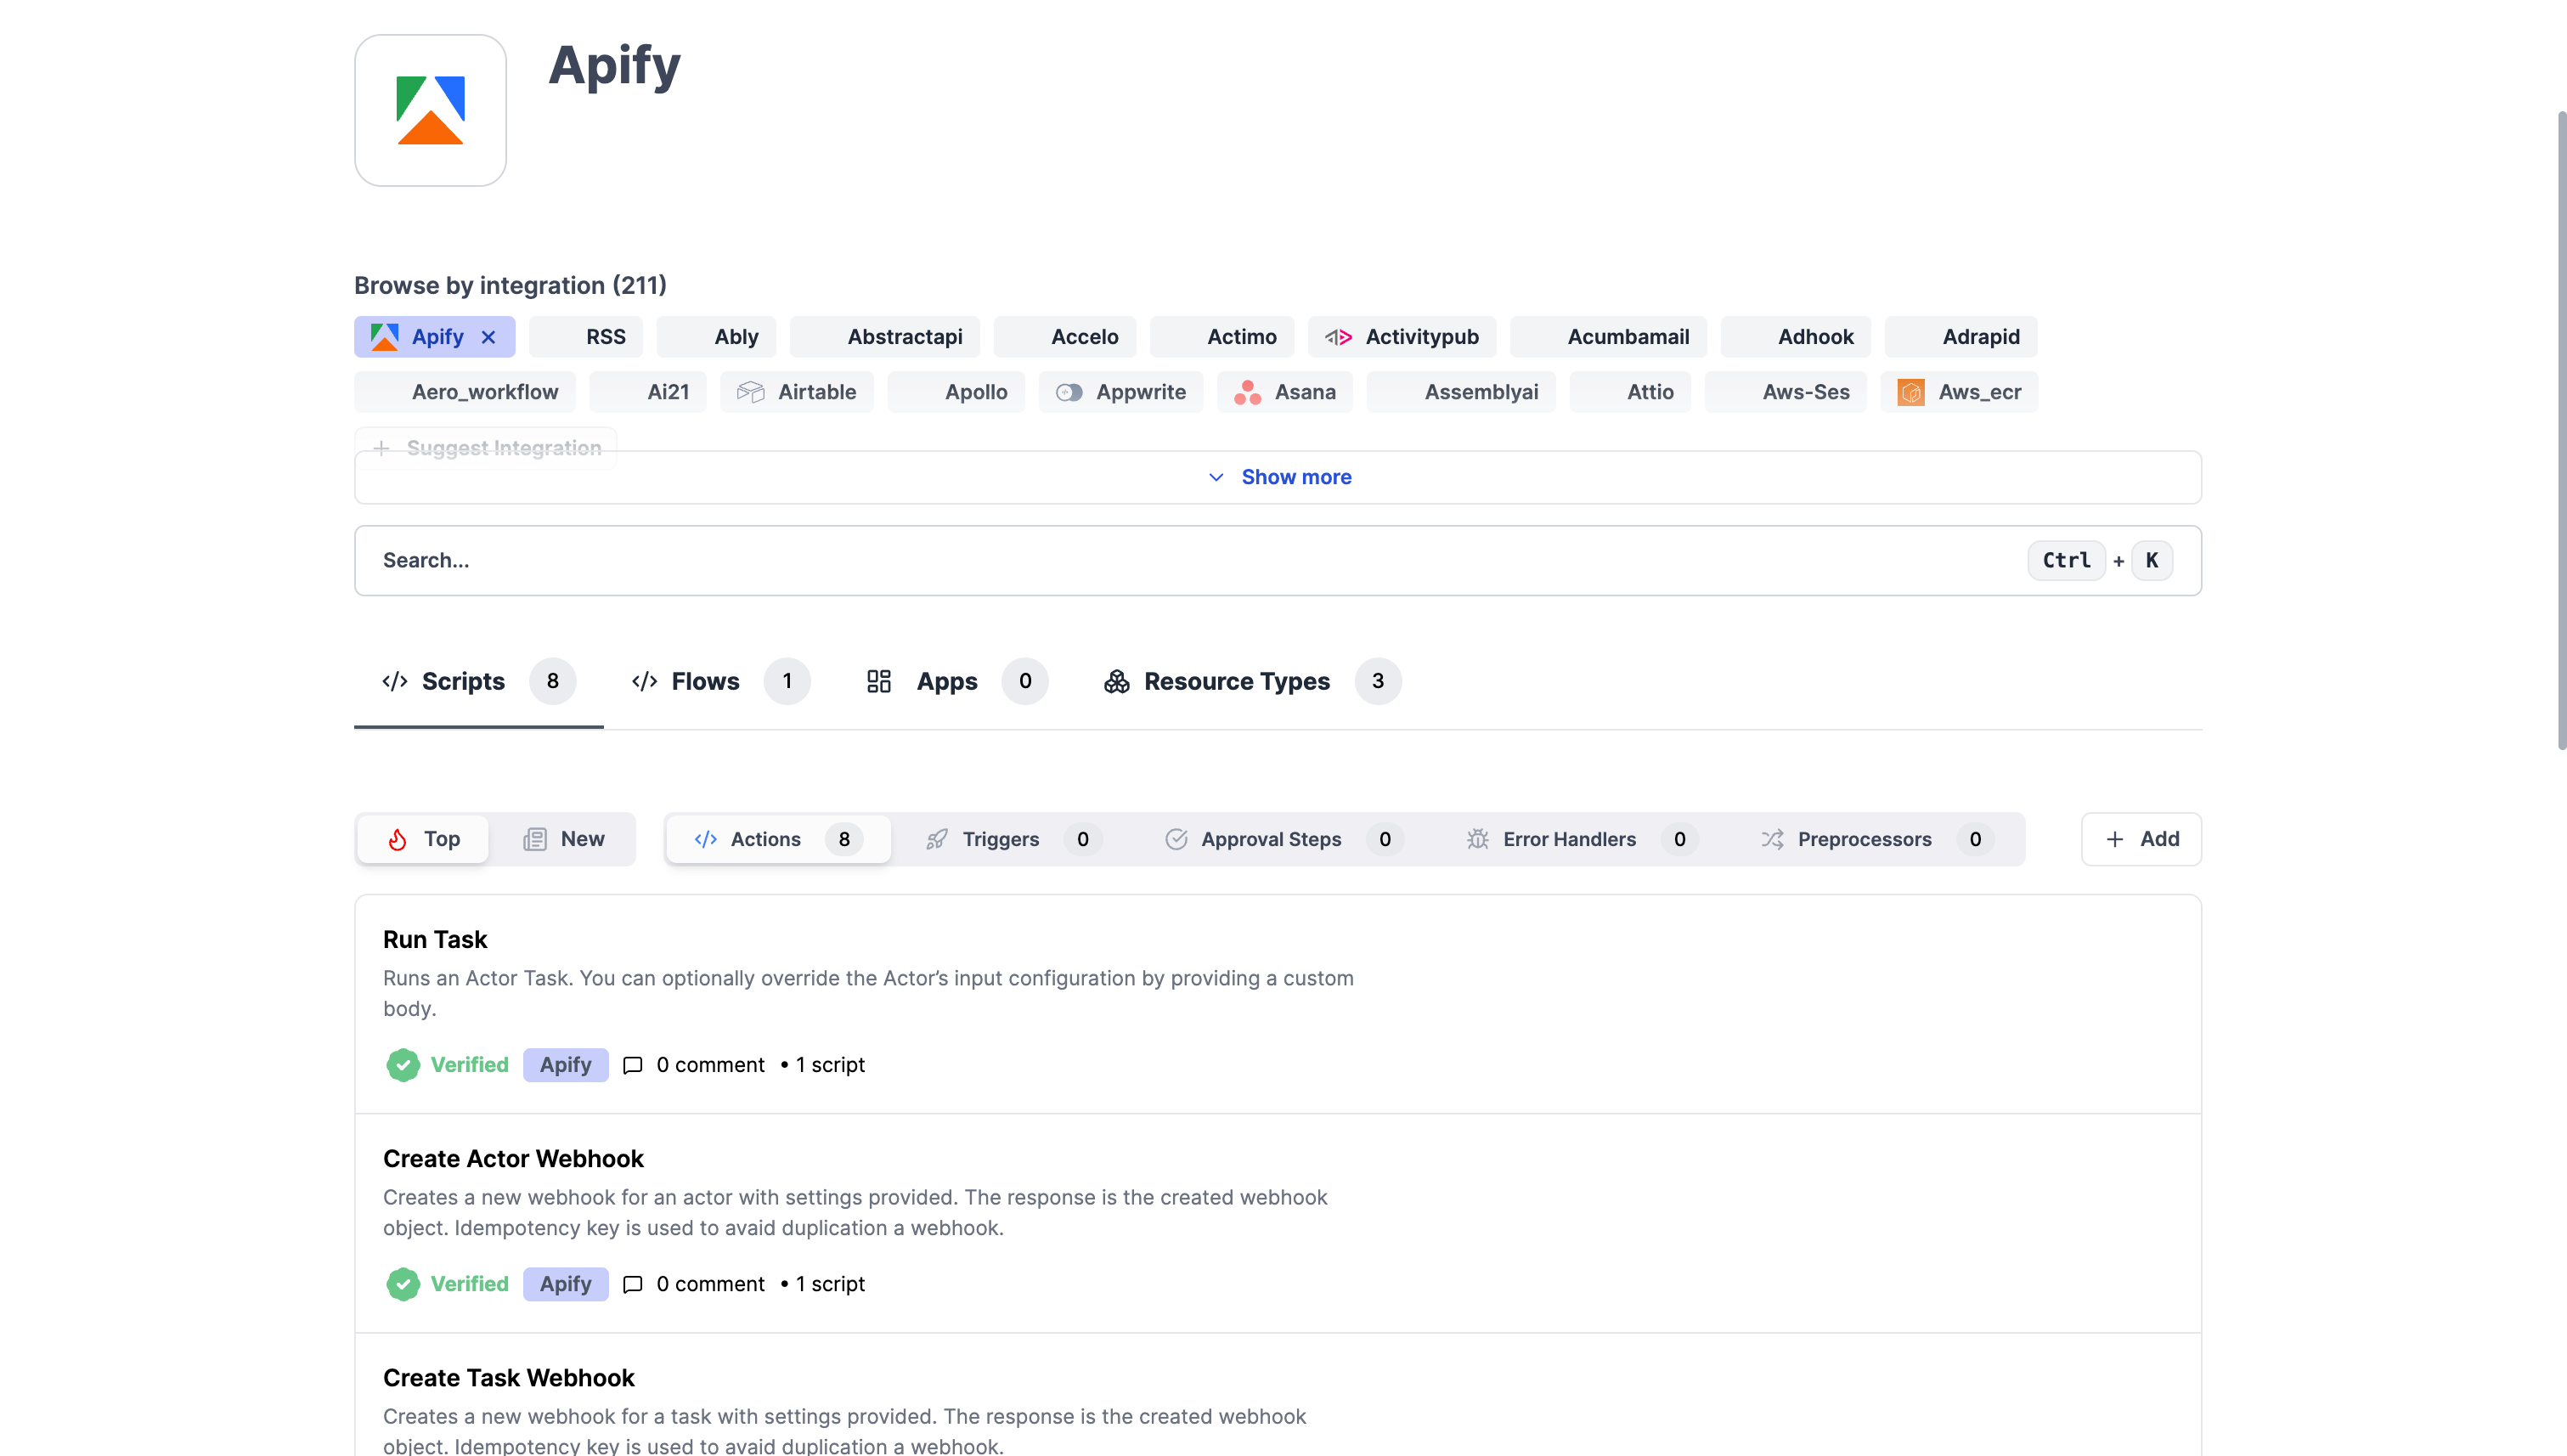
Step 1: Import Apify scripts from Windmill Hub
You can import Apify integration scripts into your flows from the Windmill Hub, regardless of whether you're using Windmill Cloud or a self-hosted instance. The following components will be available:
Scripts (Actions):
- Run Actor
- Run Task
- Scrape Single URL
- Get Dataset Items
- Get Key-Value Store
Scripts (Triggers):
- Polling-based Actor Run Trigger
- Polling-based Task Trigger
Flows (Triggers):
- Webhook-based Actor Trigger
- Webhook-based Task Trigger
Resources:
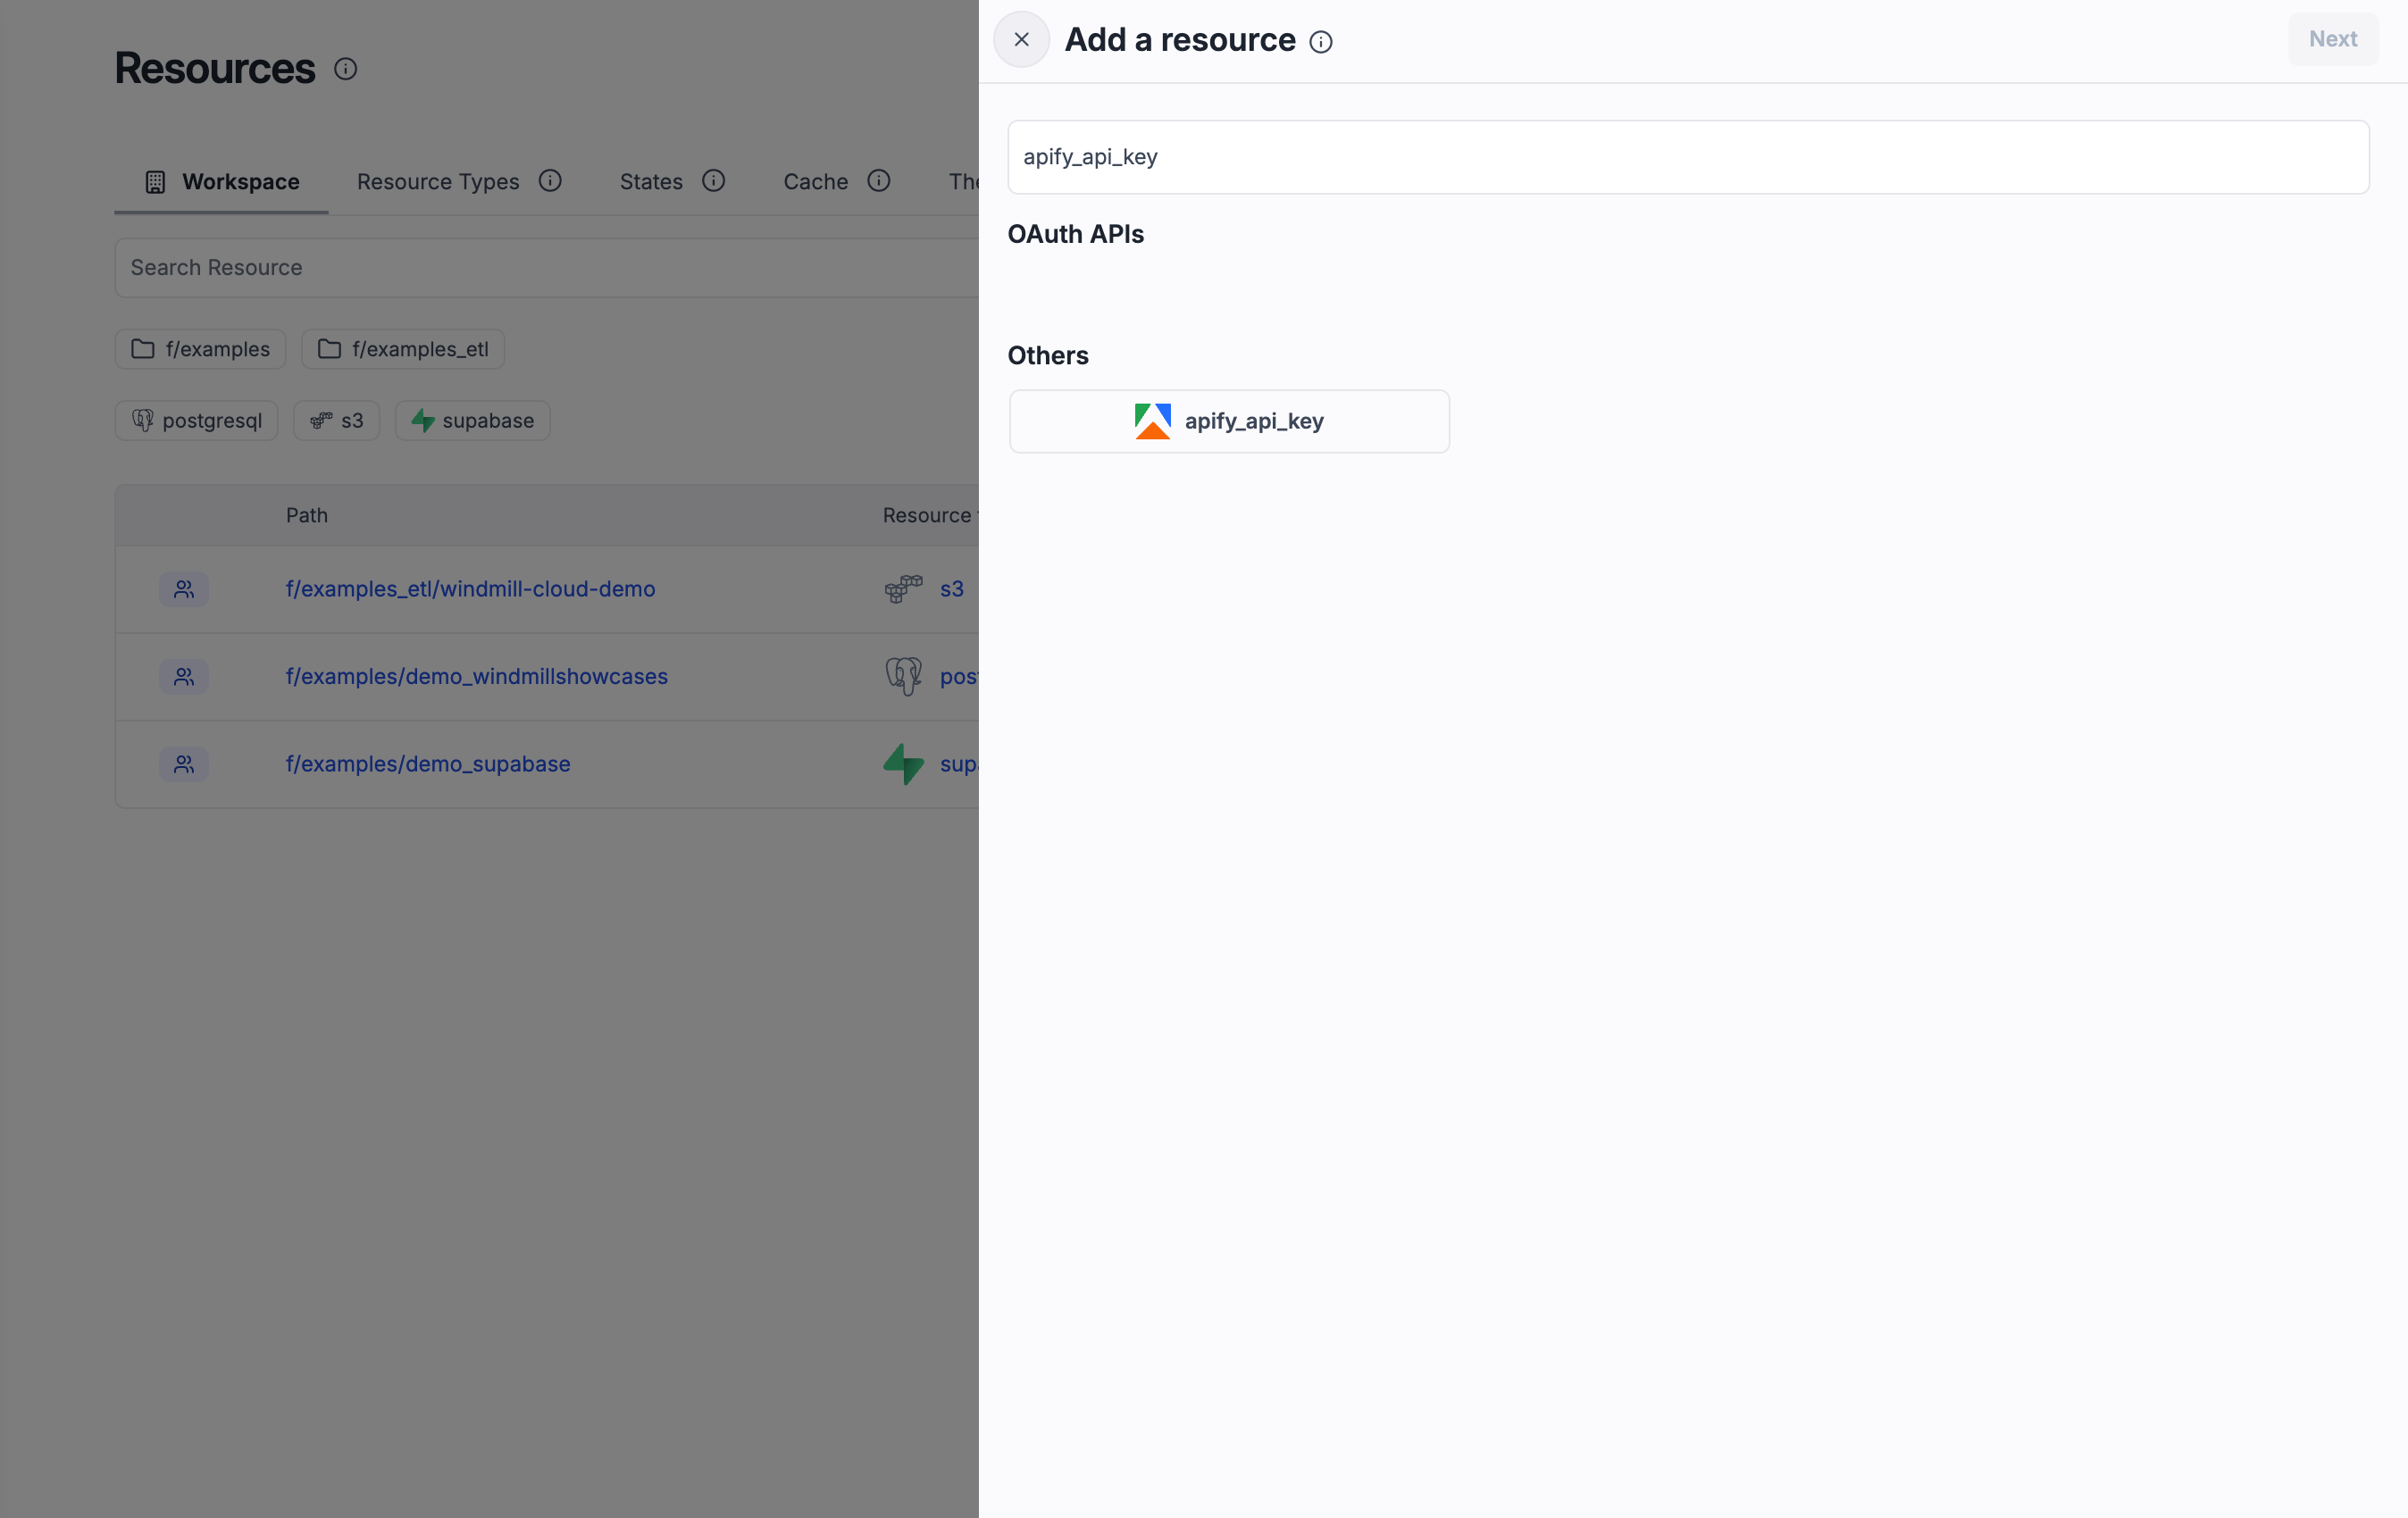
- Apify API Key Resource (for storing your API token)
- Webhook Config Resource (optional, for managing webhook-based triggers)
- Apify OAuth Resource (available only on Windmill Cloud)
Step 2: Authentication
You can provide the token to scripts via a Windmill Resource. Create it either in the Resources tab or directly from a script.
Option A - Create in the Resources tab
- Open Resources → New Resource.
- Select
apify_api_keyresource type. - Name it (e.g.,
apify_token) and paste your Apify API token. - Save, then reference this resource in your scripts/flows.
Option B - Create/bind from a script
- Open the script in Windmill UI.
- Add a secret input parameter (e.g.,
apify_token) . - Bind it to the resource you created (or create a new one inline).
- Use the bound token inside the script to call Apify.

Option C - OAuth authentication
OAuth authentication is only available on Windmill Cloud, not on self-hosted instances.
- Open Resources → New Resource.
- Select
apifyresource type. - Click the Connect button.
- Complete the OAuth flow to authorize Windmill to access your Apify account.
- Save the resource, then reference it in your scripts/flows just like the API key resource.

Create your first workflow
Let's create a simple workflow that runs an Actor and fetches its results.
Step 1: Create a new flow
- In the Windmill UI, click New Flow.
- Give your flow a descriptive name (e.g., "Run Actor and Get Results").
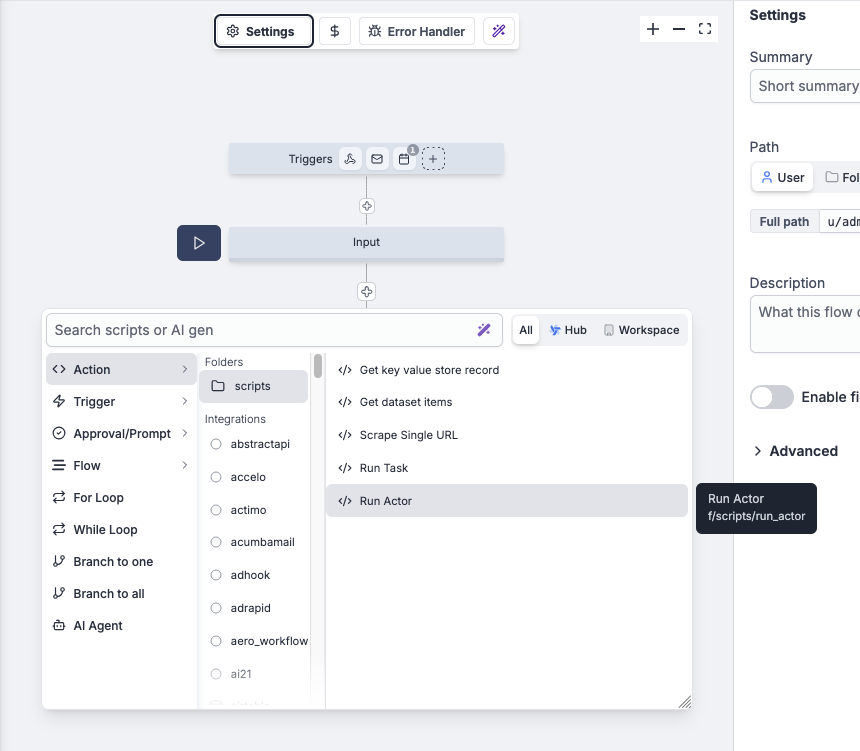
Step 2: Add the Run Actor script
-
Click Add Step and search for "Run Actor".
-
Select the Run Actor script.
-
Configure the inputs:
- Apify Auth: Select either your API Key or OAuth Token resource
- Actor ID or Slug: Enter the Actor you want to run
- Input: JSON input for the Actor (optional)
- Wait for Finish: Set to
trueto wait for completion - Memory: Memory allocation in MB (optional)
- Timeout: Timeout in seconds (optional)
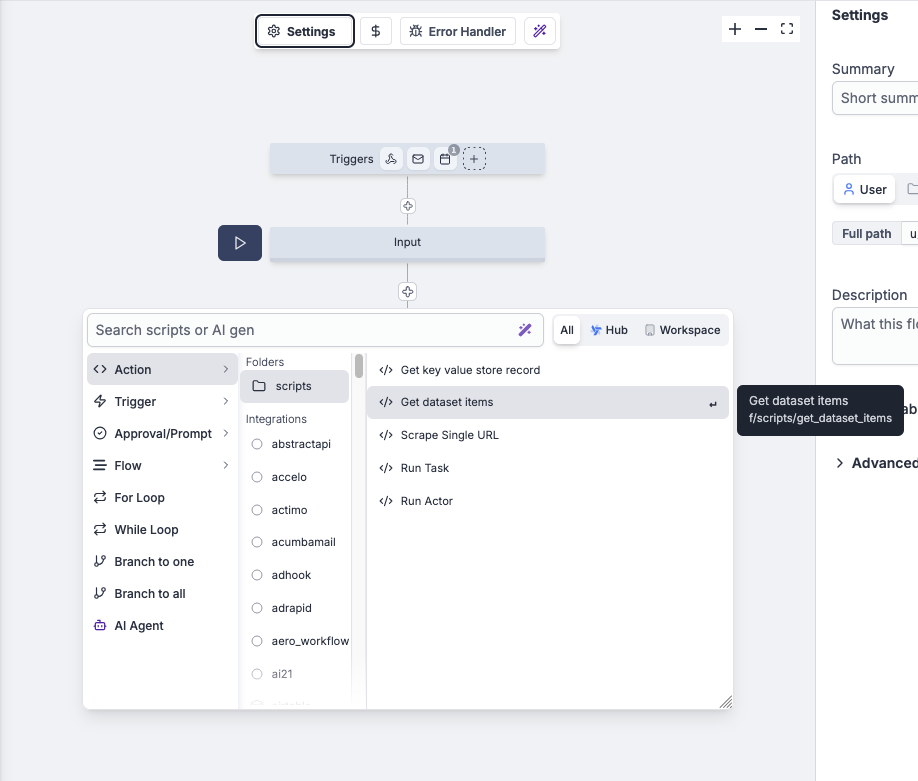
Step 3: Add the Get Dataset Items script
-
Add another step and search for "Get Dataset Items".
-
Configure the inputs:
- Apify Auth: Select either your API Key or OAuth Token resource
- Dataset ID: Use the
defaultDatasetIdfrom the previous step - Limit: Number of items to retrieve (optional)
Step 4: Test and run
With the flow created and scripts linked we can test and run it.
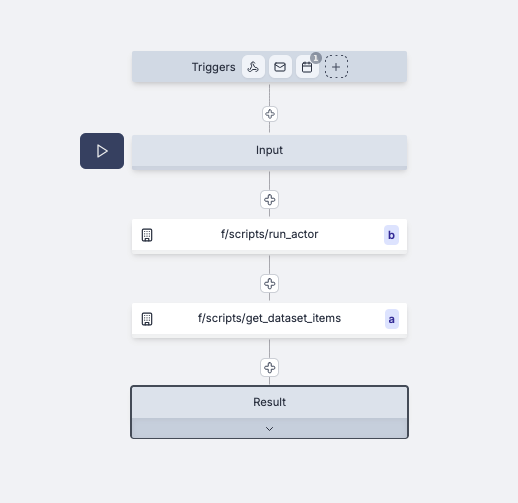
- Click Test to run the flow with sample data.
- Review the results and ensure both steps completed successfully.
- Save and activate your flow.
Use webhooks to trigger workflows
Windmill provides webhook-based triggers that can automatically start workflows when Apify events occur.
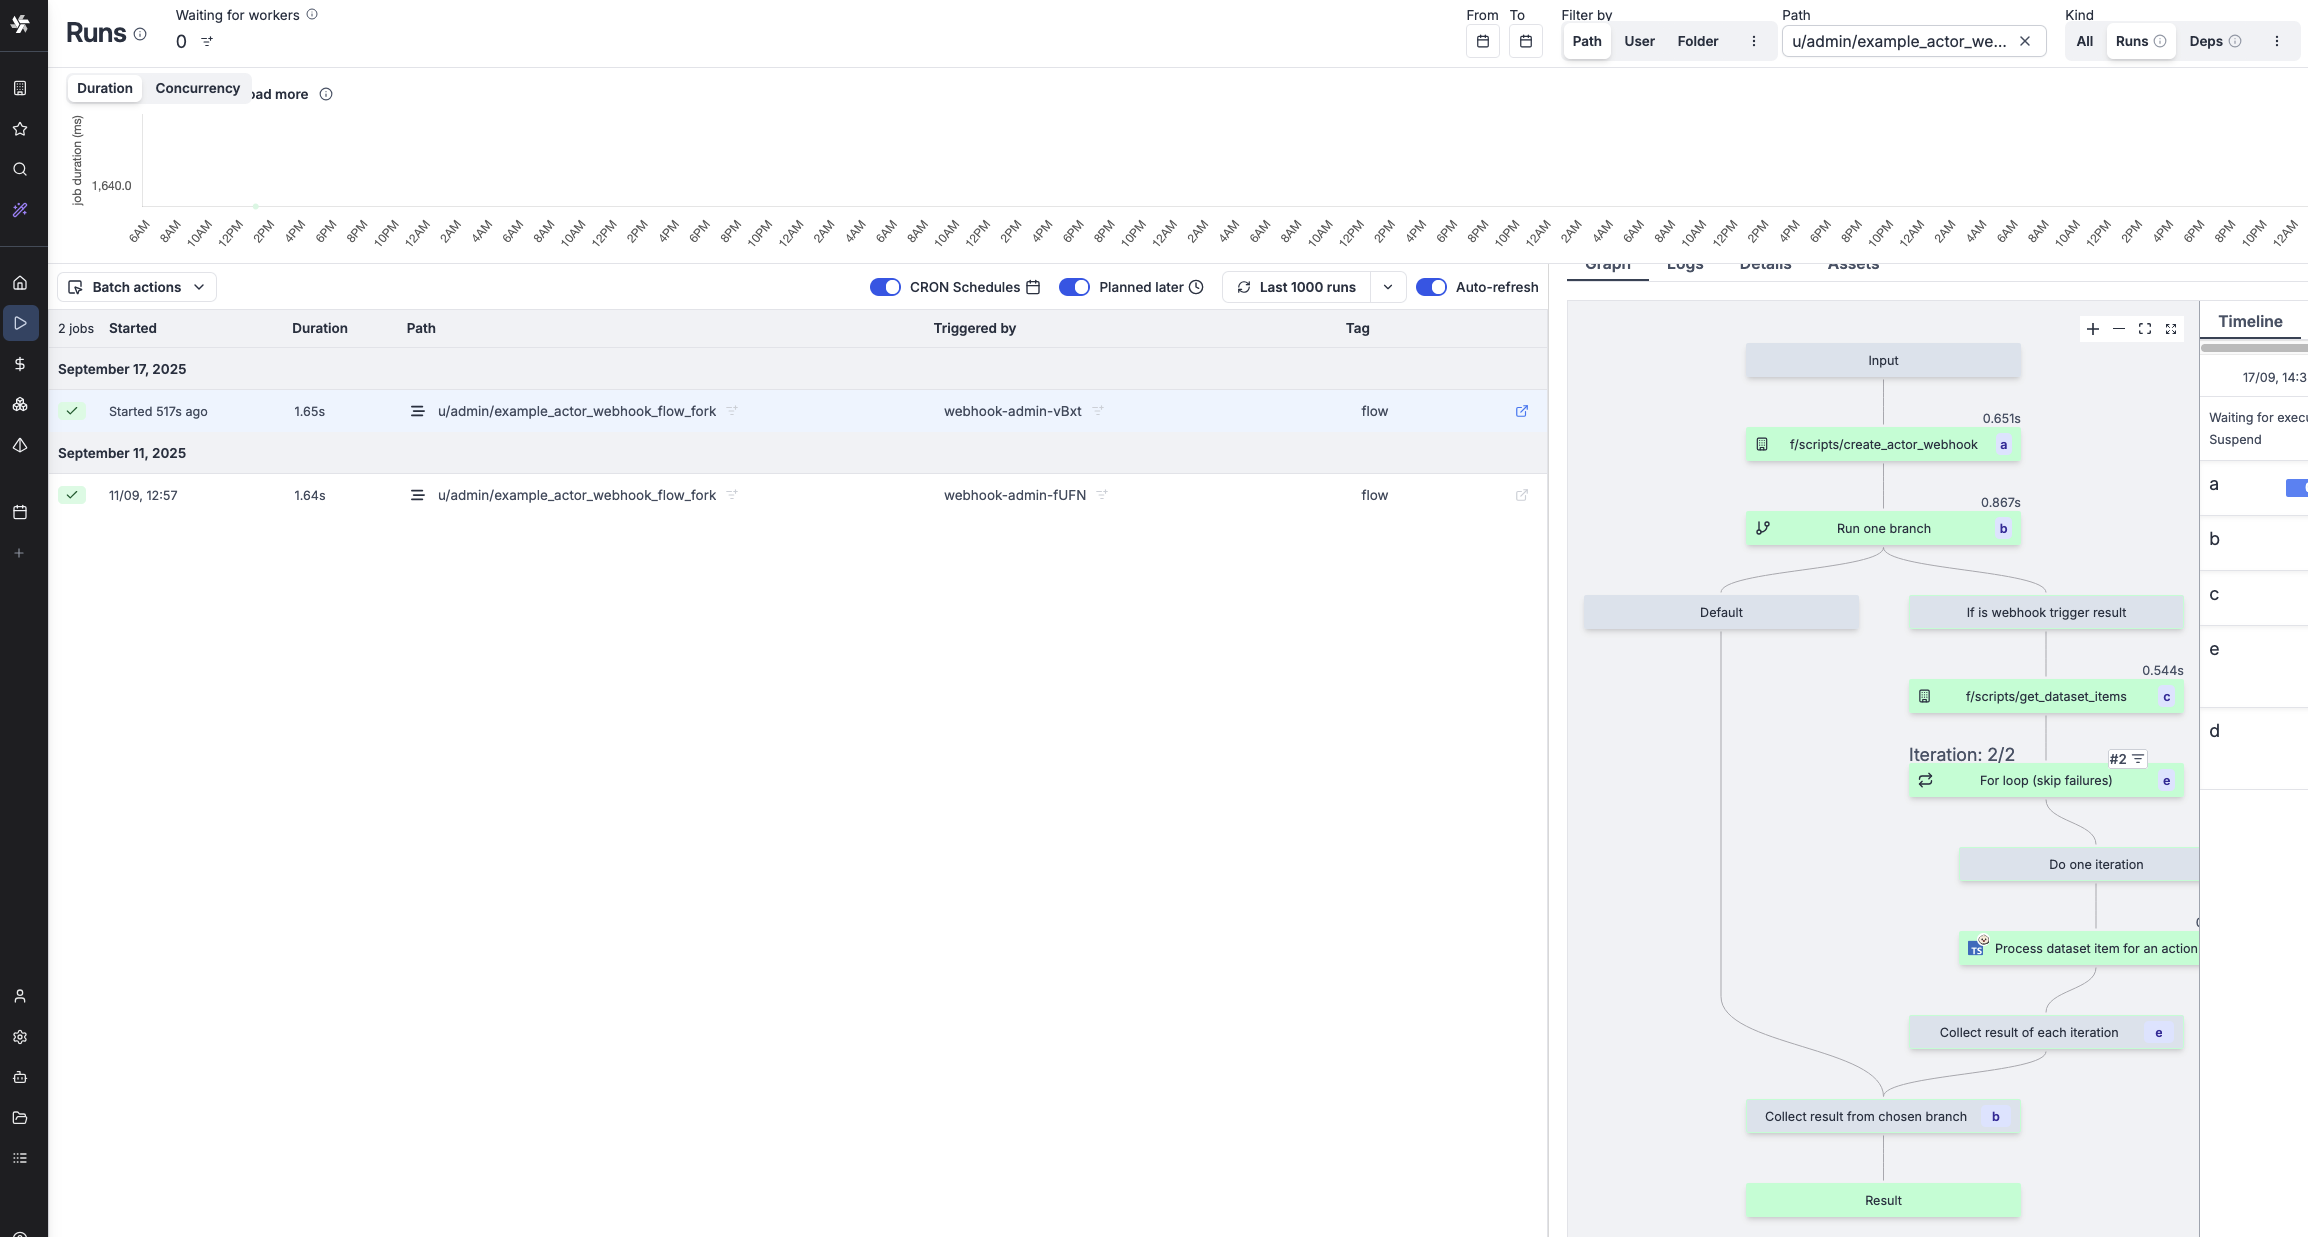
Step 1: Fork the example flow
- Search for Example Actor Webhook Flow in Windmill hub.
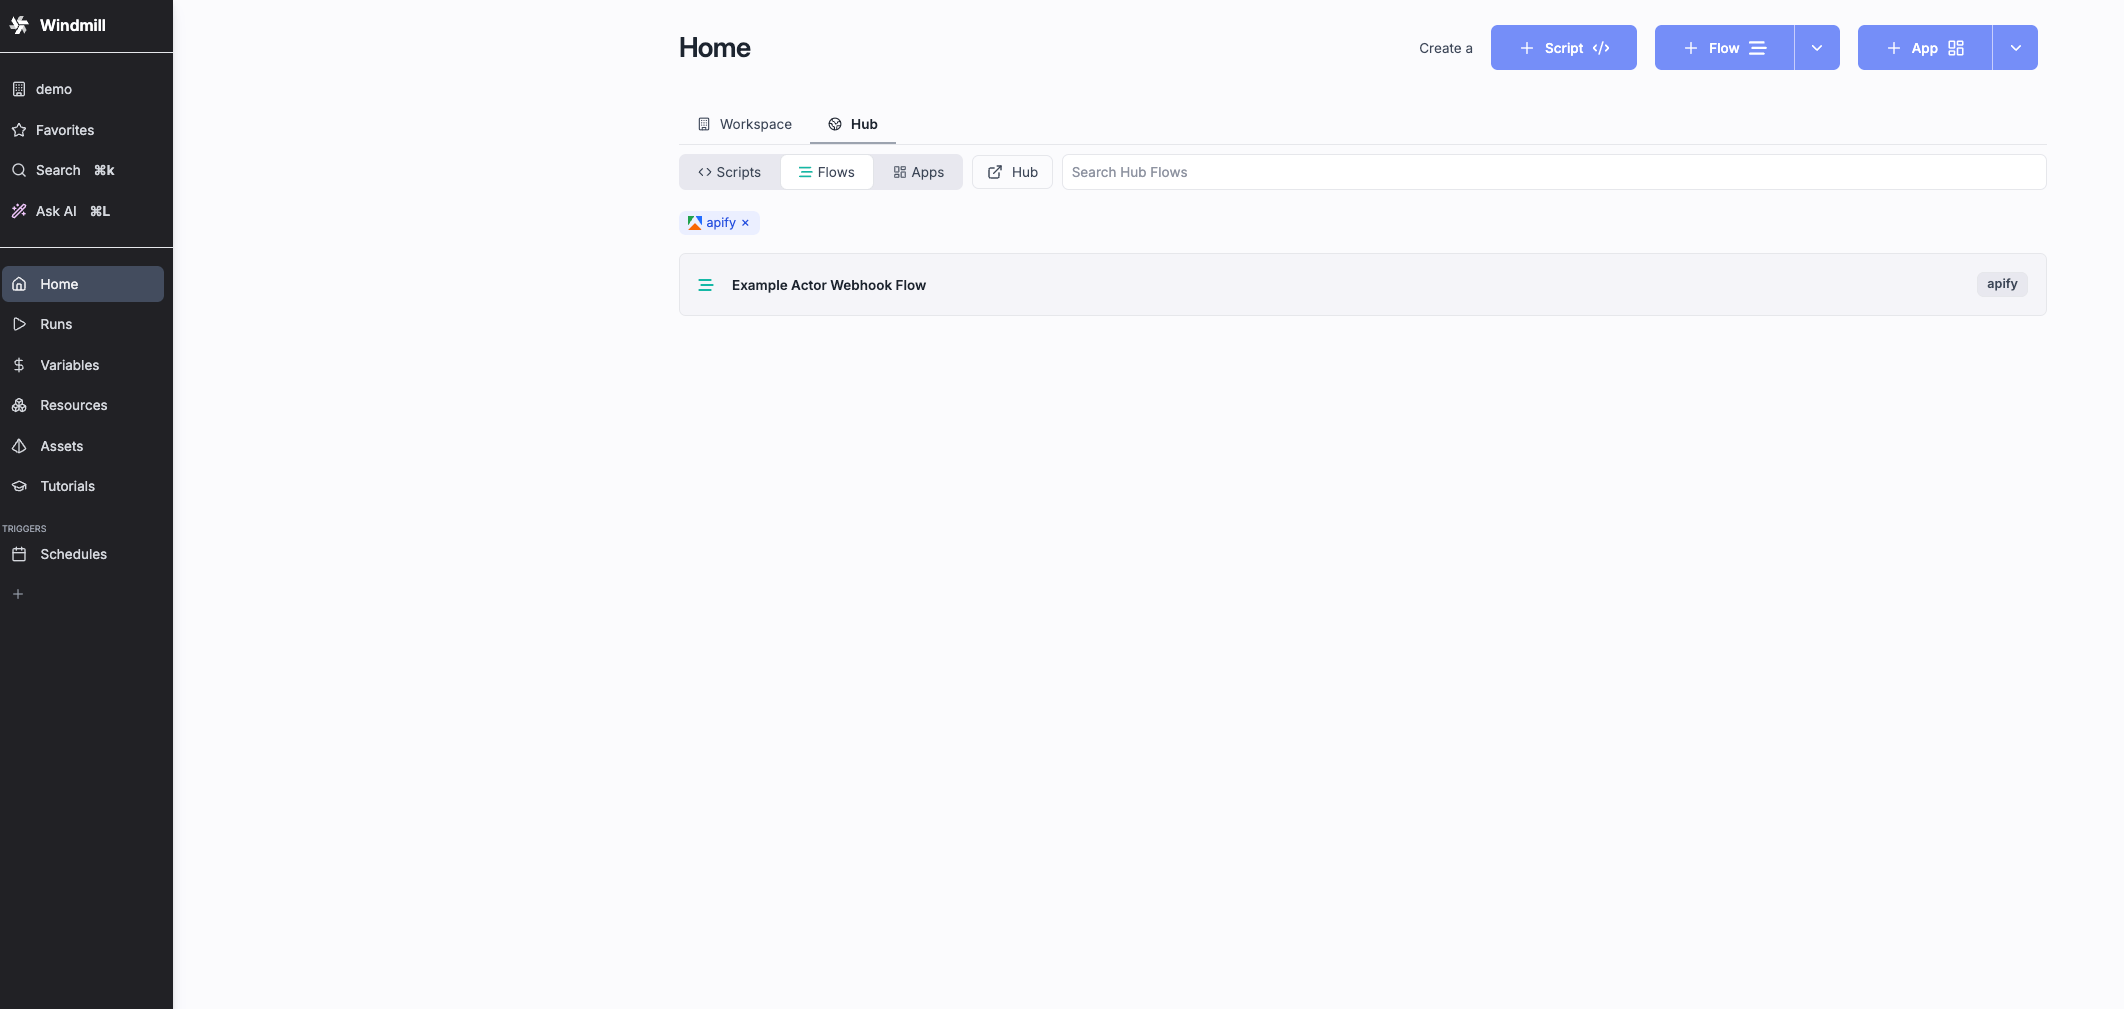
- Fork the Apify example flow with webhook trigger from Windmill’s templates.
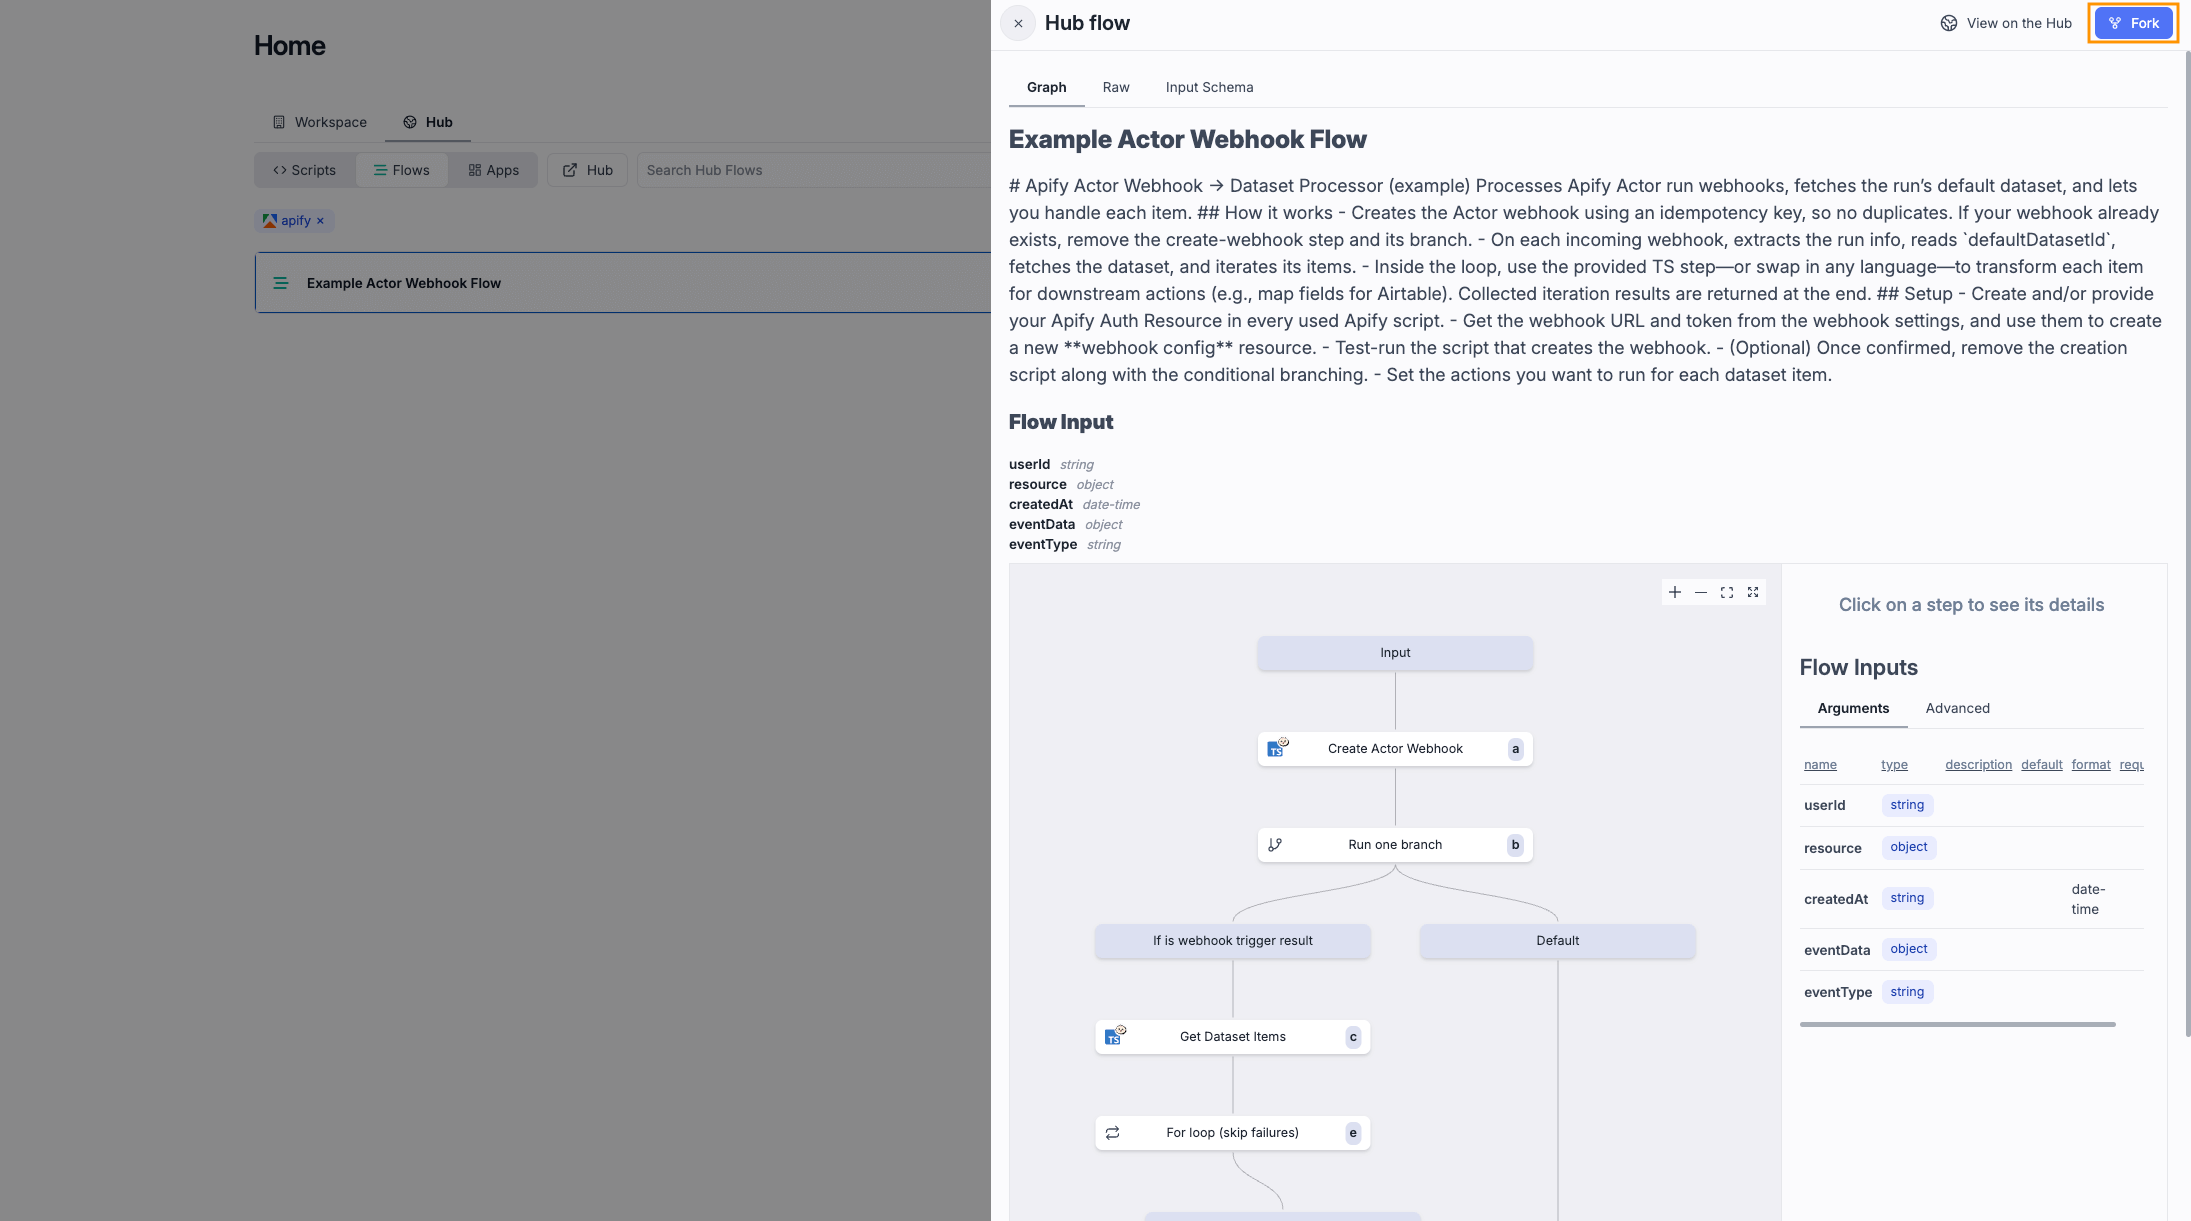
- Add a trigger of type Webhook.
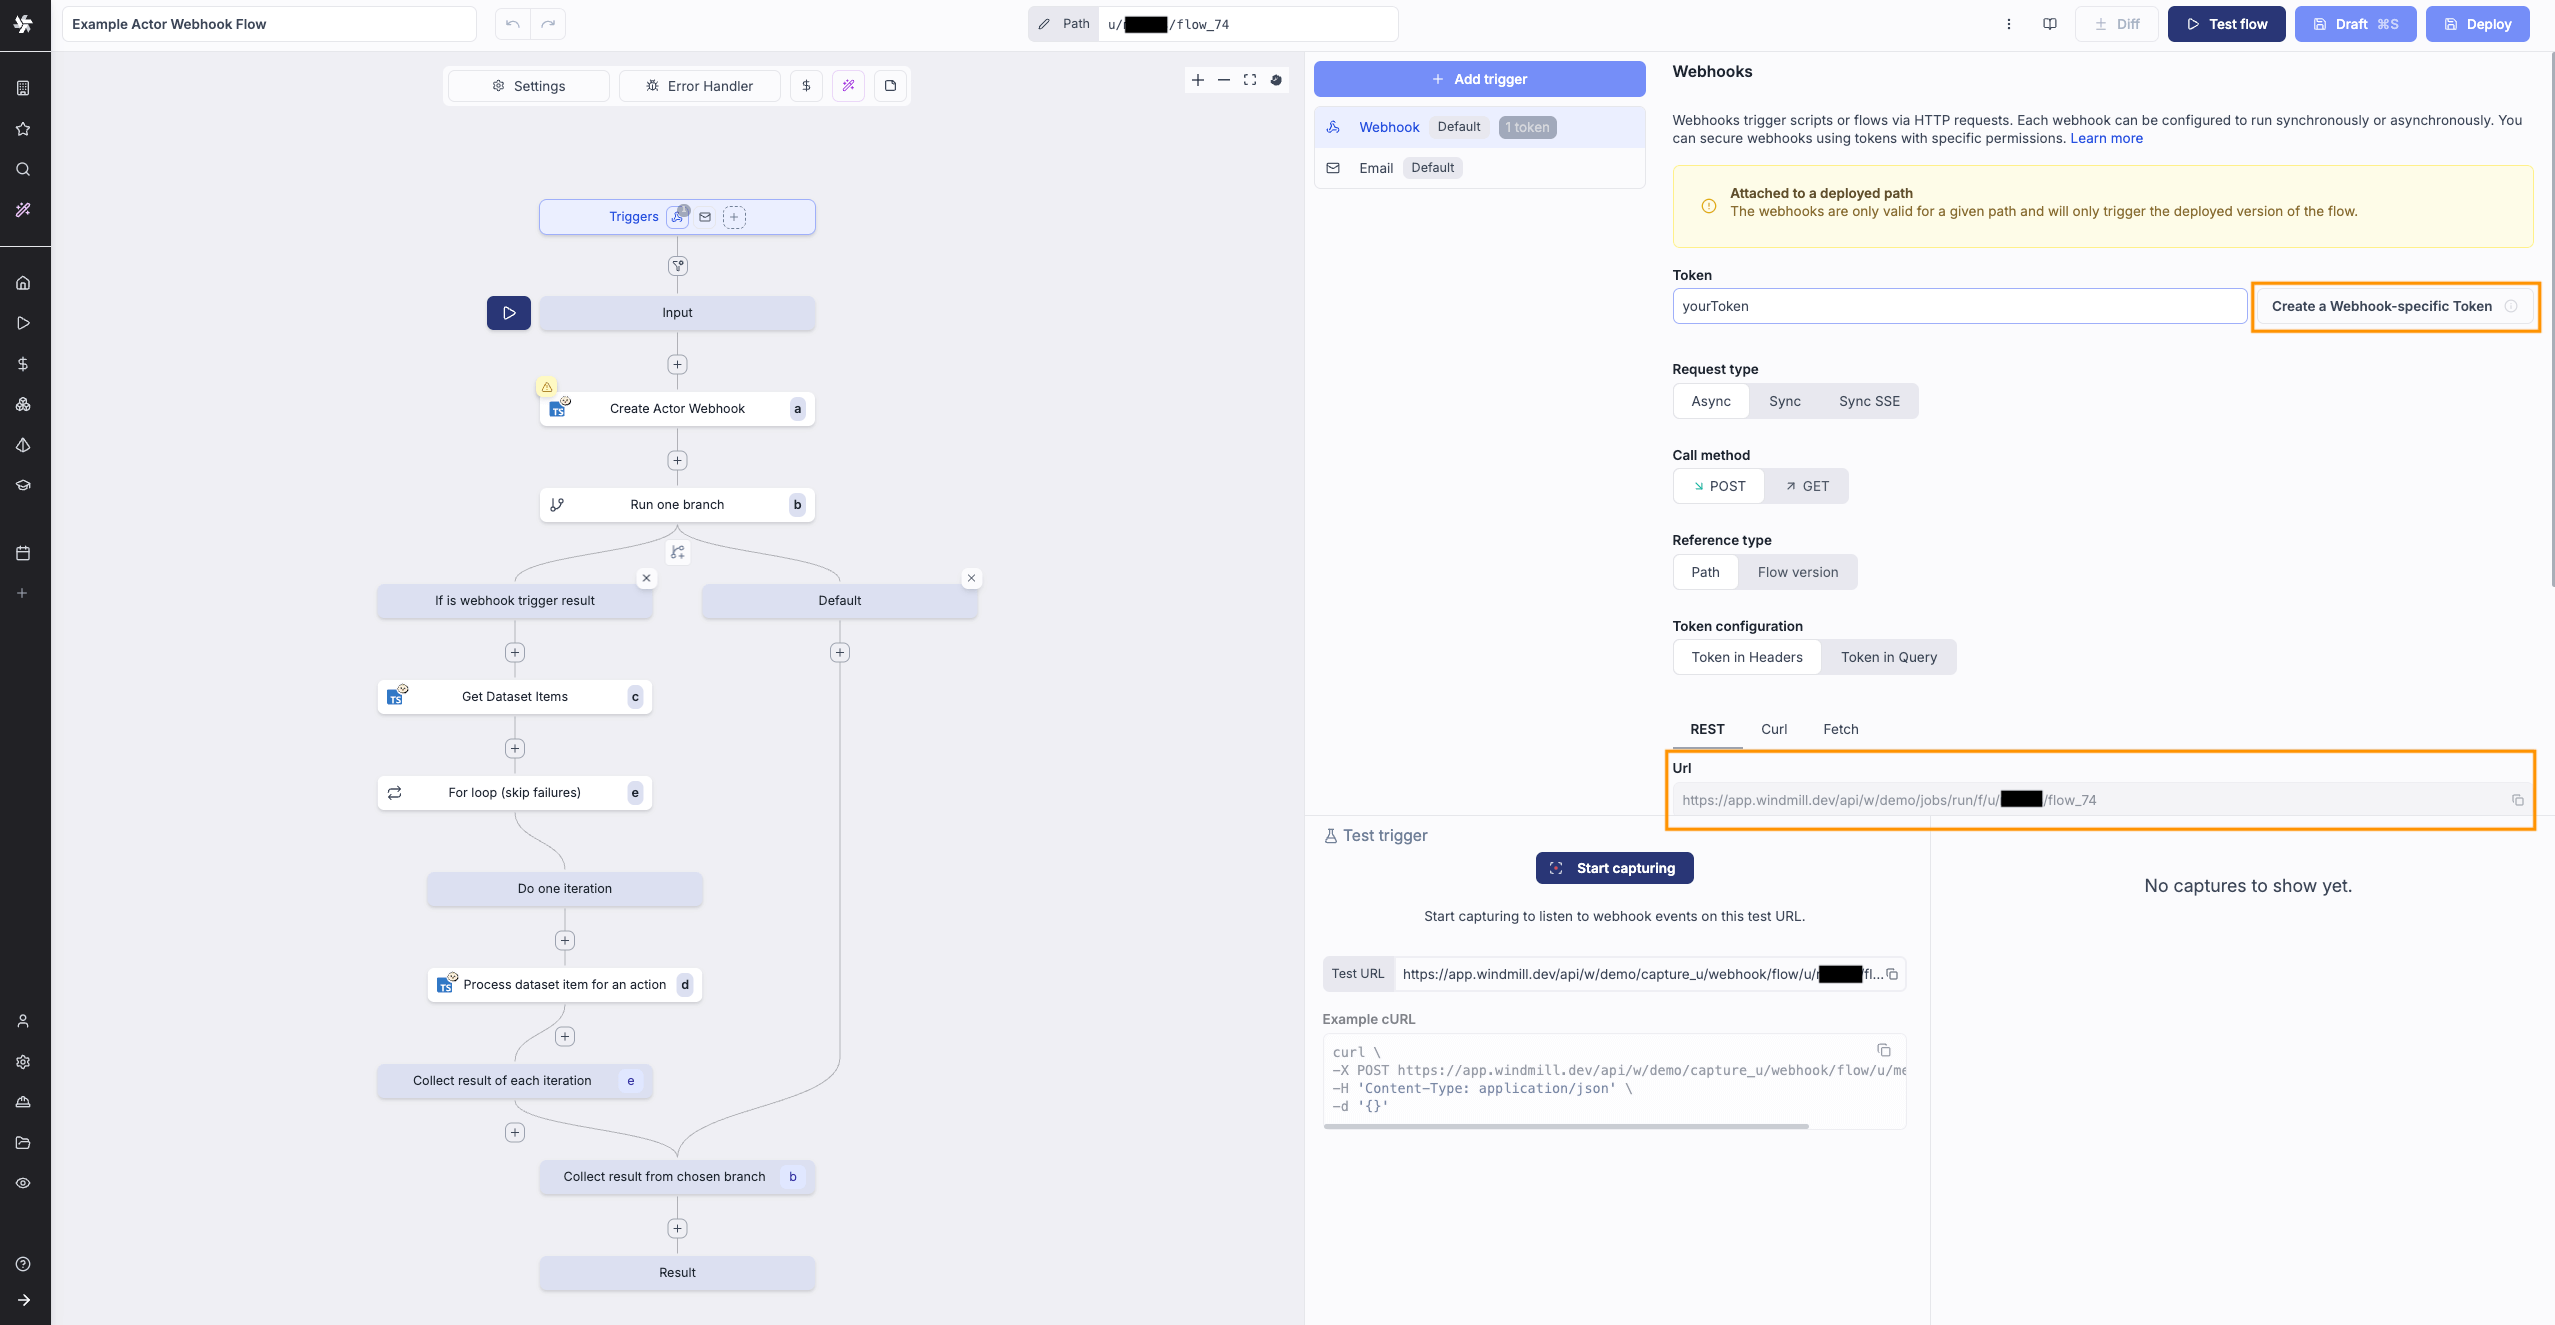
- Create a Webhook-specific Token.
- Copy both the token and the webhook URL to your clipboard. These will be used for creation of the Webhook Config resource in the next step.
Step 2: Configure the webhook creation script
-
In the flow, open the script that creates the Apify webhook.
-
Create a new Webhook Config resource using the saved token and webhook URL values from previous step.
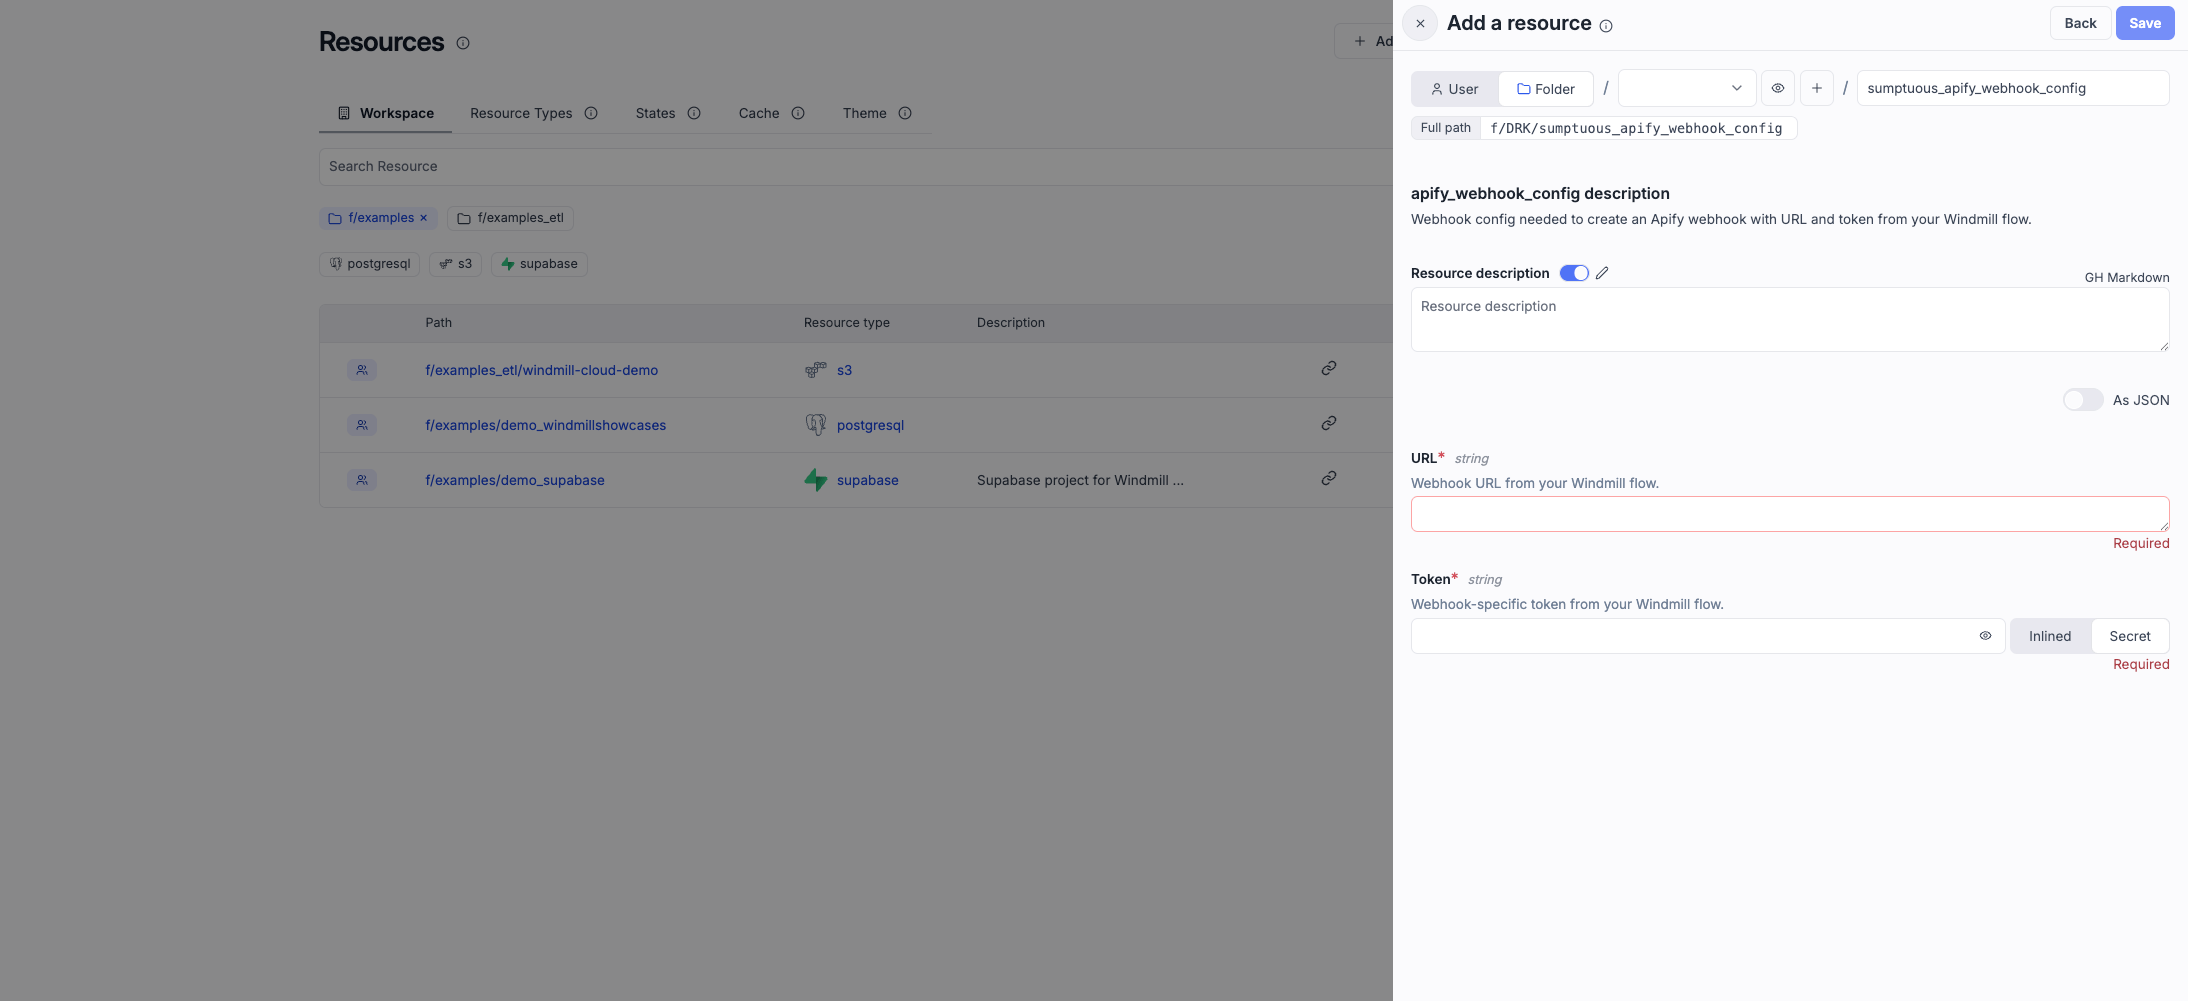
-
Configure the inputs:
- Apify Auth: Select either your API Key or OAuth Token resource
- Actor ID: the Apify Actor you want to monitor
- Event Types: the events that should trigger the flow
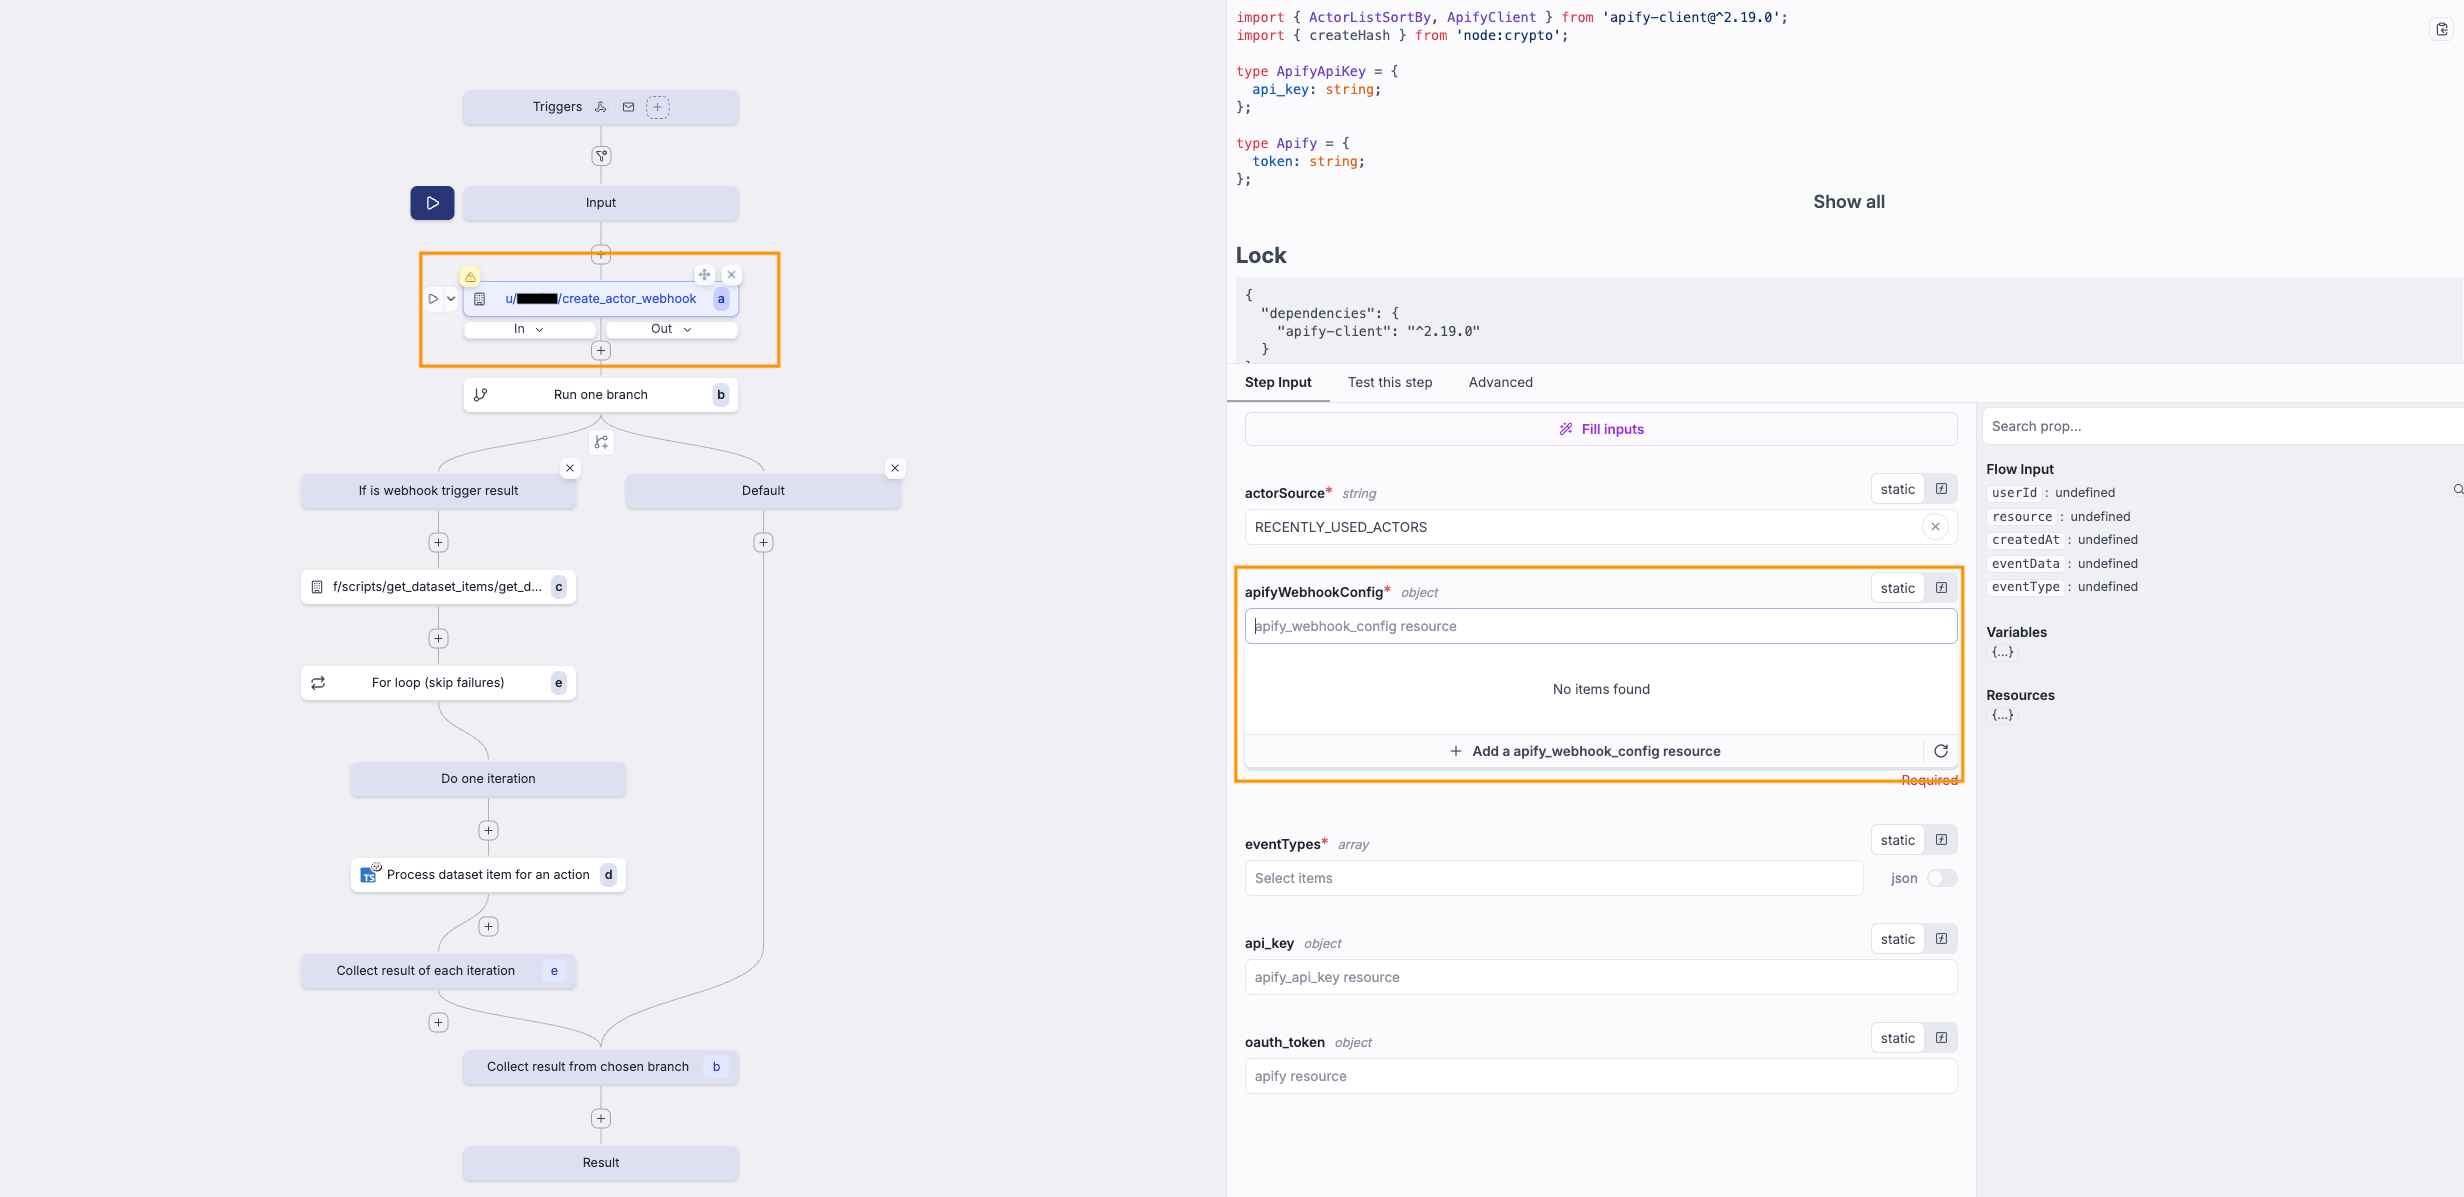
-
IMPORTANT: Test-run this script to create the webhook in Apify for the Actor.
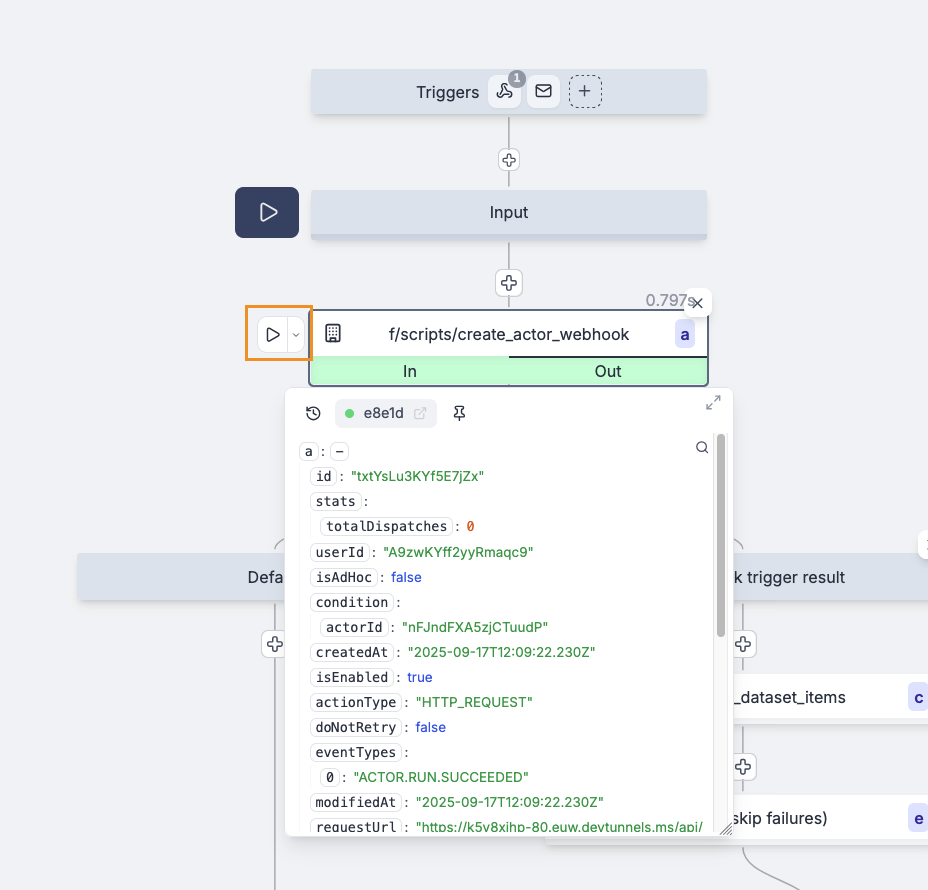
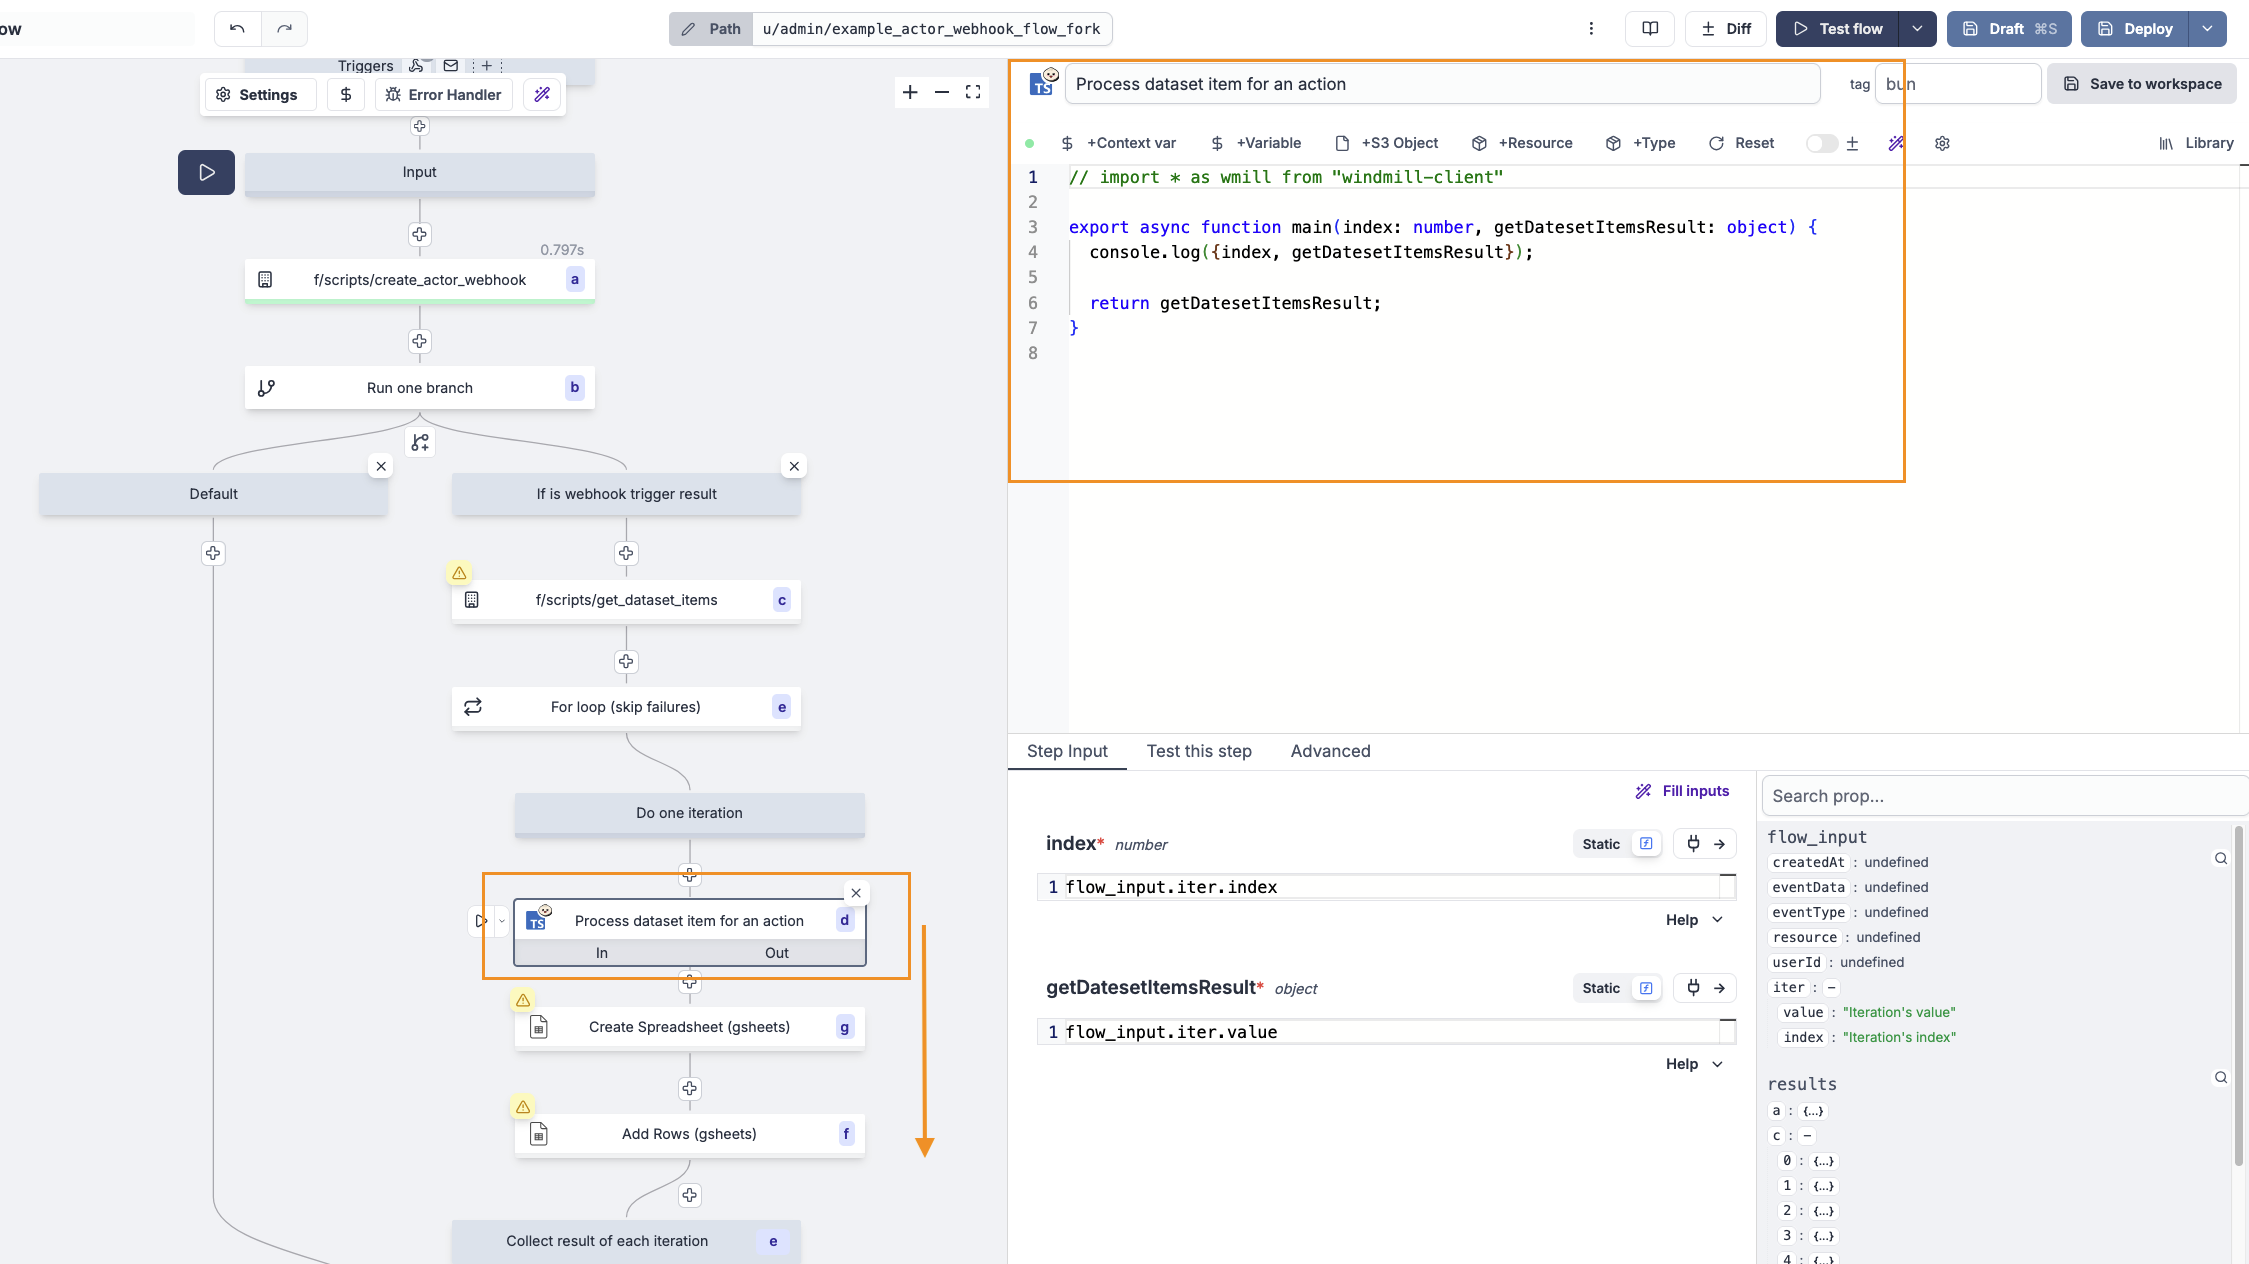
Step 3: Adjust the flow logic
-
Replace the default logic in the flow with your desired actions:
- Example: persist results into a Google Sheet.
-
If needed, use the provided helper script to “mold” the webhook payload into the correct shape for the Google Sheets operation.
Step 4: Test the flow
- Deploy the flow so it can be triggered by the webhook.
- Run the Actor in Apify that the webhook is registered for.
- Check the flow runs in Windmill to verify that the test run was registered and the logic executed.
Delete the webhook
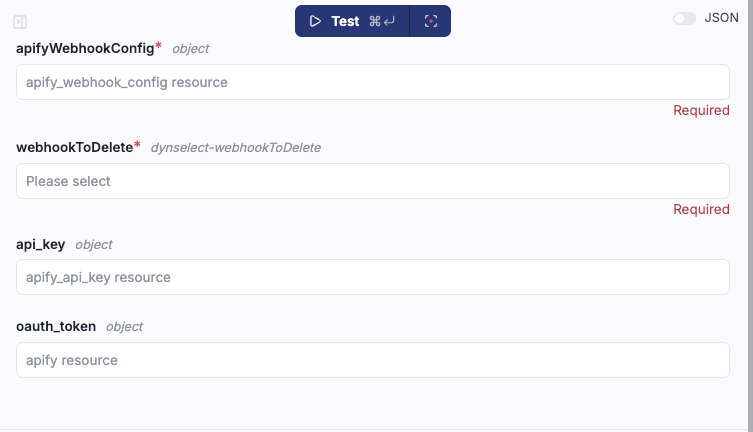
- Fork the Apify's Delete Webhook script from the Windmill Hub.
- Set either your API Key or OAuth Token resource
- Set the Webhook Config Resource to the webhook you want to delete.
- Run the script to delete the webhook in Apify.
Available operations
The Apify integration provides several operations you can use in your Windmill workflows.
Actions (Scripts)
- Run Actor: Starts an Actor with optional input and configuration, with the option to wait for completion or run asynchronously. Returns run metadata including dataset ID.
- Run Task: Executes a predefined Actor task. Similar to Run Actor but uses task configuration, making this ideal for recurring operations.
- Scrape Single URL: Runs a lightweight scraper for a single webpage and returns content as text, markdown, and HTML, making this perfect for quick content extraction.
- Get Dataset Items: Retrieves items from a dataset with options to filter by dataset ID or last run. Supports pagination and item limits.
- Get Key-Value Store: Reads values from key-value stores with the ability to retrieve specific keys or list all keys, making this useful for configuration and state management.
Triggers
Webhook-based Triggers
- Actor Webhook Trigger: Responds to Actor run events
- Task Webhook Trigger: Responds to task run events
- Real-time event processing with full payload data
Polling-based Triggers
- Actor Run Polling Trigger: Periodically checks for new Actor runs
- Task Run Polling Trigger: Periodically checks for new task runs
- Fallback option when webhooks aren't available
Resources
- Windmill Documentation
- Windmill Local Development
- Apify API Documentation
- Apify Webhooks
- Apify Actors & Tasks
Troubleshooting
If you have any questions or need help, feel free to reach out to us on our developer community on Discord.