viaSocket integration
viaSocket is a workflow automation platform that lets you connect apps and automate tasks without writing code. With the Apify integration, you can trigger Actor runs, retrieve results, and build automation pipelines that respond to events across your connected apps.
Help keep this page up to date
This integration uses a third-party service. If you find outdated content, please submit an issue on GitHub.
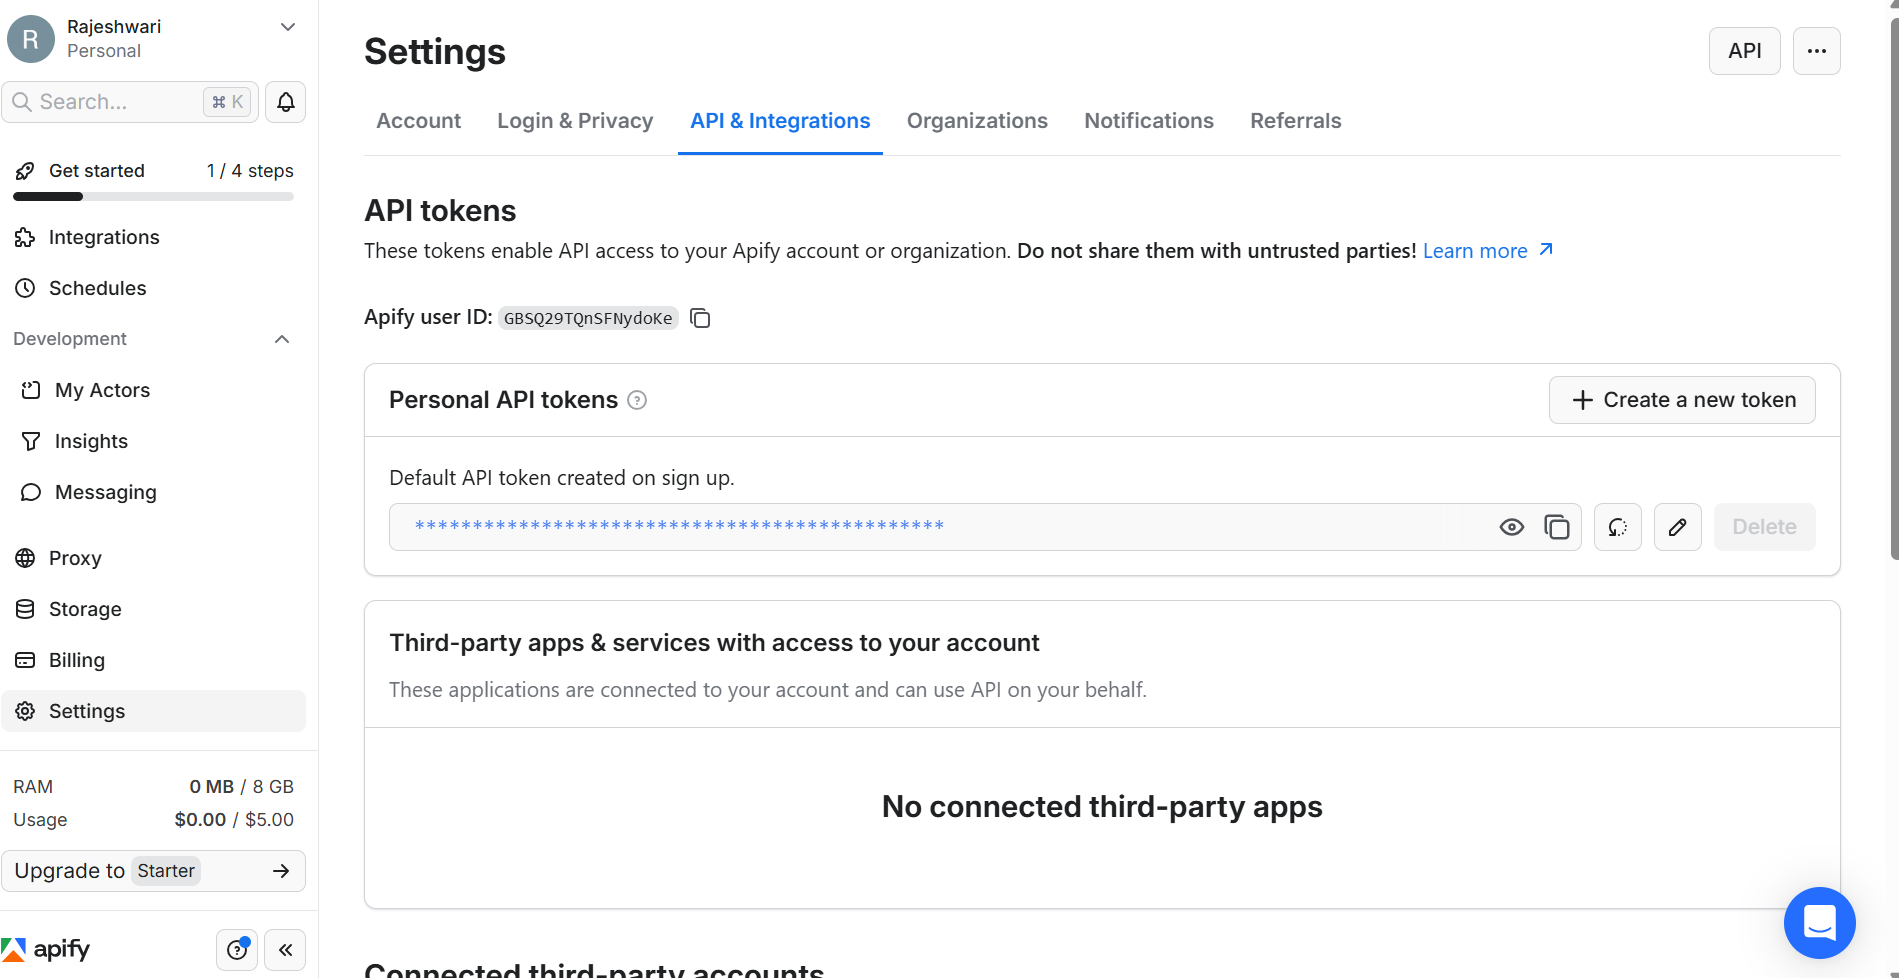
Step 1: Generate an Apify API token
- Log in to your Apify account.
- Go to Settings > API & Integrations > API Tokens.
- Copy your personal API token.
Token security
Never share your API token publicly or commit it to version control.
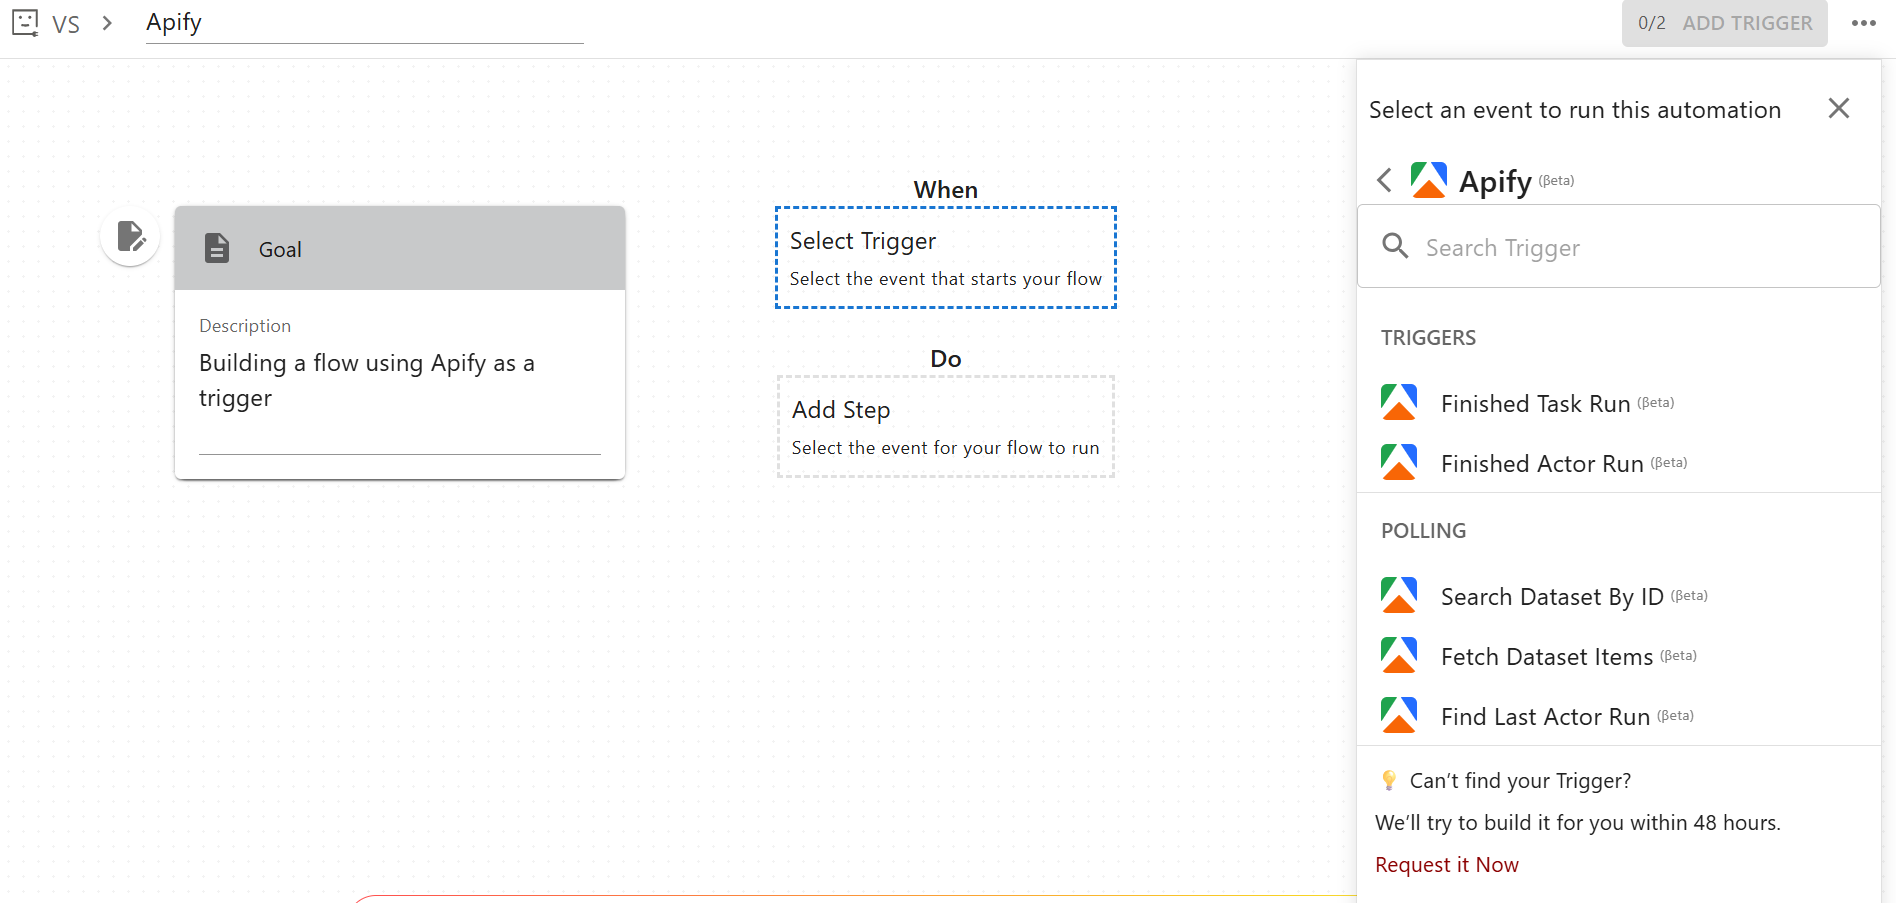
Step 2: Create a new flow in viaSocket
- Log in to your viaSocket account and click Create New Flow.
- In the Trigger section, search for and select Apify.
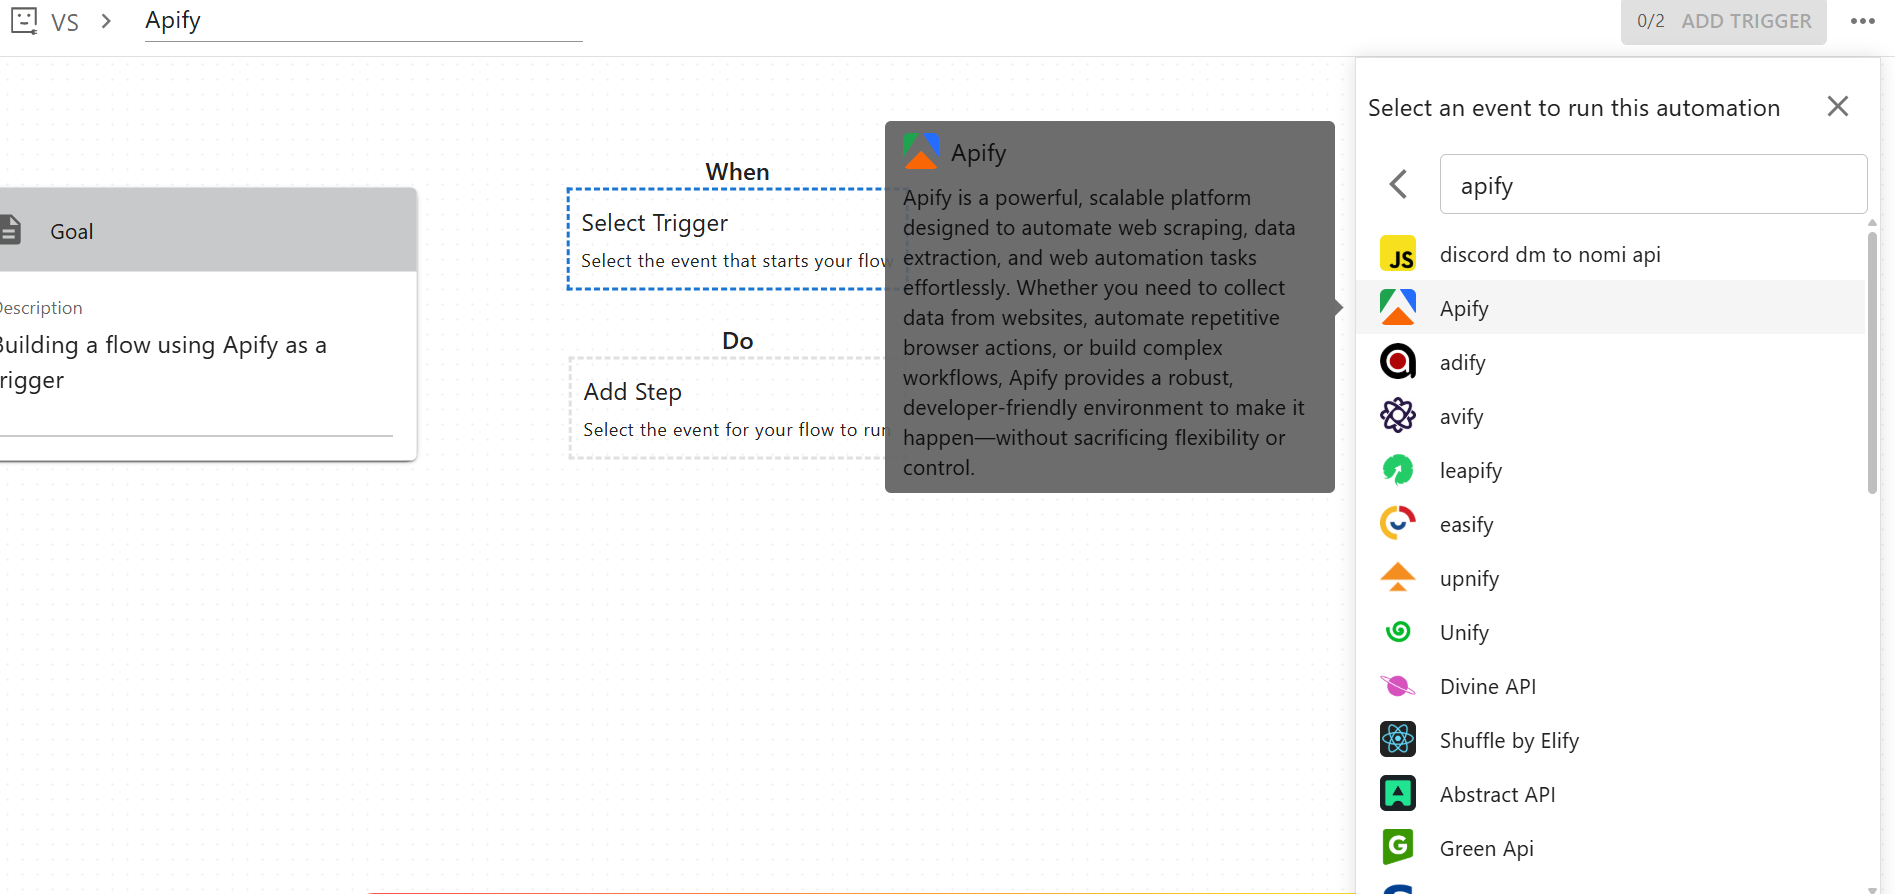
- Choose Finished Task Run or Finished Actor Run as the trigger event.
Step 3: Connect your Apify account and configure the trigger
- Click Connect to Apify.
- Paste your Apify API token into the connection dialog.
- Click Save to establish the connection.
- Confirm the connection is successfully added before continuing.
- Provide the Actor or task ID manually or map it dynamically from a previous step.
- Set Status to
Succeeded. - Click Test to fetch sample data and verify the trigger works.
- Save the trigger configuration.
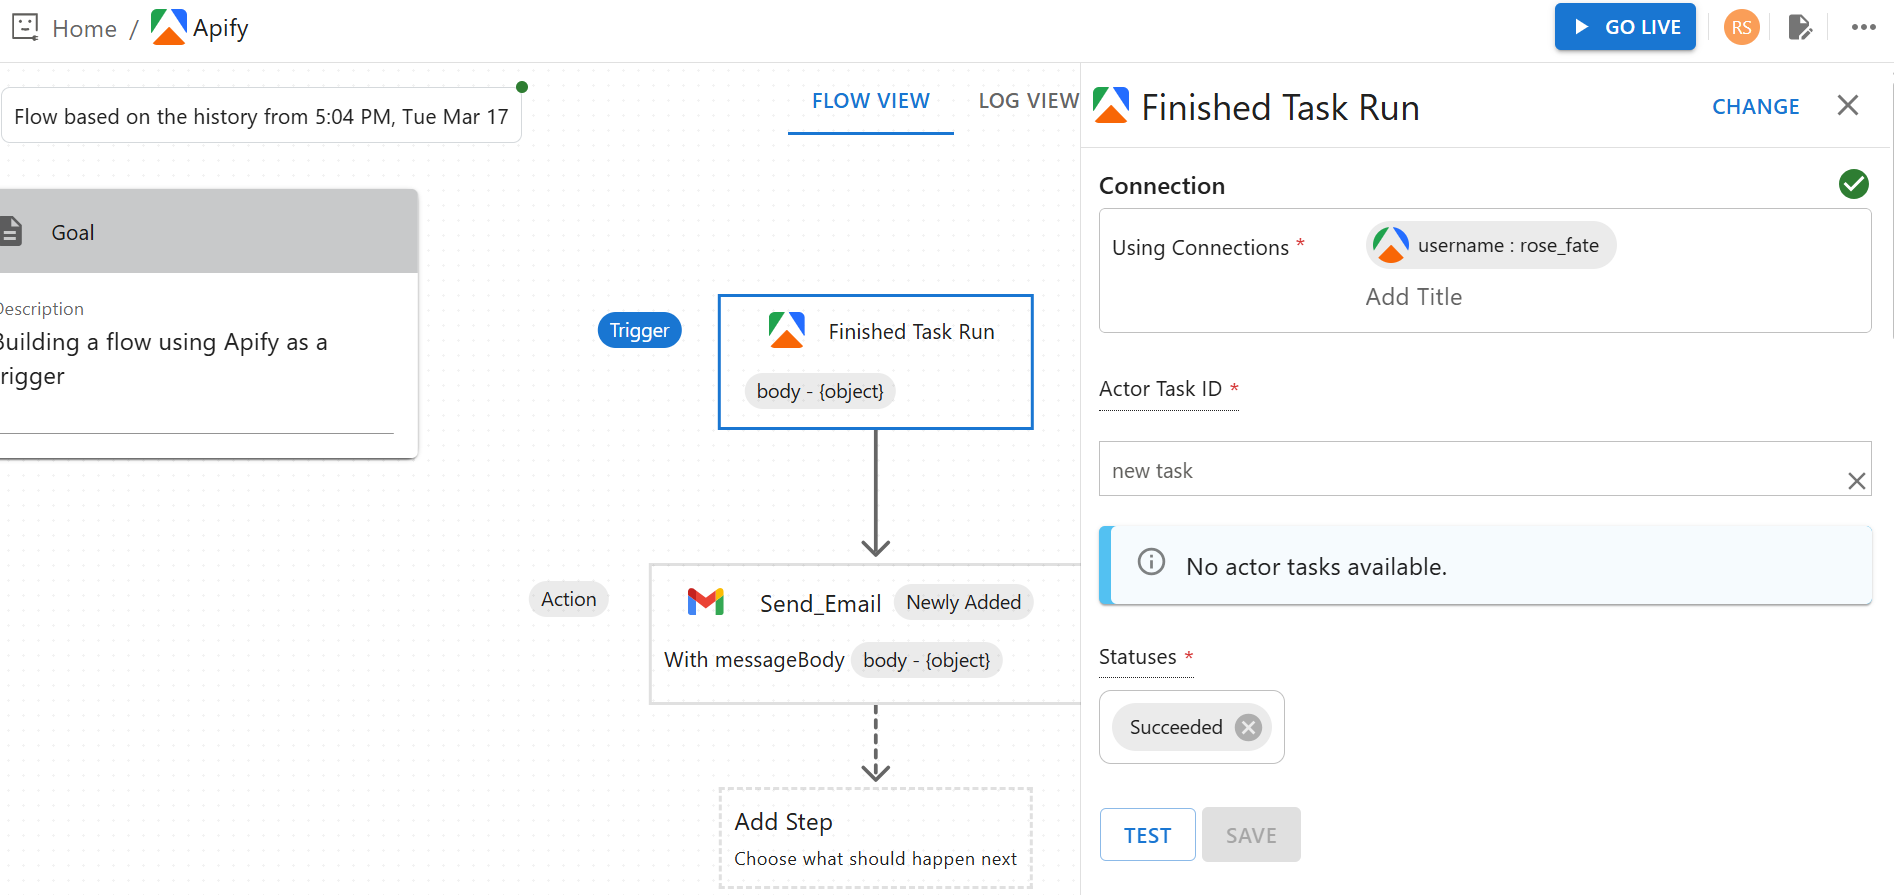
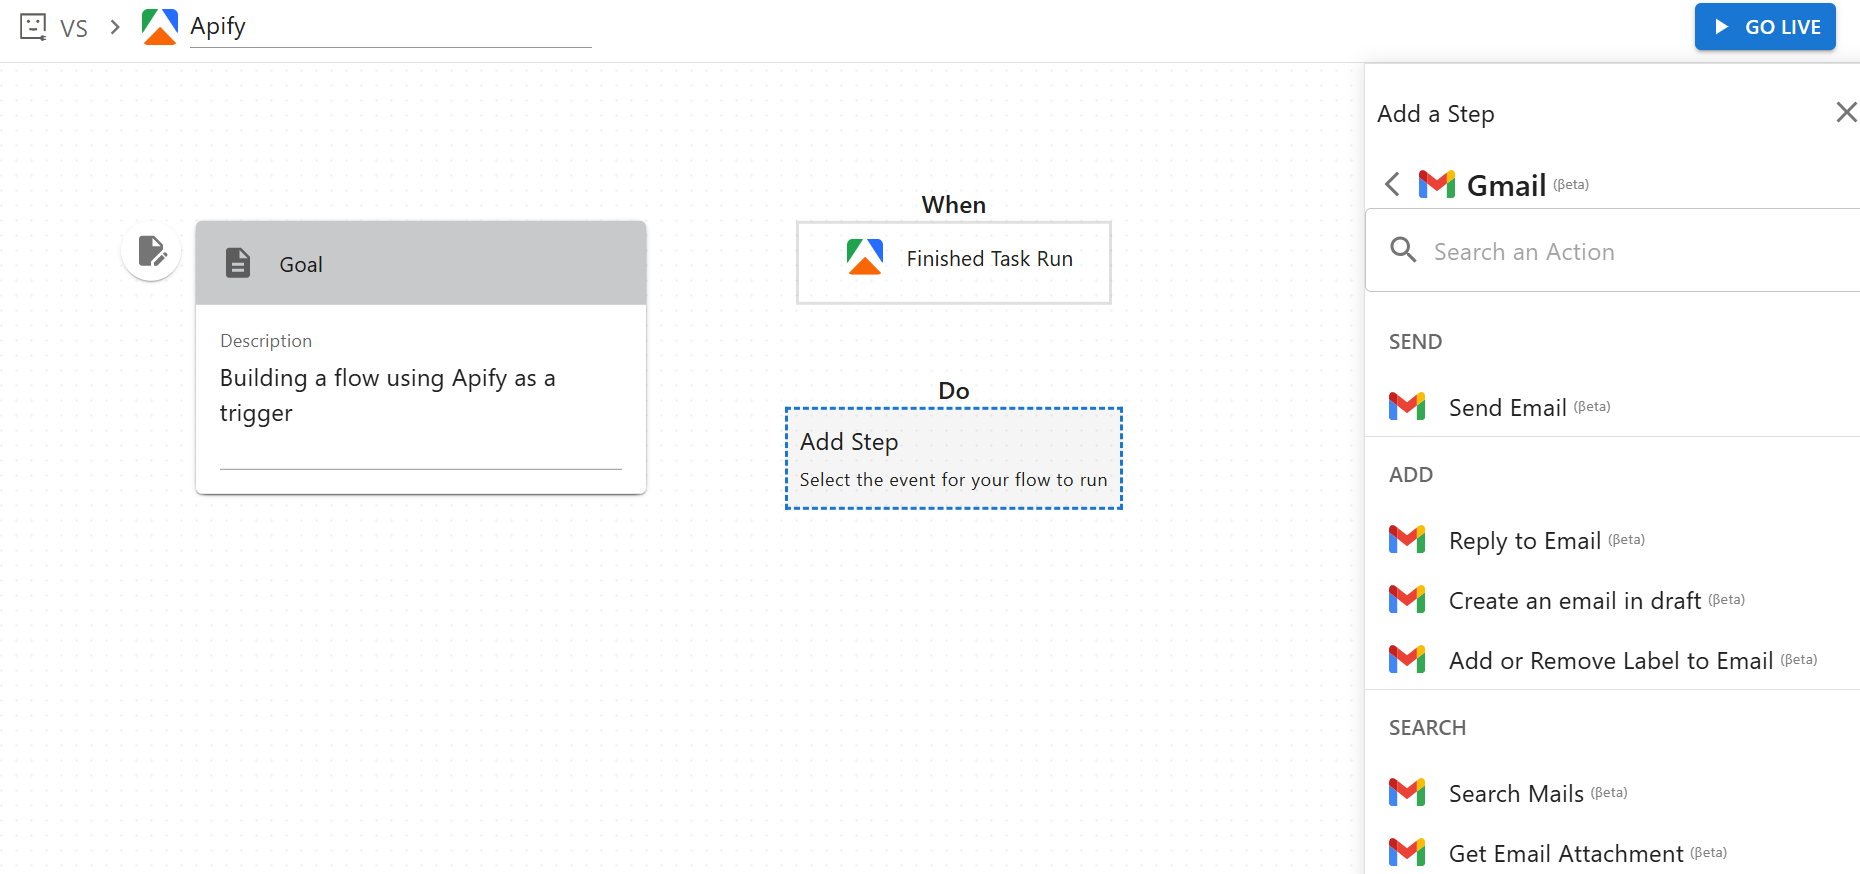
Step 4: Add an action
You can add any supported app as the next step in your flow. The example below uses Gmail to send an email when the trigger fires.
- Click Add Step.
- Select Gmail and choose the Send Email action.
- Connect or select your Gmail account.
- Map the following fields:
- To: recipient email address
- Subject: email subject line
- Message Body: use the trigger
bodyobject as dynamic input
- Click Test to run the action and confirm a
200response status.
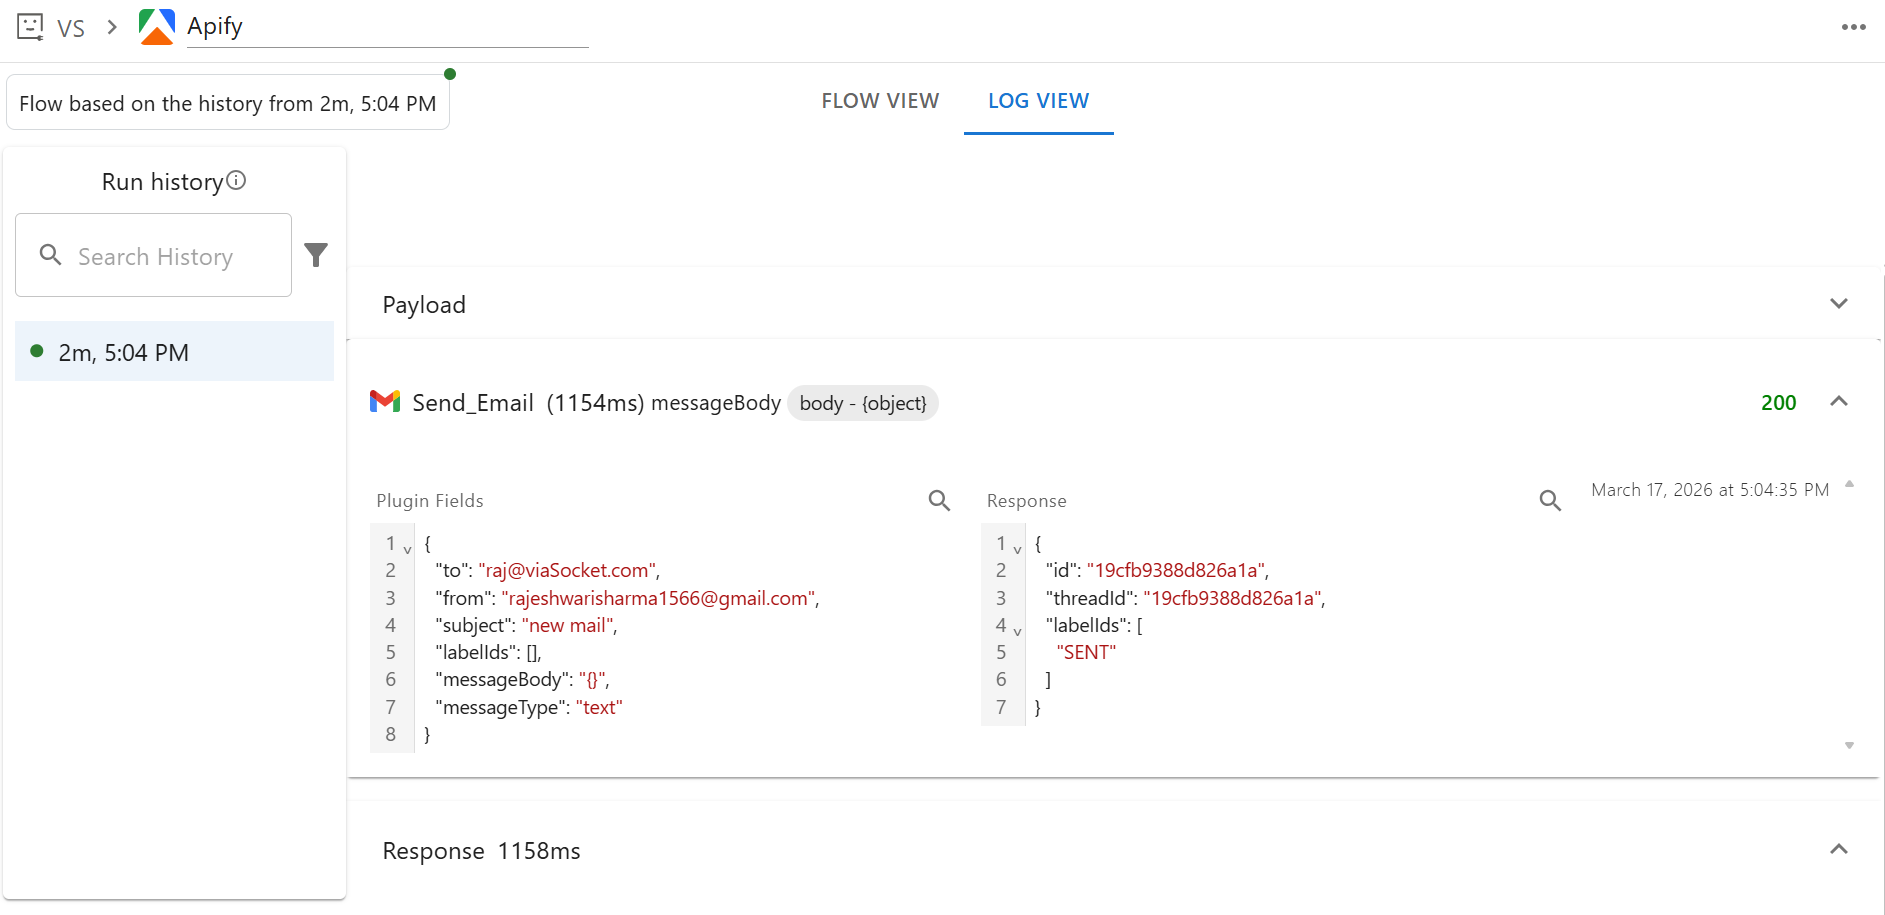
Step 5: Go live and monitor
- Click Go Live and confirm activation.
- Use Flow View to inspect the flow structure and Log View to monitor individual executions.
- Re-run a specific execution from Run History if needed.
For questions or help, join the Apify Discord community.