n8n integration
n8n is an open source, fair-code licensed tool for workflow automation. With the Apify integration for n8n, you can connect Apify Actors and storage to hundreds of services You can run scrapers, extract data, and trigger workflows based on Actor or task events.
In this guide, you'll learn how to install the Apify node, set up authentication, and incorporate it into your n8n workflows as either a trigger or an action.
This integration uses a third-party service. If you find outdated content, please submit an issue on GitHub.
Prerequisites
Before you begin, make sure you have:
- An Apify account
- An n8n instance (self‑hosted or cloud)
Install the Apify node (self-hosted)
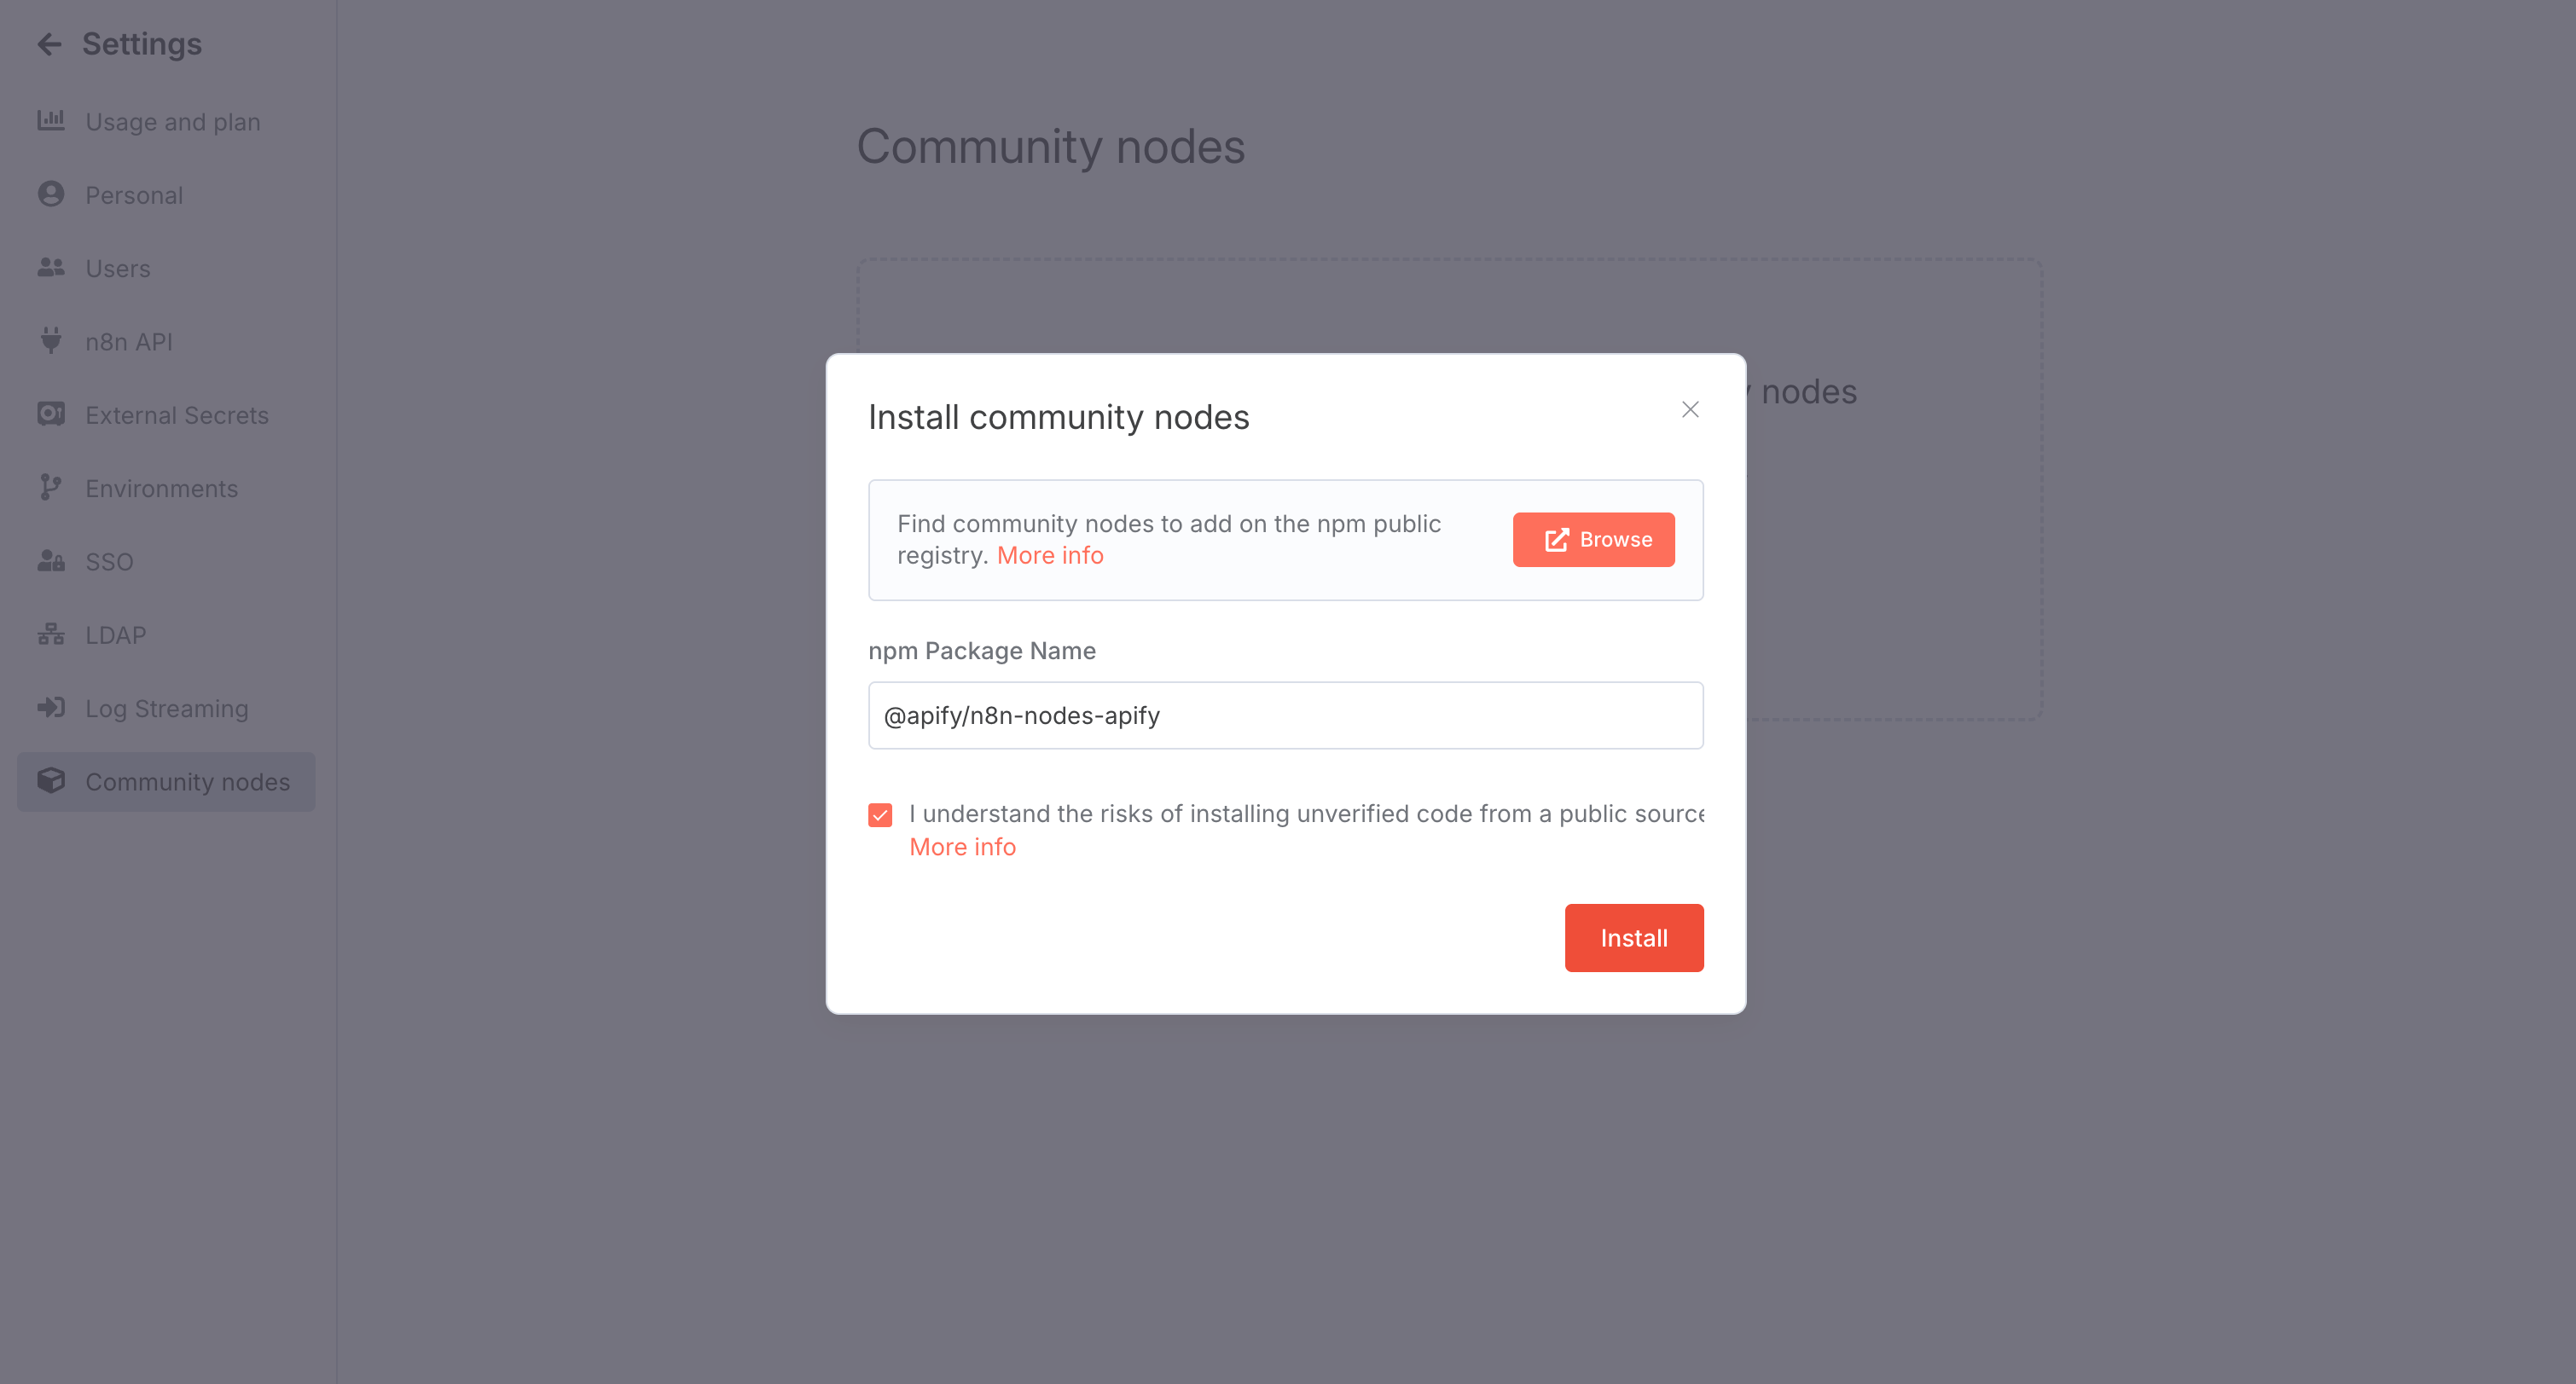
If you're running a self-hosted n8n instance, you can install the Apify community node directly from the editor. This process adds the node to your available tools, enabling Apify operations in workflows.
- Open your n8n instance.
- Go to Settings > Community Nodes.
- Select Install.
- Enter the npm package name:
@apify/n8n-nodes-apify(for latest version). To install a specific version enter e.g@apify/n8n-nodes-apify@0.4.4. - Agree to the risks of using community nodes and select Install.
- You can now use the node in your workflows.
Install the Apify node (n8n Cloud)
For n8n Cloud users, installation is even simpler and doesn't require manual package entry. Just search and add the node from the canvas.
- Go to the Canvas and open the nodes panel
- Search for Apify in the community node registry
- Click Install node to add the Apify node to your instance
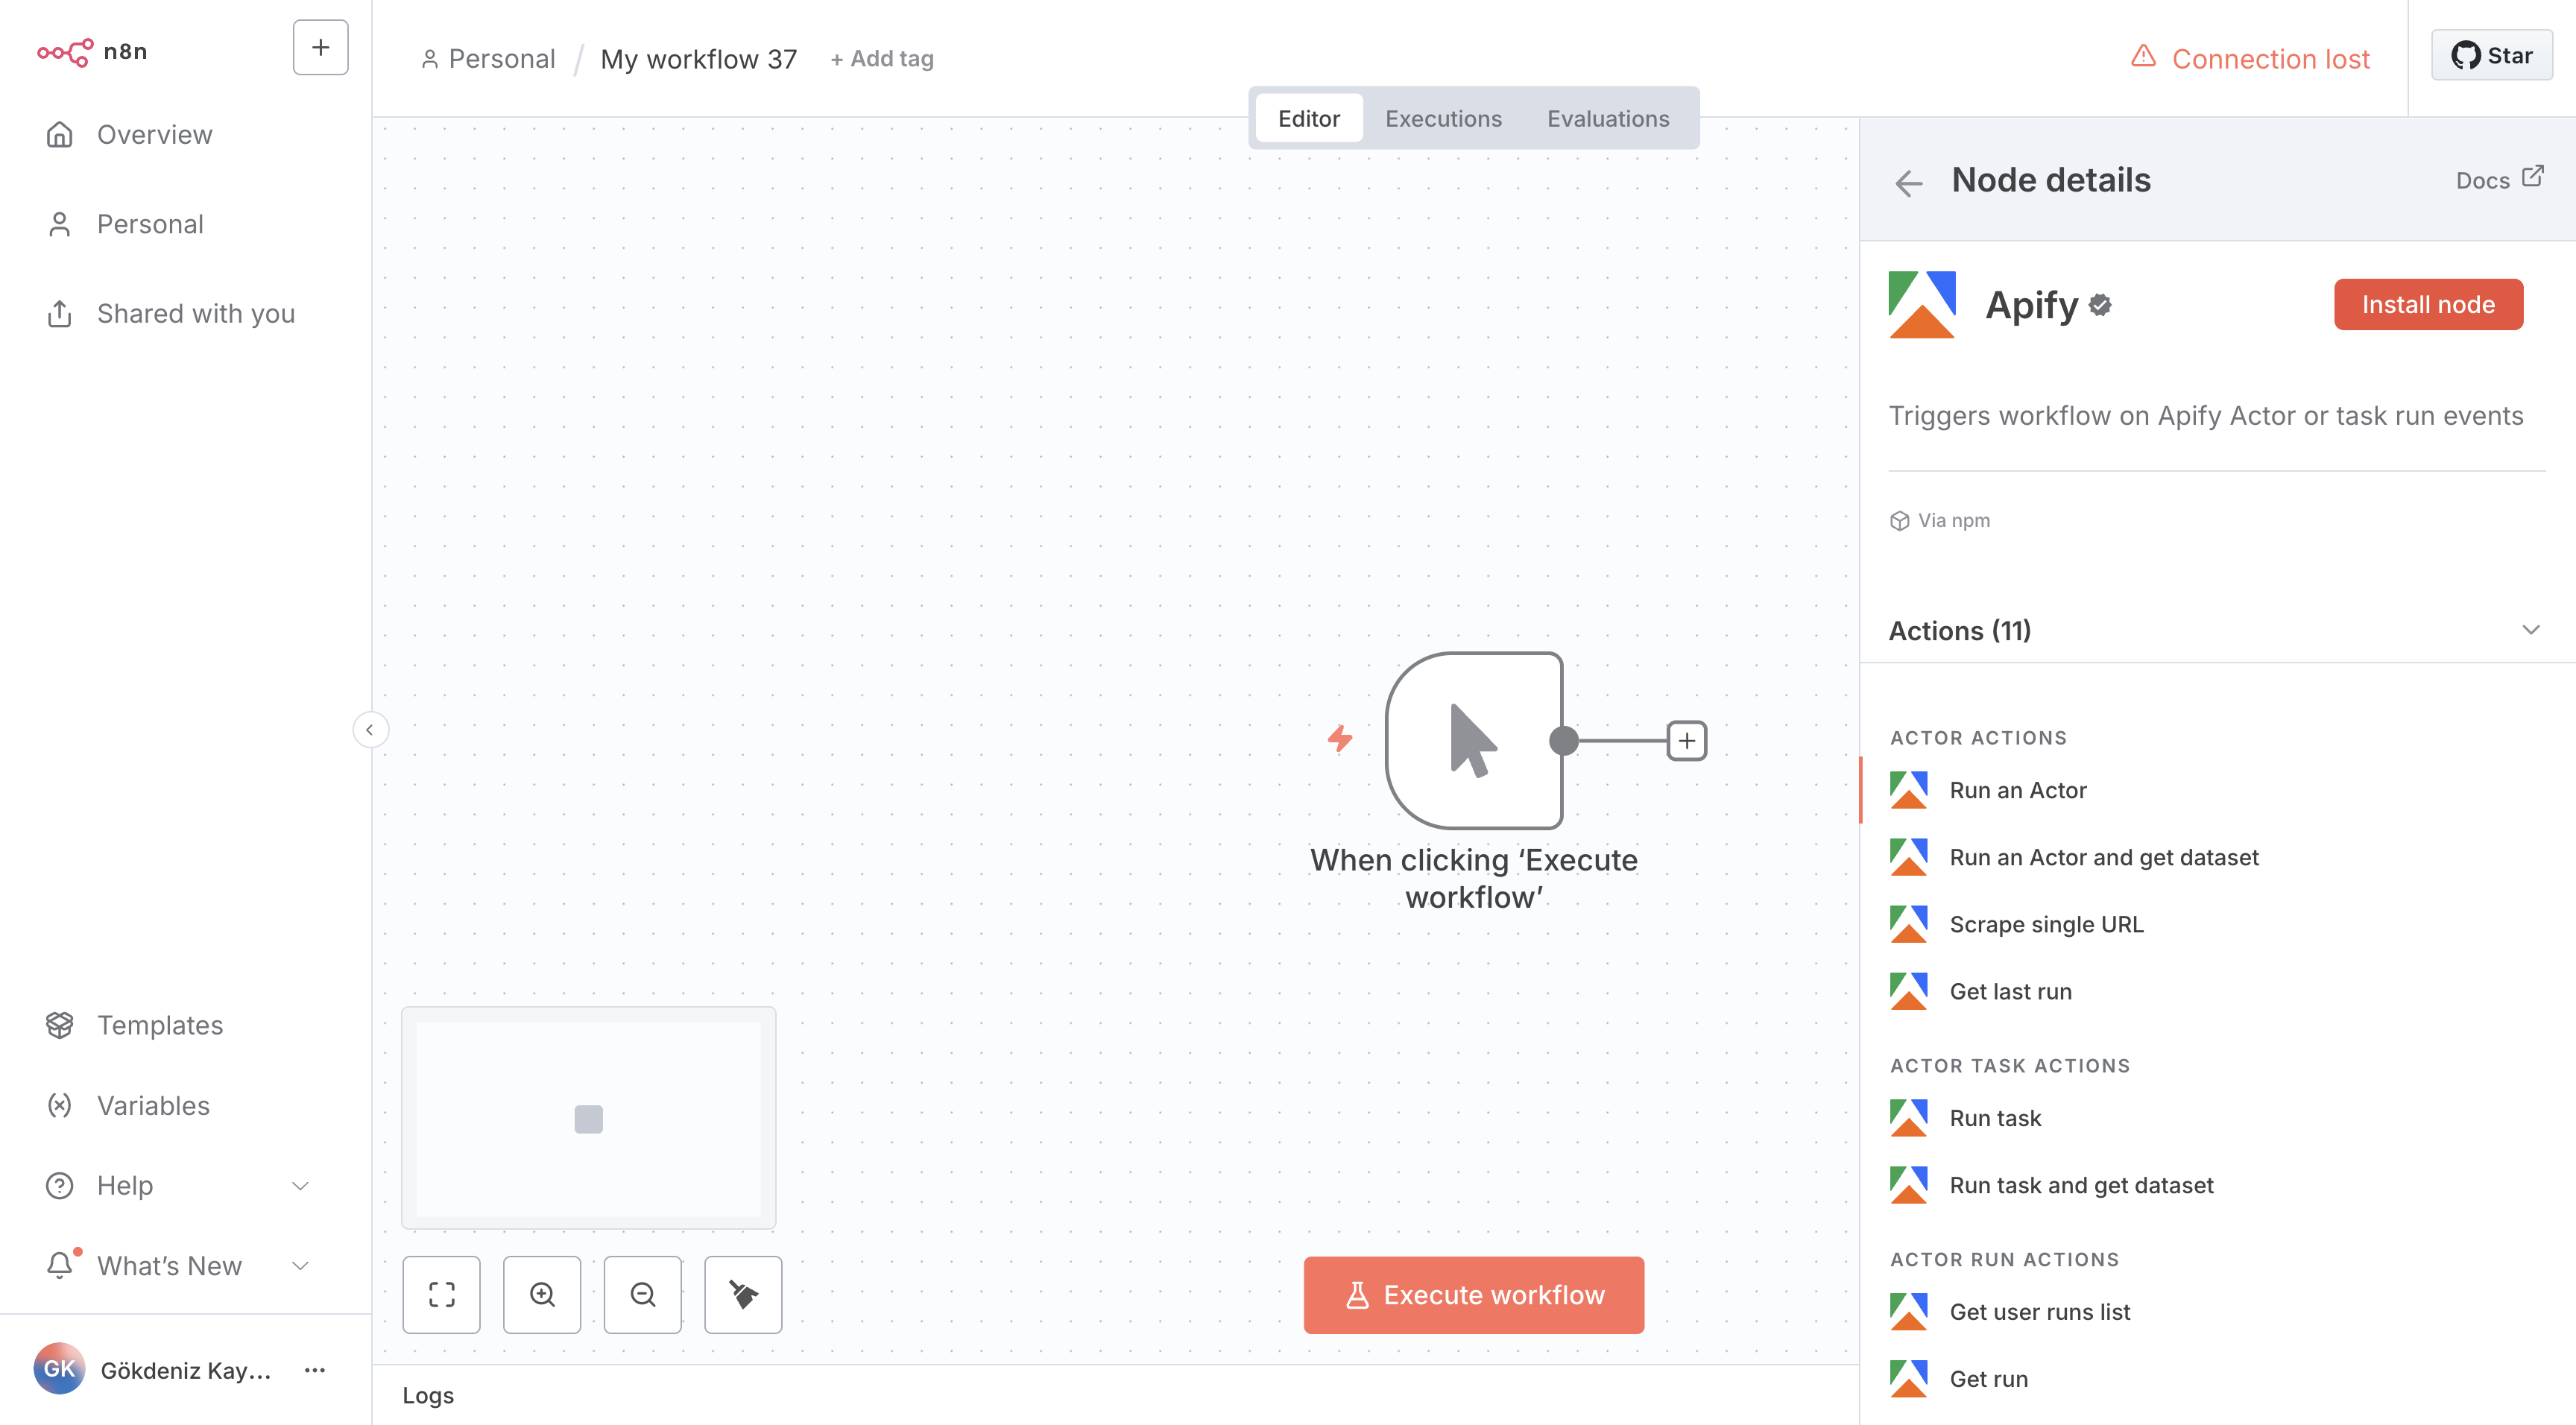
On n8n Cloud, instance owners can toggle visibility of verified community nodes in the Cloud Admin Panel. Ensure this setting is enabled to install the Apify node.
Once installed, the next step is authentication.
Authentication
The Apify node offers two authentication methods to securely connect to your Apify account. Choose based on your setup - API key works for both self-hosted and cloud instances, while OAuth2 is cloud-only.
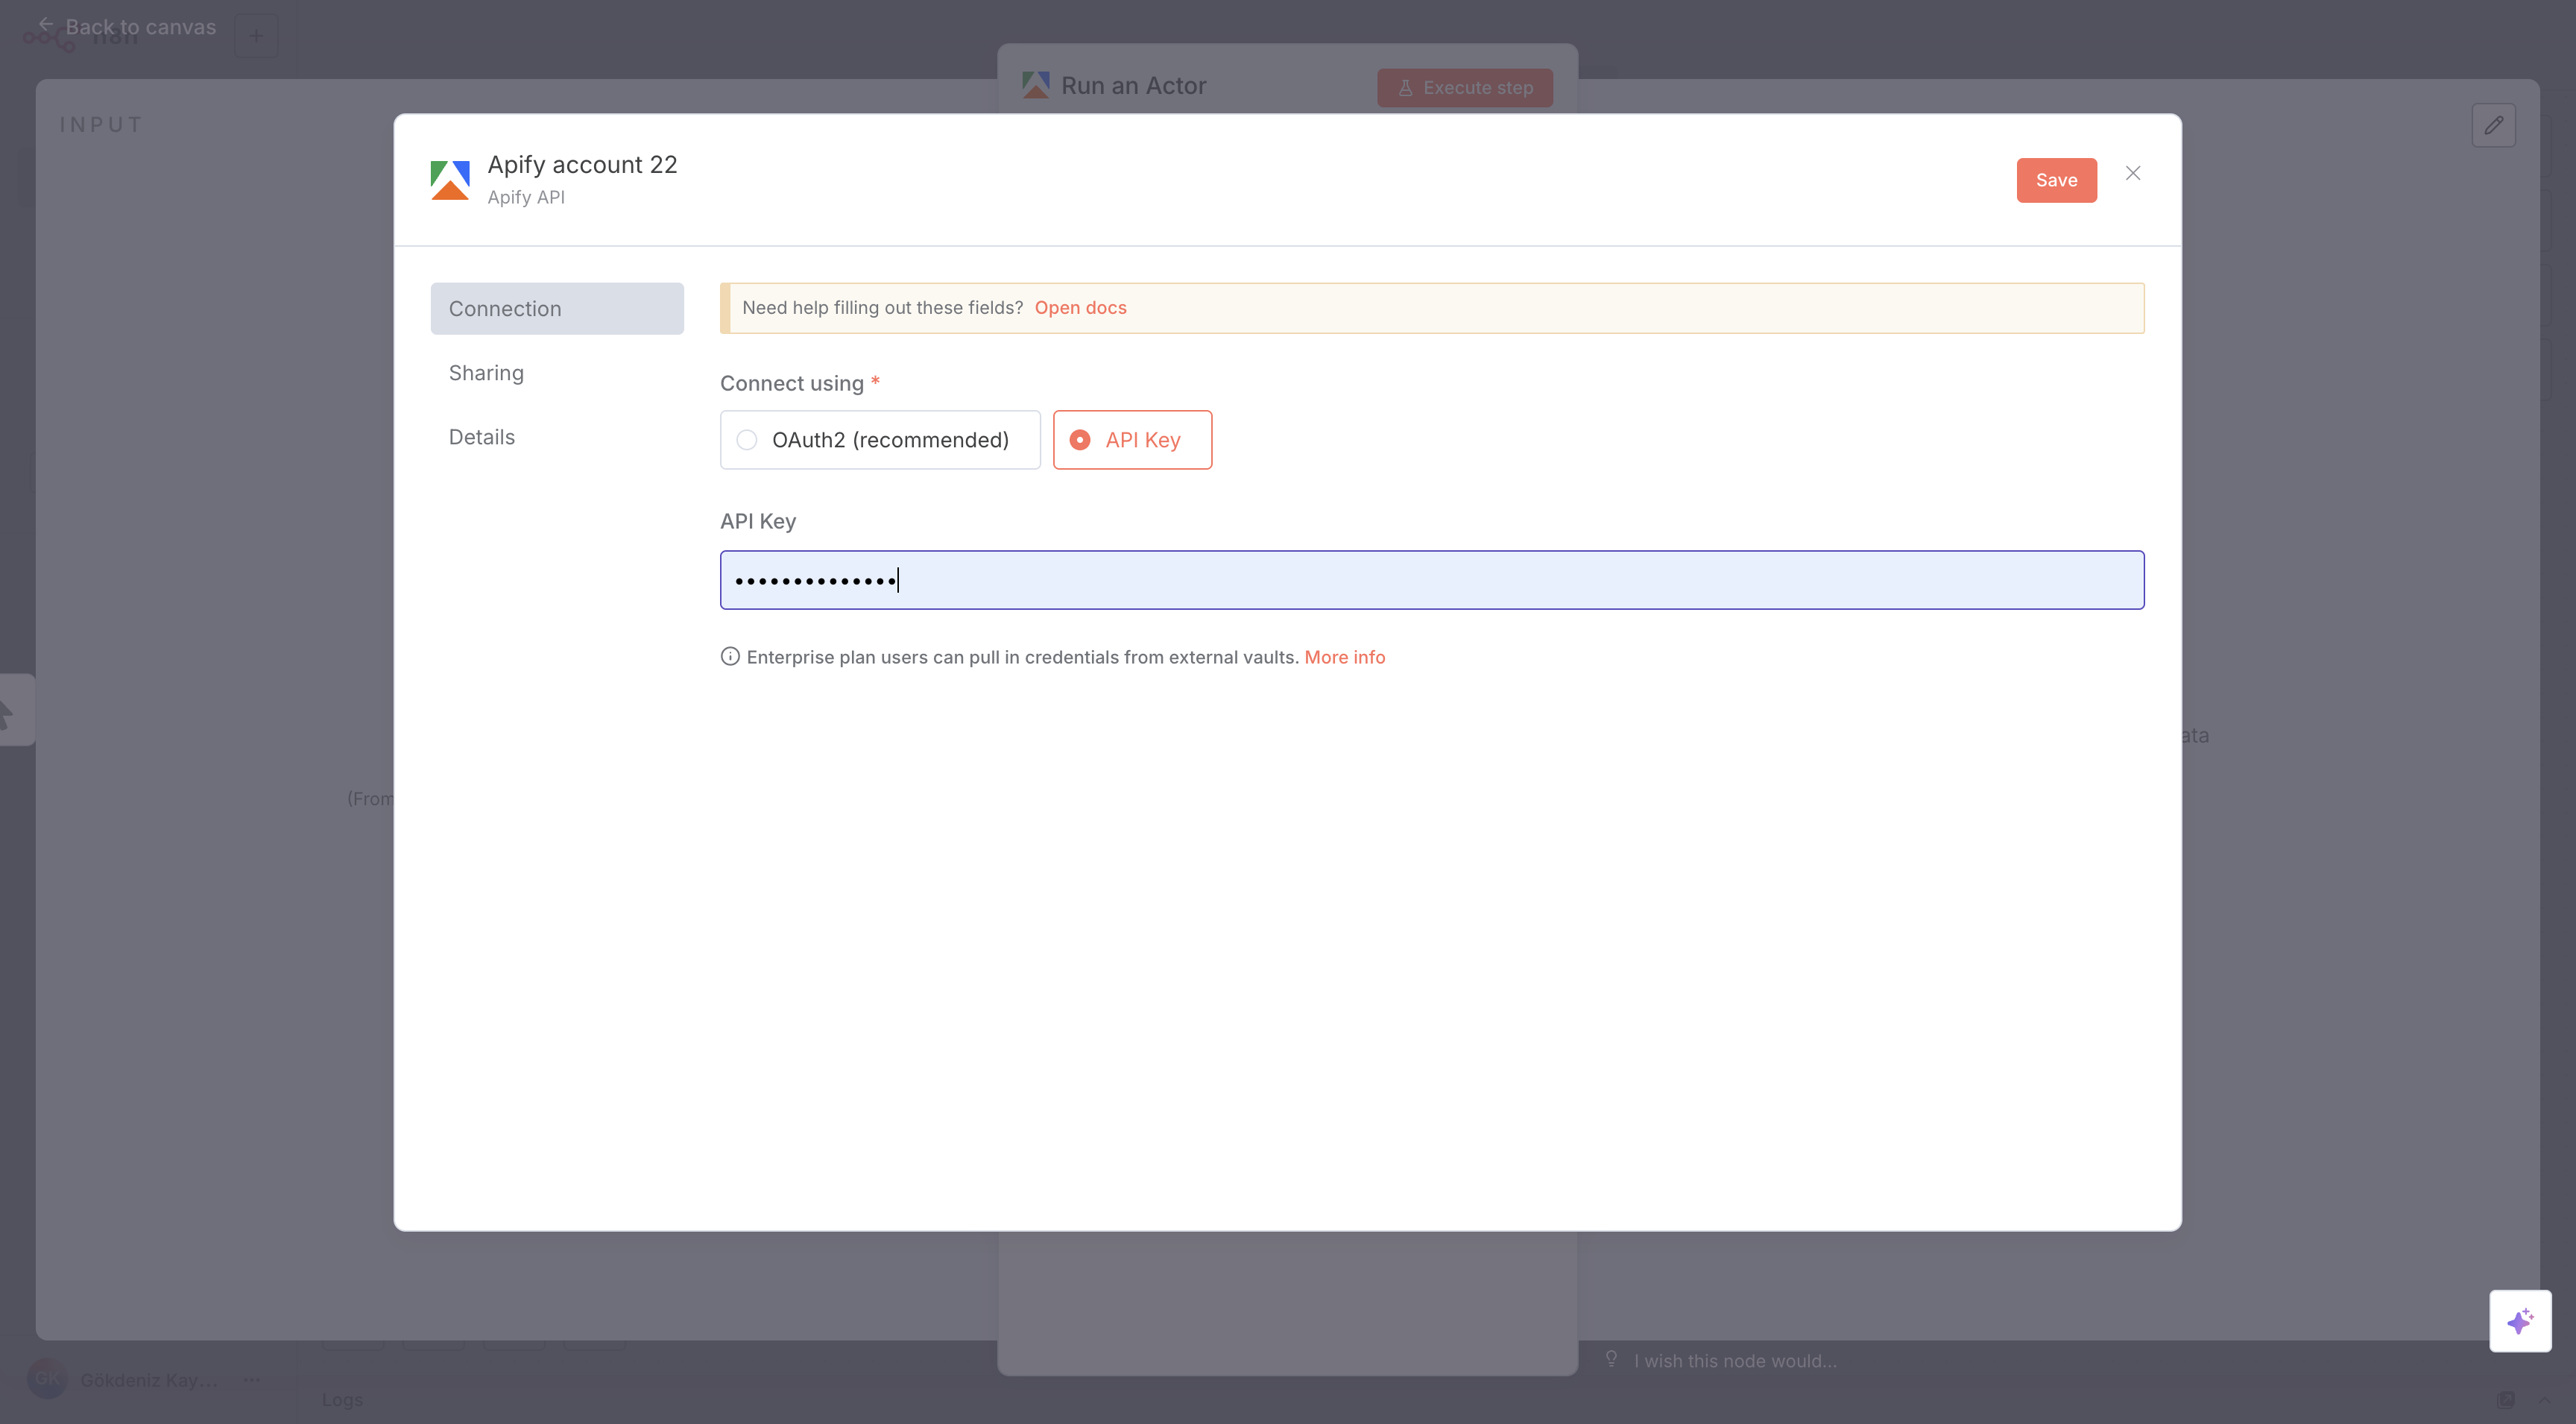
API Key (cloud & self-hosted instance)
- In the n8n Editor UI, click on Create Credential.
- Search for Apify API and click Continue.
- Enter your Apify API token. (find it in the Apify Console).
- Click Save.
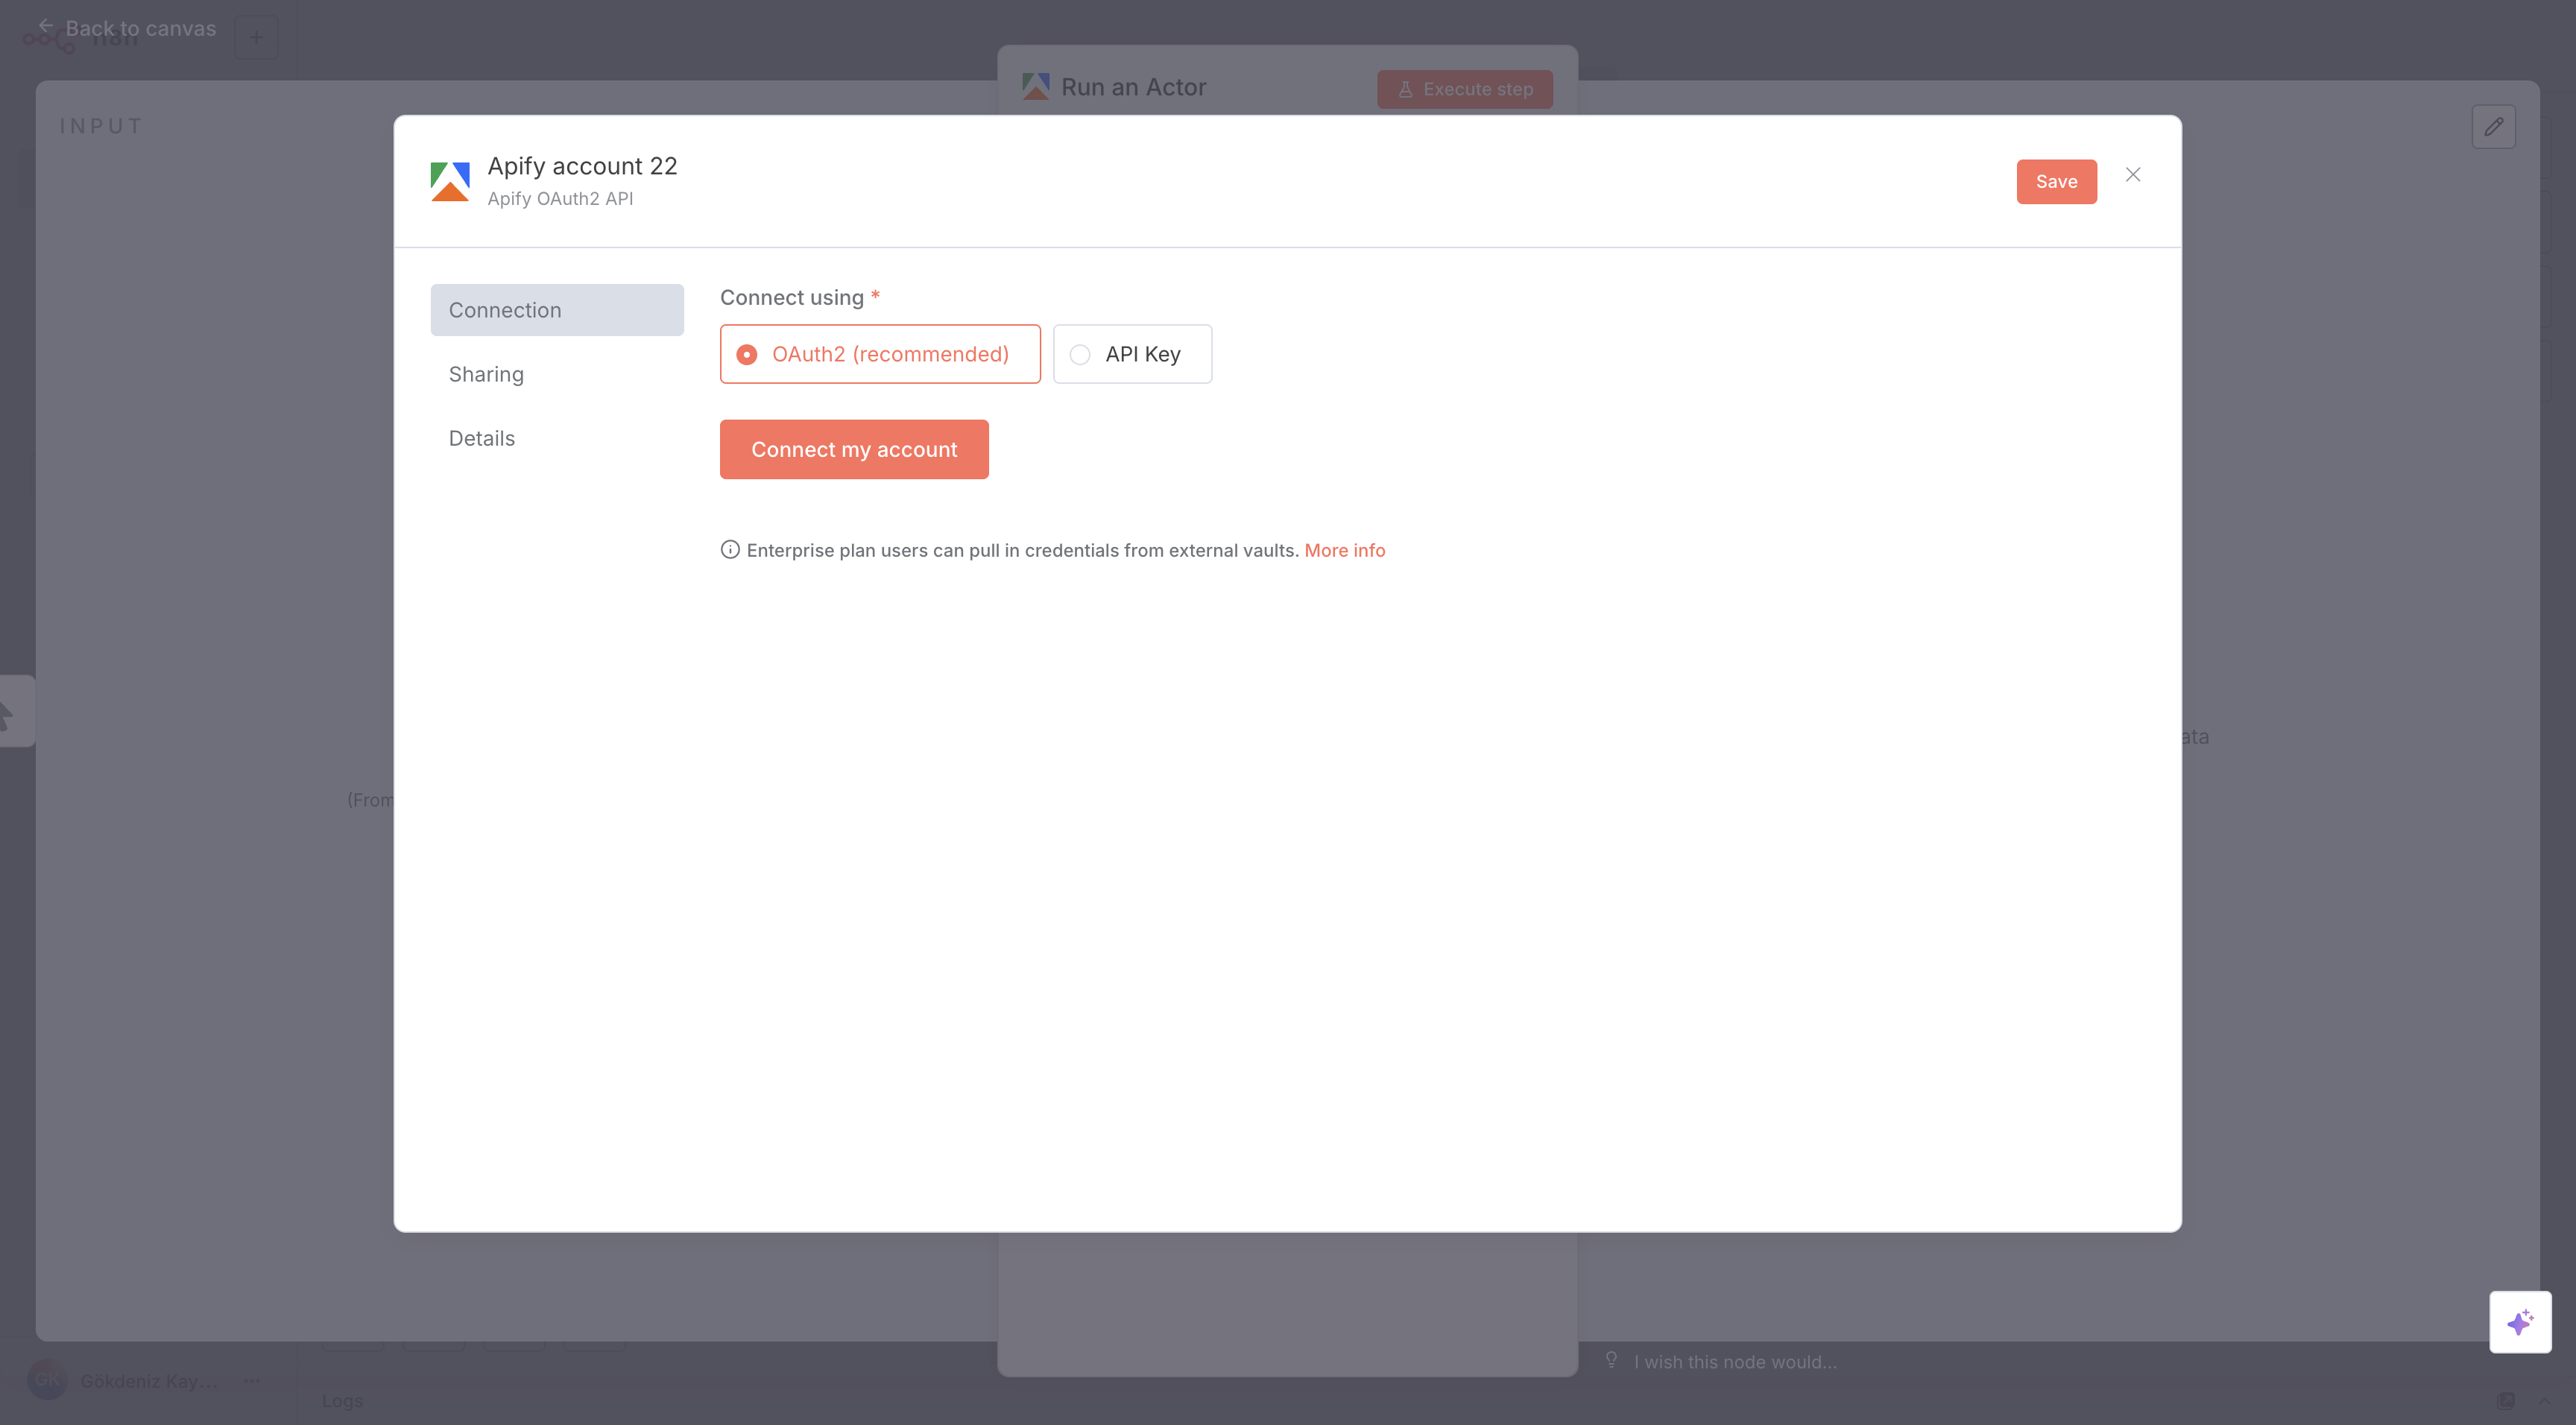
OAuth2 (cloud instance only)
- In n8n Cloud, select Create Credential.
- Search for Apify OAuth2 API and select Continue.
- Select Connect my account and authorize with your Apify account.
- n8n automatically retrieves and stores the OAuth2 tokens.
For simplicity on n8n Cloud, use the API key method if you prefer manual control over credentials.
With authentication set up, you can now create workflows that incorporate the Apify node.
Create a workflow with the Apify node
Start by building a basic workflow in n8n, then add the Apify node to handle tasks like running Actors or fetching data.
- Create a new workflow in n8n.
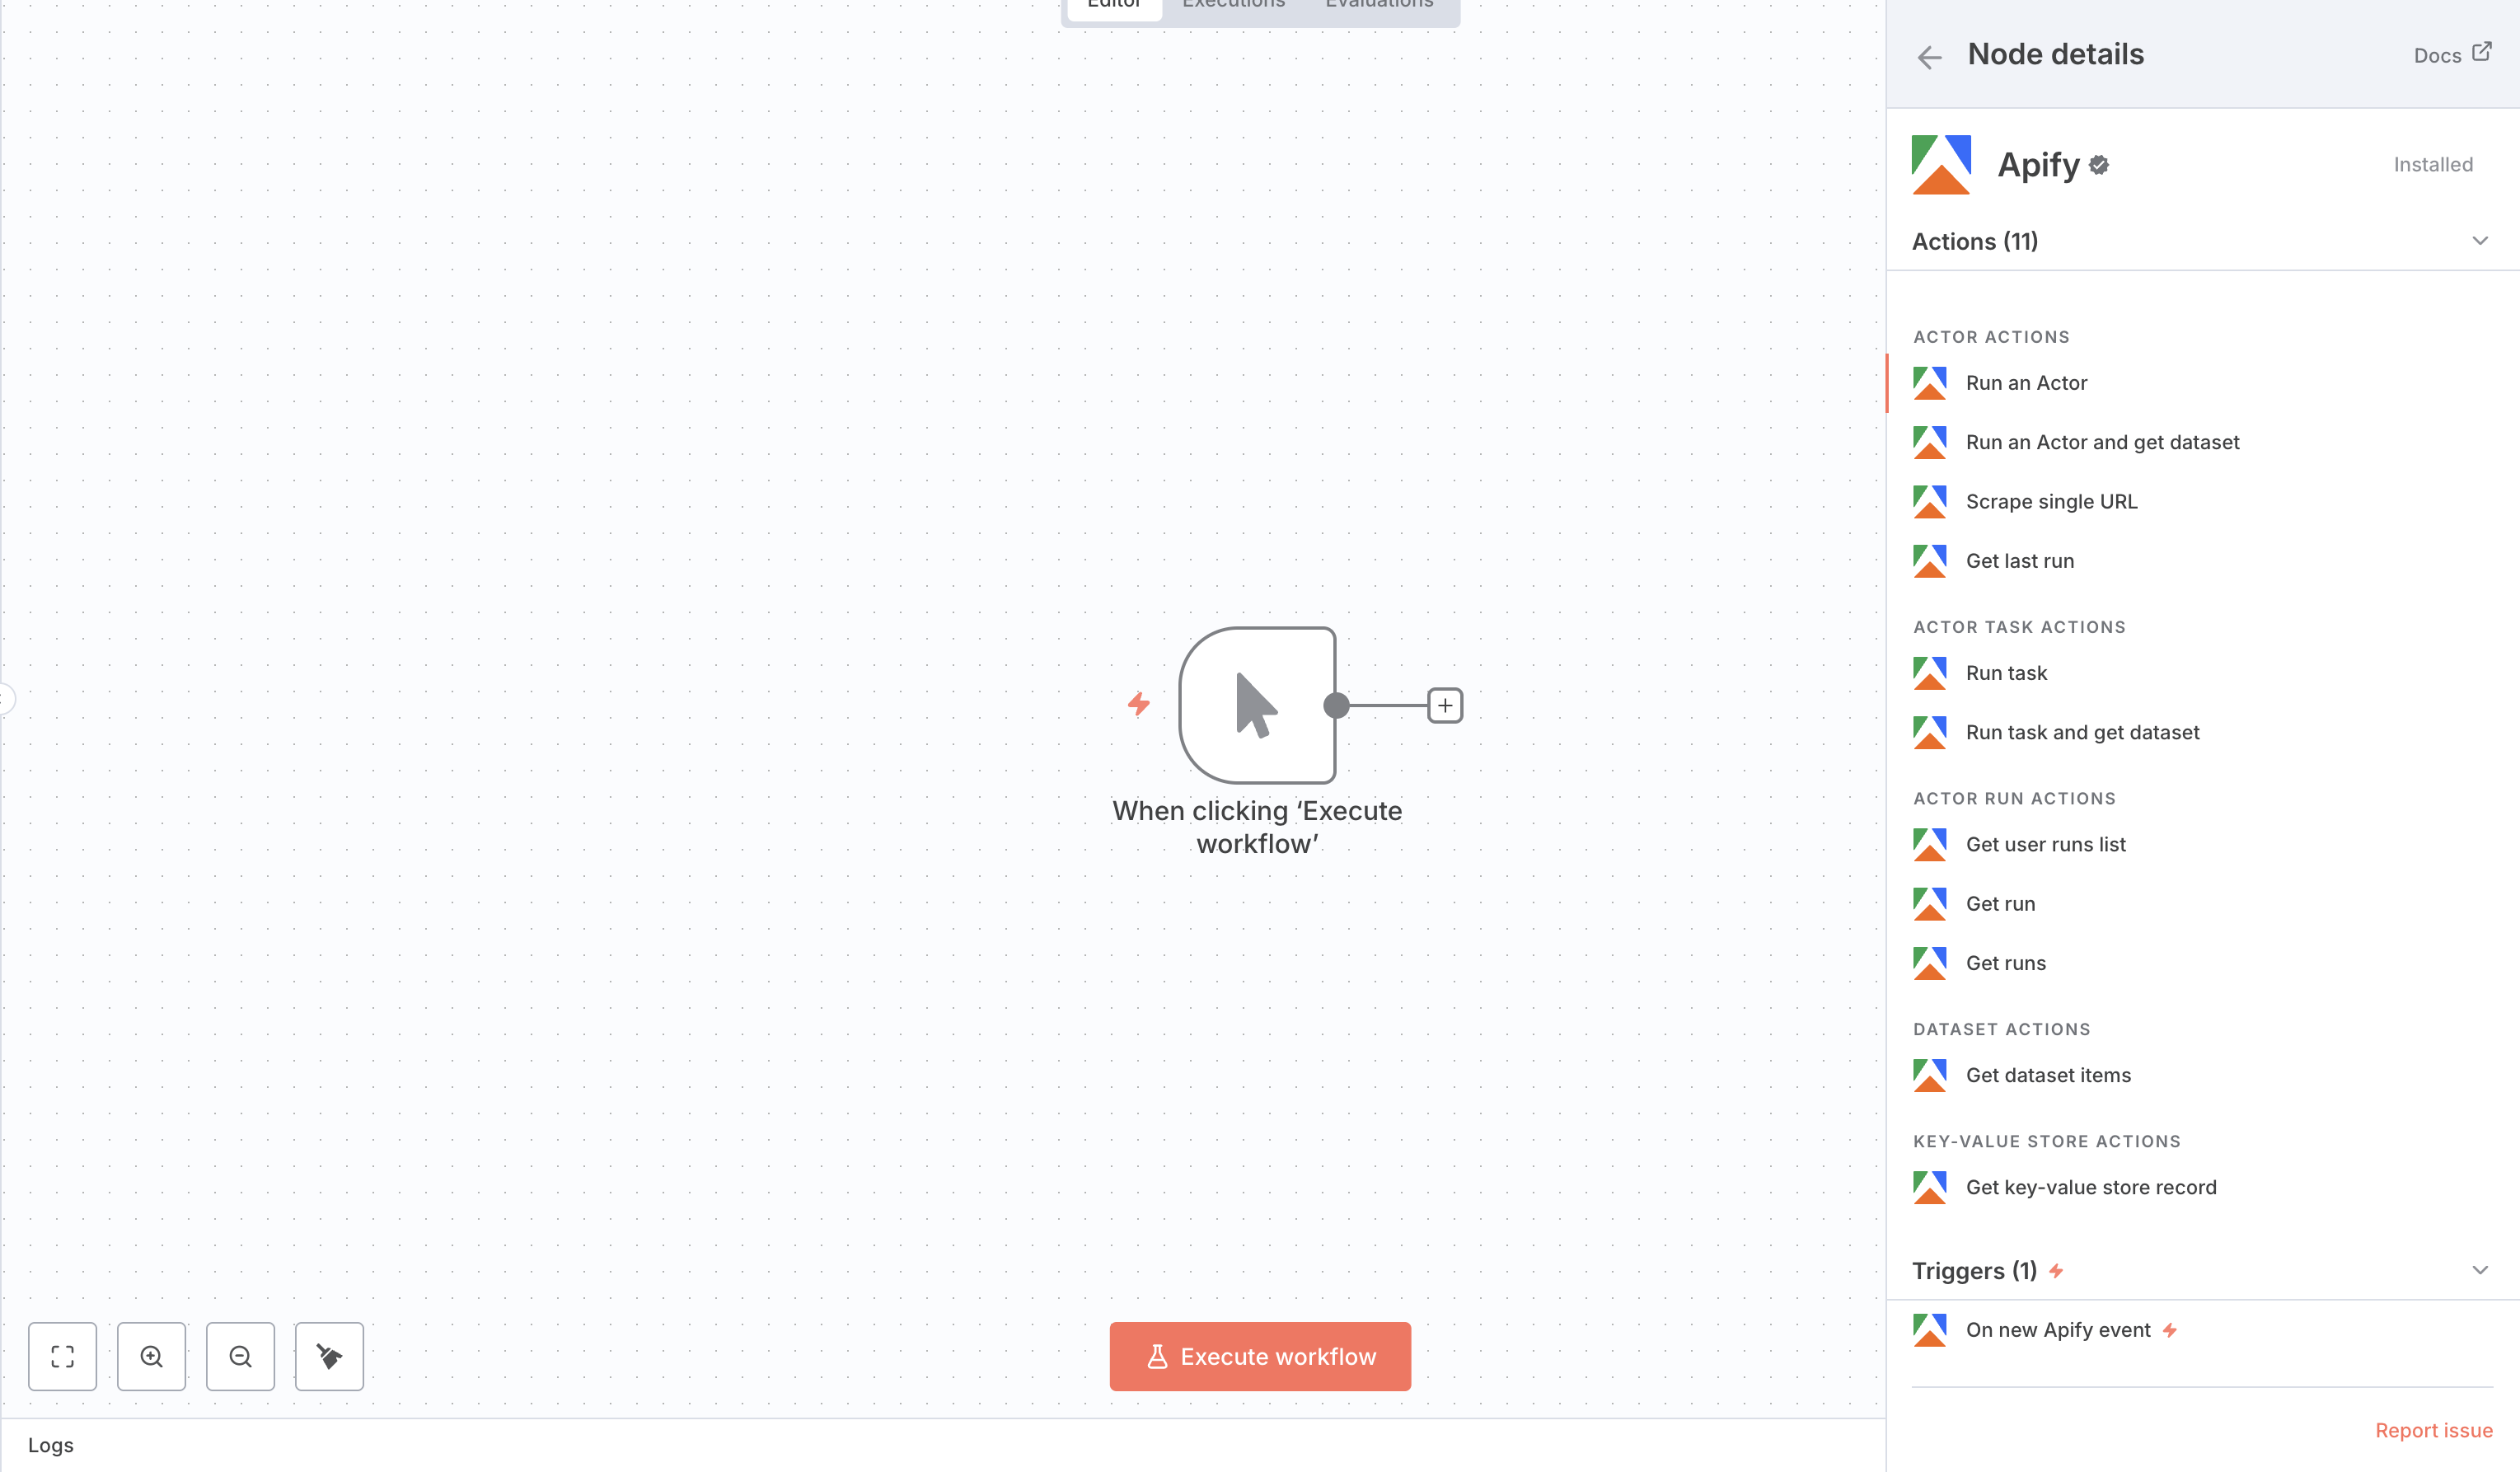
- Select Add Node, search for Apify, and select it.
- Choose the desired Resource and Operation.
- In the node's Credentials dropdown, choose the Apify credential you configured earlier. If you haven't configured any credentials, you can do so in this step. The process will be the same.
- You can now use Apify node as a trigger or action in your workflow.
Use Apify node as trigger
Triggers let your workflow respond automatically to events in Apify, such as when an Actor run finishes. This is ideal for real-time automation, like processing scraped data as soon as it's available.
- Create a new workflow.
- Click Add Node, search for Apify, and select it.
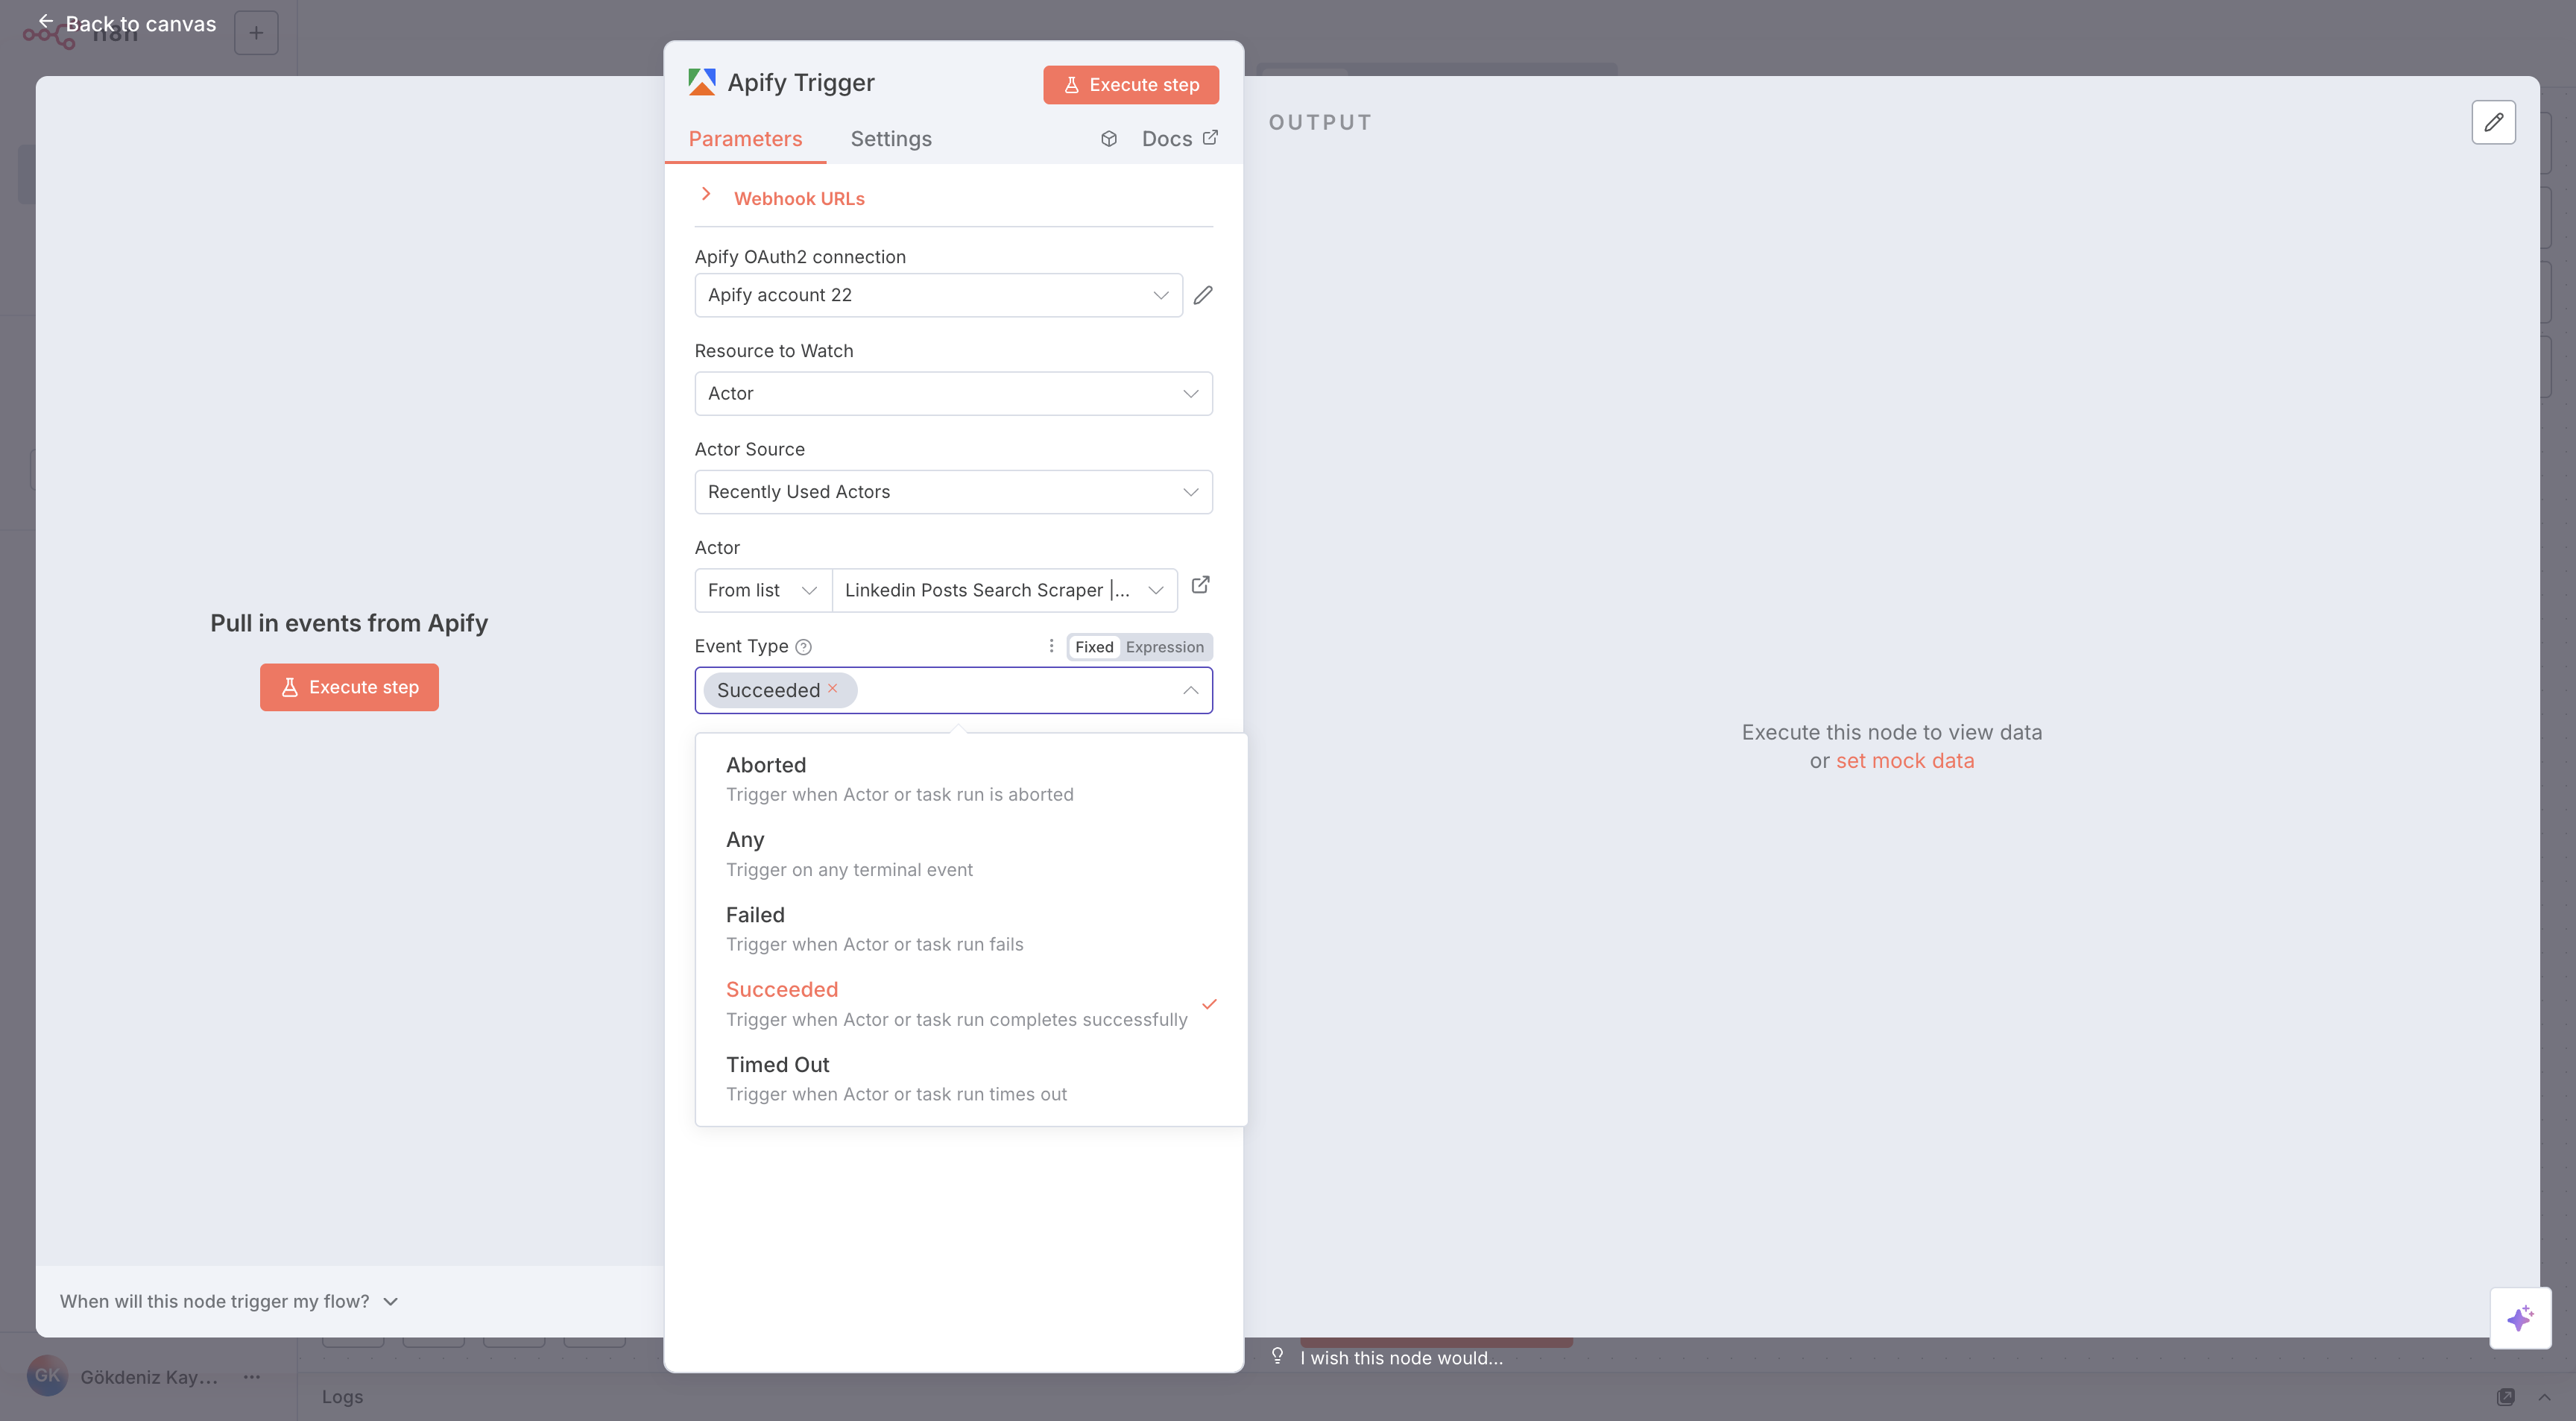
- Select On new Apify Event trigger.
- Configure the trigger:
- Actor or Actor task: select the Actor or task to listen for terminal events.
- Event Type: the status of the Actor or task run that should trigger the workflow.
- Add subsequent nodes (e.g., HTTP Request, Google Sheets) to process or store the output.
- Save and execute the workflow.
Use Apify node as an action
Actions allow you to perform operations like running an Actor within a workflow. For instance, you could trigger a scraper and then retrieve its results.
- Create a new workflow.
- Click Add Node, search for Apify, and select it.
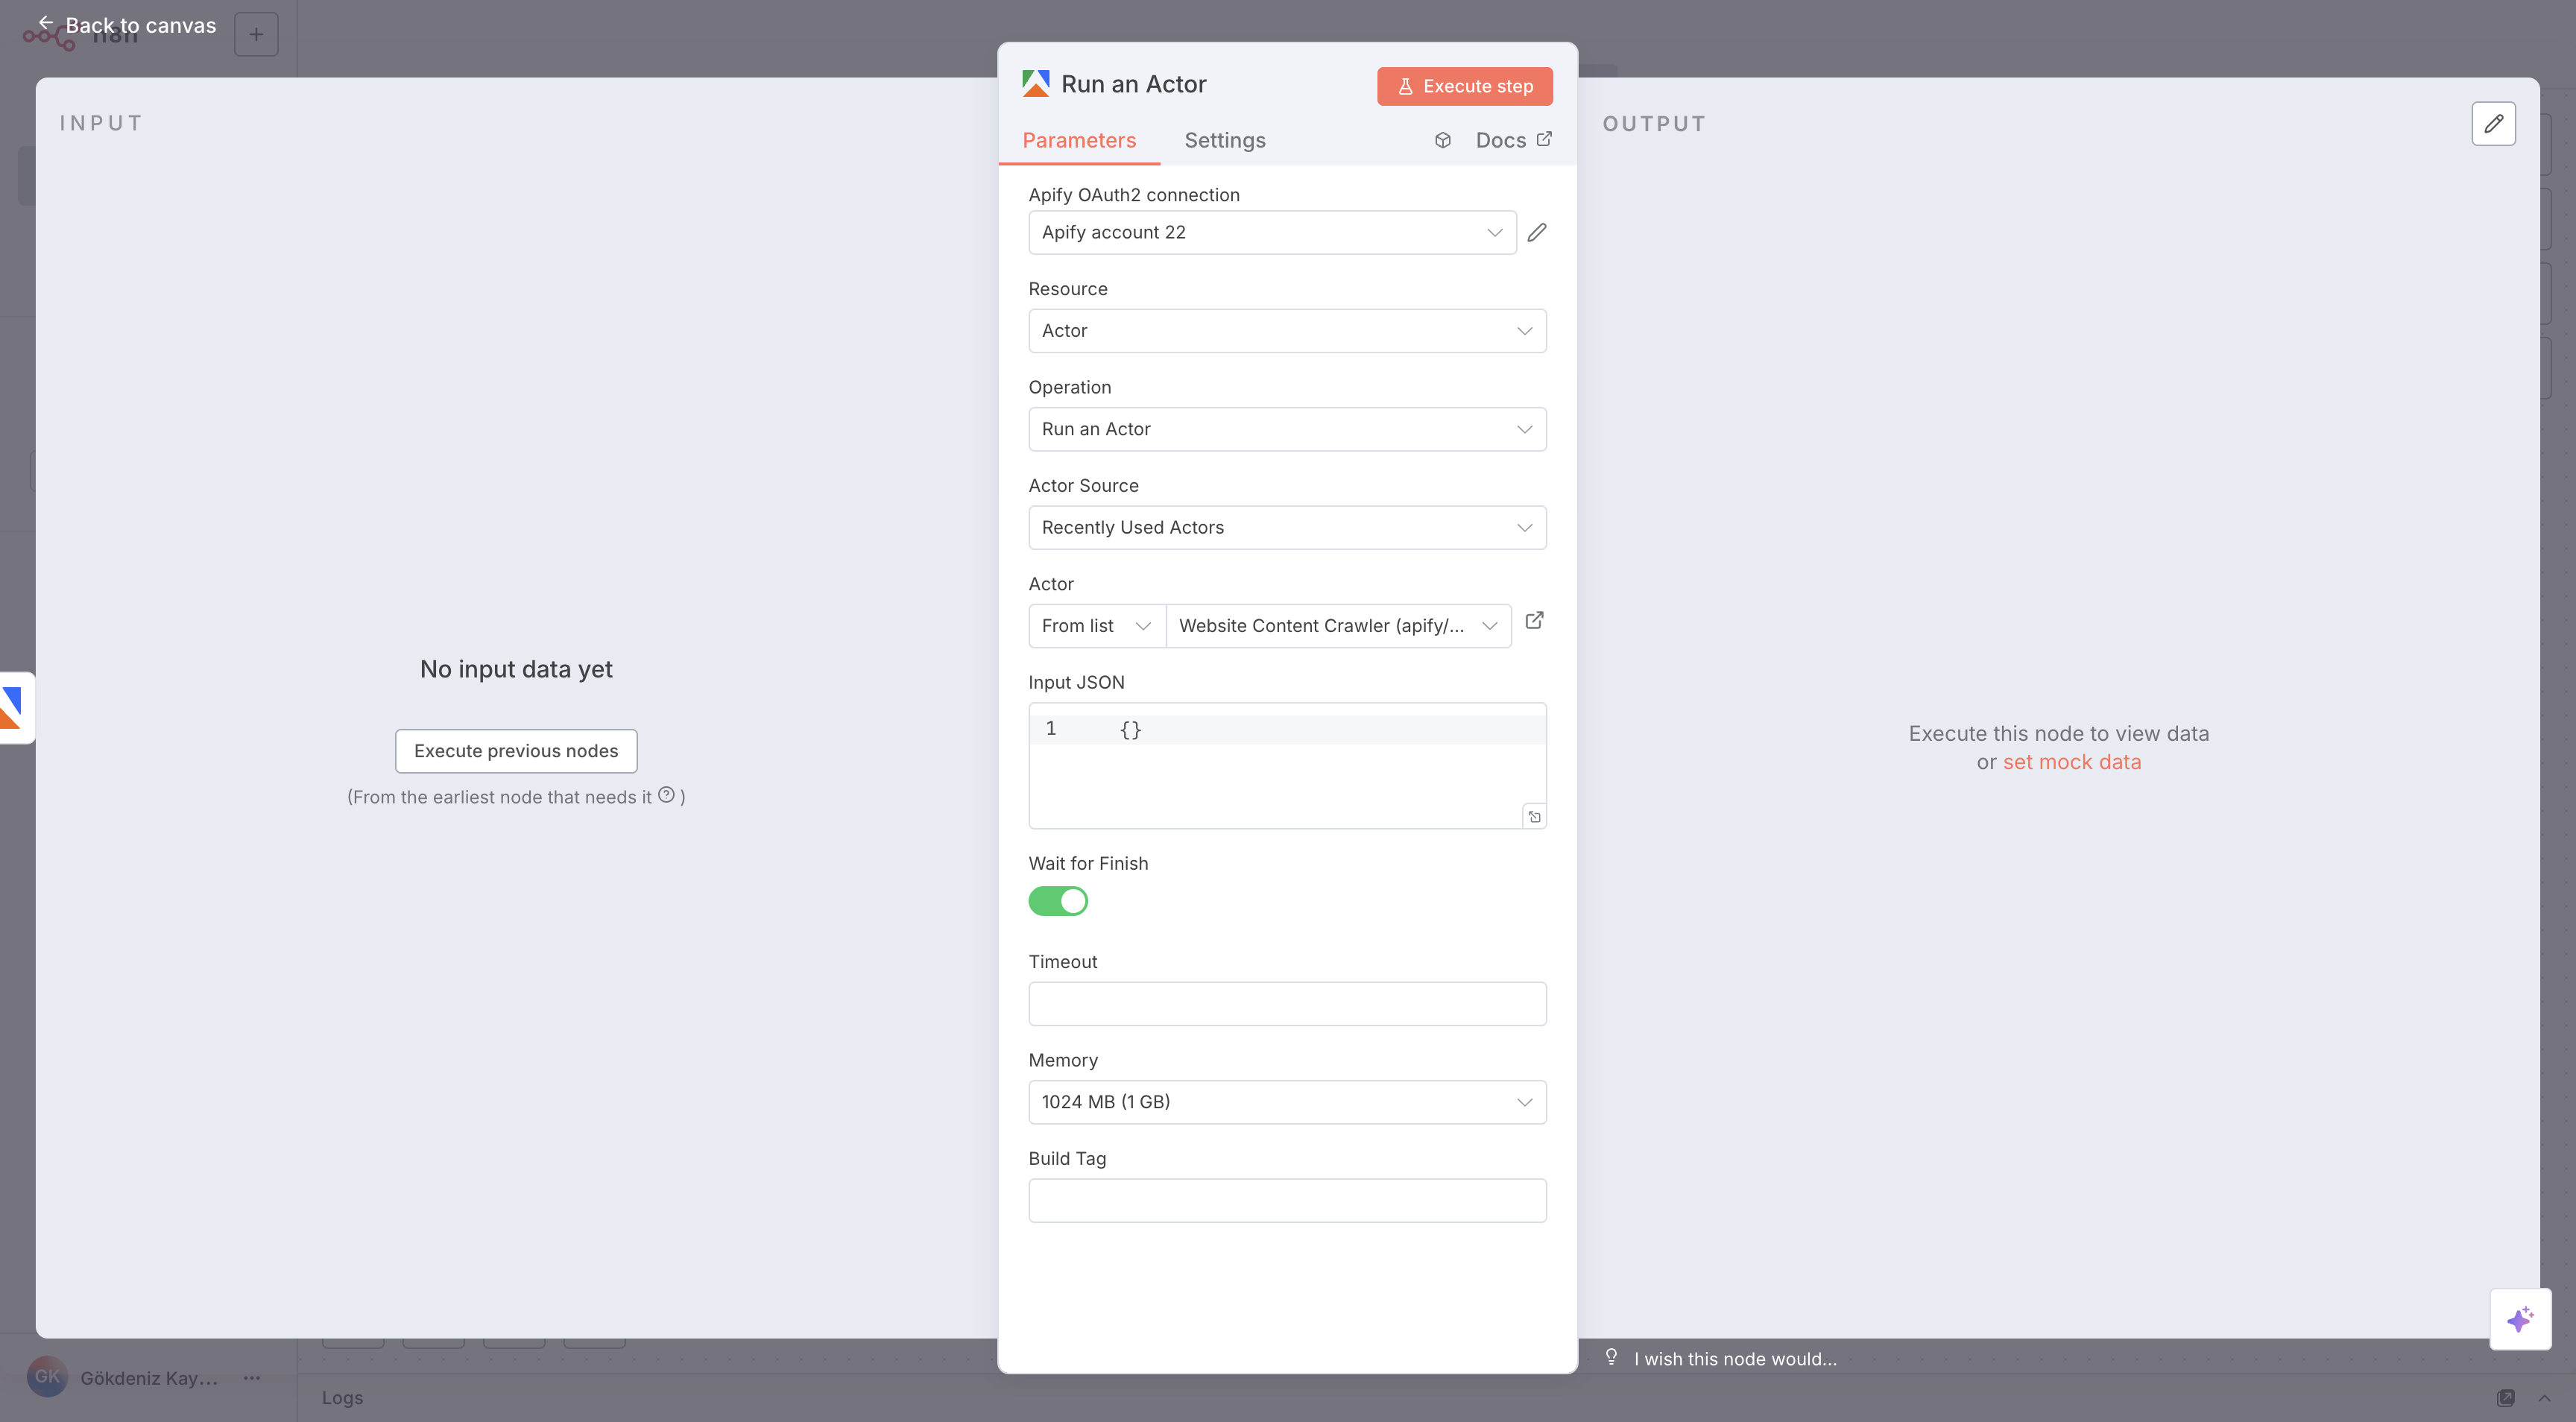
- Select any operation. In this example we will use Run Actor.
- Configure it:
- Custom input: JSON input for the Actor run, which you can find on the Actor input page in Apify Console. See Inputs for more information. If empty, the run uses the input specified in the default run configuration
- Timeout: Timeout for the Actor run in seconds. Zero value means there is no timeout
- Memory: Amount of memory allocated for the Actor run, in megabytes
- Build Tag: Specifies the Actor build tag to run. By default, the run uses the build specified in the default run configuration for the Actor (typically
latest) - Wait for finish: Whether to wait for the run to finish before continuing. If true, the node will wait for the run to complete (successfully or not) before moving to the next node
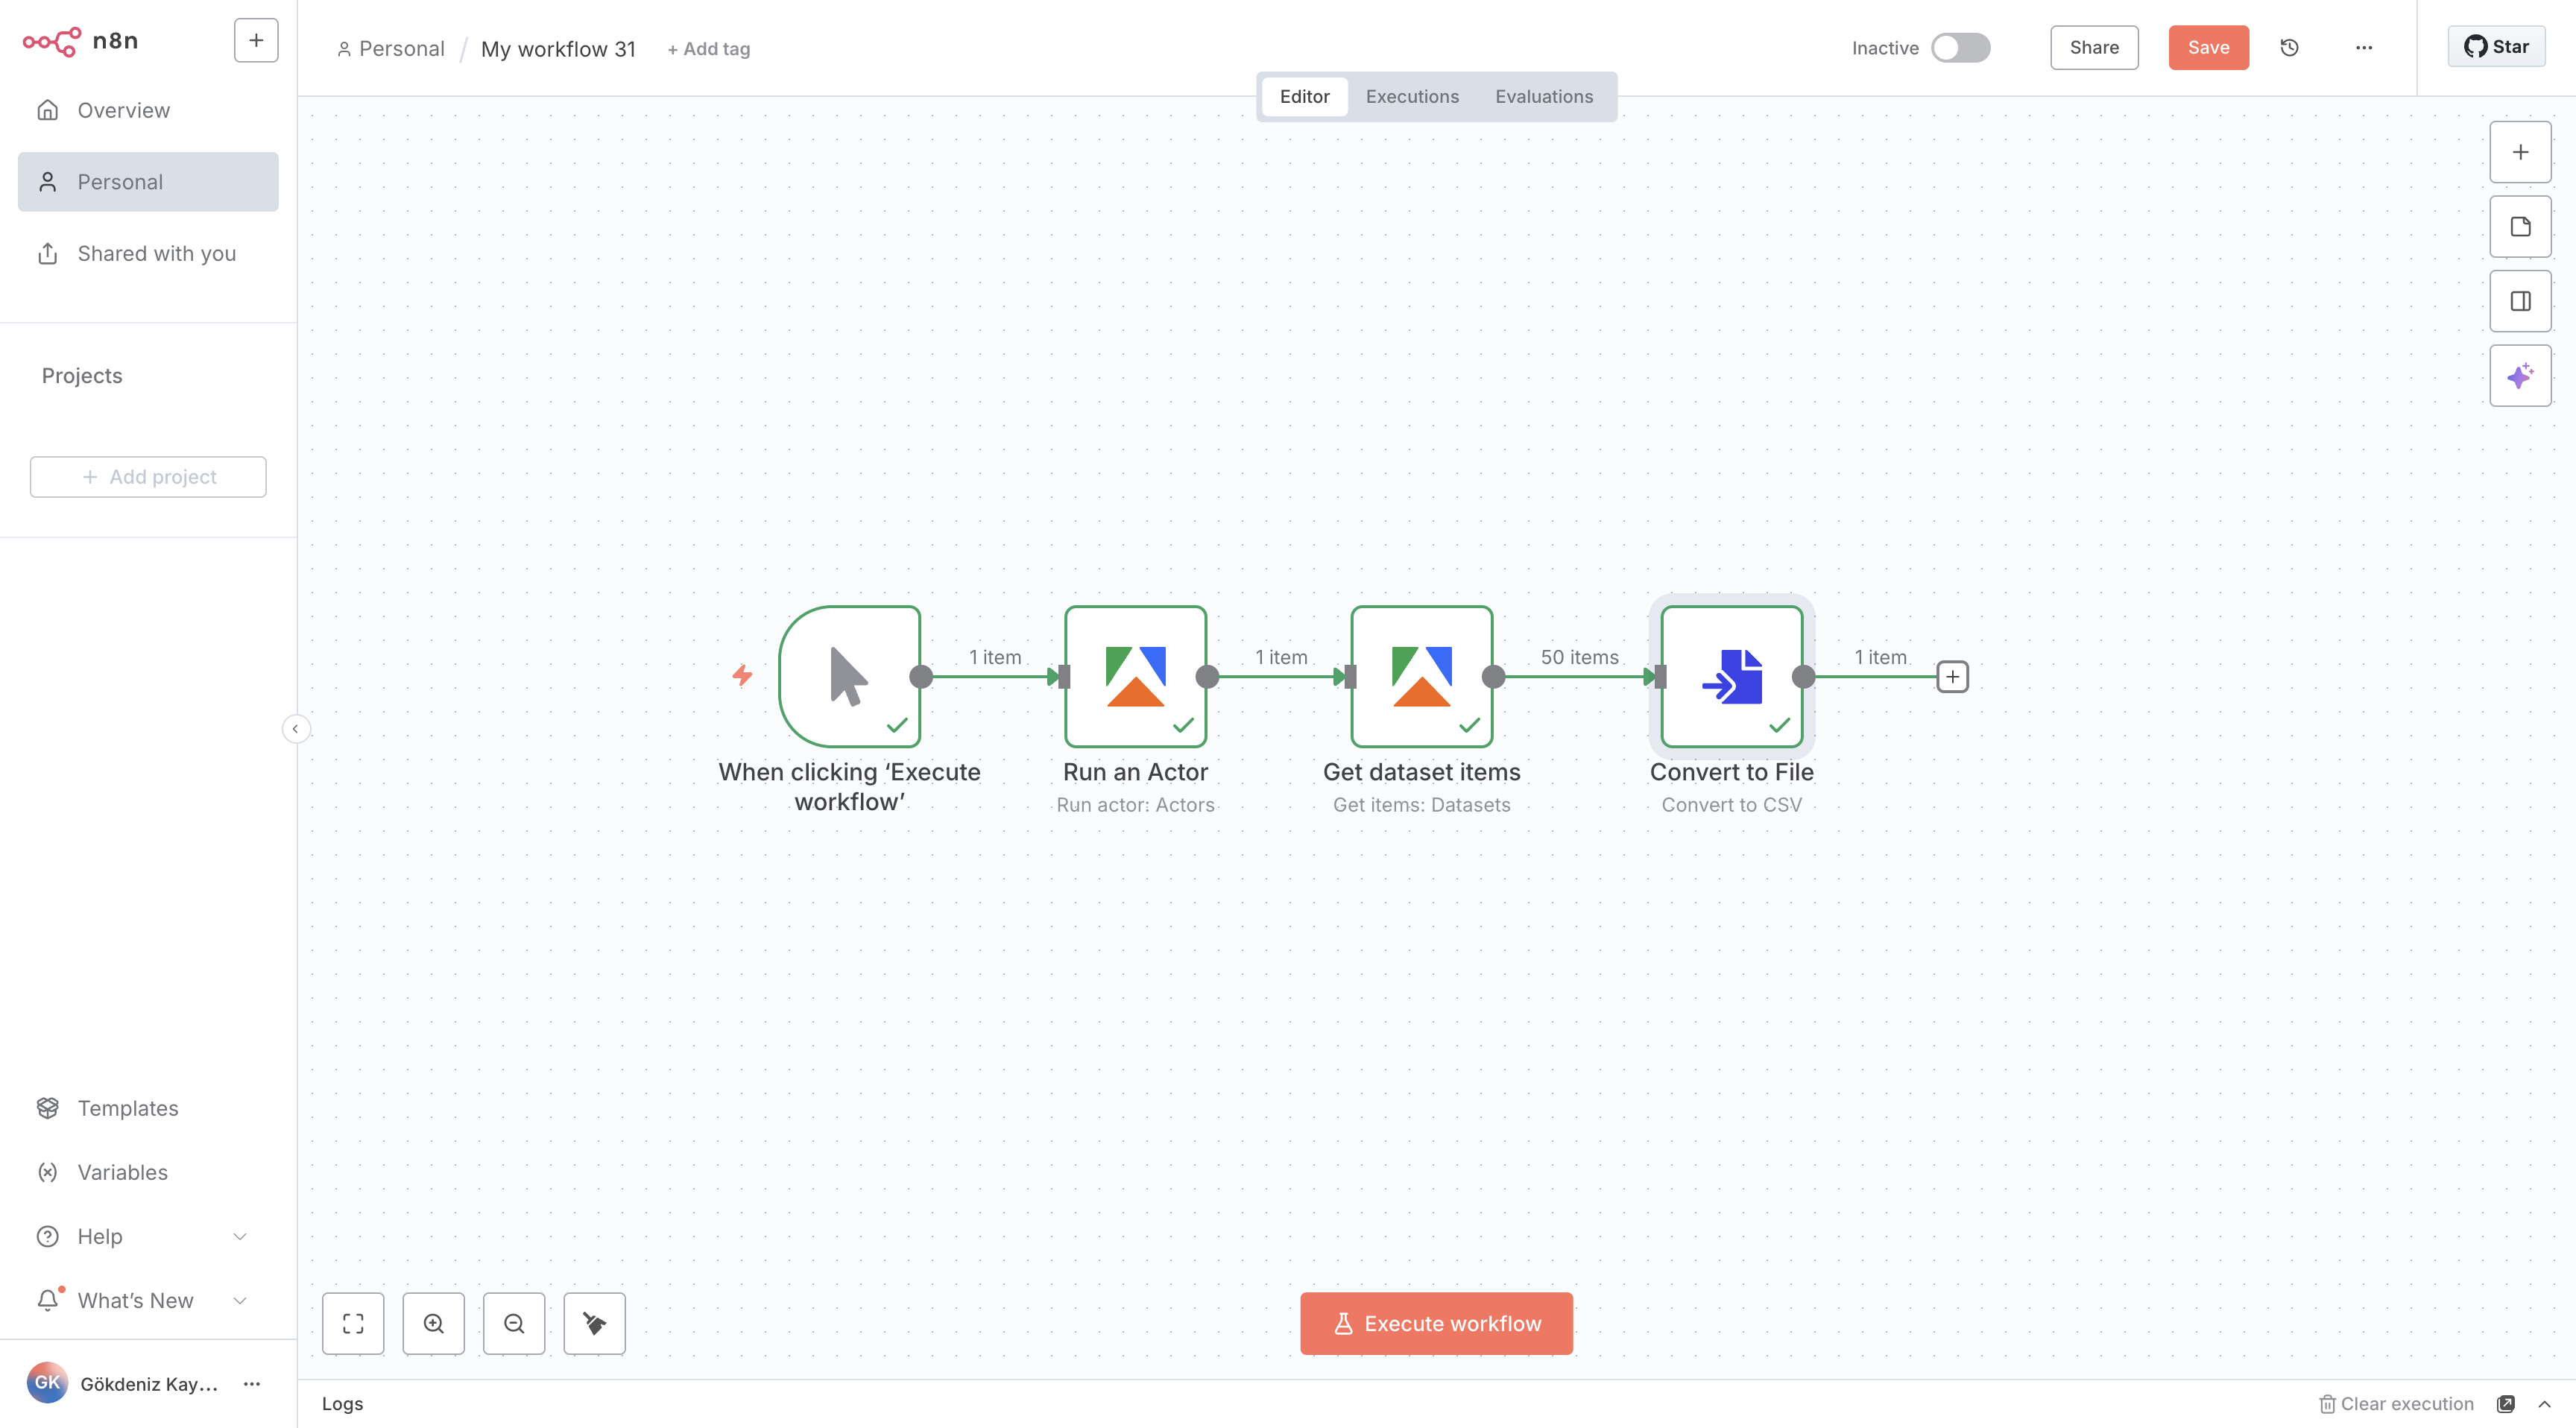
- Add another Apify operation called Get Dataset Items.
- Set Dataset ID parameter as defaultDatasetId value received from the previous Run Actor node. This will give you the items from the Actor run's default dataset

- Set Dataset ID parameter as defaultDatasetId value received from the previous Run Actor node. This will give you the items from the Actor run's default dataset
- Add any subsequent nodes (e.g. Google Sheets) to process or store the output
- Save and execute the workflow
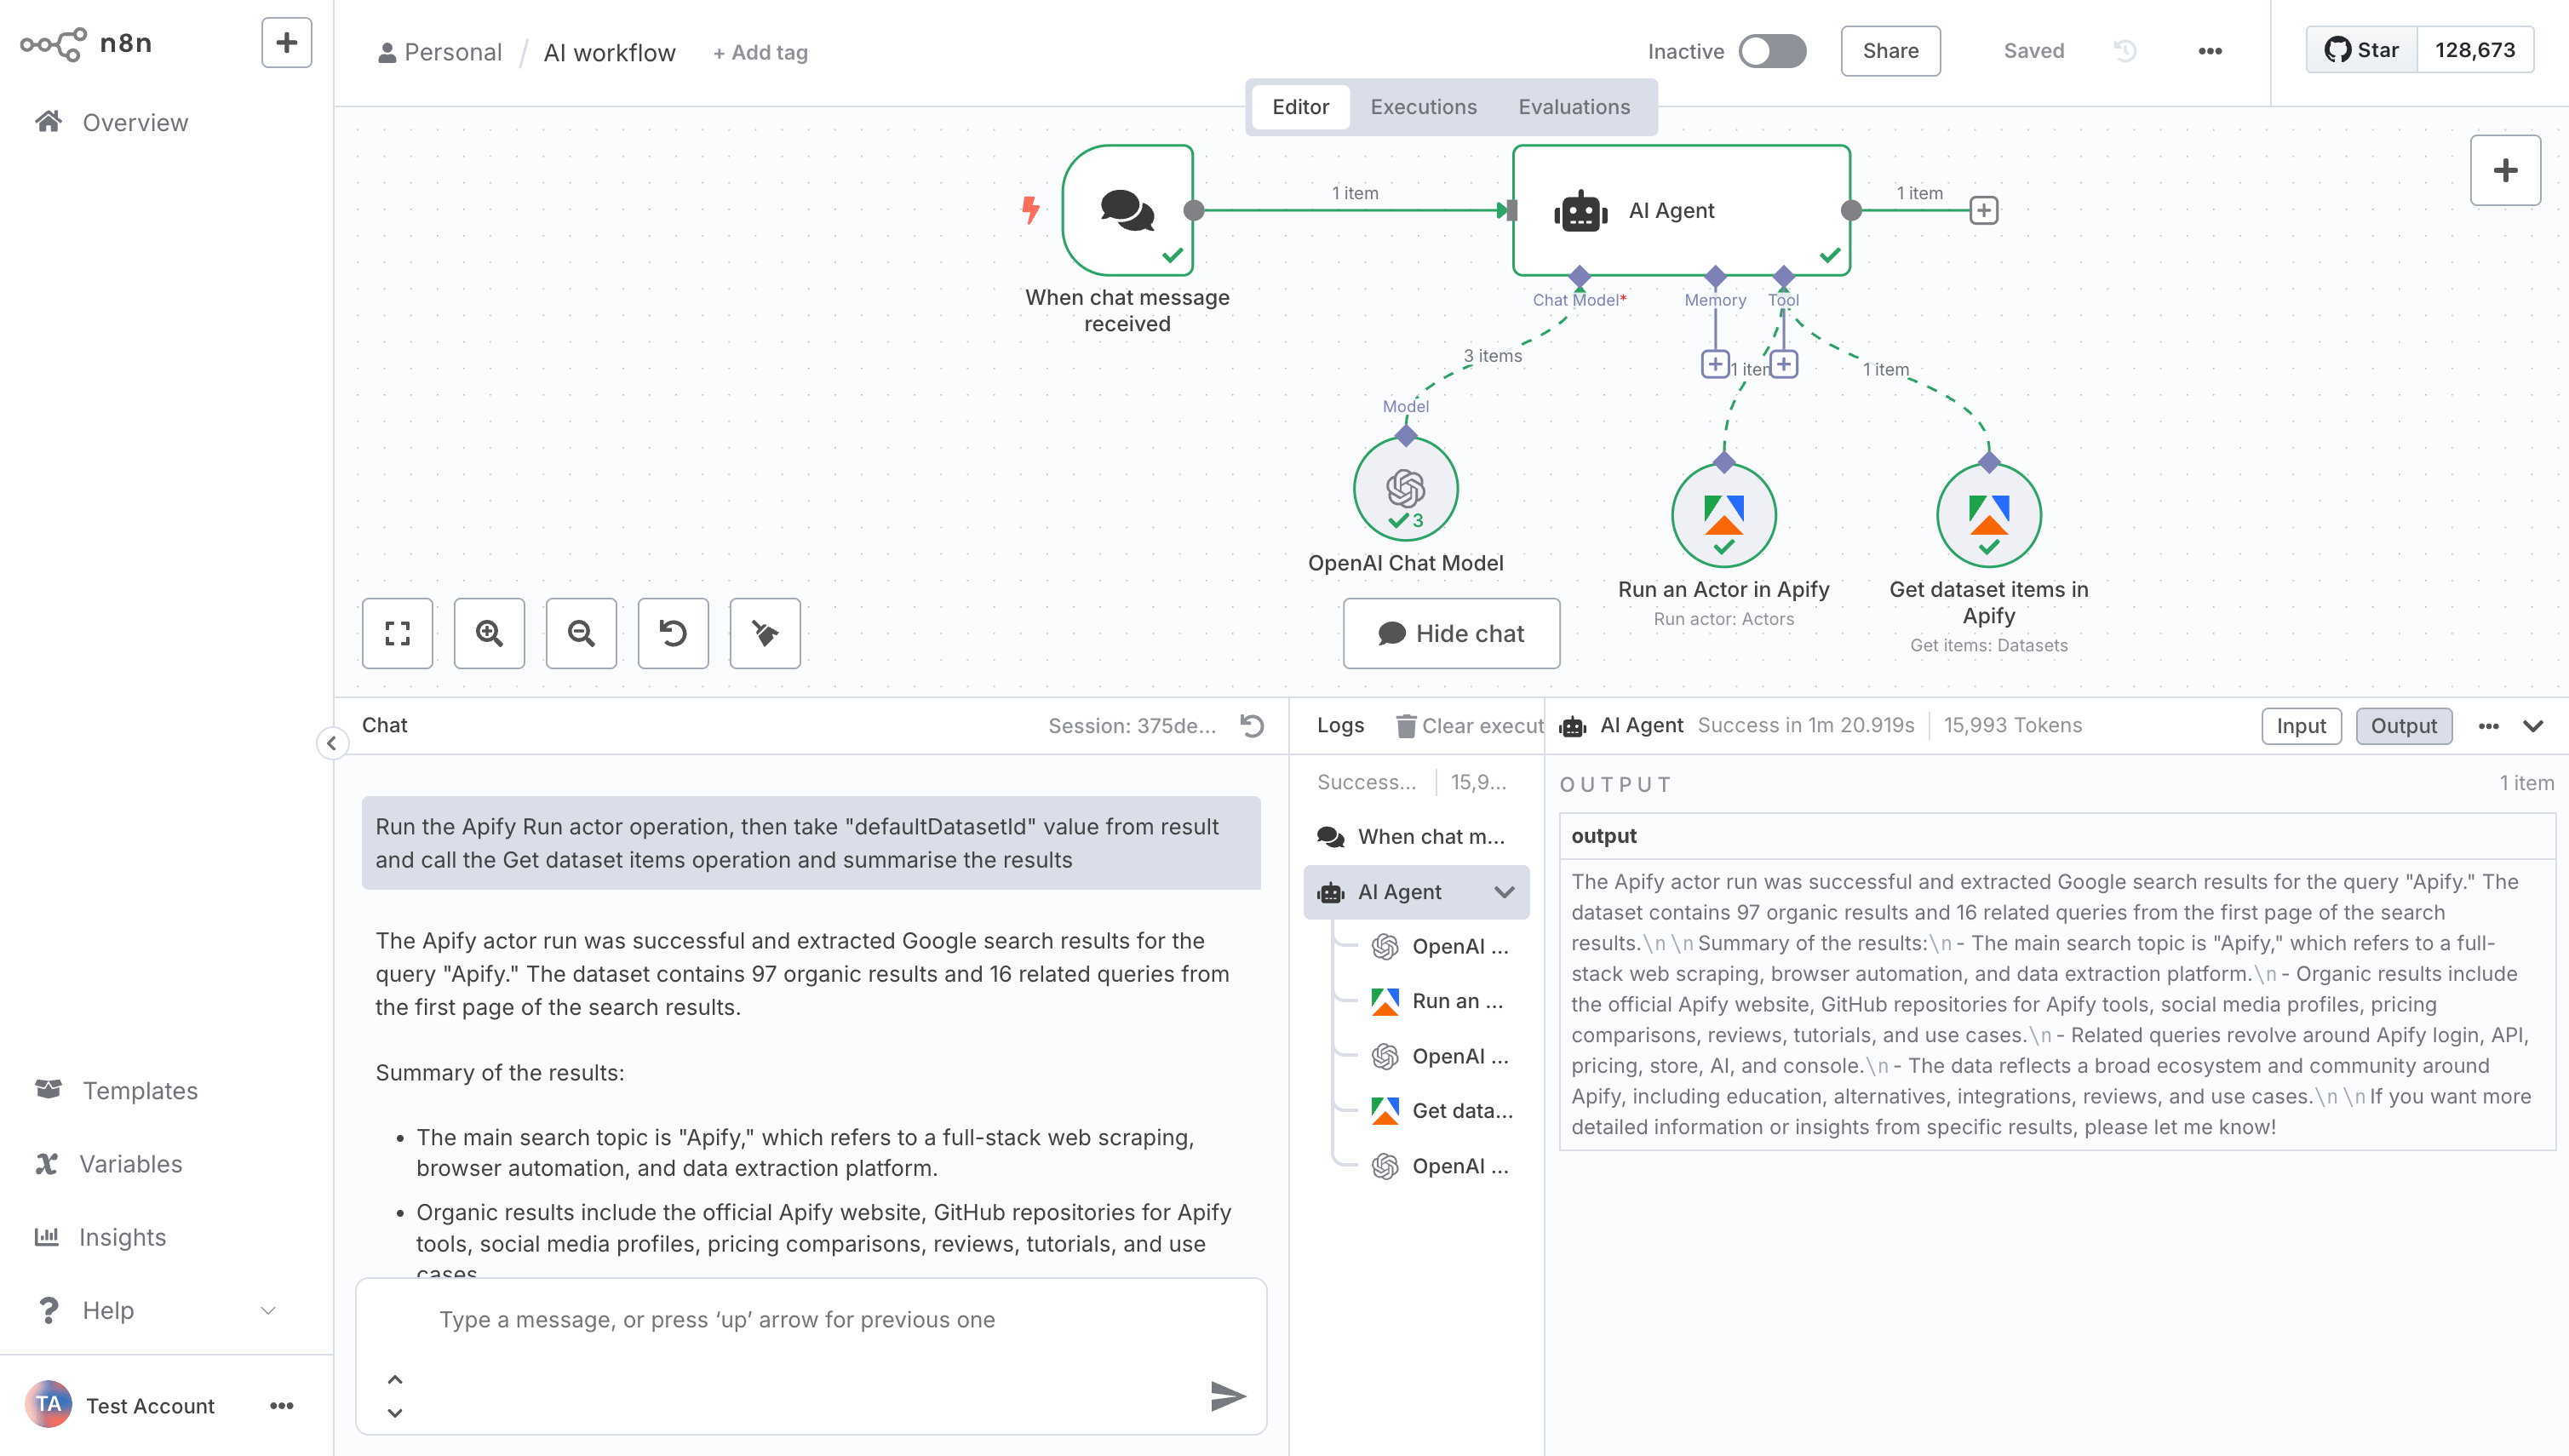
Use Apify node as an AI tool
You can run Apify operations, retrieve the results, and use AI to process, analyze, and summarize the data, or generate insights and recommendations.
- Create a new workflow.
- Add a trigger: Search for and select Chat Trigger.
- Add the AI Agent node: Click Add Node, search for AI Agent, and select it.
- Configure the AI Agent:
- Chat Model: Choose the language model you want to use.
- Memory (optional): Enables the AI model to remember and reference past interactions.
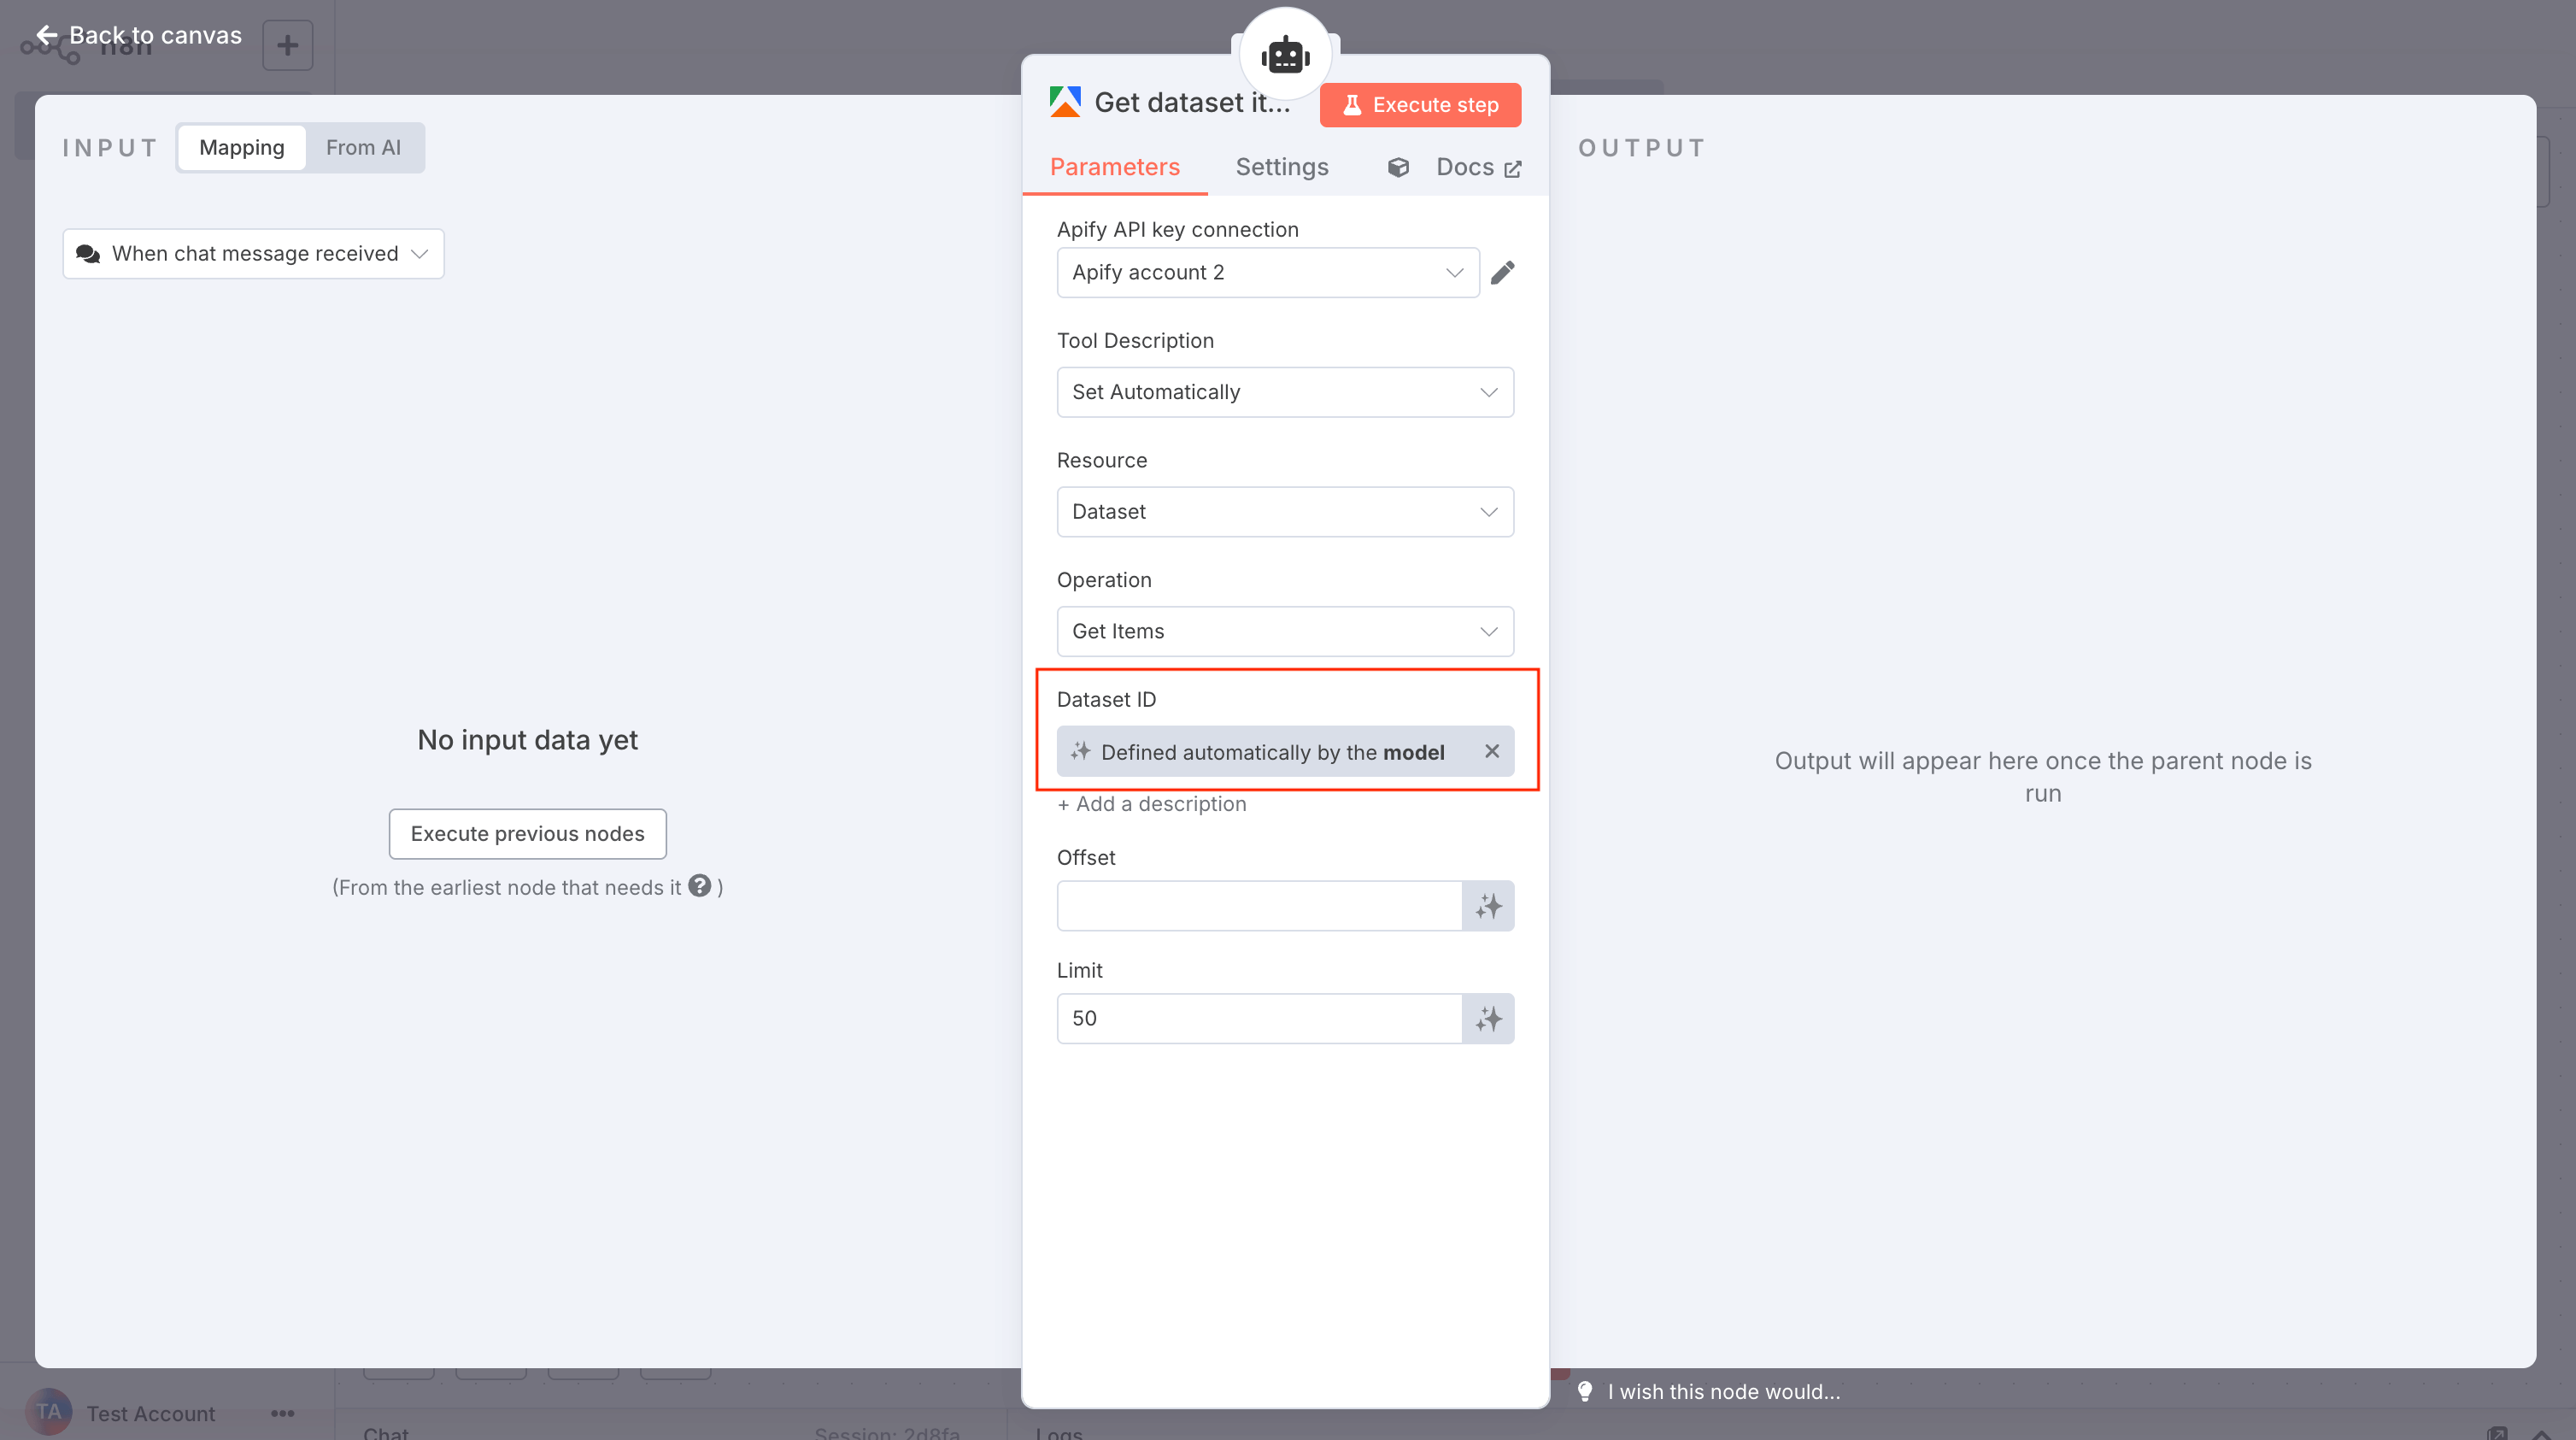
- Tools: Search for Apify, select Apify Tool, and click Add to Workflow. Choose any available operation and configure it.
- Run the workflow: Save it, then provide a prompt instructing the Agent to use the Apify tool with the operations you configured earlier.
Let the AI model define the parameters in your node when possible. Click the sparkle icon next to a parameter to have the AI fill it in for you.
Available Operations
The Apify node provides a range of operations for managing Actors, tasks, runs, and storage. These can be used as actions in your workflows. For triggers, focus on event-based activations to start workflows automatically.
Actors
Run and manage Actors directly.
- Run Actor: Starts a specified Actor with customizable parameters
- Scrape Single URL: Runs a scraper for a specified website and returns its content
- Get Last Run: Retrieve metadata for the most recent run of an Actor
Actor Tasks
Execute predefined tasks efficiently.
- Run Task: Executes a specified Actor task
Actor Runs
Retrieve run details.
- Get User Runs List: Retrieve a list of all runs for a user
- Get Run: Retrieve detailed information for a specific run ID
- Get Runs: Retrieve all runs for a specific Actor
Storage
Pull data from Apify storage.
Datasets
- Get Items: Retrieves items from a dataset
Key-Value Stores
- Get Record: Retrieves a value from a key-value store
Triggers
Automatically start an n8n workflow when an Actor or task run finishes:
- Actor Run Finished: Activates when a selected Actor run completes
- Task Run Finished: Activates when a selected Actor task run completes
Resources
Troubleshooting
If you encounter issues, start by double-checking basics.
- Authentication errors: Verify your API token or OAuth2 settings in Credentials.
- Operation failures: Check input parameters, JSON syntax, and resource IDs in your Apify account.
Feel free to explore other resources and contribute to the integration on GitHub.