Dify integration
Dify is an intuitive LLM application development platform for creating and operating AI-native apps. With the Apify integration for Dify, you can connect Apify Actors and storage to your Dify Workflows and Chatflows. You can run scrapers, extract data, and trigger workflows based on Apify events.
This guide explains how to set up authentication and incorporate the Apify plugin into your Dify applications as either a tool (action) or a trigger.
This integration uses a third-party service. If you find outdated content, please submit an issue on GitHub.
Prerequisites
Before you begin, make sure you have:
- An Apify account
- A Dify account (self‑hosted or cloud)
Authentication
To connect your Apify account, configure the plugin using your Apify API token or OAuth.
- In Dify, navigate to Plugins from the top menu.
- Select Install plugin → Marketplace.
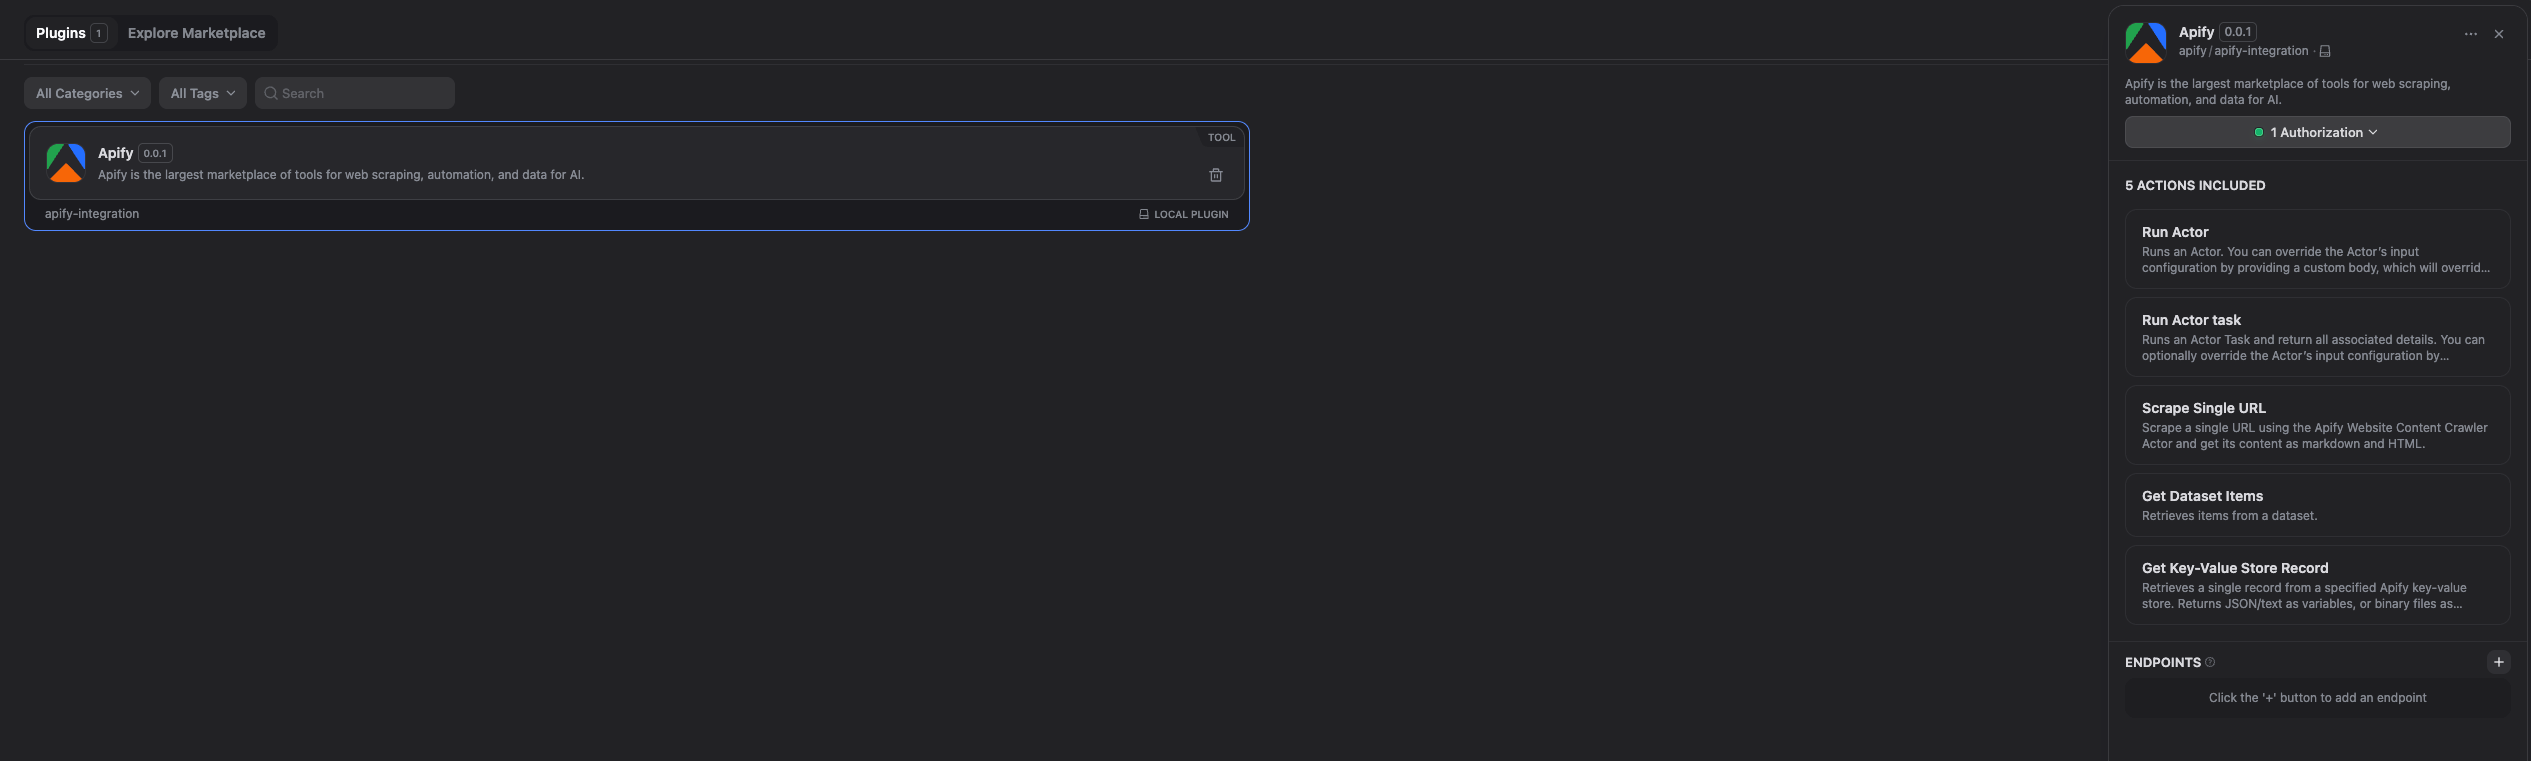
- Find the apify-integration plugin and install it.
- Return to the Plugins page.
API key
- Open the plugin window and select Add API Key.
- In the pop-up menu, paste your Apify API token. You can find it in the Apify Console.
- Select Save.
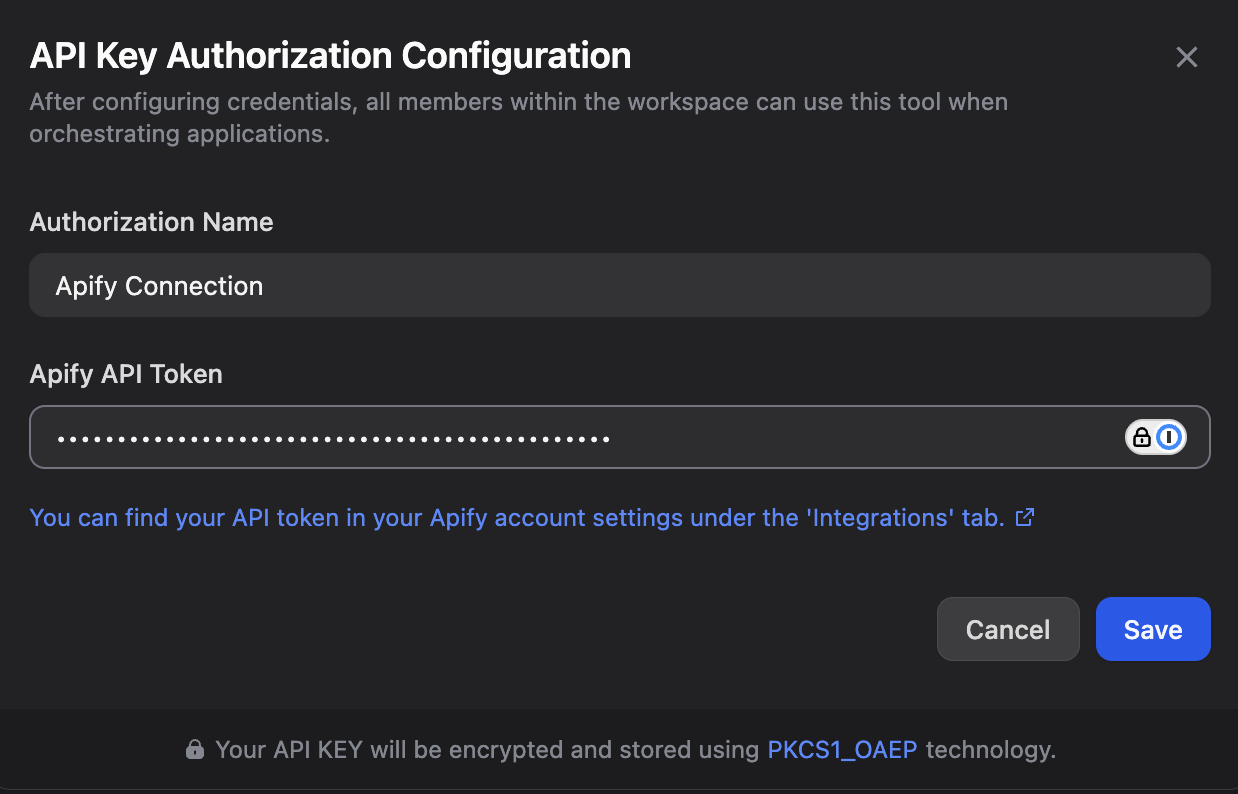
A green indicator confirms that your credentials are correct.

OAuth
- Open the plugin window and select Add OAuth.
- Follow the OAuth flow to authorize Dify to access your Apify account.
- Select Save to complete the connection.
With authentication set up, you can now add Apify tools to your applications.
Use Apify tools in a Workflow
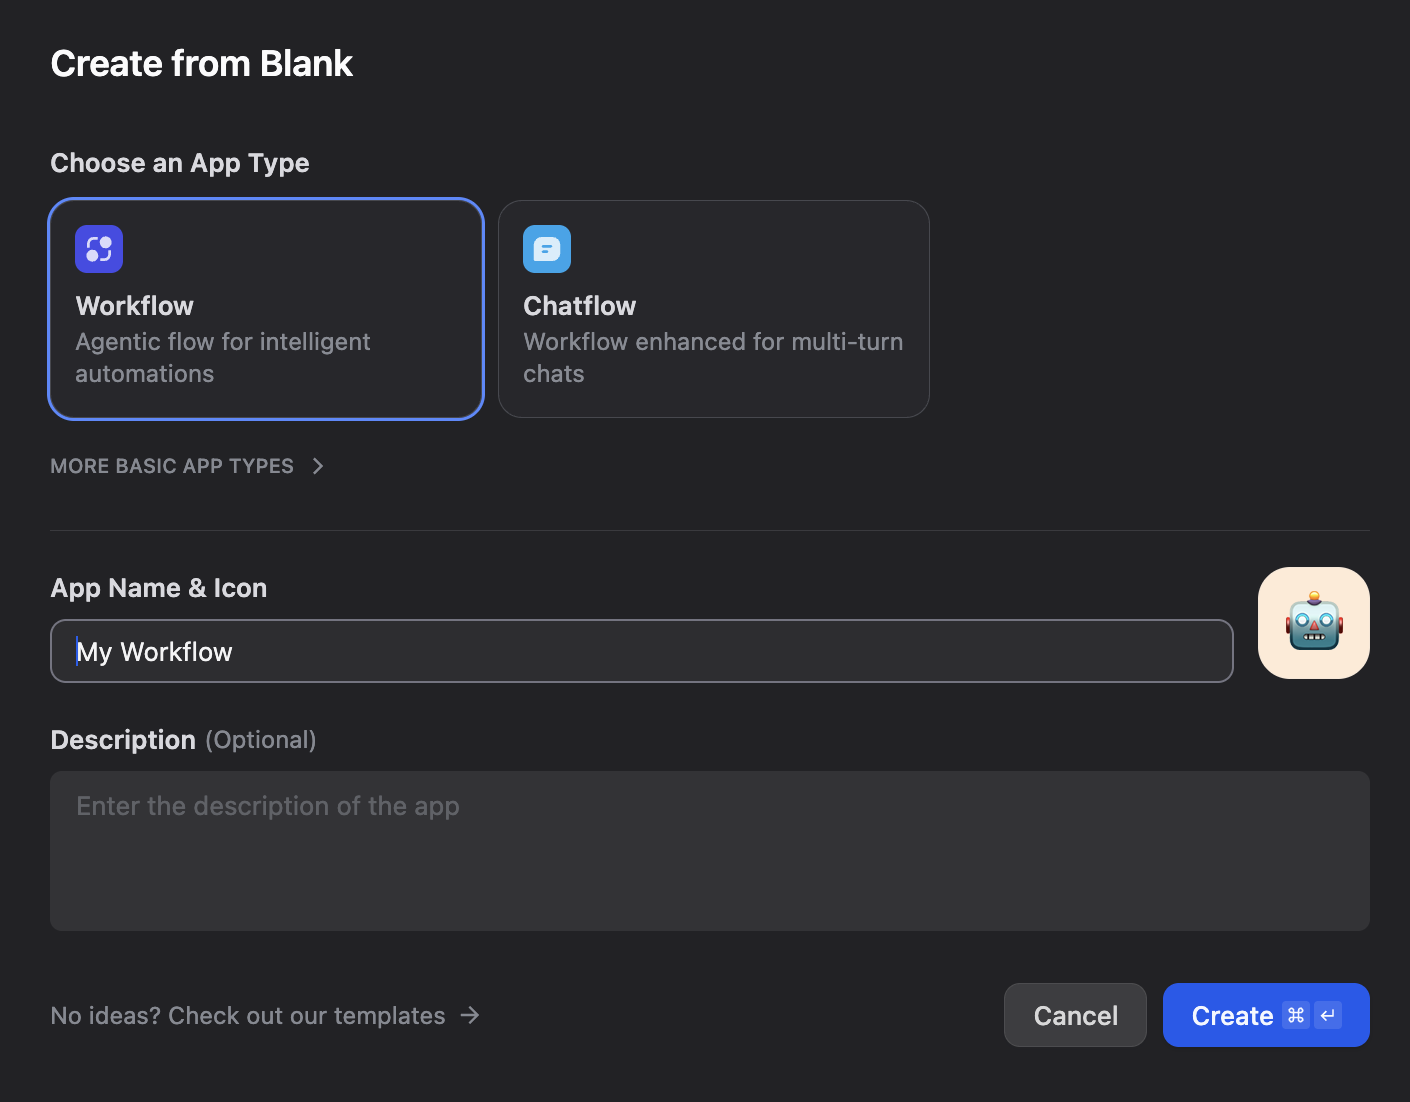
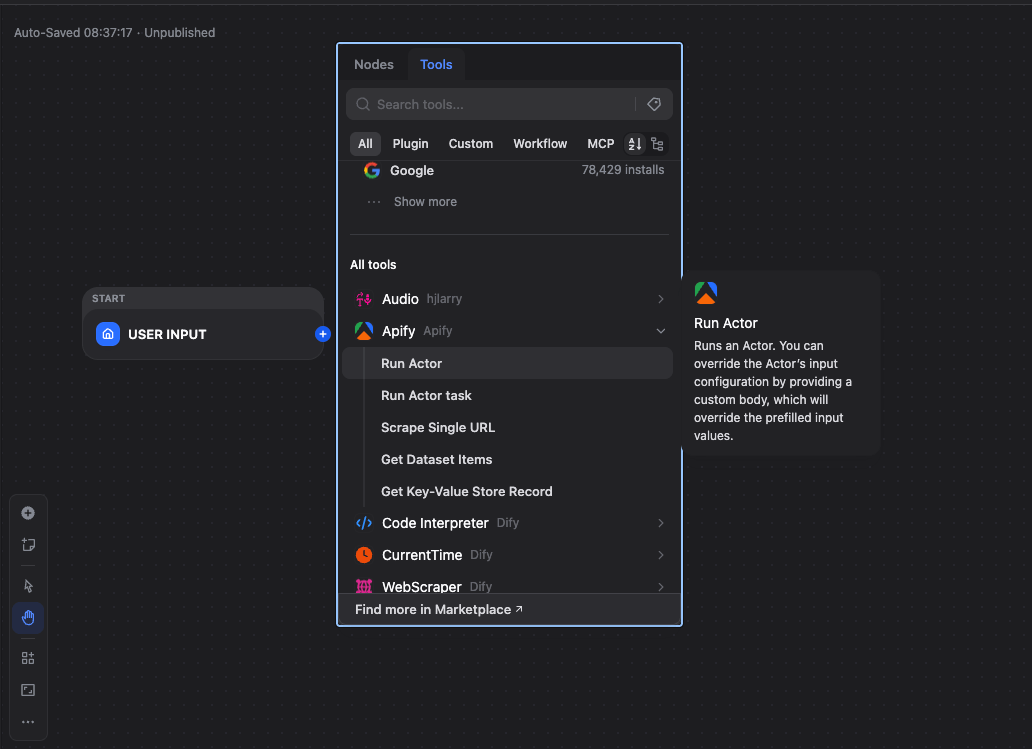
Create a new Workflow application in Dify Studio and choose Create from Blank. Select the + icon on the User Input or Trigger node and choose an Apify tool to add it to your board.
Use Apify as an action
Actions let you perform operations like running an Actor within a workflow. For example, trigger a scraper and use its results in later steps.
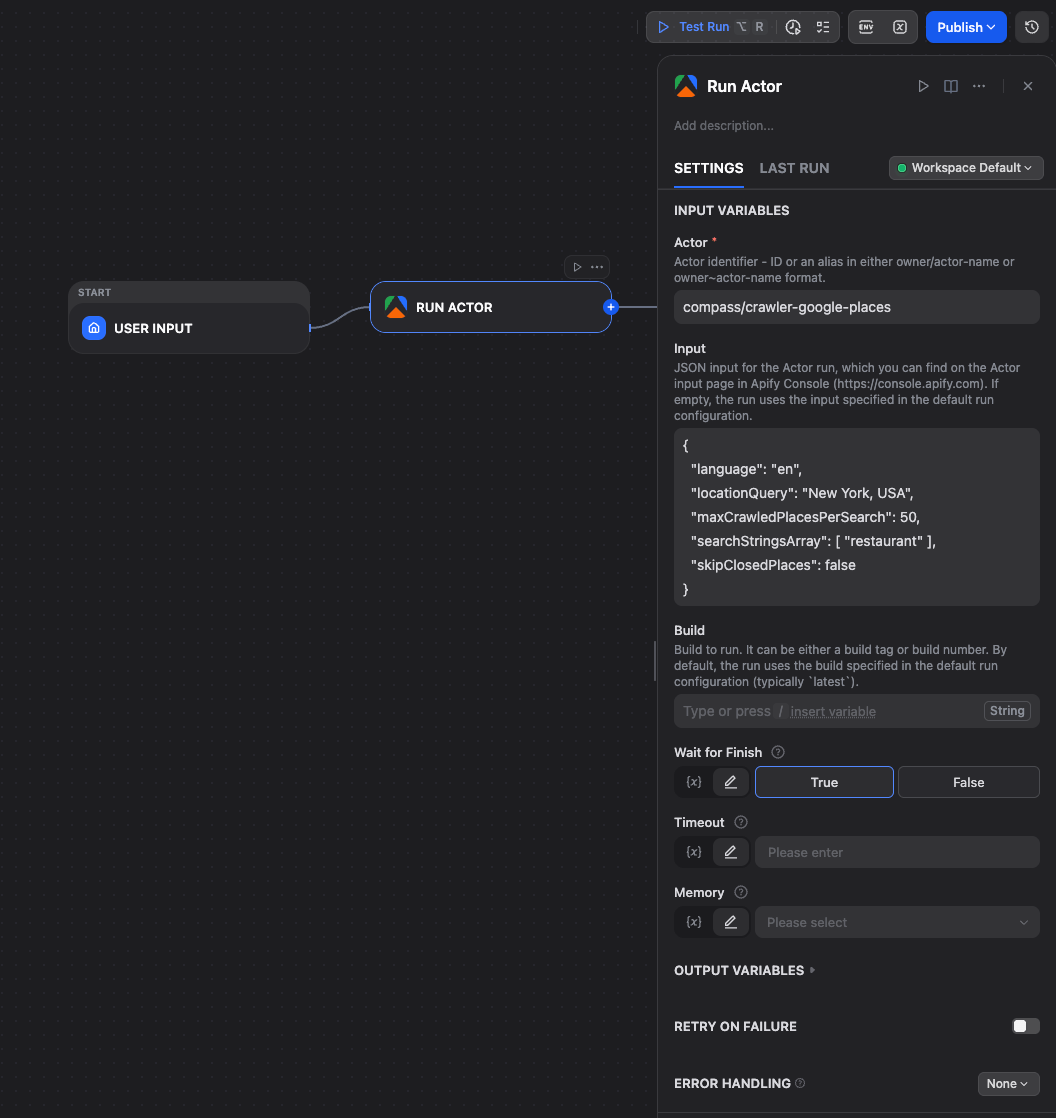
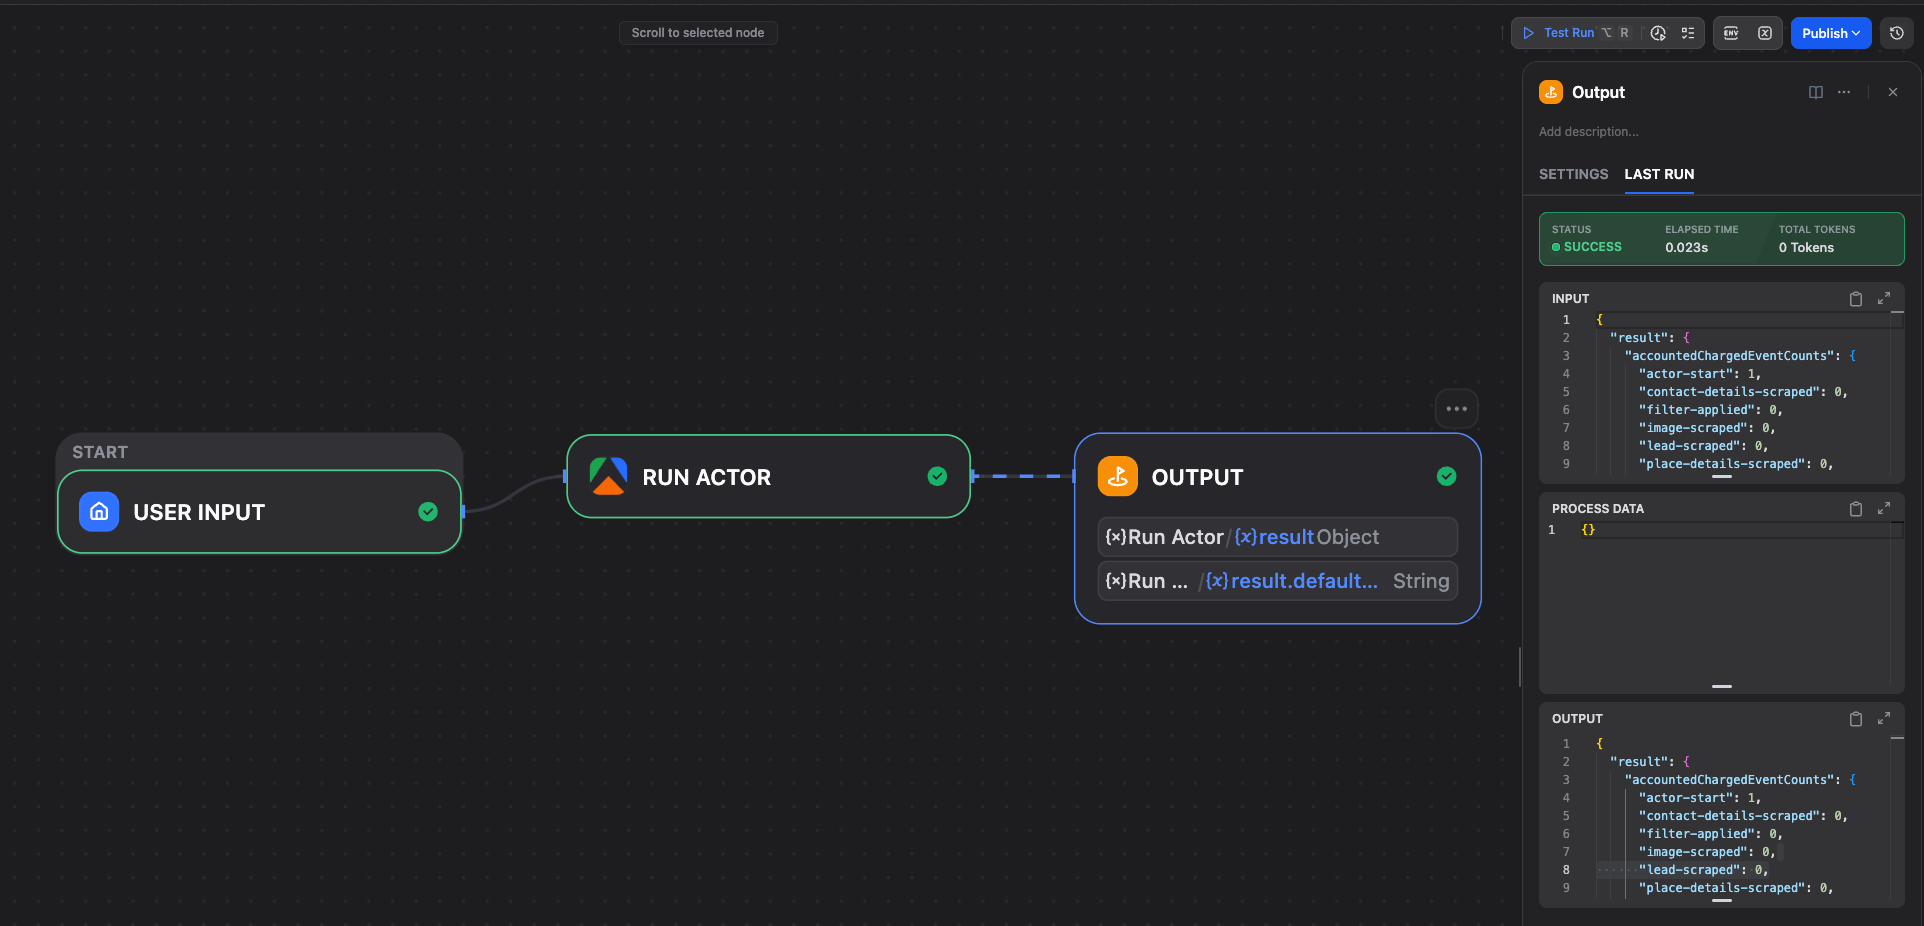
Run an Actor
Add the Run Actor tool to your workflow and configure it with the following parameters:
- Actor ID: The unique ID of the Actor to run (for example,
2Mdma1N6Fd0y3QEjRfor Google Maps Scraper) - JSON body for input: The JSON input for the Actor run
- Wait for finish: Select
Trueto make the workflow wait for the run to complete
{
  "language": "en",
  "locationQuery": "New York, USA",
  "maxCrawledPlacesPerSearch": 50,
  "searchStringsArray": [ "restaurant" ],
  "skipClosedPlaces": false
}
Add an Output node and configure its output variable to use the result from the Run Actor node.
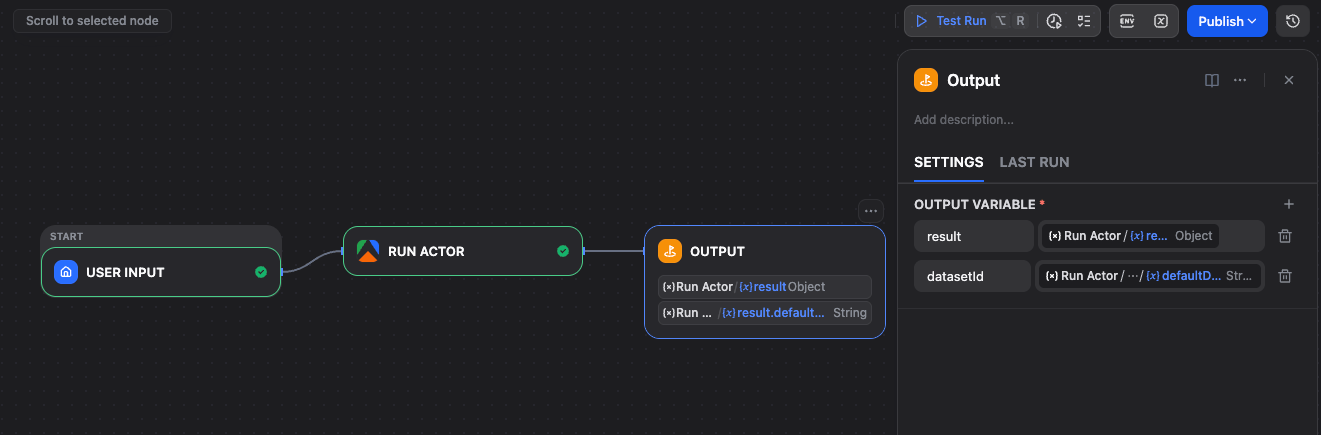
You can now start the workflow and view the results.
Run an Actor task
Add the Run Actor task tool to your workflow and enter the Task ID you want to execute. Add an Output node and map its output variable to the result from this tool.

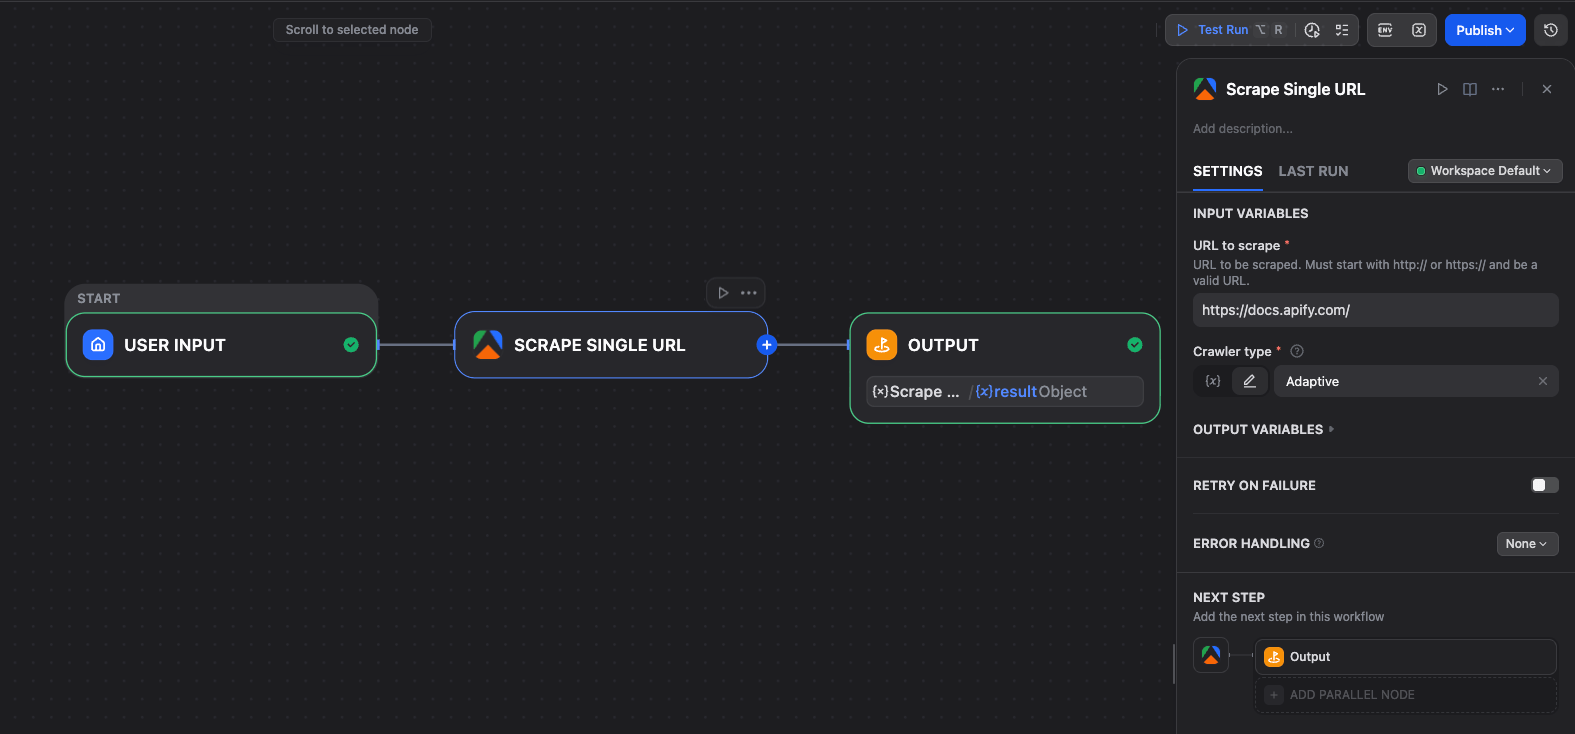
Scrape Single URL
Add the Scrape Single URL tool and enter the URL to scrape (for example, https://docs.apify.com/). Select the Crawler type, use Raw HTTP for faster execution within Dify's timeout limits. Add an Output node and map its output variable to the result.
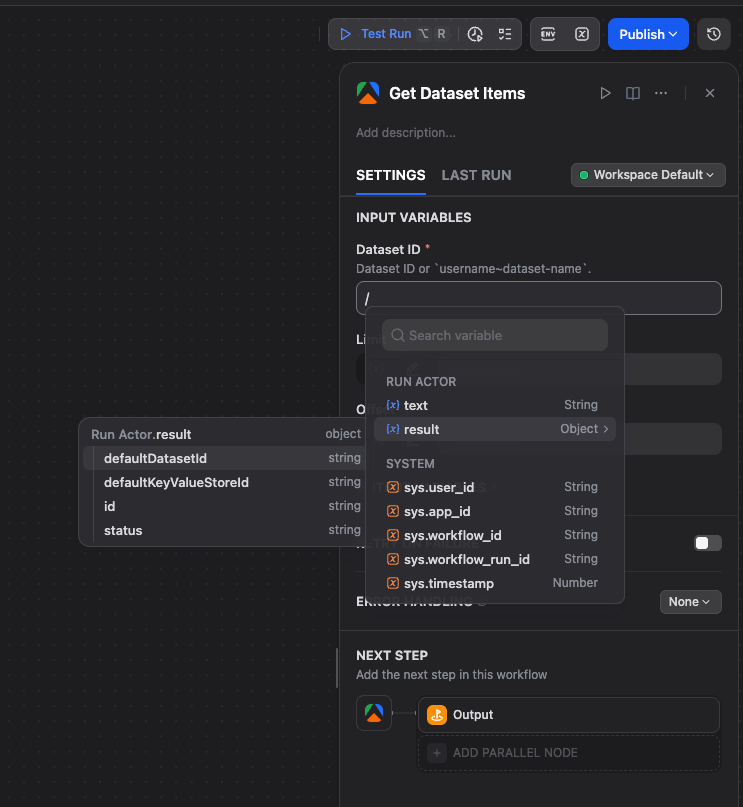
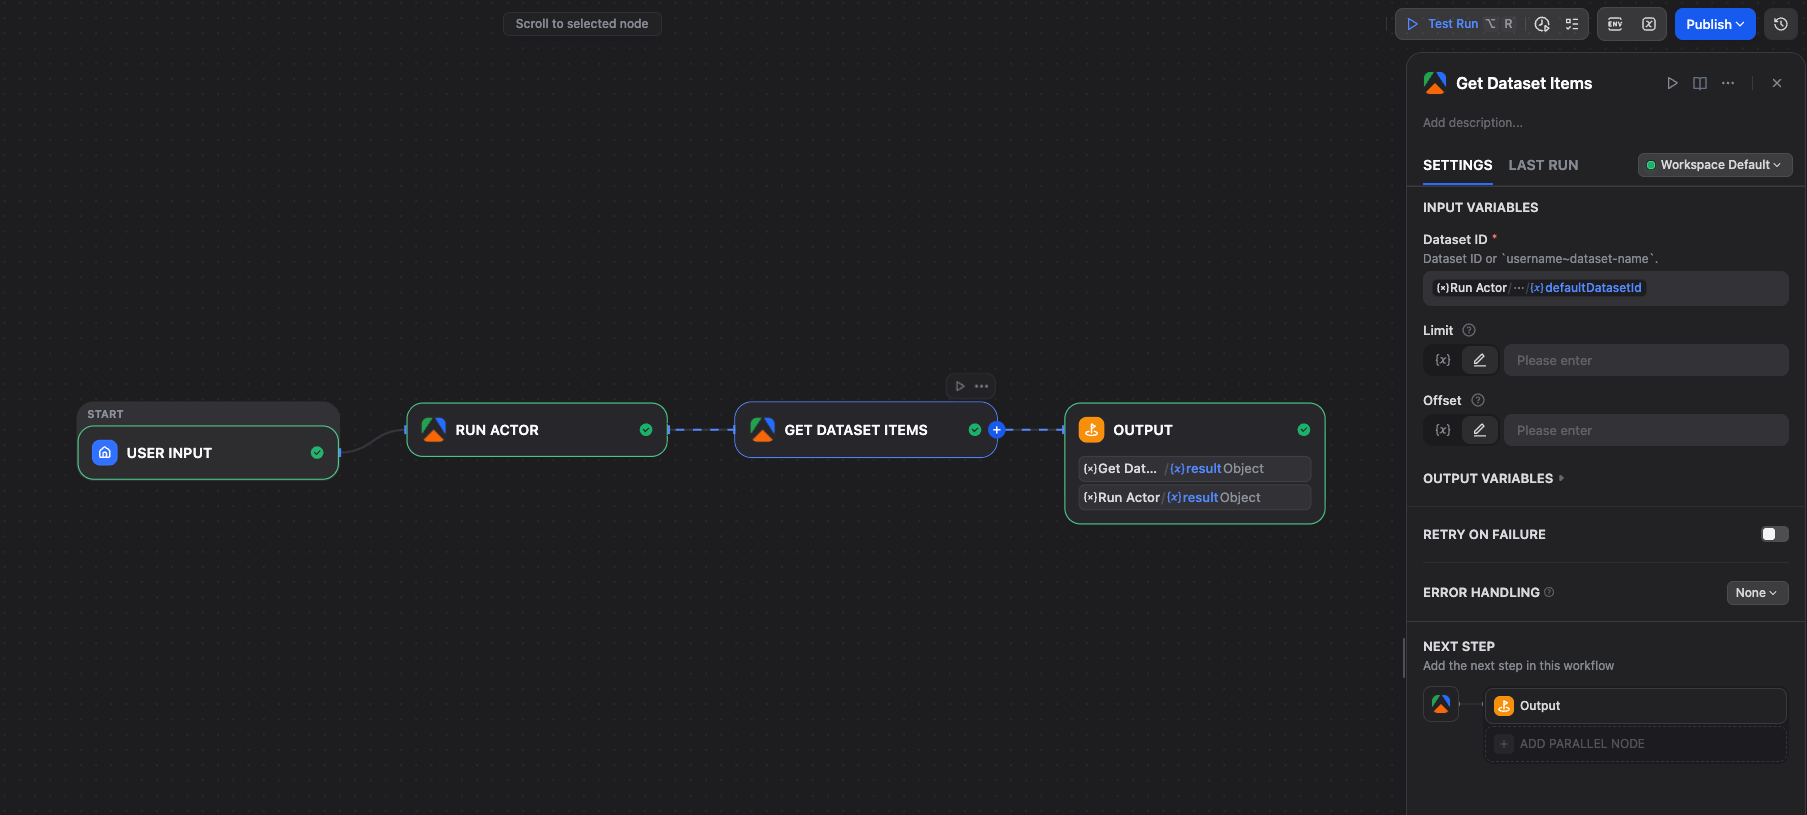
Get Dataset Items
Add the Get Dataset Items tool and enter the Dataset ID to retrieve items from. You can use a variable picker to select the Dataset ID from a previous Run Actor or Run Actor task node. Add an Output node and map its output to the tool's result.
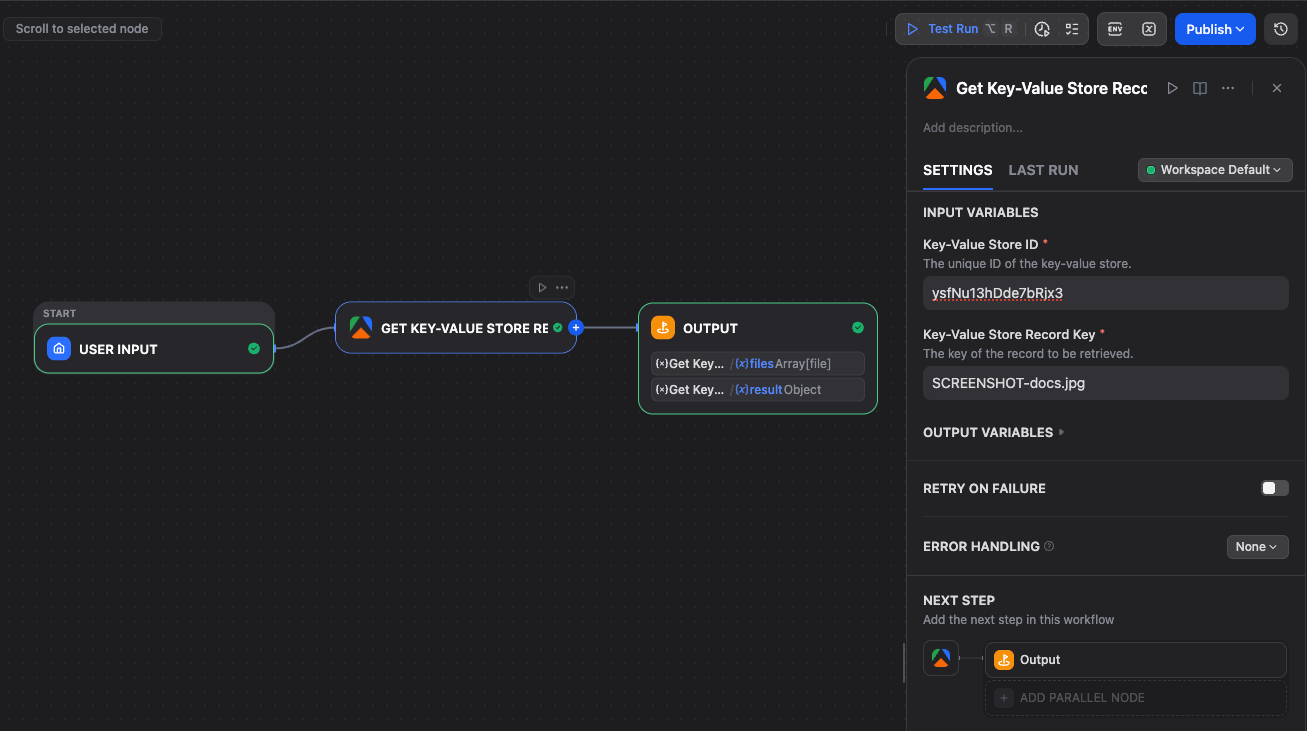
Get Key-Value Store
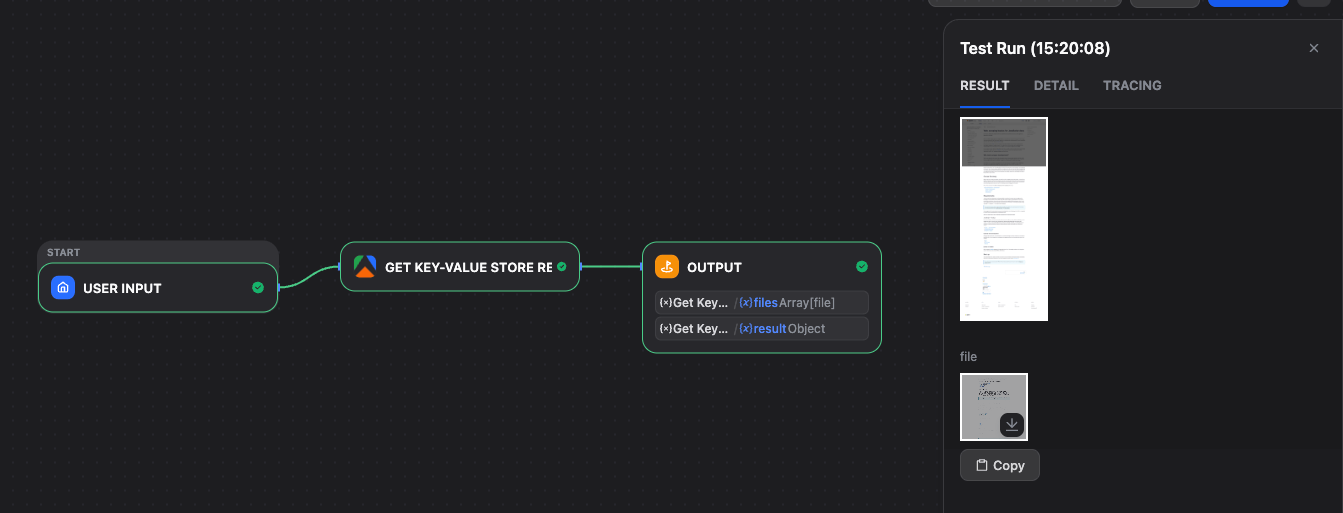
Add the Get Key-Value Store tool and enter the Store ID and Key for the record you want to retrieve. Add an Output node and map its output to the tool's result. You can also download files from the store.
Use Apify as a trigger
Triggers enable your Dify application to respond automatically to Apify events, such as completed Actor runs. This approach is ideal for creating event-driven automations.
Set up a webhook endpoint
In Dify, navigate to Plugins from the top menu. Click on your plugin and look for Endpoints section. Select the + icon to create a new endpoint. Choose the Workflow or Chatflow application you want to trigger and give it a name. Select Save. Dify will generate two URLs.
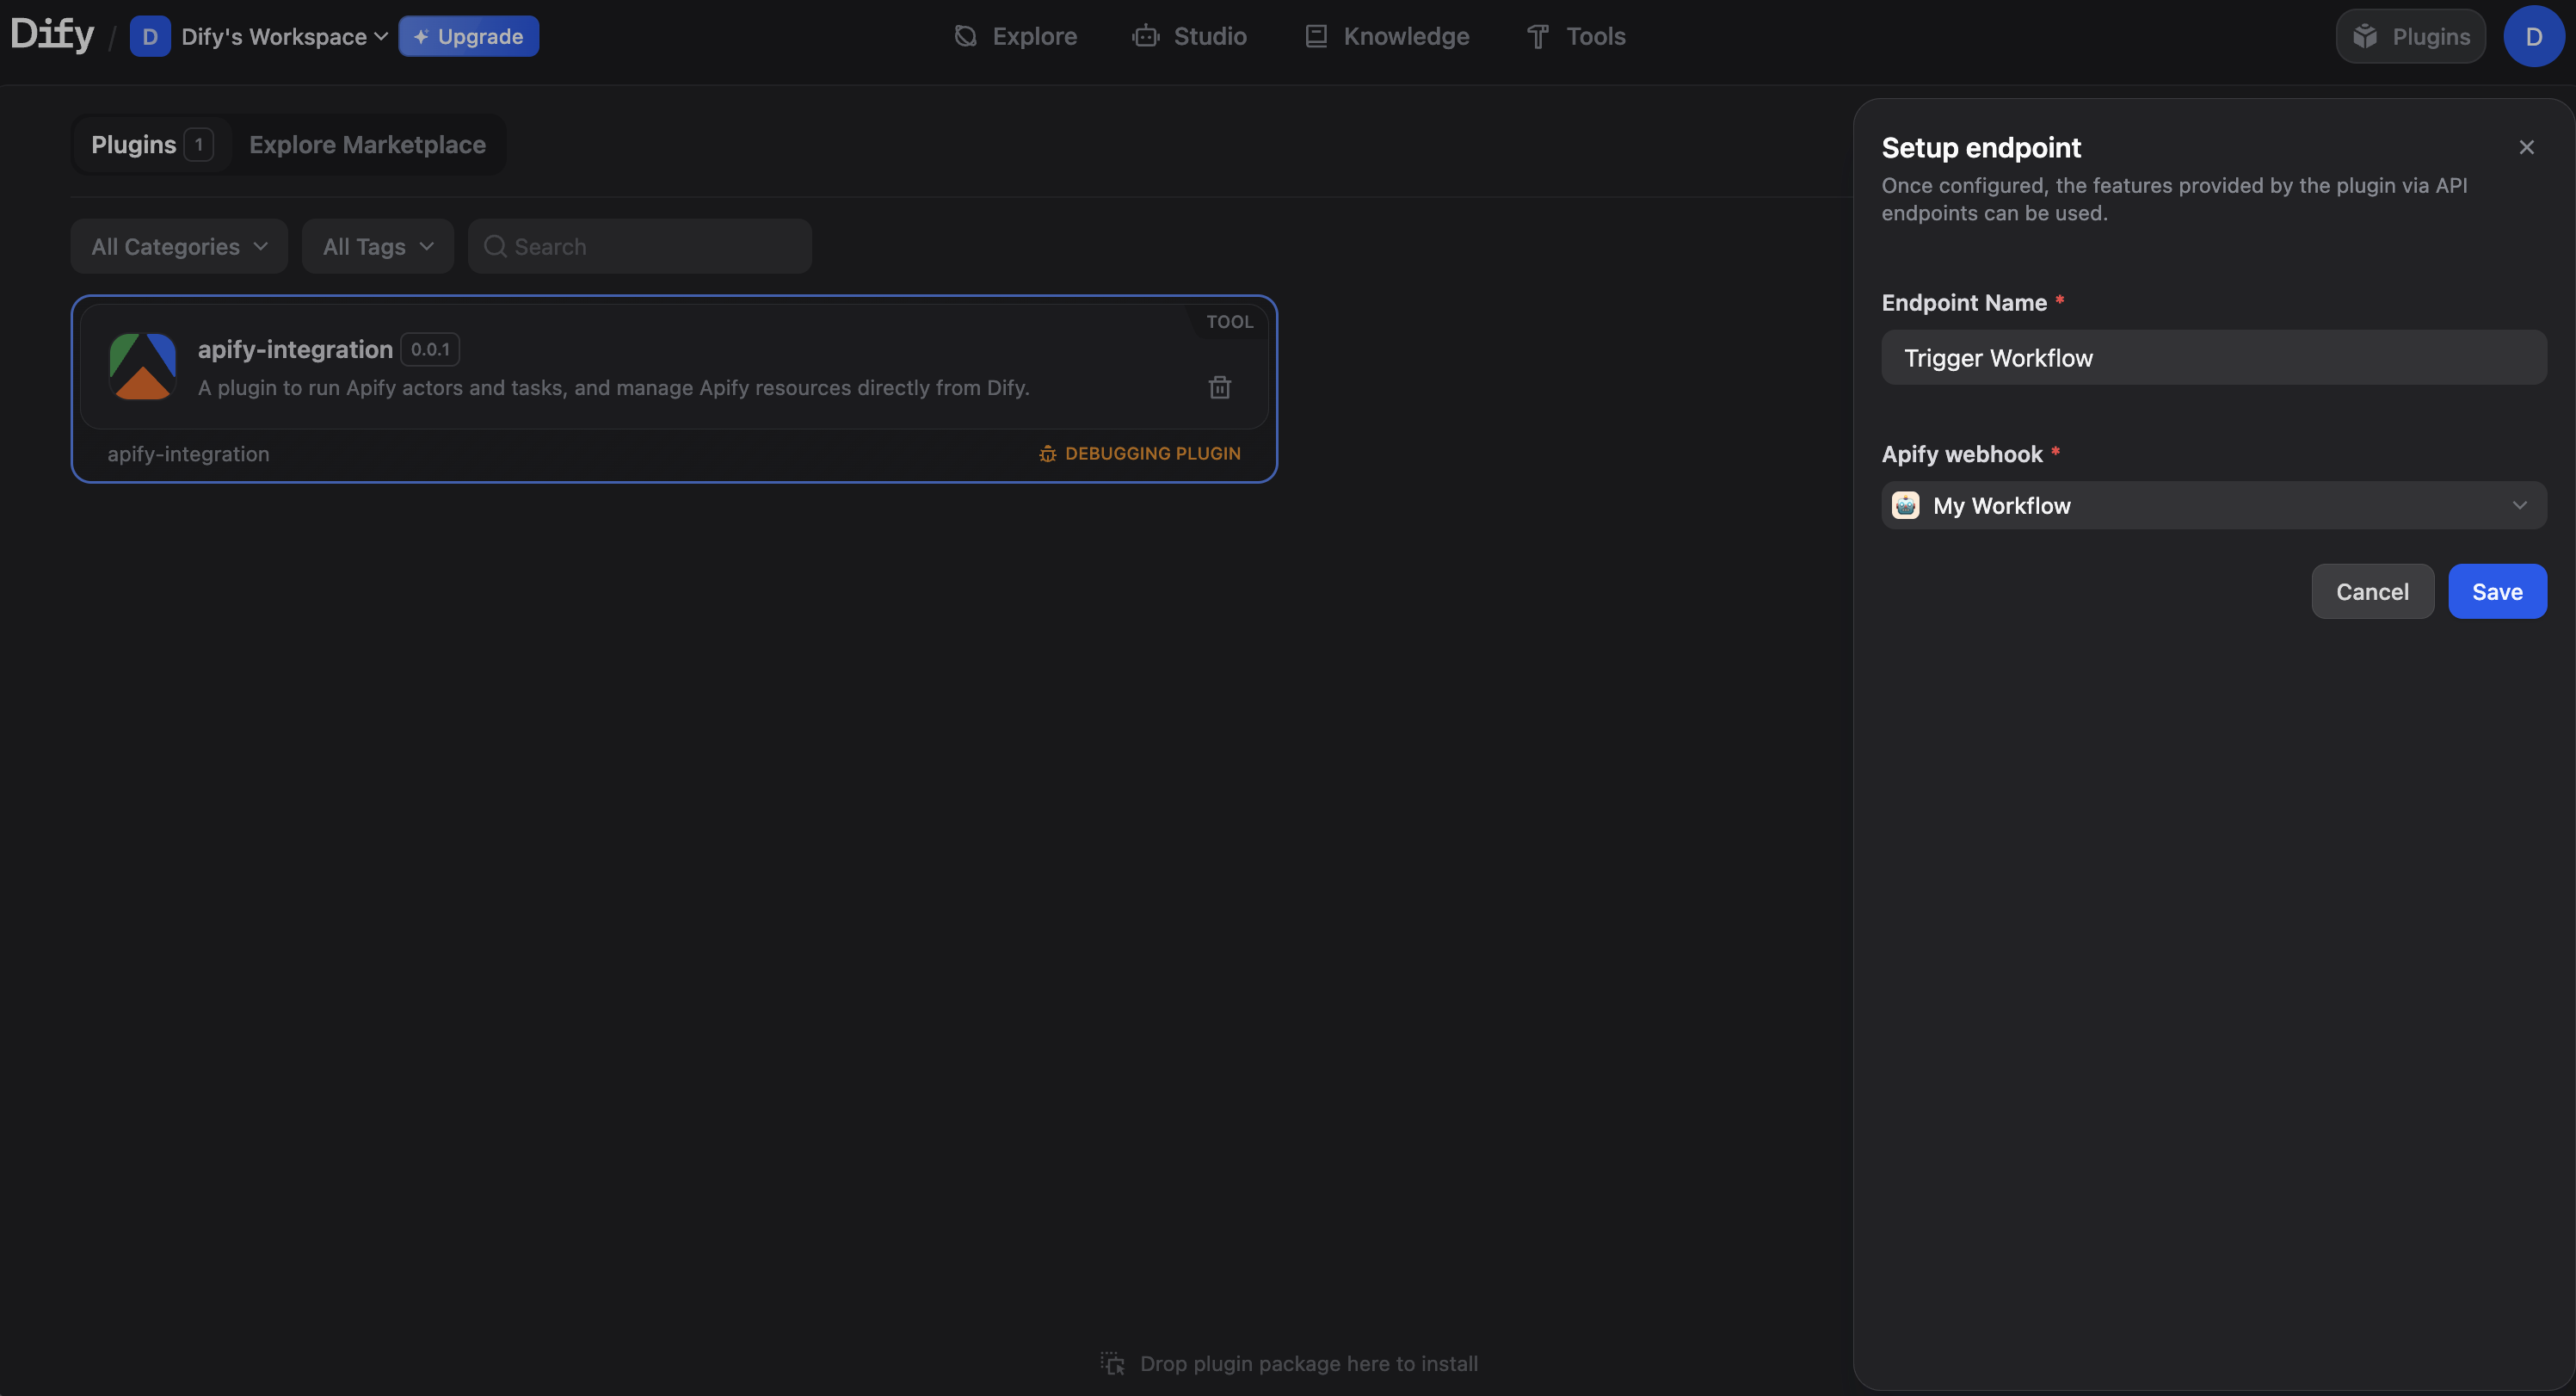
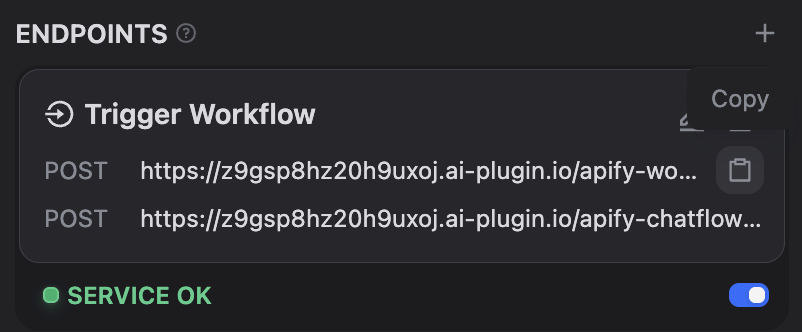
Copy the URL that corresponds to your application type (Workflow or Chatflow).
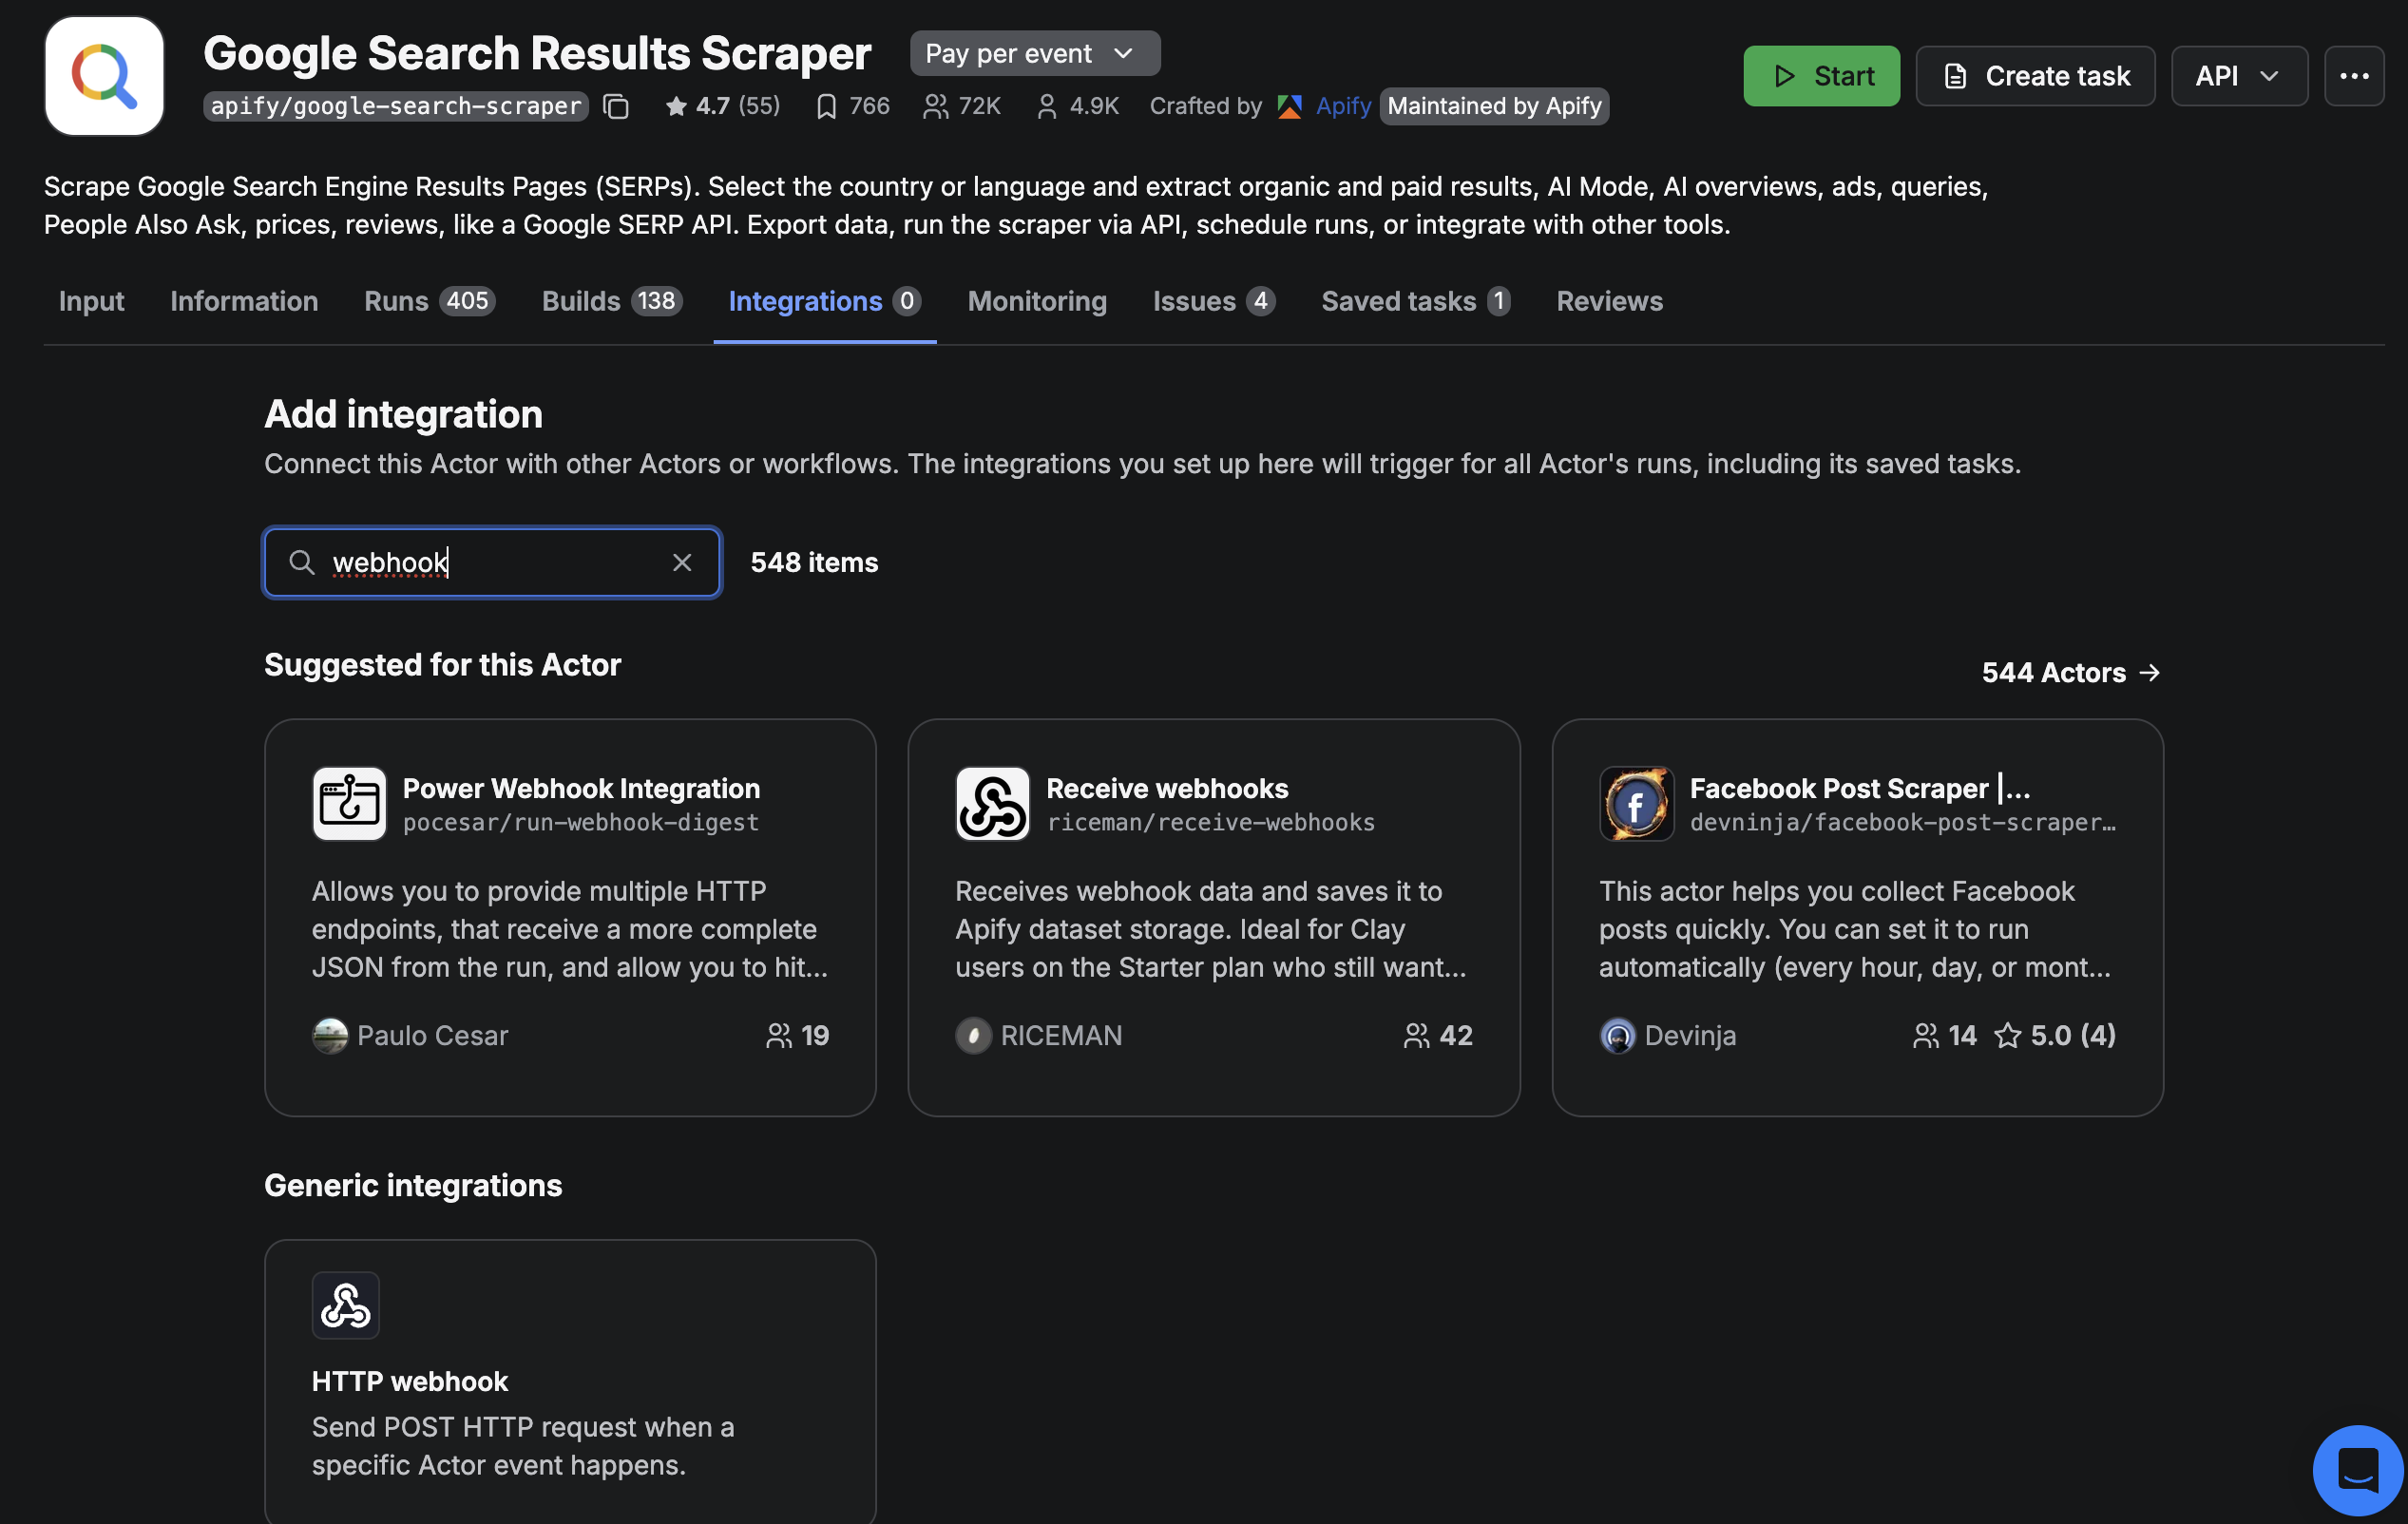
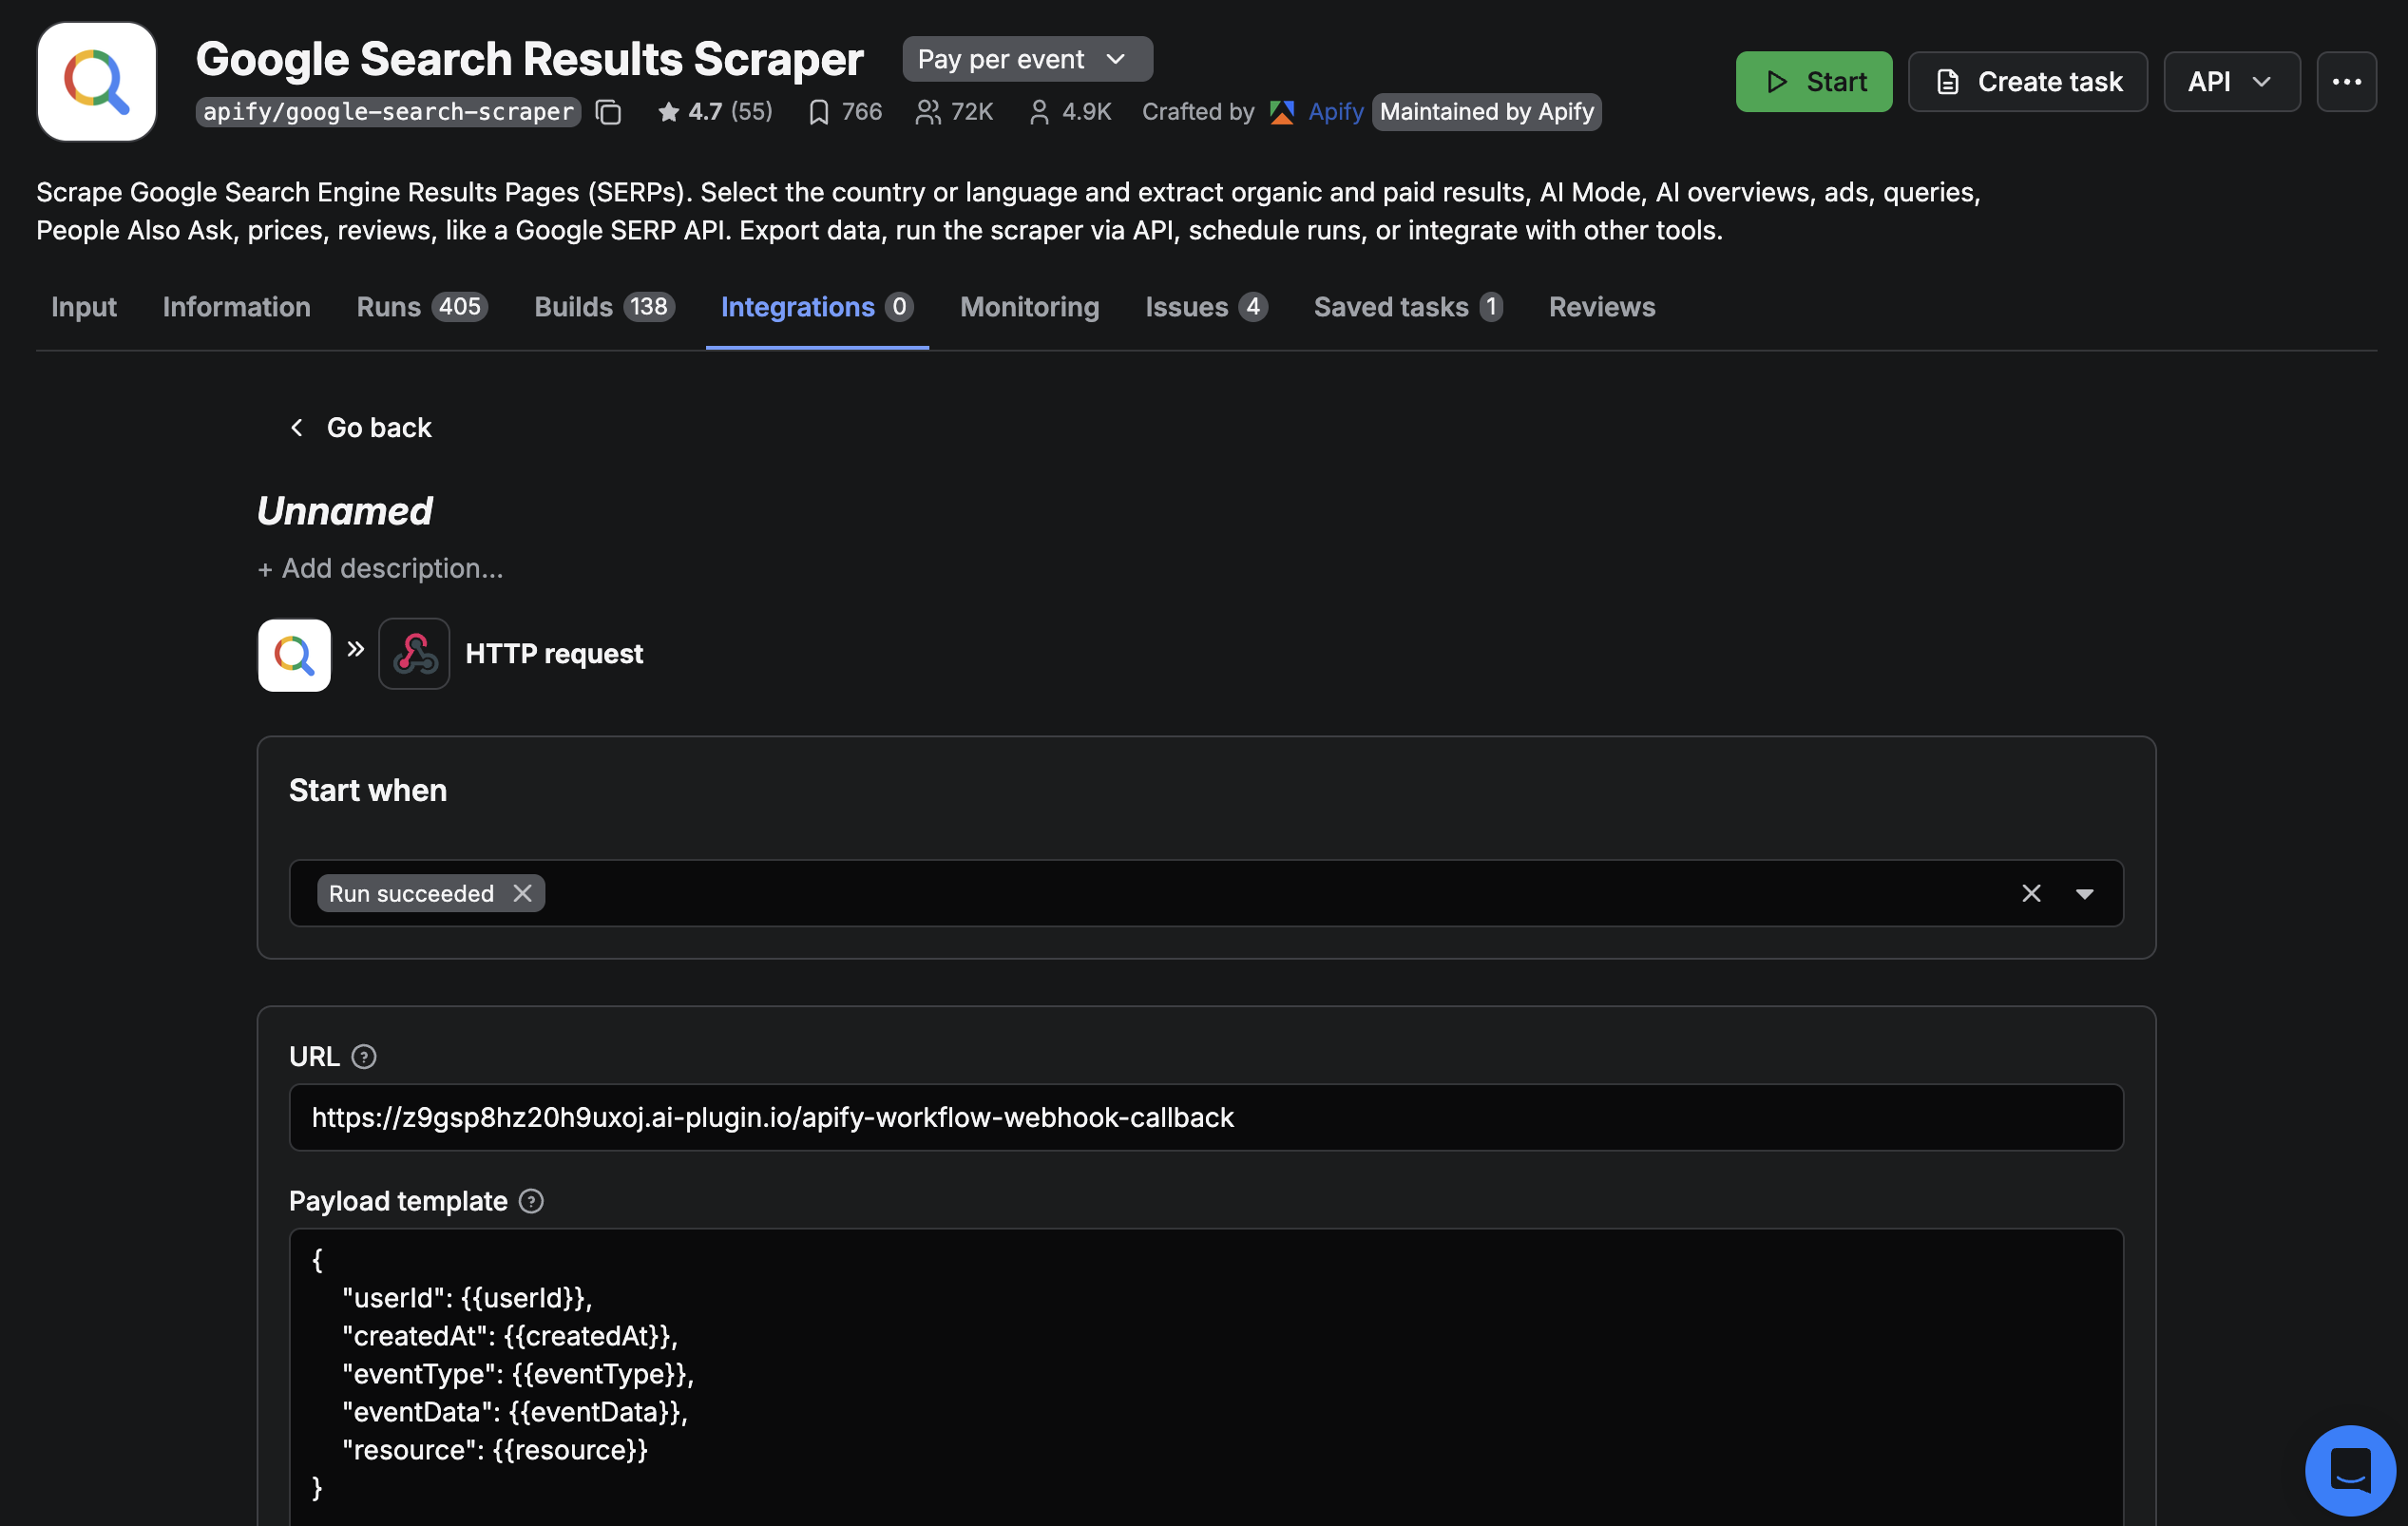
Configure the webhook in Apify
In the Apify Console, open the Actor you want to use as a trigger and go to the Integrations tab. Select the HTTP webhook option and paste the Dify endpoint URL. Under Events, select Run succeeded and save the integration.
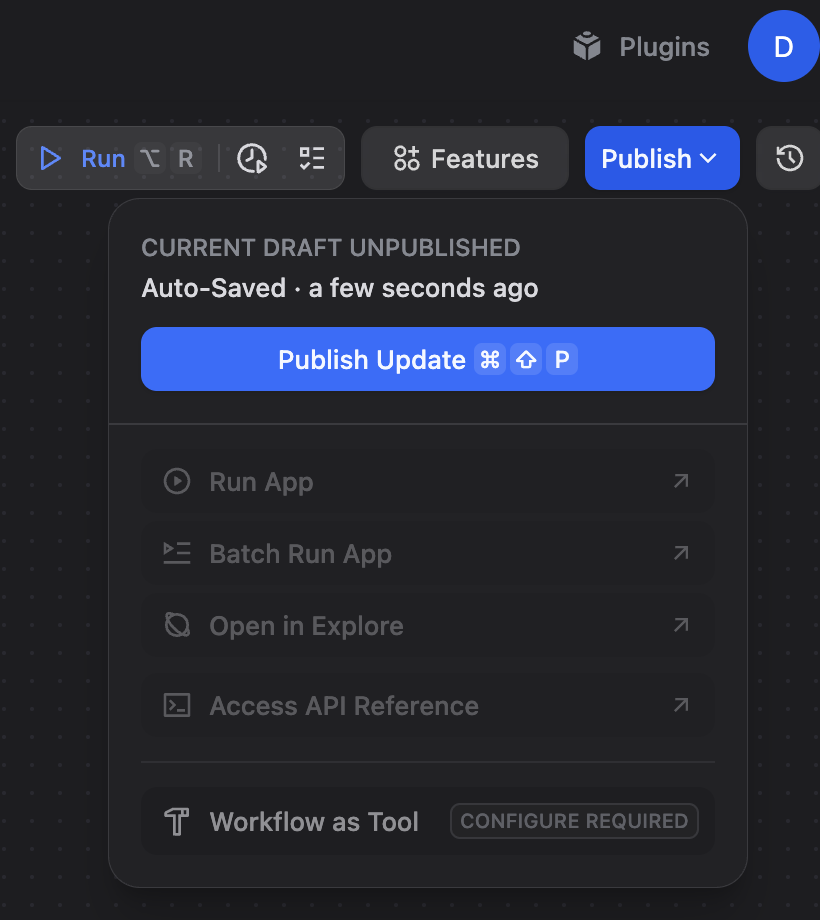
A Dify Workflow or Chatflow must be published for the webhook trigger to work. If the application is not published, the webhook will fail.
Start the Actor in the Apify Console to trigger your workflow.
Trigger a Chatflow
The setup for a Chatflow is similar to a Workflow. Select your Chatflow app instead of a Workflow and copy the Chatflow endpoint URL.
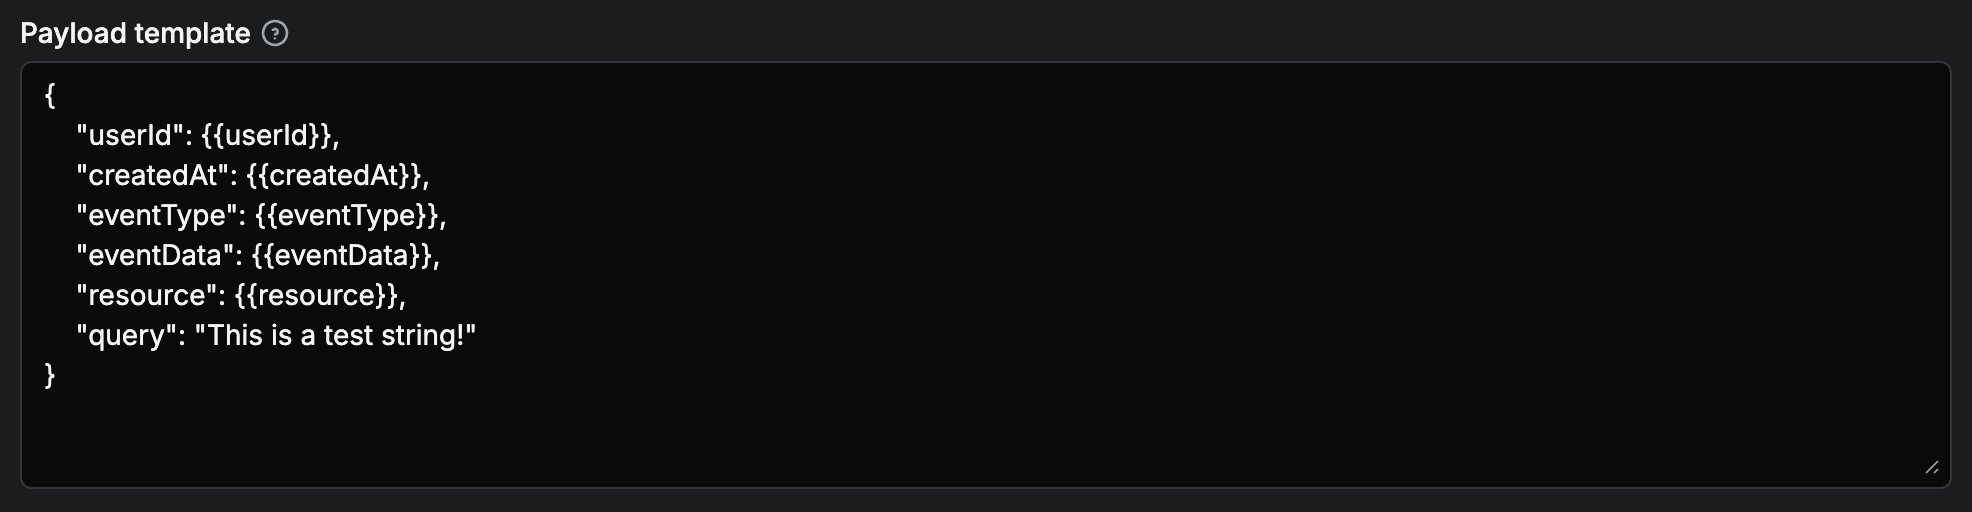
When triggering a Chatflow, you must provide a Payload template in the Apify webhook settings. This template needs a query field to serve as the first message to the chatflow.
Access Apify Data in Dify
When an Apify Actor run completes and triggers your Dify workflow, Apify sends a JSON response object containing information about the completed run. This includes details like the run ID, Actor ID, dataset ID, and status.
Understand nested data access
Dify's variable system cannot directly access nested JSON properties using dot notation like resource.id. Instead, you must use a flattened format where each level of nesting is represented by double underscores (__).
For example, if Apify sends:
{
  "resource": {
    "id": "abc123",
    "defaultDatasetId": "xyz789"
  }
}
In Dify, you would access these values as:
resource__idfor the run IDresource__defaultDatasetIdfor the dataset ID
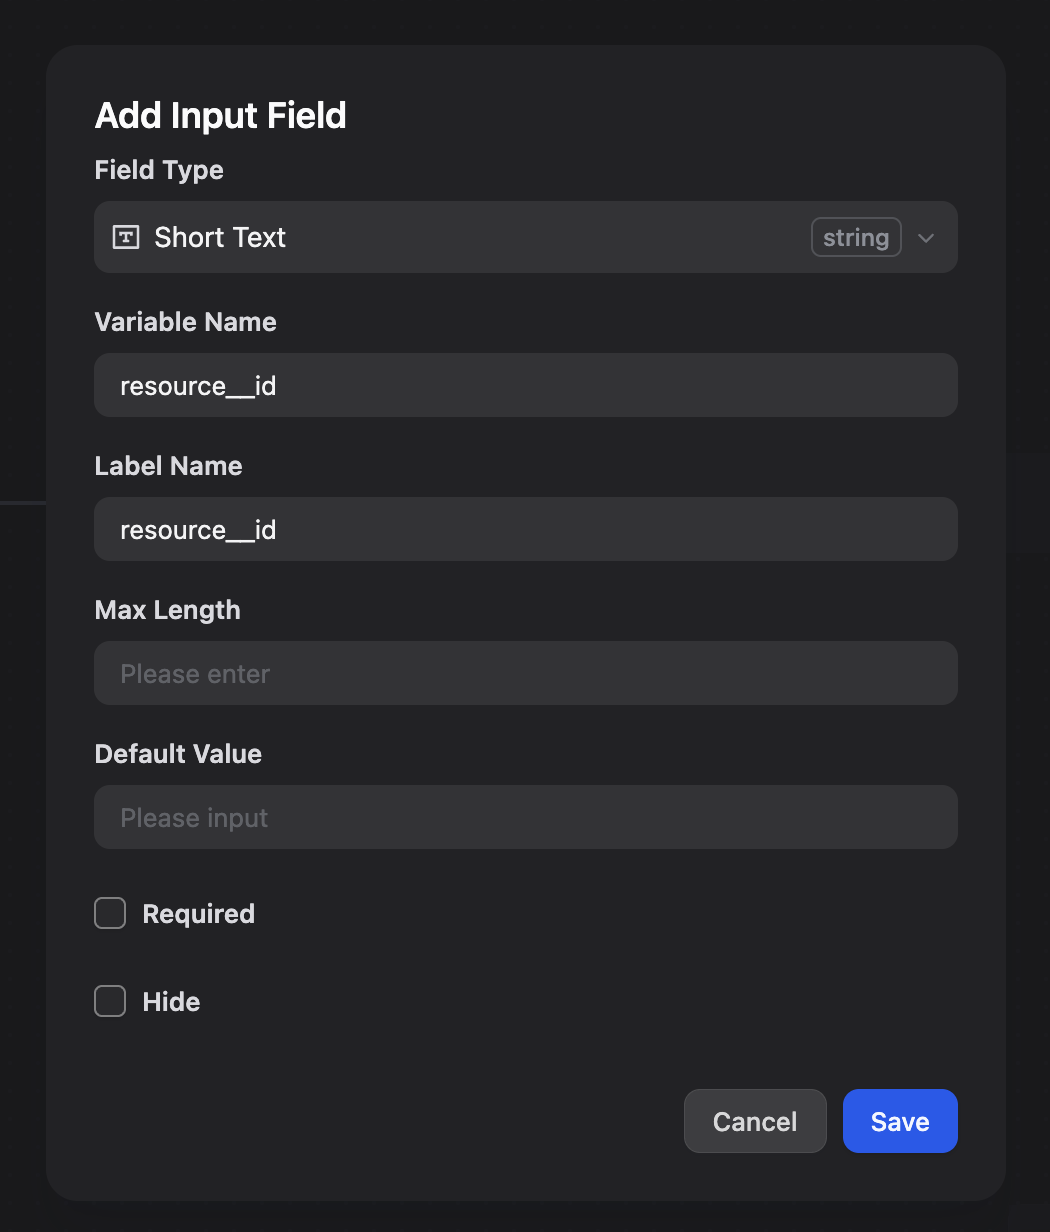
Define input variables
To use nested properties from the webhook payload in your workflow:
- In your workflow's Input Node node, select + to add a new input variable.
- Enter the flattened property name (e.g.,
resource__defaultDatasetId). - The variable is now available throughout your workflow.
Example: Download data from a completed Actor run
A common use case is automatically fetching data from a dataset after an Actor run completes. Here's how to set it up:
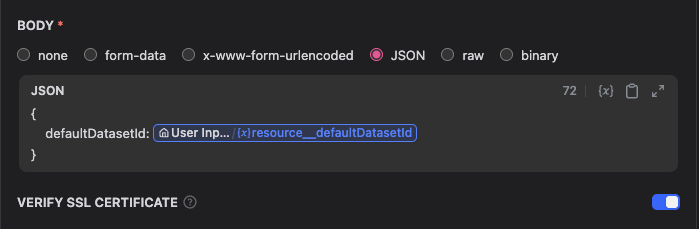
- Define the dataset ID variable: In your workflow's Input node, add an input variable named
resource__defaultDatasetIdto capture the dataset ID from the webhook payload. - Add the Get Dataset Items tool: Add the Get Dataset Items Apify tool to your workflow.
- Use the variable: In the Dataset ID field of the Get Dataset Items tool, reference your input variable (e.g.,
{{resource__defaultDatasetId}}). - Process the data: The tool retrieves all items from the dataset, which you can then process, transform, or send to other services in your workflow.
This workflow automatically downloads and processes data whenever your Actor completes, without manual intervention.