Claude Code CLI integration
Claude Code CLI is Anthropic's agentic coding tool that runs in your terminal. It reads and edits your codebase, runs commands, and completes multi-step development tasks.
The Apify plugin for Claude Code connects Claude Code to Apify's library of Actors and bundles:
- The Apify MCP server for searching the Store, running Actors, and retrieving datasets through the Model Context Protocol (MCP).
- An
apifyrouting agent that picks the right tool or skill from a natural-language request. - Five built-in skills for common workflows (see Bundled skills below).
This guide covers installation in the Claude Code CLI. Support for the Claude Code app is still in development.
This integration uses a third-party service. If you find outdated content, please submit an issue on GitHub.
Prerequisites
- An Apify account - sign up for free if you don't have one.
- Claude Code CLI - installed and authenticated locally.
Install the plugin
-
In Claude Code, run
/pluginsto open the plugin manager. -
Open the Marketplaces tab and select + Add Marketplace.
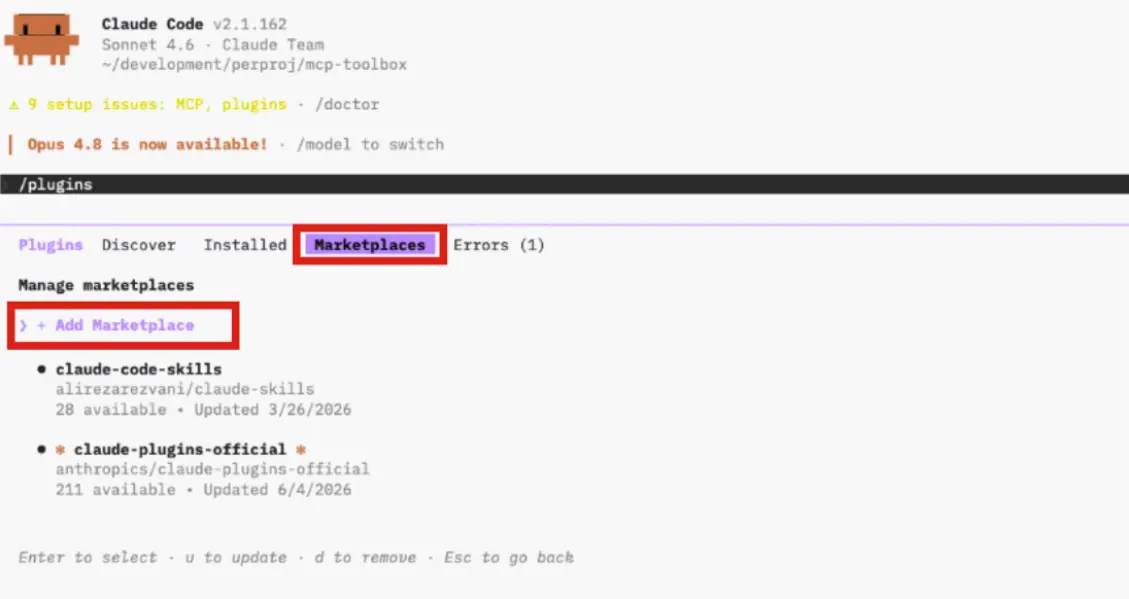
-
Paste the Apify plugin repository URL and press Enter:
https://github.com/apify/apify-claude-code-plugin -
Open the Discover tab. The
apifyplugin appears under Install Plugins. Press Enter to view its details. -
Review the plugin details, choose an install scope (Install for you (user scope) is the typical choice), and press Enter.
-
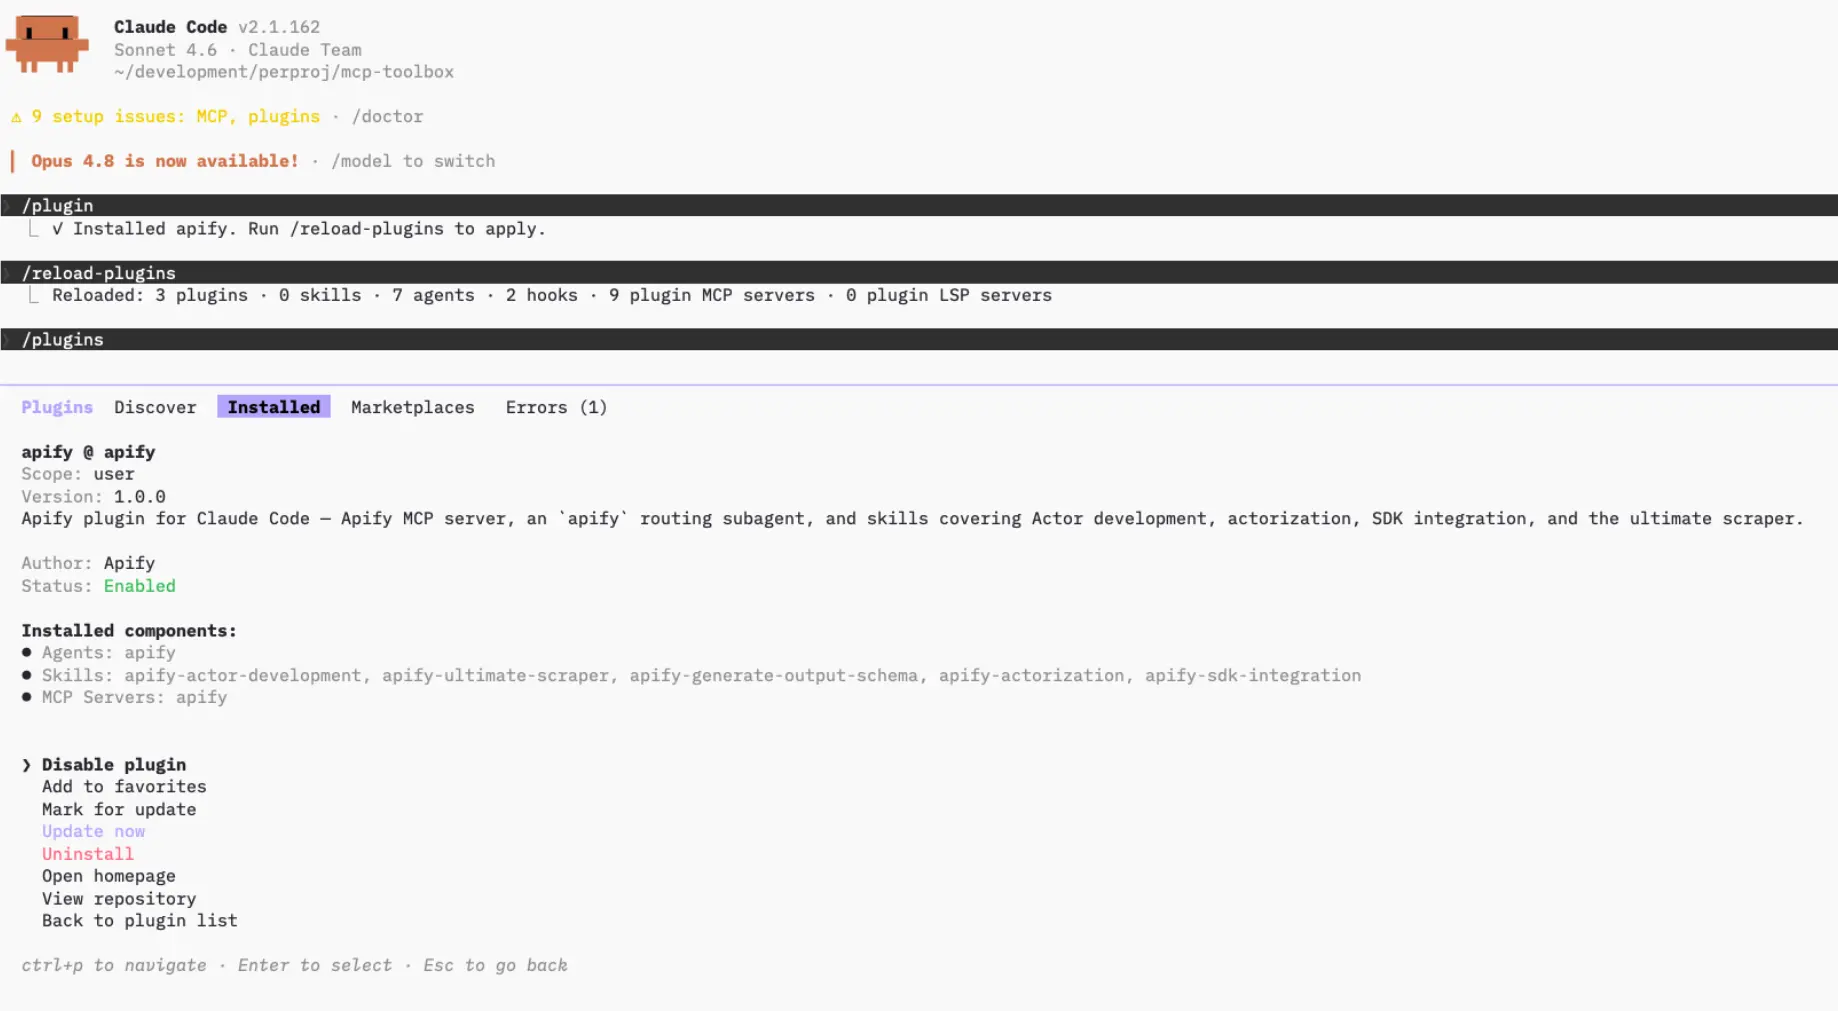
Run
/reload-pluginsto activate the plugin in the current session. -
Open the Installed tab to confirm the
apifyplugin is listed as enabled.
Authenticate to Apify
The plugin bundles the Apify MCP server. Read-only tools like searching the Store and fetching Actor details work without signing in, but you need to authenticate to run Actors and access your account data.
-
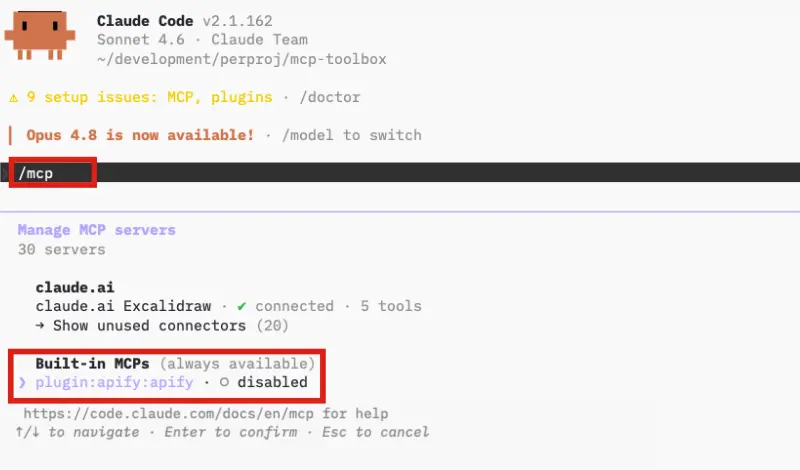
Run
/mcpto open the MCP server manager. -
Find plugin:apify:apify in the list (currently disabled) and press Enter to open it.
-
Select Enable. Claude Code enables the server and returns you to the
/mcplist.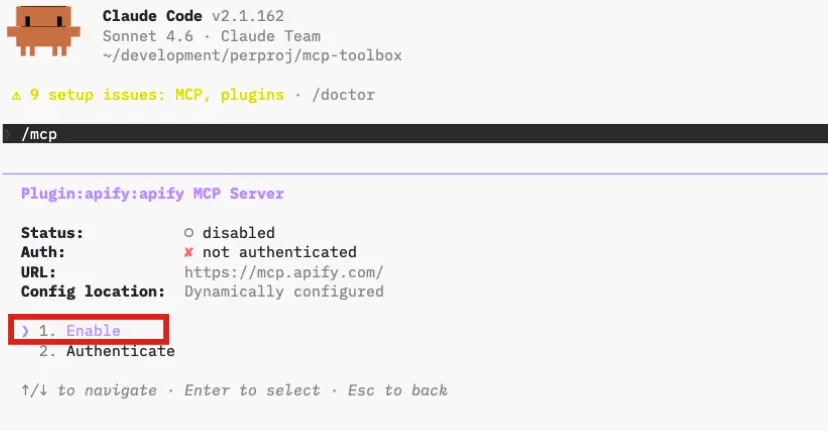
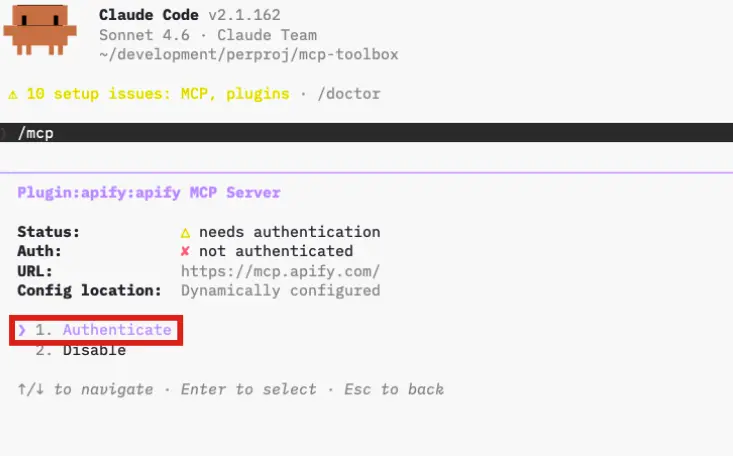
-
Find plugin:apify:apify again and press Enter to reopen it, then select Authenticate. Claude Code opens a browser tab for the Apify OAuth flow.
-
Review the permissions and click Allow access.
Dynamic registration warningThe OAuth page shows a warning that the application was registered dynamically and wasn't verified by Apify. This is expected for the current plugin release - the plugin uses dynamic OAuth client registration. Make sure you trust this installation before allowing access.
-
Back in the terminal, you'll see
Authentication successful. Connected to plugin:apify:apify.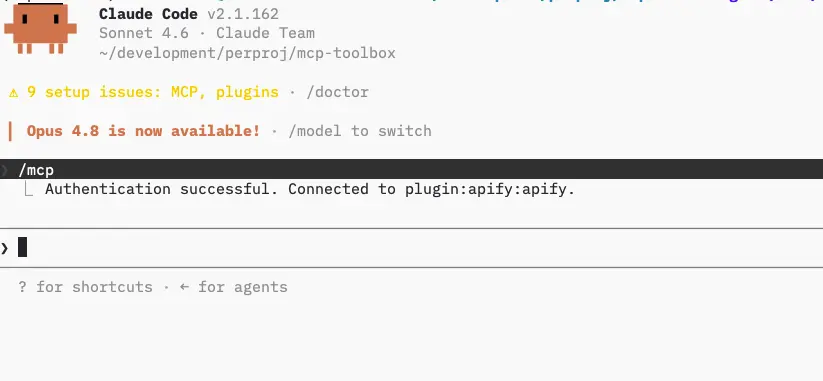
The connection stays authenticated for future sessions. You can revoke access at any time in Apify Console > Settings > Integrations.
Run your first prompt
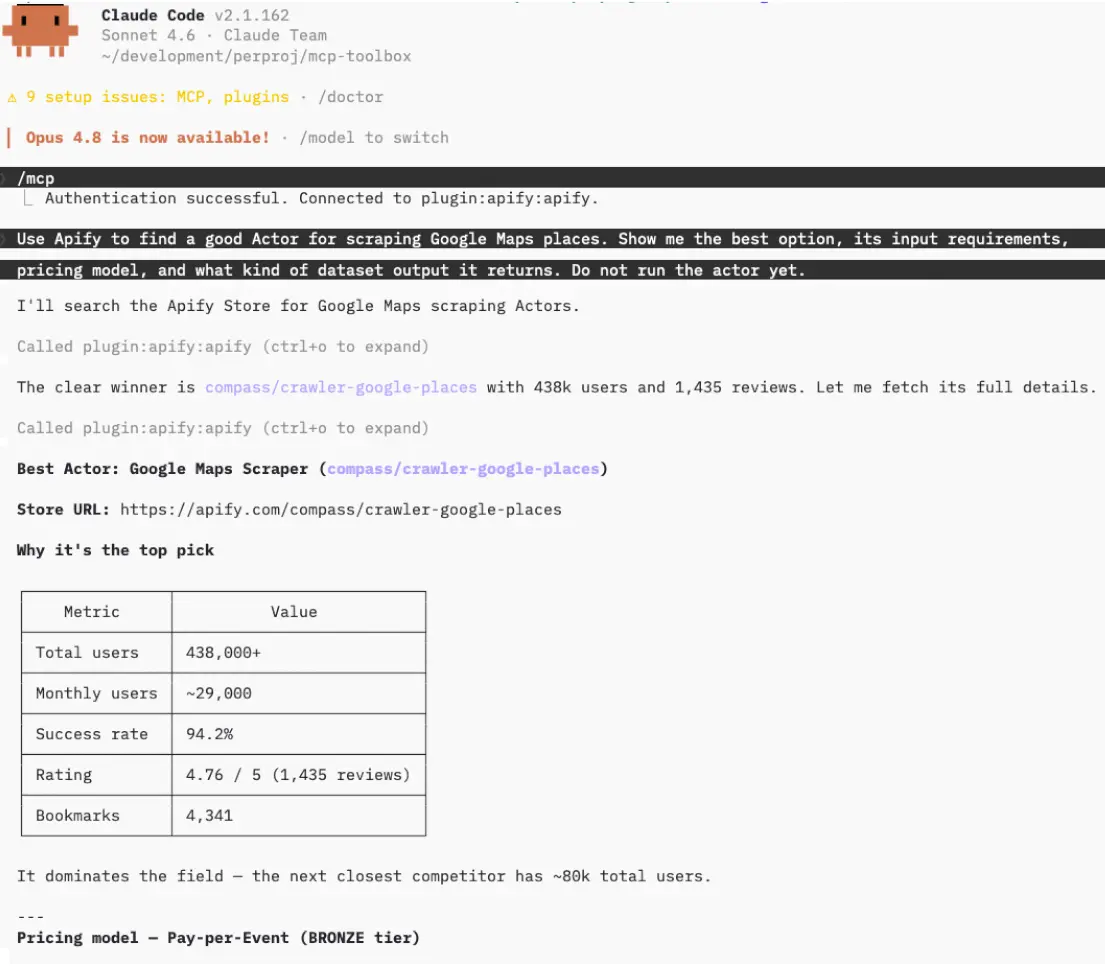
Describe what you want in natural language. The apify agent routes the request to the right tool or skill, so you don't need to name tools yourself.
"Use Apify to find a good Actor for scraping Google Maps places. Show me the best option, its input requirements, pricing model, and what kind of dataset output it returns. Do not run the Actor yet."
The agent searches Apify Store, fetches the top Actor's details through plugin:apify:apify, and summarizes its inputs, pricing, and output - all without running the Actor.
Bundled skills
| Skill | Description |
|---|---|
apify-ultimate-scraper | CLI-driven extraction using existing Actors for multi-step scraping and lead-generation workflows. |
apify-actor-development | Full Actor lifecycle - template selection, development, local testing, and deployment with apify push. |
apify-actorization | Converts existing JavaScript, TypeScript, Python, or CLI projects into Apify Actors. |
apify-generate-output-schema | Generates dataset and key-value store schemas for existing Actors. |
apify-sdk-integration | Integrates Actor execution into applications using the apify-client package. |
Example prompts that route to specific skills:
Ultimate scraper:
"Find 10 highly rated coffee shops in Seattle with name, address, rating, phone, and website."
Actor development:
"Create an Apify Actor that accepts a
startUrlandmaxPagesinput, crawls the site, and stores each page title and URL."
SDK integration:
"Add Apify to this project. The Node.js API route should run an Actor and return dataset items as JSON."
Troubleshooting
The apify plugin is disabled
Run /plugins, open the Installed tab, select the apify plugin, and choose Enable plugin. If the action reads Disable plugin instead, the plugin is already enabled - the MCP server may need authentication; see Authenticate to Apify.
The /plugins command isn't available
Plugins require a local installation of the Claude Code CLI. They aren't available in remote or web sessions (claude.ai/code). Install or update the Claude Code CLI locally.
Browser doesn't open, or OAuth fails
If the browser doesn't open automatically, copy the OAuth URL shown in the terminal and paste it into your browser manually.
If you're running Claude Code in a headless environment (SSH, remote container) or the OAuth flow still fails, authenticate with an API token instead. Copy your token from Apify Console > Settings > Integrations and set it before starting Claude Code:
export APIFY_TOKEN=<YOUR_API_TOKEN>
Limitations
- Long-running Actors may exceed the time a single tool call waits for completion. Reduce the scope or split the work across multiple prompts.
- Each Actor run consumes Apify platform usage from your plan in addition to any Claude usage. See Billing for details.
- Skills that edit files in your project (Actor development, actorization, SDK integration) make local changes - review them before deploying or committing.
Related integrations
- MCP server integration - Use the Apify MCP server with other clients
- ChatGPT integration - Connect the Apify MCP server to ChatGPT
Resources
- Apify plugin for Claude Code - Source repository and full README with advanced setup notes (Apify CLI install, all auth paths, available MCP tools)
- Claude Code documentation - Official Claude Code docs
- Apify Store - Browse Actors you can run from Claude Code