Airtable integration
The Airtable Data Import Actor transfers items from any Apify dataset into an Airtable base. Use it standalone or chain it after other Actors in automated workflows via integrations.
This integration uses a third-party service. If you find outdated content, please submit an issue on GitHub.
Prerequisites
Connect to Airtable
The Actor uses OAuth 2.0 to connect to your Airtable account:
- Navigate to the Actor's Integrations tab in Apify Console.
- Click Connect next to Airtable and follow the OAuth consent flow.
- Once connected, the OAuth account field is populated automatically.

The Actor retrieves a fresh access token at the start of each run. Your Airtable credentials are never stored or logged.
Configure the Actor
Configure the Actor from its Input tab in Apify Console. Each field is described below.
Operation
Controls how the Actor handles the target table and its existing records.
Append: Adds new records to the table. Existing records are never modified or deleted. Use for continuous pipelines.Override: Deletes all existing records before importing. Use for full data refreshes.Create: Creates a new table with fields from your mappings, then imports data. If the table already exists, theclearOnCreatesetting determines what happens.
Clear on create
A safety switch for Create mode only. Defaults to false.
Enabled(true): Clears all existing records and imports. Use for automated fresh starts.Disabled(false): Throws an error if the table exists, preventing accidental data loss.
Base
Accepts a base ID (appXXXXXXXXXXXXXX, found in the Airtable URL) or a base name. Base IDs are recommended - they are immutable and globally unique.

Table
Accepts a table name or table ID (tblXXXXXXXXXXXXXX). When using Create mode and the table does not exist, the Actor creates it automatically.
Dataset ID
Specifies the dataset to import from:
- A static dataset ID (for example,
cqxkhXcn2SCjTpeCz). {{resource.defaultDatasetId}}when used as an integration - automatically passes the upstream Actor's dataset.
Unique ID
Enables duplicate detection. When set, the Actor reads existing values from the mapped Airtable column and skips records with matching values. The value must match one of the source fields in your dataMappings.
Field mappings
An array defining how dataset fields map to Airtable columns.
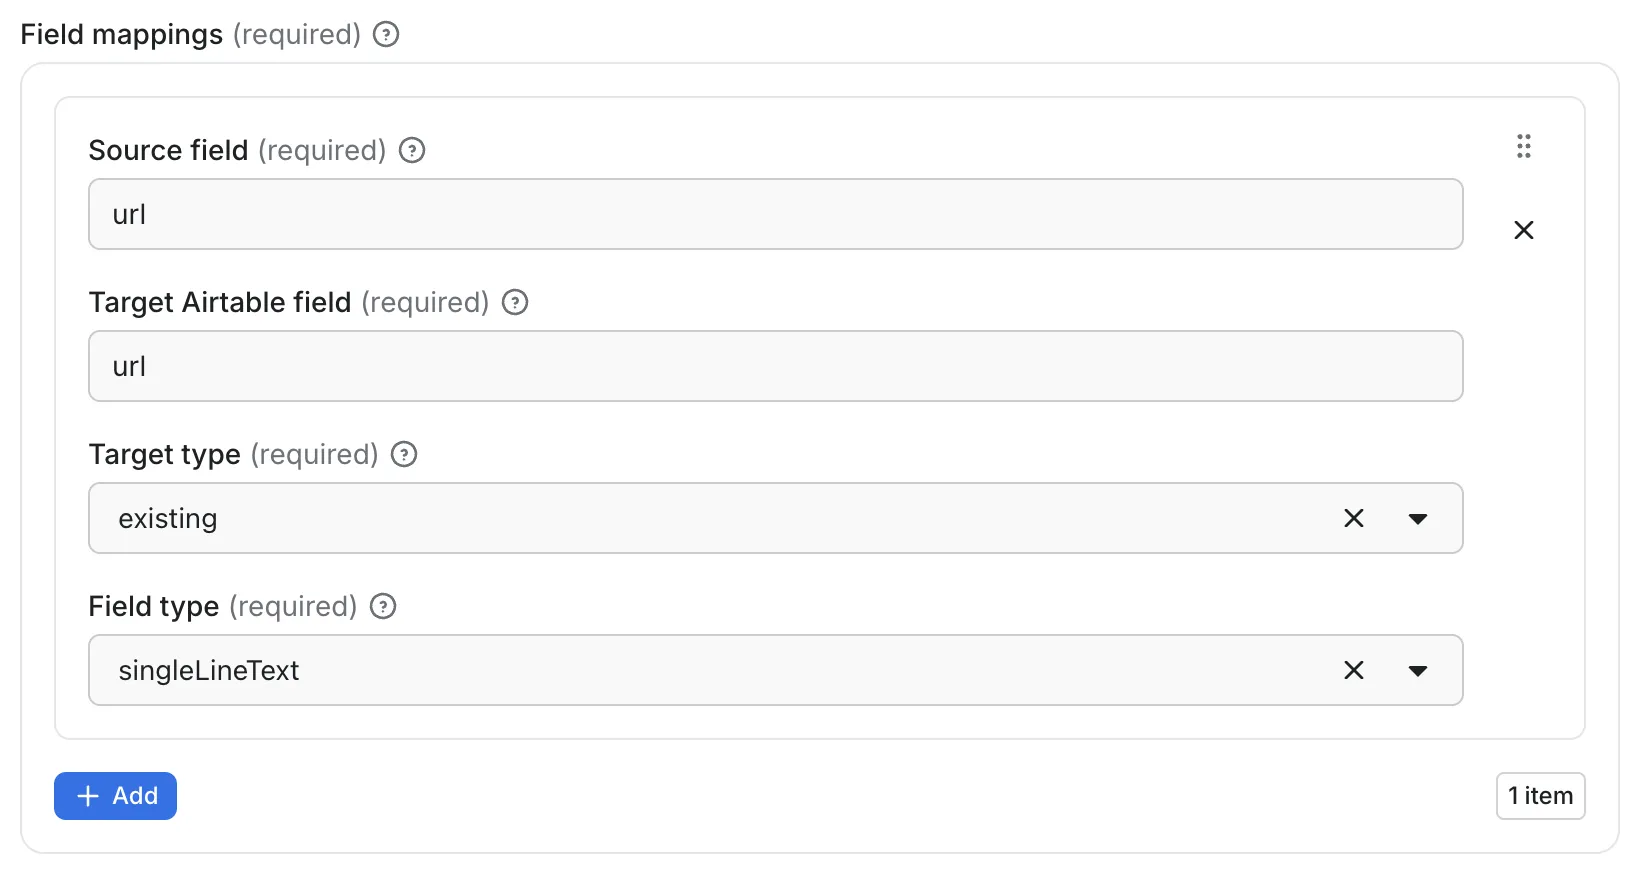
Each mapping has these properties:
| Property | Description |
|---|---|
source | Dataset field path, supports dot notation for nested objects (crawl.depth, metadata.uid) |
target | Airtable column name |
targetType | existing if the field already exists, new to create it automatically |
fieldType | Airtable field type: singleLineText, multilineText, number, checkbox |
Dot notation
Use dot notation to access nested object properties. items[0].name style array indexing is not supported.
Field types
| Field type | Use for |
|---|---|
singleLineText | Names, URLs, IDs (max 10,000 characters) |
multilineText | Descriptions, paragraphs, JSON blobs |
number | Prices, counts, ratings (integer precision) |
checkbox | Boolean values, yes/no flags |
The Actor creates number fields with integer precision. For decimal values, create the field manually in Airtable and use targetType: "existing".
Import results from another Actor automatically
Chain the Actor after a scraping or extraction Actor so its dataset flows into Airtable on every run. Use this for scheduled scrapers, recurring price checks, or any pipeline where fresh data should reach your base without a manual trigger.
- Open the upstream Actor in Apify Console and go to the Integrations tab.
- Click Add integration and select Airtable Data Import Actor.
- Set
datasetIdto{{resource.defaultDatasetId}}. - Configure the base, table, operation, and field mappings.
- Connect your Airtable account via OAuth.

Example of the output
After each run, the Actor writes a JSON summary to its dataset. Each field reports a key result from the import operation:
{
    "success": true,
    "operation": "Append",
    "baseName": "My Product Catalog",
    "tableName": "Products",
    "totalItems": 1500,
    "importedCount": 1450,
    "skippedDuplicates": 50,
    "duration": 330
}
Example configurations
Append with duplicate detection
{
    "operation": "Append",
    "base": "appABC123456789",
    "table": "Products",
    "datasetId": "{{resource.defaultDatasetId}}",
    "uniqueId": "url",
    "dataMappings": [
        { "source": "title", "target": "Product Name", "targetType": "existing", "fieldType": "singleLineText" },
        { "source": "price", "target": "Price", "targetType": "existing", "fieldType": "number" },
        { "source": "url", "target": "URL", "targetType": "existing", "fieldType": "singleLineText" },
        { "source": "description", "target": "Description", "targetType": "existing", "fieldType": "multilineText" },
        { "source": "inStock", "target": "In Stock", "targetType": "existing", "fieldType": "checkbox" }
    ]
}
Create new table
{
    "operation": "Create",
    "clearOnCreate": false,
    "base": "appXYZ987654321",
    "table": "Customer Feedback",
    "datasetId": "cqxkhXcn2SCjTpeCz",
    "dataMappings": [
        { "source": "reviewer.name", "target": "Reviewer Name", "targetType": "new", "fieldType": "singleLineText" },
        { "source": "rating", "target": "Rating", "targetType": "new", "fieldType": "number" },
        { "source": "comment", "target": "Review Text", "targetType": "new", "fieldType": "multilineText" },
        { "source": "verified", "target": "Verified Purchase", "targetType": "new", "fieldType": "checkbox" }
    ]
}
Override for full refresh
{
    "operation": "Override",
    "base": "Daily Competitor Prices",
    "table": "Pricing",
    "datasetId": "{{resource.defaultDatasetId}}",
    "dataMappings": [
        { "source": "sku", "target": "SKU", "targetType": "existing", "fieldType": "singleLineText" },
        { "source": "competitor", "target": "Competitor", "targetType": "existing", "fieldType": "singleLineText" },
        { "source": "price", "target": "Price", "targetType": "existing", "fieldType": "number" }
    ]
}
Limits
- Text values are truncated at 10,000 characters per field.
numberfields are created with integer precision; create decimal fields manually.- Imports process at approximately 50 records per second (10 per batch, 200ms delay).
- Progress is automatically persisted - if a run is interrupted, it resumes from where it left off.
Next steps
- Learn about Apify integrations to chain Actors in automated workflows.
- Explore Airtable's API documentation for field type details.
- If you have questions about the Airtable integration, reach out via the support live chat in Console or the developer community on Discord.