Actor-to-Actor integrations
Actor-to-Actor integrations connect Apify Actors with other Actors or tasks on the platform itself, letting you build multi-step workflows without leaving Apify. This is different from the third-party integrations covered elsewhere in this section - instead of routing data out to Make, n8n, or a warehouse, you chain Actors so the output of one becomes the trigger for another.
Any integration-ready Actor can act as the target of an Actor-to-Actor integration, so the catalog keeps growing as new Actors are published.
You can browse all Actors built specifically as integration targets in the Integrations category on Apify Store.
Add an integration
To connect an Actor with another Actor or task:
- Open the Actor's detail page and select the Integrations tab.
- If the Actor already has integrations set up, the Integrations tab lists them instead. Click Add integration to open the catalog.
- In the Add integration catalog, find the target Actor in one of two places:
- Suggested for this Actor - Actors relevant to the source Actor's output.
- Search integrations field at the top - search across the full catalog.
- Click the Actor card to open its setup screen.
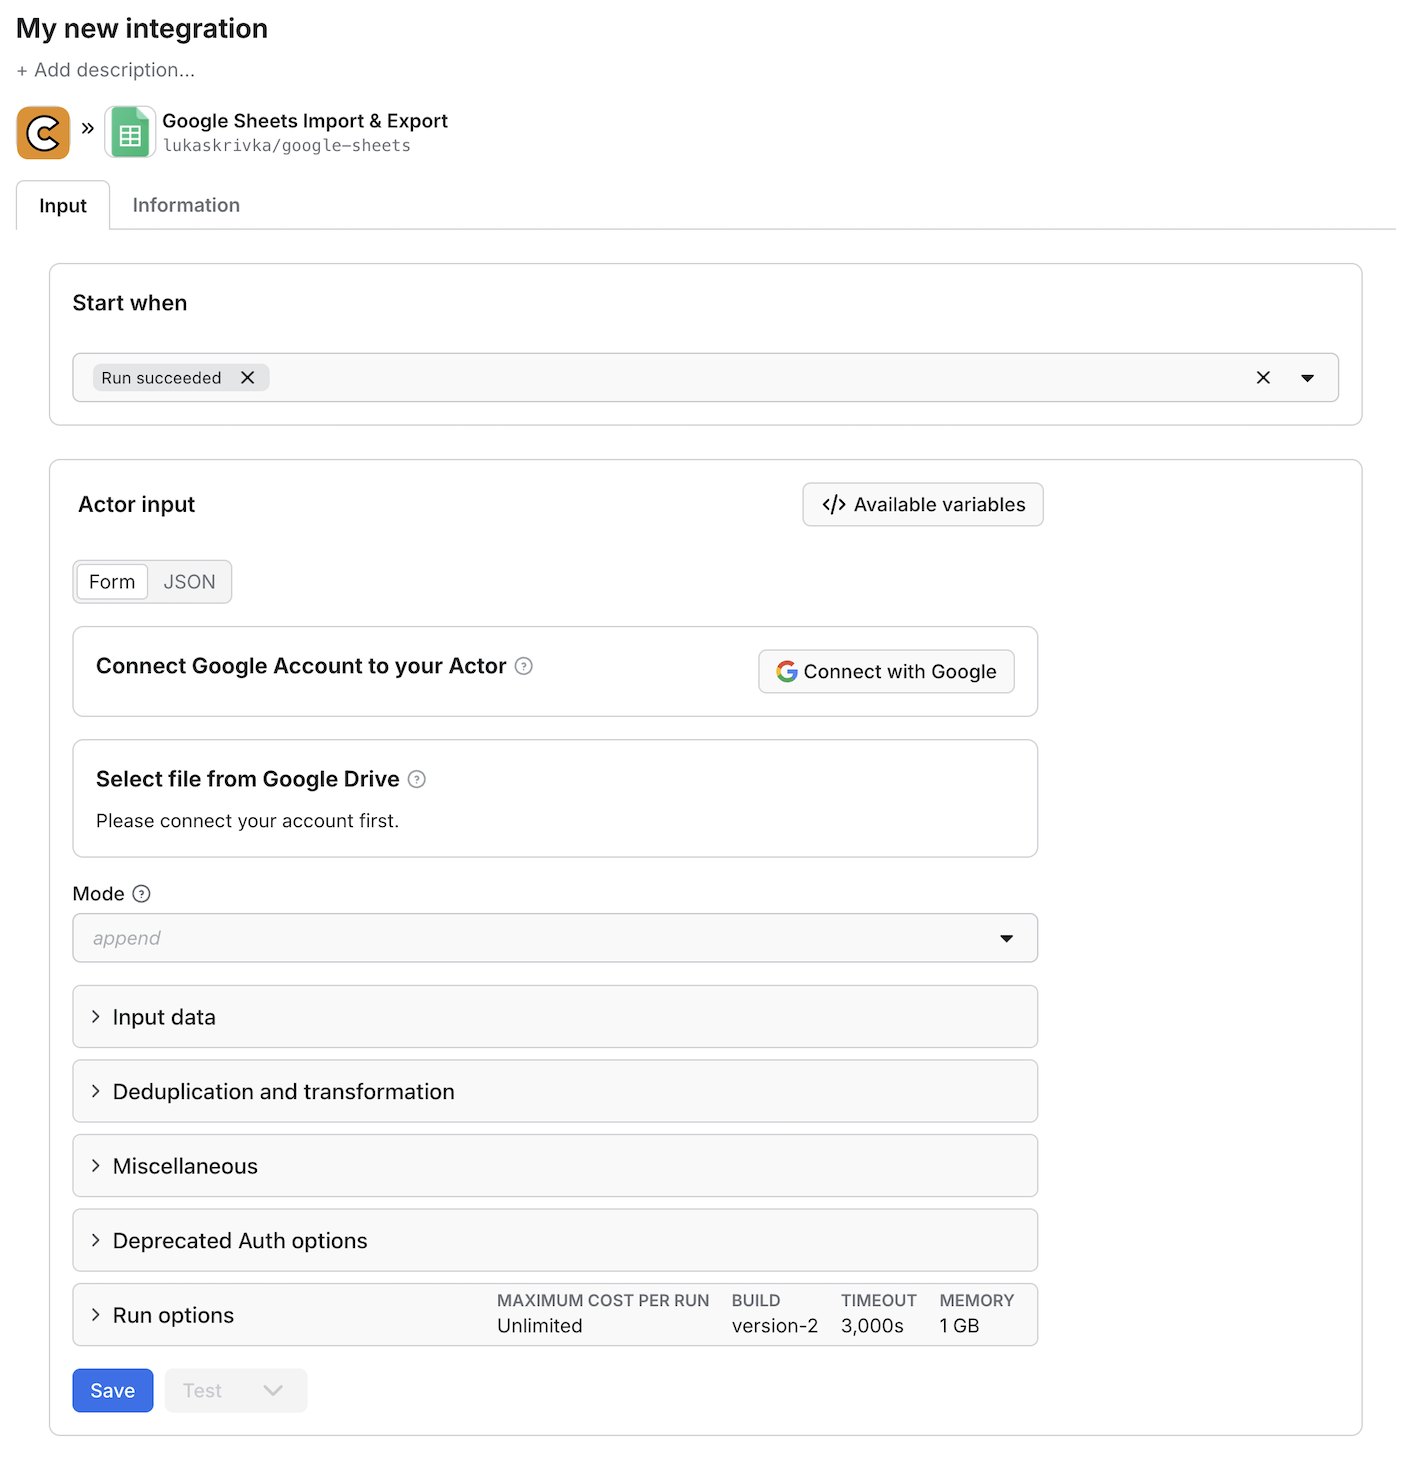
On the setup screen, configure:
- Start when - Events that trigger the integrated Actor. These match webhook event types (
run succeeded,build failed, and so on). - Actor input - The input usually has two parts: static fields whose value doesn't change between runs (for example, a database connection string or table name) and dynamic fields specific to the triggering run (for example, a dataset ID). Static fields go in as-is. Dynamic fields are pulled from the implicit
payloadfield (the default for most integration-ready Actors) or set with variables. The Available variables button in the input panel lists the variables you can interpolate. - Available variables - The same variables as in webhooks. The most common is
{{resource}}, which holds the Run object in the shape returned by the API, or the Build object for build event types. Variables support dot notation,{{resource.defaultDatasetId}}and{{resource.defaultKeyValueStoreId}}cover most cases.
Test your integration
When you add a new integration, you can test it using a past run or build as a trigger. The integrated Actor or task runs as if the trigger event just happened. The only difference from a regular run is that the event type is set to TEST. Test runs consume compute units.
To test, set the input and options, save, then pick an option from the test menu:
- A past run, if the source is an Actor or a task.
- A past build, if the source is an Actor.
- A random joke in the webhook payload, if the source has no runs or builds yet.
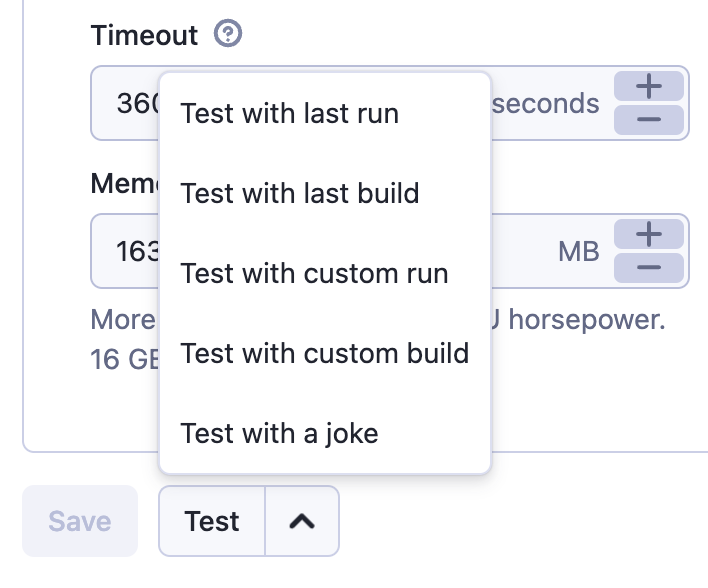
For a custom run or build, enter its ID - you can find it on the run's or build's detail page. The run or build must belong to the source Actor, since that is where the trigger originates.
Implementation details
Actor integrations are regular HTTP POST webhooks targeting the Apify API. The Integrations UI is a friendlier wrapper that lets you fill the payload template through the Actor input UI instead of plain text, and constructs the URL that starts the target Actor with the chosen options.
The UI keeps variables enclosed in strings, which means the payload template is valid JSON rather than only the interpolated result. The UI also adds a payload field with the default webhook payload, so integration-ready Actors can read run data from payload without users having to set variables themselves.
Next steps
- Develop integration-ready Actors - design your own Actor to be used as an integration target.
- Integrating Actors via API - set up the same integrations programmatically with the Apify API.
- Connecting scrapers with Apify integrations - a complete walkthrough on the Apify blog.