Publish your Actor
Before making your Actor public, it's important to ensure your Actor has a clear Description and comprehensive README section. This will help users understand your Actor's purpose, how to configure its inputs, and the type of output it generates. This guide we'll review the essential fields you must complete before publishing your Actor. For more detailed information on SEO & promotion and how to write a comprehensive README,refer to guides available at the Apify Marketing Playbook.
Make your Actor public
Once you've finished coding and testing your Actor, it's time to publish it. Follow these steps:
- From your Actor's page in Apify Console, go to Publication > Display information
- Fill in all the relevant fields for your Actor (e.g., Icon, Actor name, Description, Categories)
- Save your changes
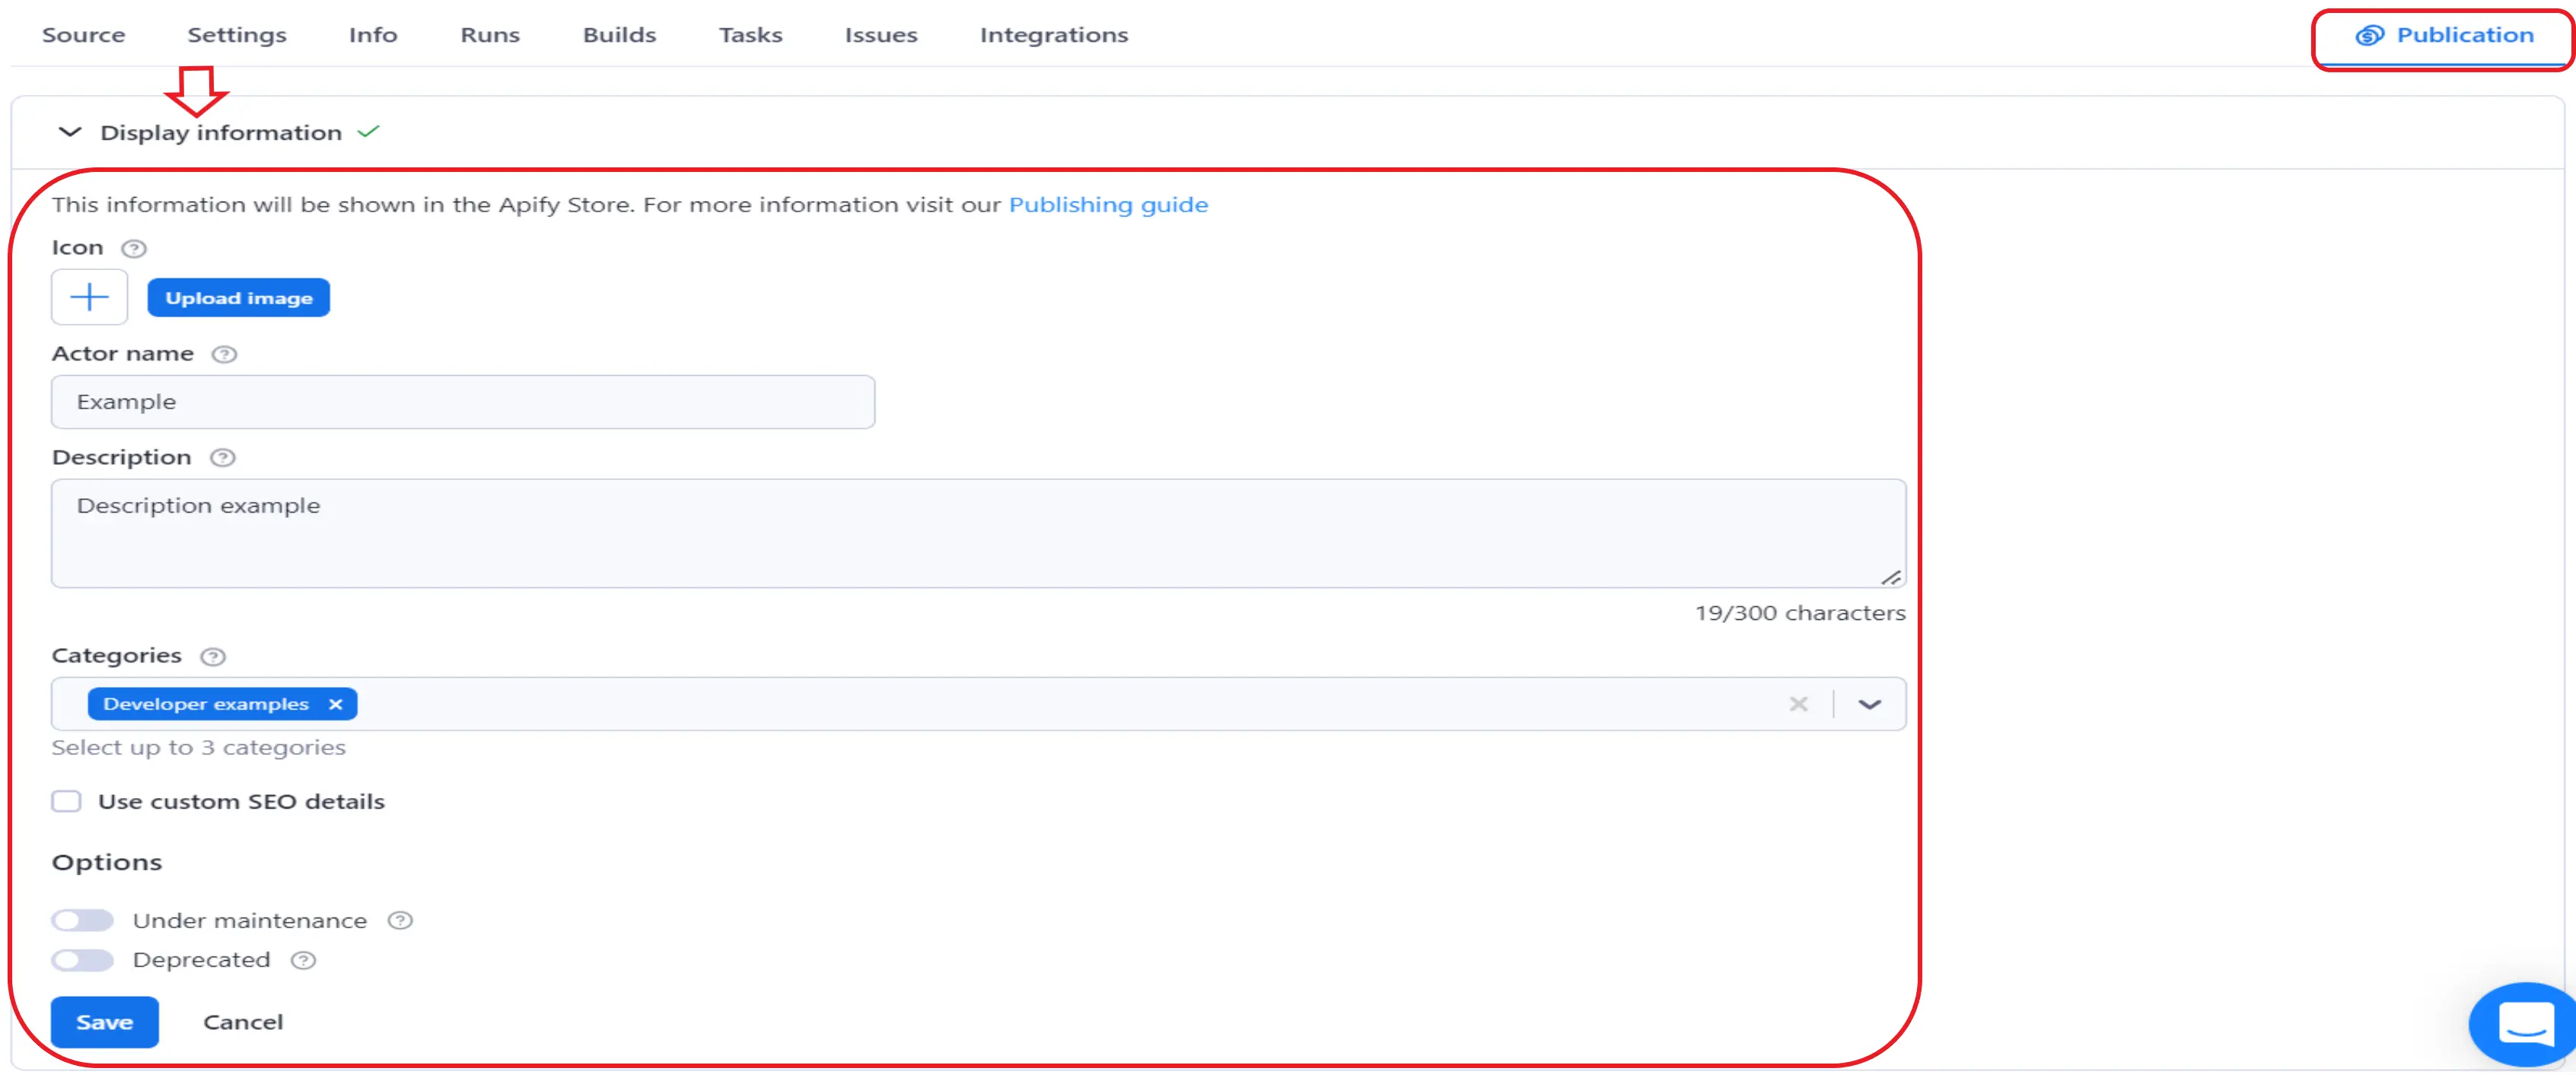
After filling in all the required fields, the Publish to Store button will turn green. Click on it to make your Actor available to the public on Apify Store.

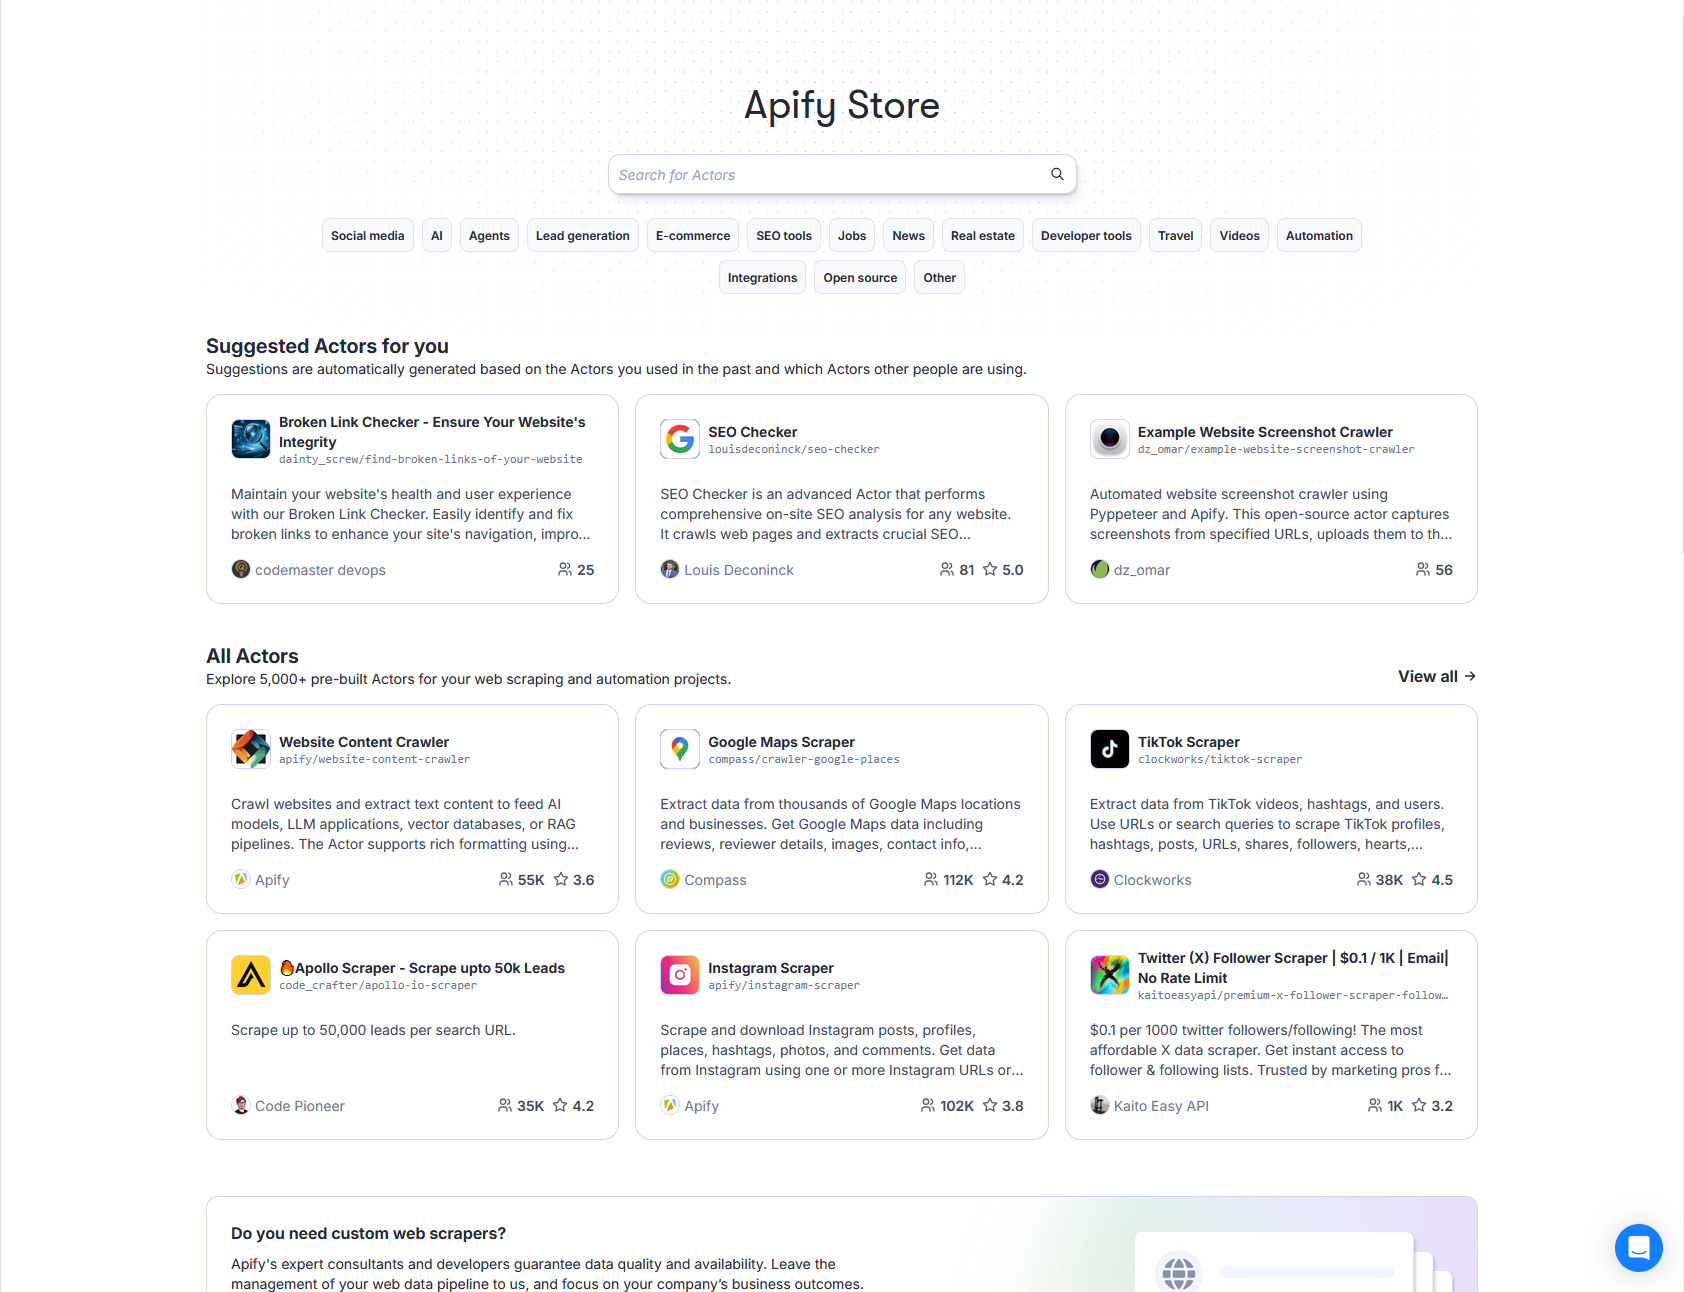
To verify that your Actor has been published successfully, go to the Apify Store, search for your Actor's name. Click on your Actor's card, to view its dedicated page. This is the page where users will likely have their first interaction with your Actor, so carefully review it and ensure everything is set up correctly.
Logo
We strongly recommend adding a unique image to your Actor that visually represents the service it provides. This helps users quickly understand its purpose. However, do not use official logos or branded images from the sites you're scraping, as this can lead to copyright or trademark issues.
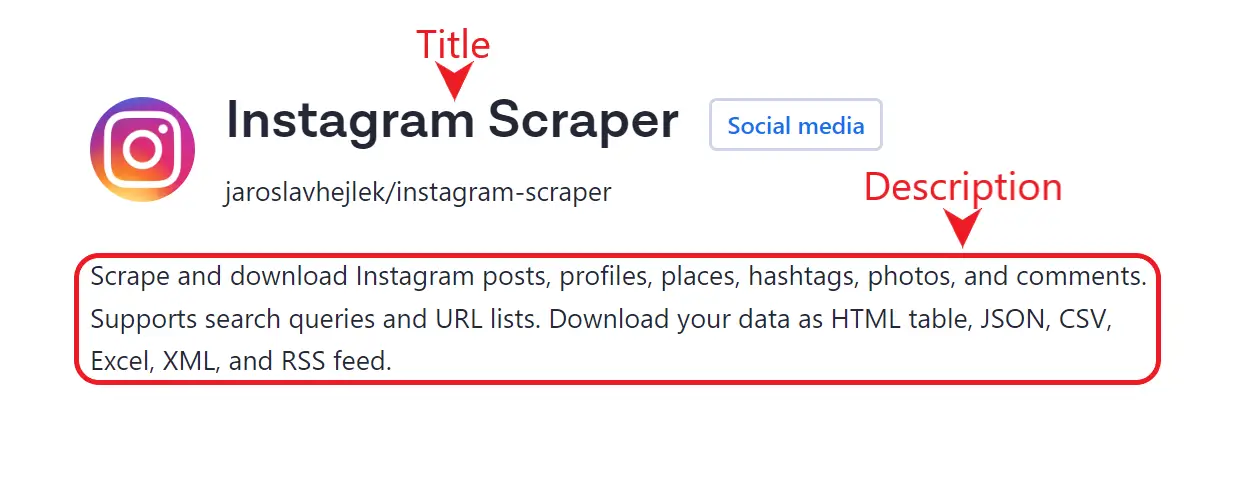
Description
The Actor's description is a short paragraph that explains its purpose. It will be displayed on the Actor's page, right below its title.
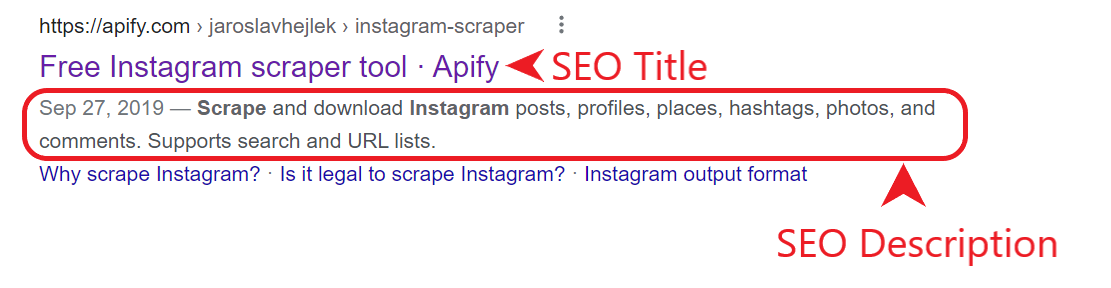
When writing your Actor's description, you also have the option to provide an SEO title & description. These will be used in search engine result pages instead of Actor's name & description. Effective SEO titles & descriptions should:
- Utilize popular keywords related to your Actor's functionality
- Summarize the Actor's purpose concisely
- Be between 40 to 50 characters for the title and 140 to 156 characters for description
README
The next step is to include a comprehensive README detailing your Actor's features, reasons for scraping the target website, and instructions on how to use the Actor effectively.
Remember that the Actor's README is generated from your README.md file, and you can apply the same SEO principles mentioned earlier to optimize you README for search engines.
To save time when writing your Actor's README, you can use the following template as a starting point:
https://github.com/zpelechova/readme-template
Note that the complexity of your README should match the complexity of your Actor. Feel free to adapt the template to fit your Actor's specific requirements.
Source code visibility
When you publish an Actor, its source code files and non-secret environment variables are publicly visible by default on the Actor detail page.
To hide them, go to your Actor's Settings tab in Apify Console and check Hide source files from Actor detail. Secret environment variables are never exposed regardless of this setting.