Actor permissions
Every time a user runs your Actor, it runs under their Apify account. Actor permissions define the level of access your Actor needs to run. This gives users transparency and control over what data your Actor can access, building trust in your tools.
Permission levels
Your Actors can request two levels of access:
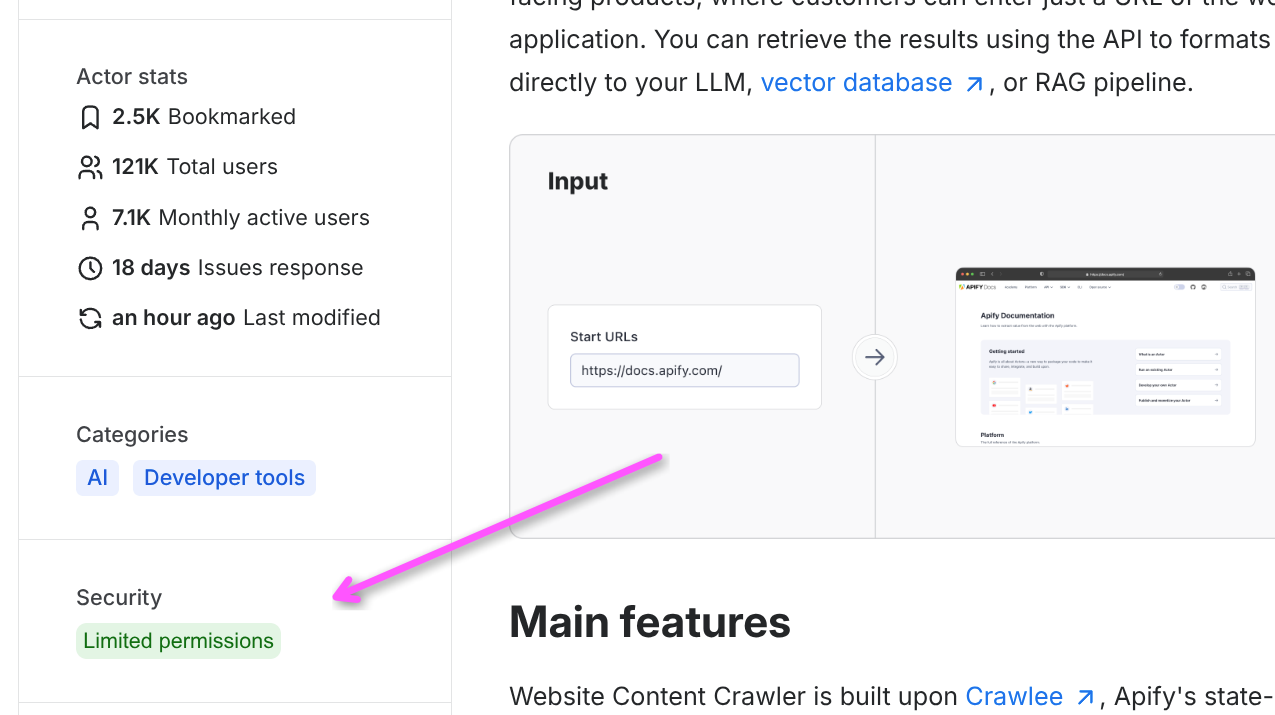
- Limited permissions (default): Actors with this permission level have restricted access, primarily to their own storages and the data they generate. They cannot access other user data on the Apify platform.
- Full permissions: This level grants an Actor access to all of a user's Apify account data.
Most Actors should use limited permissions to request only the specific access they need and reserve full permissions for exceptional cases where the Actor cannot function otherwise.
How Actor permissions work
When a user runs an Actor, it receives an Apify API token. This token is injected to the Actor's runtime and has a scope of access as requested by the Actor's permission level.
Actors with Full permissions receive a token that grants complete access to the user's Apify account via the Apify API.
Actors with Limited permissions receive a restricted scoped token. This token only allows the Actor to perform a specific set of actions, which covers the vast majority of common use cases.
A limited-permission Actor can:
- Read and write to its default storages.
- Create any additional storage, and write to that storage.
- Read and write to storages created in previous runs.
- Update the current run's status or abort the run.
- Metamorph to another Actor with limited permissions.
- Read and write to storages provided via Actor input (for example, when the user provides a dataset that the Actor should write into).
- Read basic user information from the environment (whether the user is paying, their proxy password, or public profile).
- Run any other Actor with limited permissions and obtain the results.
This approach ensures your Actor has everything it needs to function while protecting user data from unnecessary exposure.
To learn how to migrate your Actors to run under limited permissions, check out the Migration guide.
Configure Actor permissions level
New Actors use limited permissions by default. Older Actors might still use full permissions until you update their configuration.
To configure the permission level for your Actor:
- Log in to Apify Console.
- In the left-side panel, go to Development > My Actors.
- From the table, select the Actor you want to configure.
- Go to the Settings tab.
- In the Actor permissions section, use the dropdown to select the right permission level.

If you choose to switch your existing Actor in Store from limited to full permissions, your users won't be able to run the Actor until they approve it. It means that any existing schedules or integrations will immediately stop working.
End-user experience
Users see a visible permission badge on your Actor's Store page and Actor detail page indicating whether it requires Limited permissions or Full permissions.
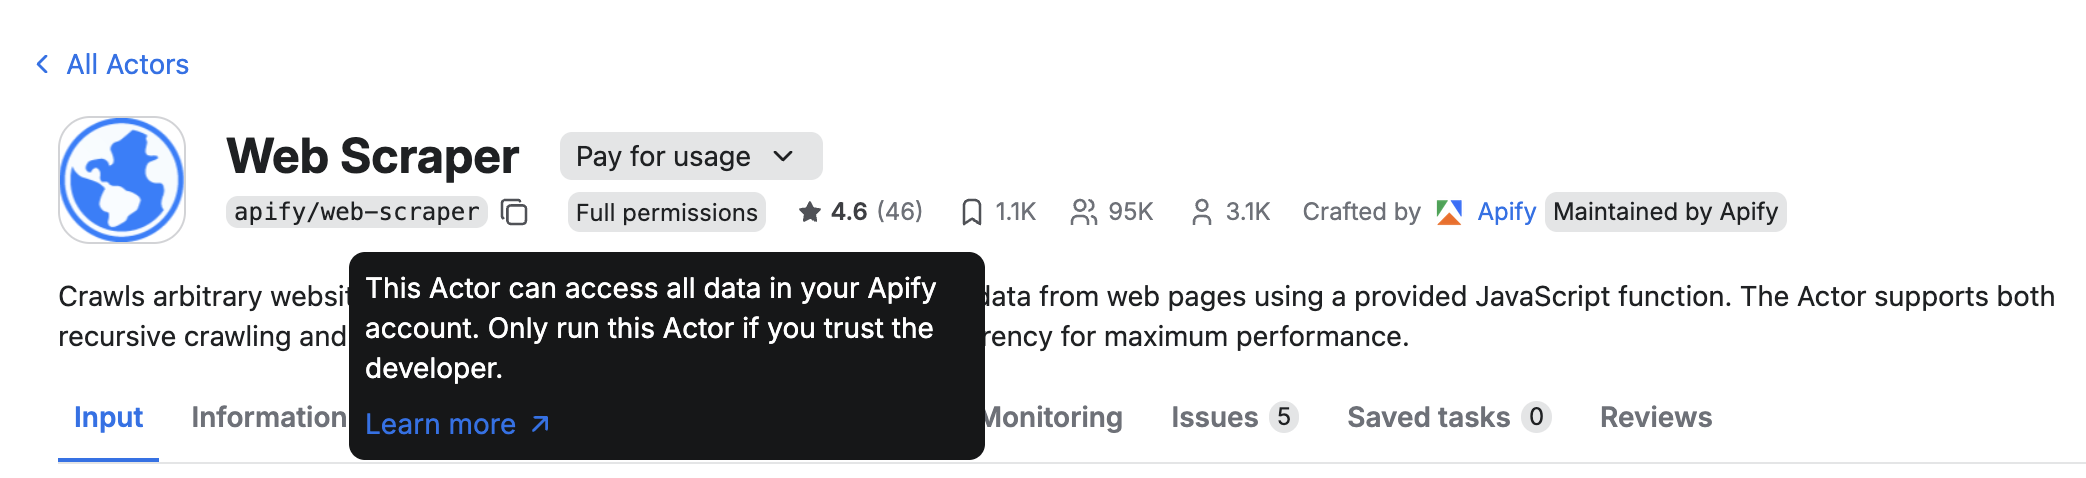
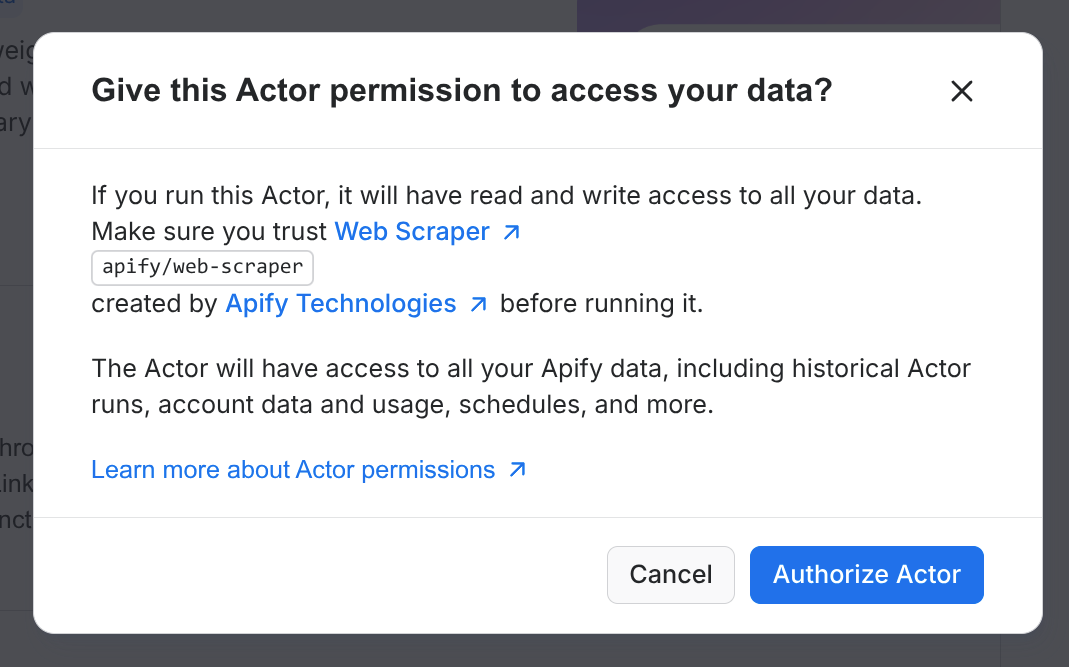
Moreover, when users run a full-permission Actor for the first time, they need to explicitly approve the Actor's permissions in Console. This applies even when the Actor is executed via MCP, CLI, or API, which makes Actors with full permissions less suitable for fully autonomous AI workflows.
When possible, design your Actors to use limited permissions and request only the access they truly need. Actors requiring full permissions may receive a lower Actor Quality score, which can reduce their ranking in Apify Store, and in some situations (autonomous agent workflows) they might even be excluded from search results.
Access user provided storages
By default, limited-permissions Actors can't access user storages. However, they can access storages that users explicitly provide via the Actor input. To do so, use the input schema to add a storage picker and declare exactly which operations your Actor needs.
- Add a field with
editor: "resourcePicker". - Set
resourceTypeto one ofdataset,keyValueStore, orrequestQueue. - Specify
resourcePermissionswith the minimal required scope:"READ"or"READ", "WRITE".
Actors running under full permissions are assumed to have full (i.e. read/write/manage) access to user storages. In that case the resourcePermissions field does not have to be set.
Example input schema field (single resource):
{
  "title": "Output dataset",
  "type": "string",
  "editor": "resourcePicker",
  "resourceType": "dataset",
  "resourcePermissions": ["READ", "WRITE"]
}
Selecting multiple resources:
- Use
type: "array"to let users choose more than one storage. - Each selected resource will have the same
resourcePermissions.
{
  "title": "Source datasets",
  "type": "array",
  "editor": "resourcePicker",
  "resourceType": "dataset",
  "resourcePermissions": ["READ"],
  "minItems": 1
}
Behavior at run time:
- The user’s selection is injected into the run input, and the run token is expanded to allow only the requested operations on the selected storages.
- If your code attempts an operation not covered by
resourcePermissions(for example, writing with onlyREAD), the platform returns an insufficient-permissions error.
See the full input schema reference for details.
Request full permissions
Designing your Actors to work under limited permissions is the recommended approach, it helps improve your Actor Quality score and increases user trust and adoption. However, some use cases do legitimately require broader access to user data (e.g., to perform administrative tasks or orchestrate other Actors). If your Actor falls in this category or cannot function with limited permissions for another reason:
- Explain why you need full permissions in your Actor's README. This will help keep user trust and set correct user expectations.
- Set the permission level in the Actor’s Settings in Console to Full permissions.
- Be aware of the UX implications and impact on Actor Quality score for full-permission Actors.
If you cannot migrate to limited permissions or have a use case that should work under limited permissions but does not, contact support or ask on the community forum.