Microsoft Power Automate integration
Microsoft Power Automate is an automation platform where you build flows, automated workflows that connect your apps through no-code connectors. The Apify connector lets you run Apify Actors and tasks inside your flows. It can also start a flow when a run finishes and read the scraped results from Apify storage.
This integration uses a third-party service. If you find outdated content, please submit an issue on GitHub.
Prerequisites
To use the Apify integration with Power Automate, you need:
- An Apify account
- A Power Automate account on a plan that includes premium connectors
Find the Apify connector
Apify publishes the connector in the Power Automate connector library.
Power Automate lists the Apify connector as a premium connector, so your plan must include premium connectors. It also labels the connector as preview.
- Sign in to Power Automate.
- Open the Connectors page. If Connectors isn't in the navigation menu, select More, then Discover all, and find Connectors under Data.
- Search for Apify.
- Select the Apify connector to see the triggers and actions it provides.
Connect your Apify account
Before you can use the Apify connector in a flow, create a connection that authorizes Power Automate to call the Apify API on your behalf.
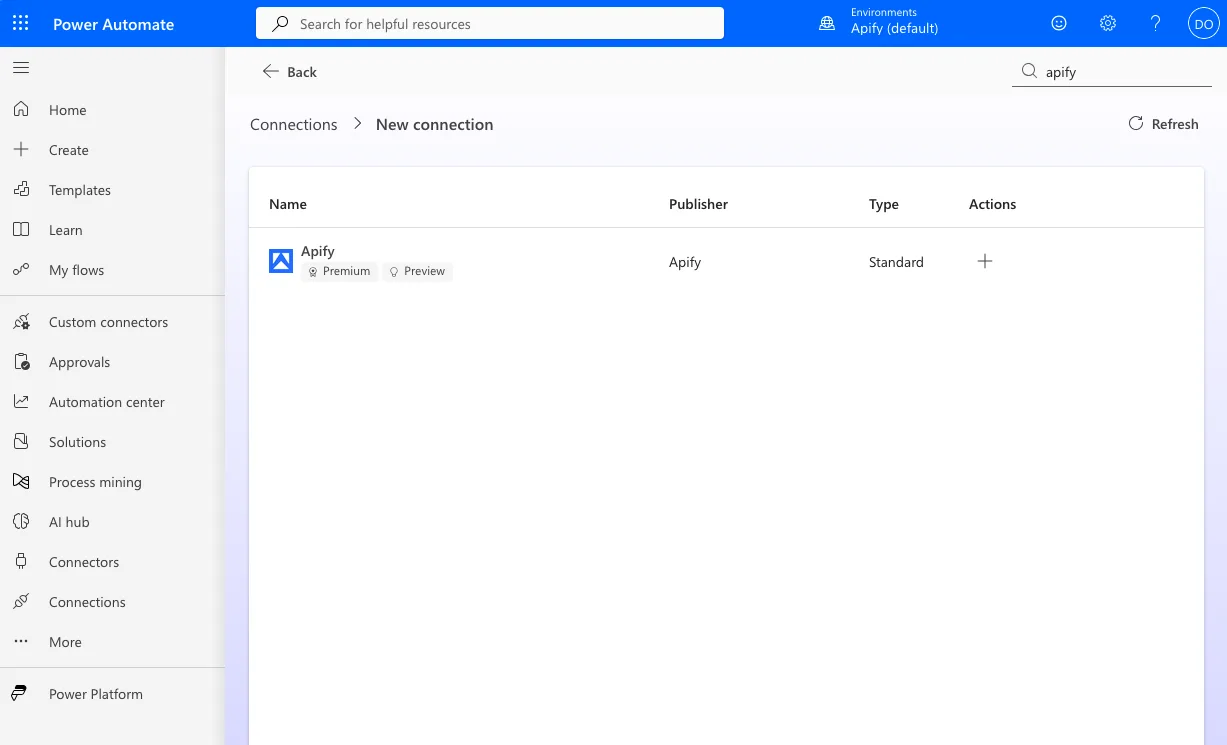
Power Automate prompts you to create a connection the first time you add an Apify trigger or action. You can also create one ahead of time from the Connections page: select New connection, search for Apify, and select the Apify connector.
Authenticate with OAuth 2.0
The Apify connector authenticates with OAuth 2.0. It doesn't accept an API token.
- Select Sign in.
- Sign in to Apify Console in the window that opens.
- Authorize the connector. It requests two scopes:
profileto read your account detailsfull_api_accessto run Actors and tasks, read datasets and key-value stores, and manage webhooks
After you authorize, Power Automate returns to the Connections page and the connection shows as Connected.
Create your first flow
A flow starts with a trigger (an event that starts the flow) and continues with one or more actions (operations to perform). You can combine Apify triggers and actions with any other Power Automate connector.
Select resources and provide input
Most Apify triggers and actions let you pick a resource from a dropdown populated from your Apify account. For the Actor-based operations, Select Actor from controls what the Actor dropdown lists:
- Recently used Actors lists Actors you have run recently.
- Apify Store Actors lists Actors from Apify Store.
- Enter custom value lets you type an Actor ID or name directly.
Actor and task input is JSON. Run Actor takes the full input object in Input Body (JSON). Run task takes an optional JSON object that overrides fields in the task's saved input.
Open the Actor or task Input page in Apify Console, switch the format to JSON, and copy the content. Replace the placeholder with your own ID:
https://console.apify.com/actors/<your-actor-id>/inputhttps://console.apify.com/actors/tasks/<your-task-id>/input
Where to find resource identifiers
When you use Enter custom value instead of a dropdown, you need the resource's identifier. Actors and tasks accept either an ID or a name in owner/name form, for example apify/website-content-crawler. Type the name directly instead of looking up the ID. Find the other identifiers in Apify Console:
- Actor: Actors > Actor detail > API panel, or the URL
https://console.apify.com/actors/<actorId> - Task: Tasks > task detail > API panel, or the URL
https://console.apify.com/actors/tasks/<taskId> - Dataset: Storage > Datasets > dataset detail > API panel, or the table on the Datasets page
- Key-value store: Storage > Key-value stores > store detail > API panel, or the table on the Key-value stores page
Triggers
A trigger starts your flow when a run finishes in your Apify account. When you save a flow that uses an Apify trigger, the connector creates a webhook on your Apify account.
Four separate Yes/No fields control which run statuses fire the flow: Trigger On Run Succeeded, Trigger On Run Failed, Trigger On Run Timed Out, and Trigger On Run Aborted. Set each to Yes for the statuses you want.
Turning off or deleting a flow doesn't remove the webhook it created on Apify. To stop unused webhooks from accumulating, open the Actor in Apify Console, go to its Integrations tab, and delete the webhook whose URL points at the flow you removed.
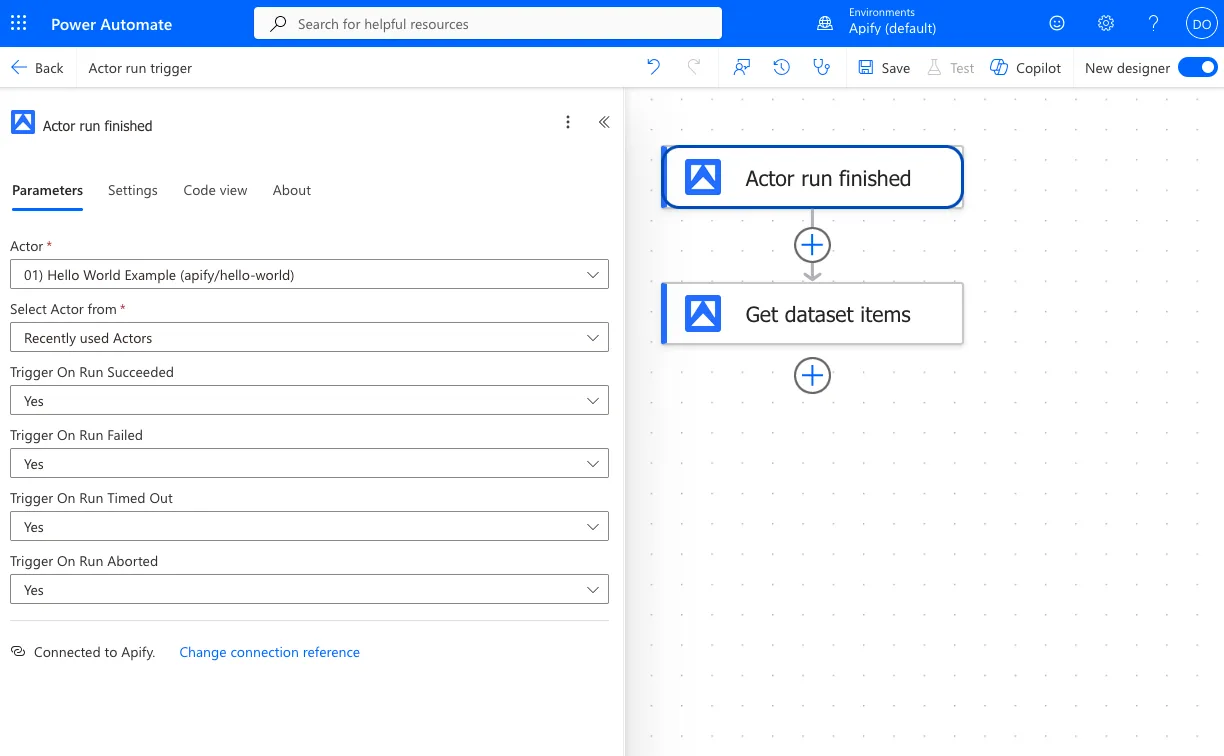
Actor run finished
Starts the flow when a run of the selected Actor finishes with one of the statuses you enabled.
- Actor: select the Actor to watch.
- Select Actor from: choose whether the Actor dropdown lists recently used Actors, Apify Store Actors, or a value you type.
- Trigger On Run Succeeded, Trigger On Run Failed, Trigger On Run Timed Out, Trigger On Run Aborted: set the statuses that fire the flow.
The trigger passes the finished run's webhook payload to the next step, including the run ID and the IDs of its default dataset and key-value store.
Actor task finished
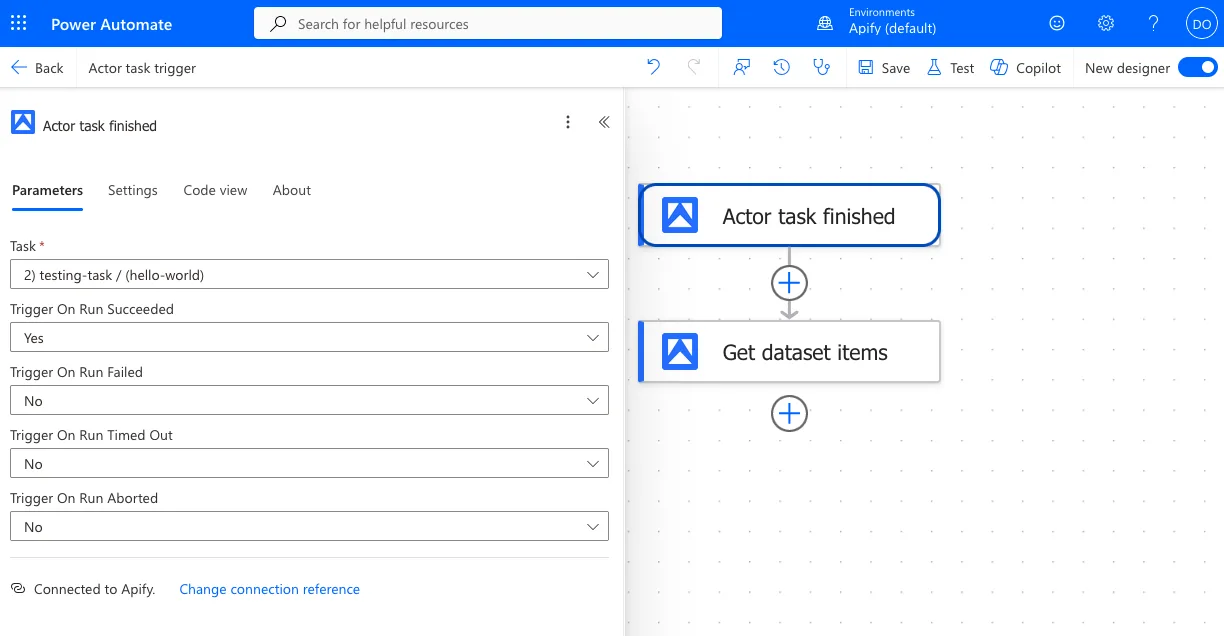
Starts the flow when a run of the selected task finishes with one of the statuses you enabled.
- Task: select the task to watch.
- Trigger On Run Succeeded, Trigger On Run Failed, Trigger On Run Timed Out, Trigger On Run Aborted: set the statuses that fire the flow.
Use this trigger for scheduled or recurring jobs, where the input is already saved in the task.
Actions
The Apify connector provides the following actions.
Run Actor
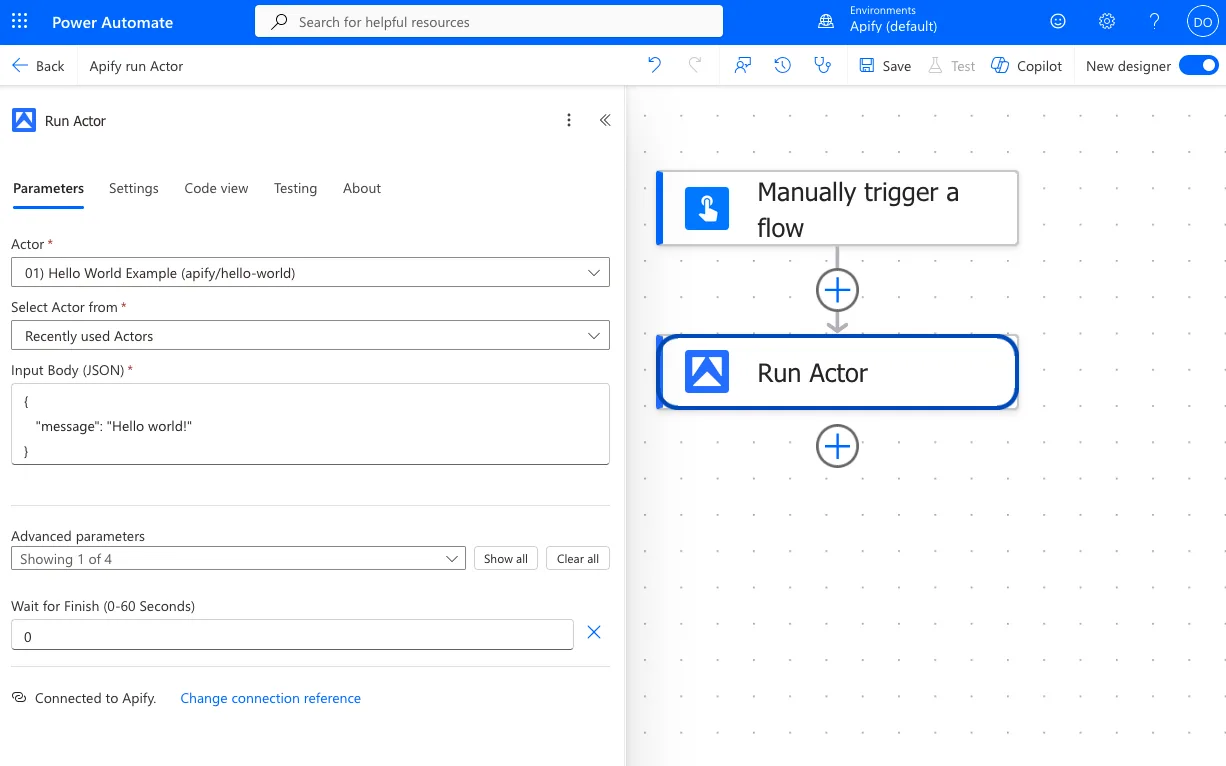
Starts a run of the selected Actor.
- Actor: select the Actor to run.
- Select Actor from: choose whether the Actor dropdown lists recently used Actors, Apify Store Actors, or a value you type.
- Input Body (JSON): enter the Actor's input as a JSON object.
- Advanced parameters: select Show all to reveal the run options.
- Wait for Finish: enter the number of seconds to wait for the run to finish, up to 60. Set it to
0to start the run and continue immediately. - Build: specify a build tag or ID. Defaults to the Actor's
latestbuild. - Timeout: set the run timeout in seconds.
- Memory: set the memory allocated to the run, in MB.
- Wait for Finish: enter the number of seconds to wait for the run to finish, up to 60. Set it to
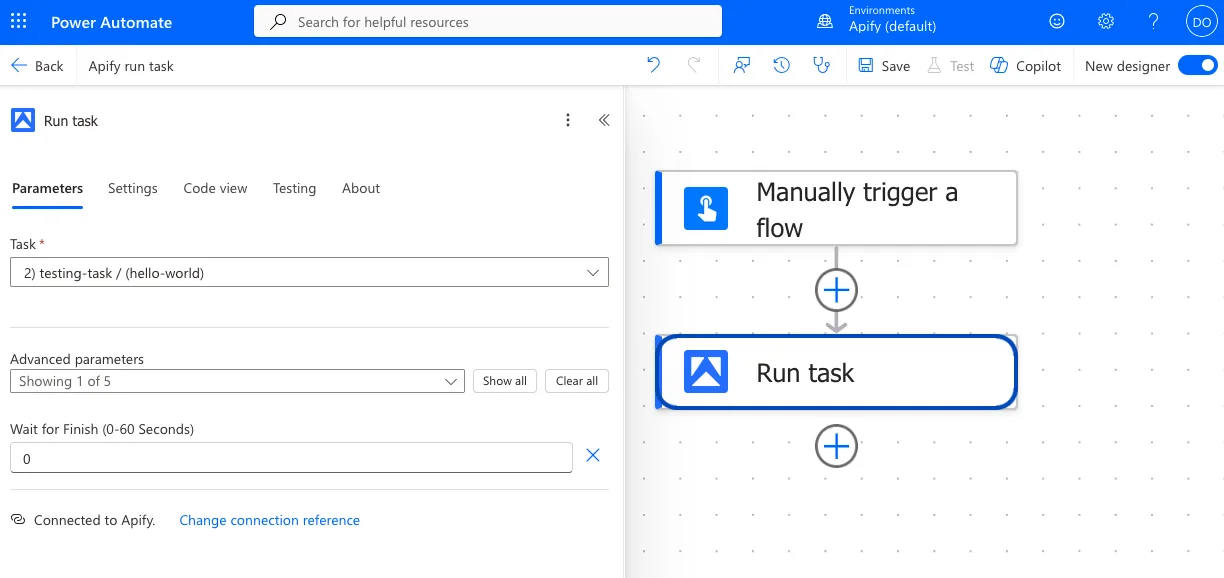
Run task
Starts a run of the selected task, optionally overriding its saved input.
- Task: select the task to run.
- Advanced parameters: select Show all to reveal the input override and run options.
- Input Body (JSON): enter a JSON object that overrides fields in the task's saved input. Leave it empty to run the task as saved.
- Wait for Finish: enter the number of seconds to wait for the run to finish, up to 60. Set it to
0to start the run and continue immediately. - Build: specify a build tag or ID.
- Timeout: set the run timeout in seconds.
- Memory: set the memory allocated to the run, in MB.
Get dataset items
Retrieves items from a dataset.
- Dataset: select the dataset to read.
- Advanced parameters: select Show all to reveal pagination.
- Limit: set the maximum number of items to return.
- Offset: set the number of items to skip.
The action returns an array of items. The connector samples the dataset to infer a schema, so the item fields appear as dynamic content in later steps.
Get key-value store record
Retrieves a single record from a key-value store.
- Store: select the key-value store to read.
- Key: select the record's key. The dropdown lists the keys in the selected store.
The action returns the record's content along with its Content-Type, so it handles both text records and binary ones, such as screenshots.
Scrape single URL
Scrapes one page with the Website Content Crawler Actor, without you assembling the Actor input yourself.
- URL to Scrape: enter the full URL of the page.
- Crawler Type: select the crawling engine.
- Adaptive (Recommended): switches between a browser and raw HTTP.
- Firefox: renders JavaScript in a full browser, which handles sites that block other crawler types.
- Cheerio: uses a raw HTTP client, which is faster but doesn't run JavaScript.
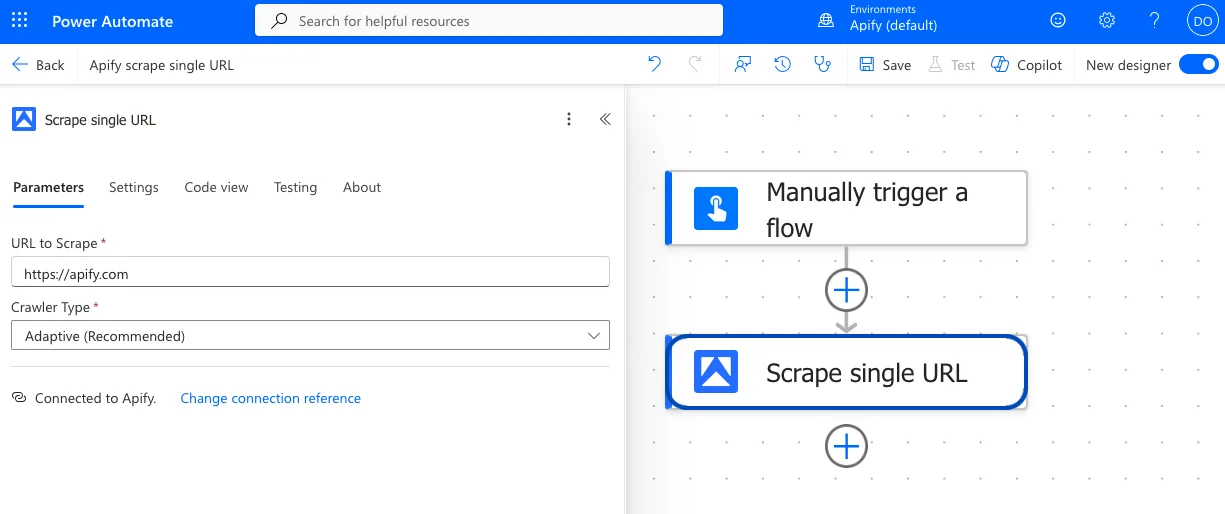
This action starts the Actor and returns the run details right away, not the scraped page. To use the content, either react to the run in a second flow with the Actor run finished trigger, or poll for it as described in Handle long-running scrapes.
Handle long-running scrapes
If a run finishes within a minute, set Wait for Finish to 60 in Run Actor or Run task. The action waits for the run and returns it with a final status, so you need neither of the patterns below.
Wait for Finish accepts at most 60 seconds, so a longer run won't have finished when the action returns. Start such runs asynchronously and collect the results separately: set Wait for Finish to 0 in Run Actor or Run task, then use one of the two patterns below.
React to the finished run in a second flow
Build a second flow that starts with the Actor run finished or Actor task finished trigger, and add Get dataset items to it. Apify calls that flow when the run finishes, so nothing waits or polls. Prefer this pattern.
Poll for the result in one flow
This keeps everything in a single flow, at the cost of more steps:
- Add Run Actor or Run task and set Wait for Finish to
0. - Add Initialize variable, set Type to Array, and leave the value empty.
- Add a Do until loop that stops when the variable is no longer empty.
- Inside the loop:
- Add Get dataset items and set Dataset to the dataset ID from the run output.
- Add Set variable and set it to the items collection from Get dataset items, not the whole action output.
- Add Delay and set it to around 10 seconds, so the loop doesn't burn through its iterations.
- After the loop, check that the variable isn't empty, then use it in the rest of the flow.
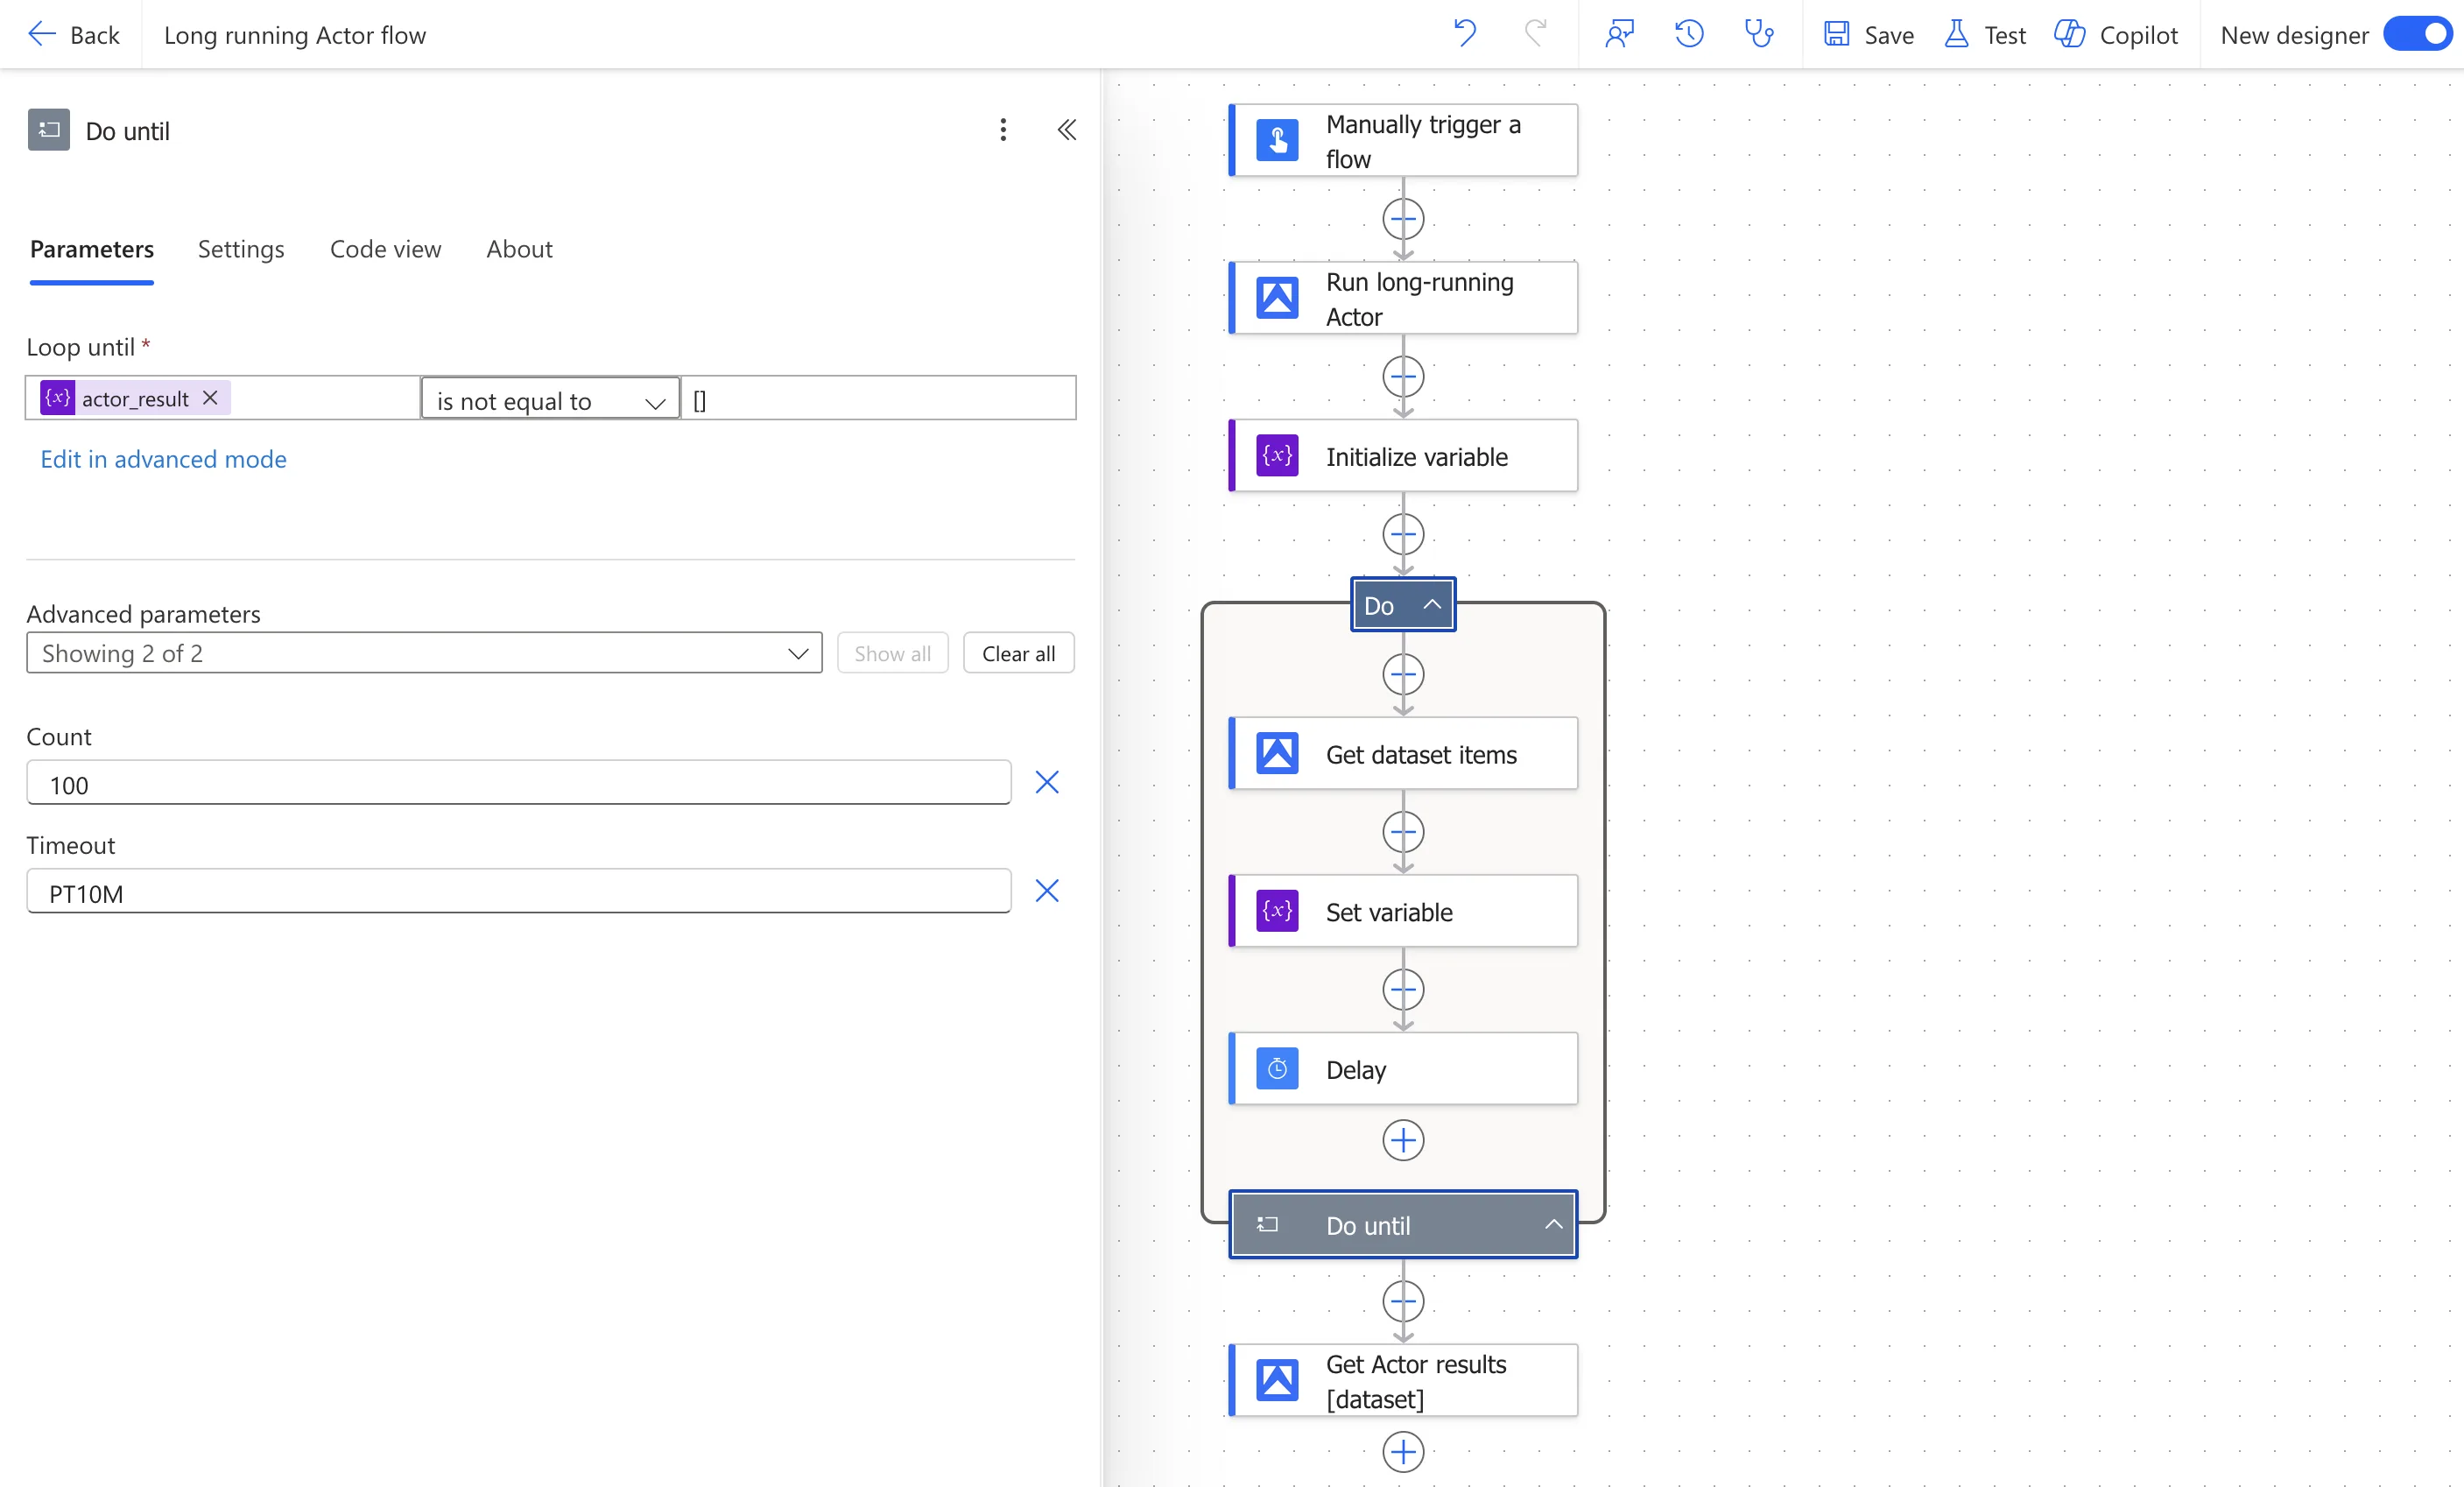
The loop stops when Get dataset items returns at least one item, not when the run finishes. An Actor that writes items as it goes can exit the loop with a partial dataset. An Actor that returns no items keeps polling until Count or Timeout, and the loop still succeeds, so check that the variable isn't empty before you use it.
Example use cases
- Run a price scraper on a schedule and post to Microsoft Teams when a price drops.
- Scrape company websites and write the results to a SharePoint list or to Dynamics 365.
- Watch competitor pages for changes and log them to Excel.
- Scrape a directory, filter the results, and create leads in your CRM.
Tips and best practices
- Use a trigger rather than Wait for Finish for any Actor that runs longer than a minute.
- Map dataset item fields to Excel columns, SharePoint list fields, or database rows through Power Automate's dynamic content.
- Read large datasets in chunks with Limit and Offset instead of loading everything in one step.
- Start with the Actor's default memory and raise it only if the run needs it.
- Save a task for a scraping job you run repeatedly, then use Run task so the input lives in one place.
Troubleshooting
If a flow doesn't behave as expected, check the following.
The action times out waiting for a run
Wait for Finish caps at 60 seconds. Set it to 0 and collect the results with a trigger or a polling loop, as described in Handle long-running scrapes.
An Actor or task is missing from the dropdown
Recently used Actors only lists Actors you have already run. Run the Actor once in Apify Console, or select Enter custom value and type the Actor's owner/name.
Dataset fields are missing from dynamic content
The connector infers the dataset's schema from a sample of its items, so a field absent from the sampled items won't appear. Parse the raw JSON output instead, or make the Actor's output consistent across items.
Apify still calls a flow you deleted
Deleting a flow doesn't delete the webhook it created. Open the Actor's Integrations tab in Apify Console and delete the webhook.
Resources
For questions or help, join the Apify developer community on Discord.