GitHub Copilot desktop app integration
The GitHub Copilot desktop app is GitHub's standalone Copilot client. It runs agentic coding sessions in a chat interface, connects to your repositories, and supports plugins, skills, and Model Context Protocol (MCP) servers.
The Apify plugin for GitHub Copilot connects Copilot to Apify's library of Actors and bundles:
- The Apify MCP server for searching Apify Store, running Actors, and retrieving datasets.
- An
apifyrouting agent that picks the right tool or skill based on your prompt. - Five built-in skills for common workflows.
This guide covers installation in the GitHub Copilot desktop app.
This integration uses a third-party service. If you find outdated content, please submit an issue on GitHub.
Prerequisites
- An Apify account - sign up for free if you don't have one.
- The GitHub Copilot desktop app - installed and signed in.
Install the plugin
-
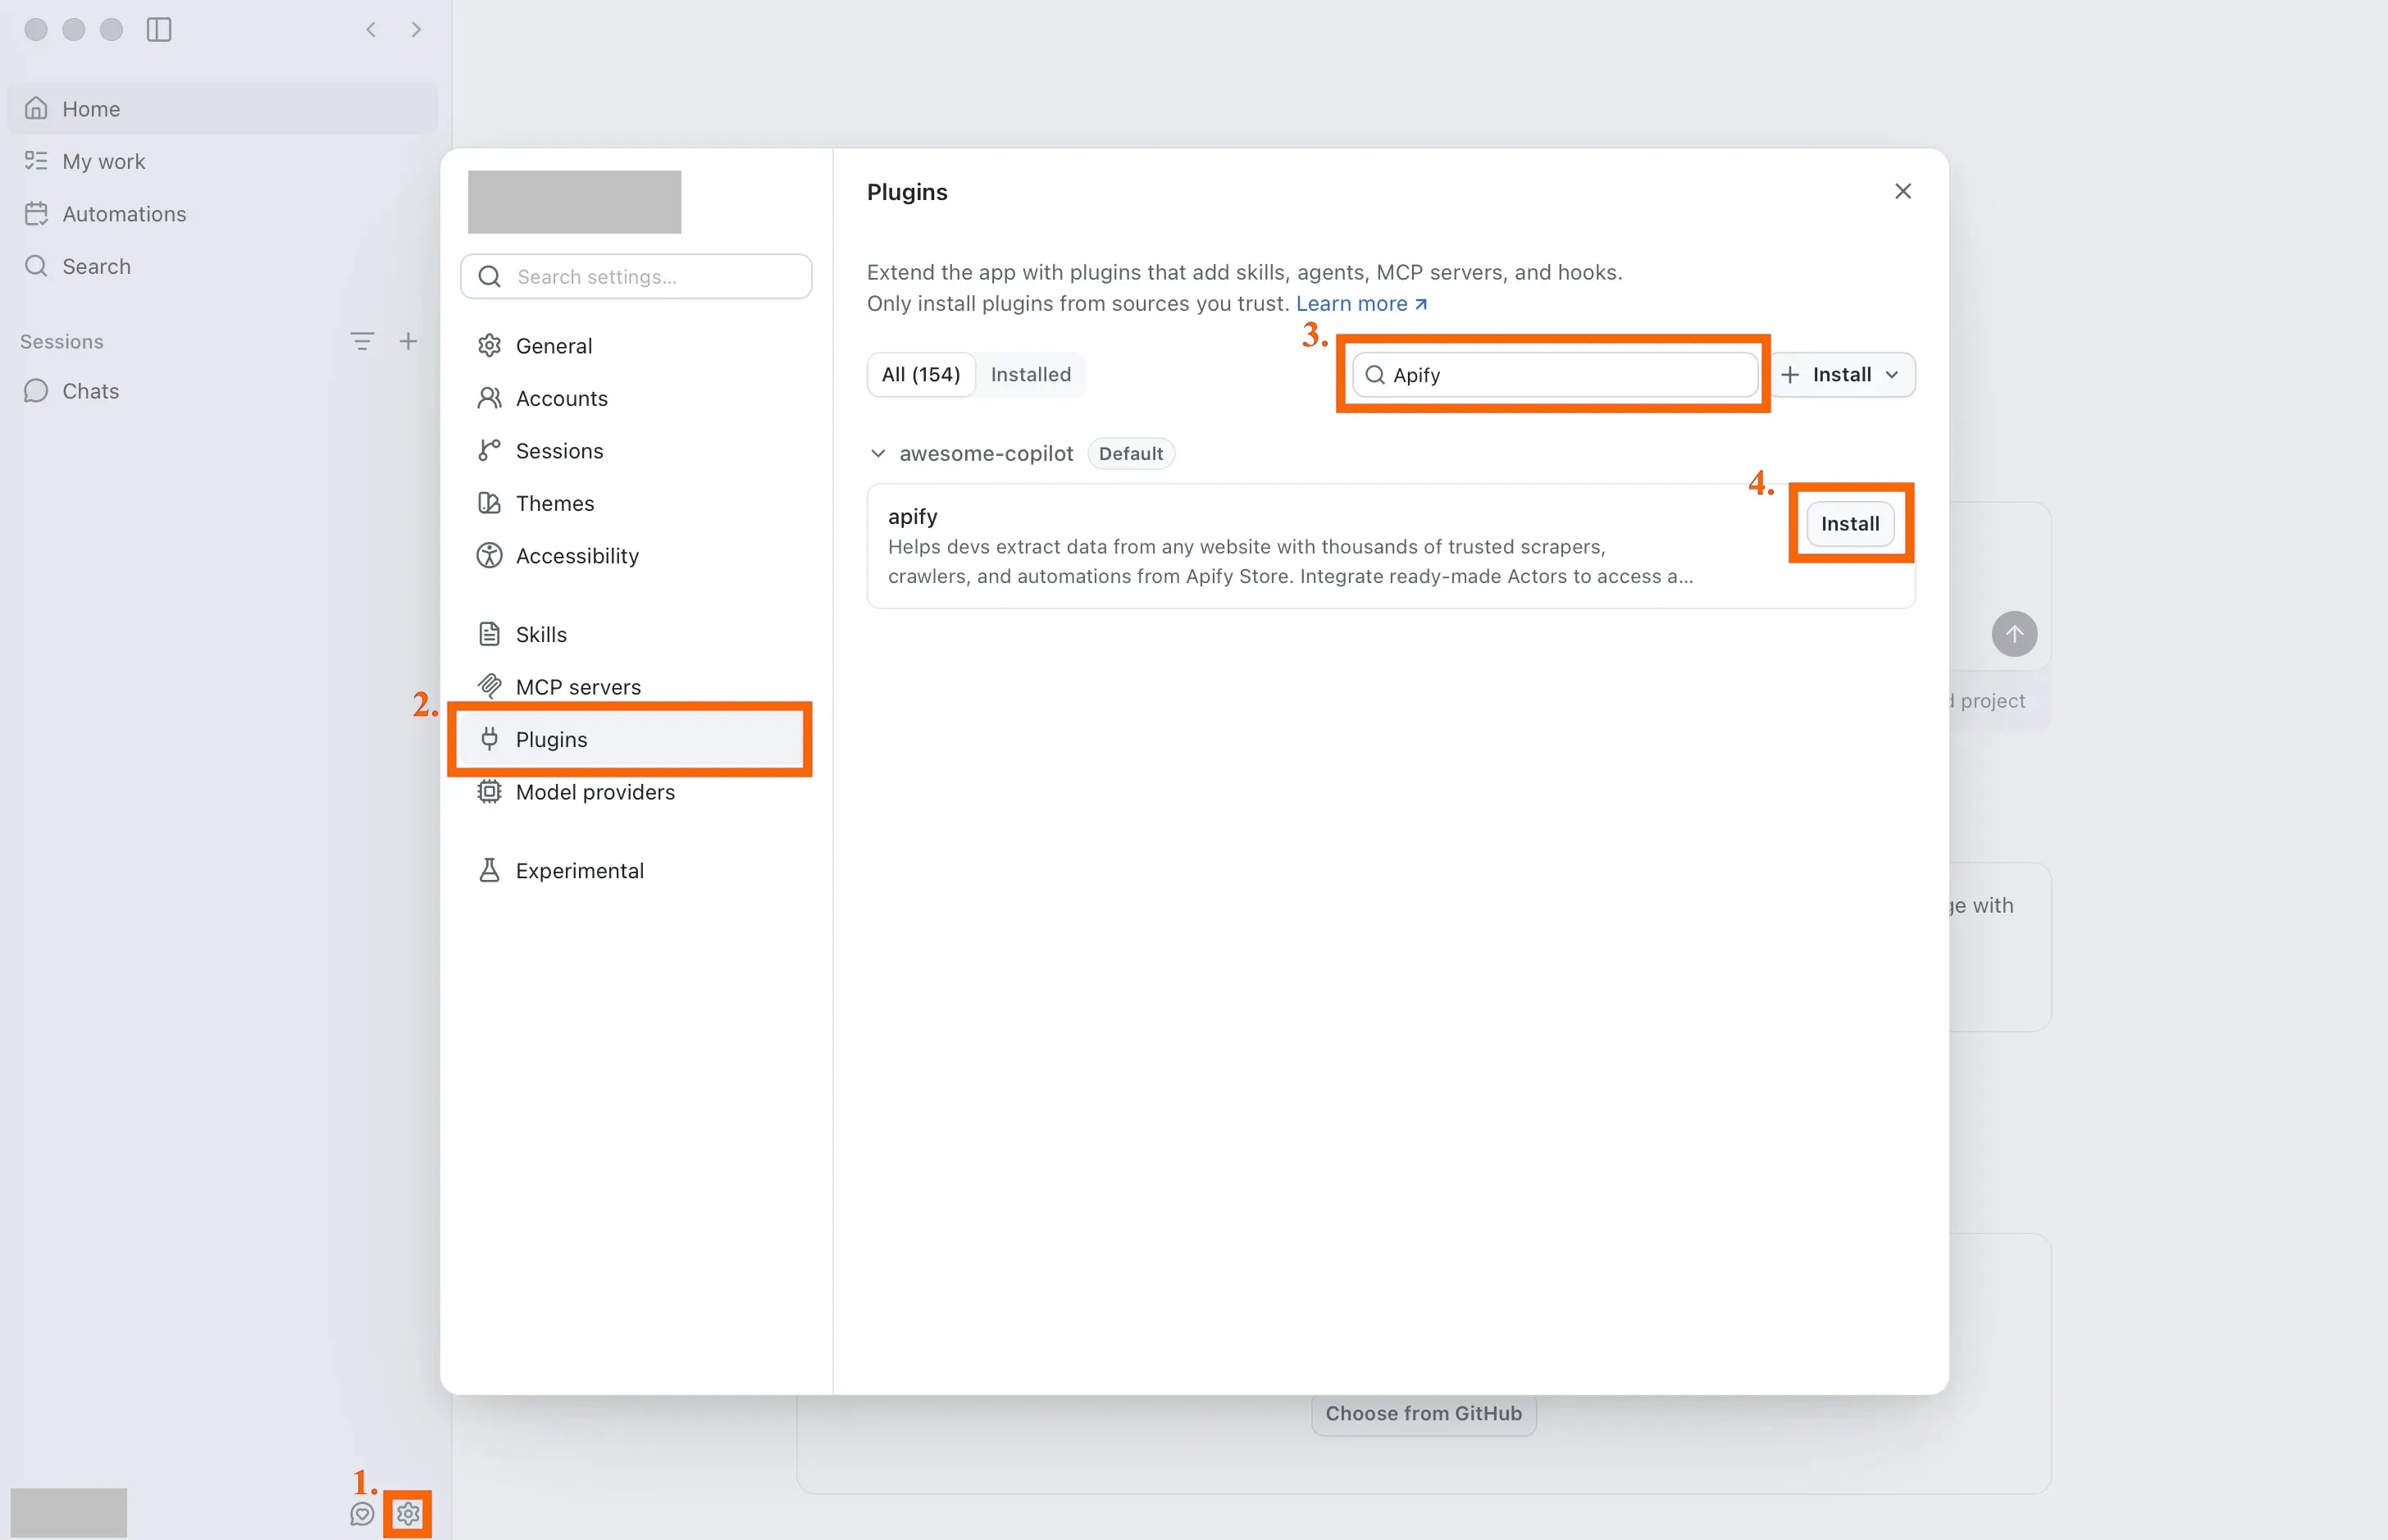
Open Settings.
-
Select the Plugins tab.
-
Search for
Apify. Theapifyplugin appears in the results, under the Awesome Copilot marketplace. -
Select Install.
-
The plugin appears under Installed with its toggle enabled.
Connect the Apify MCP server
The plugin connects to the Apify MCP server (https://mcp.apify.com/) using HTTP transport. Read-only tools like searching Apify Store and fetching Actor details work without signing in. To run Actors and access your account data, you need to authenticate.
-
Open Settings, select the MCP servers tab, and find
apify-mcp-serverwith theHTTPtransport. Select Sign in.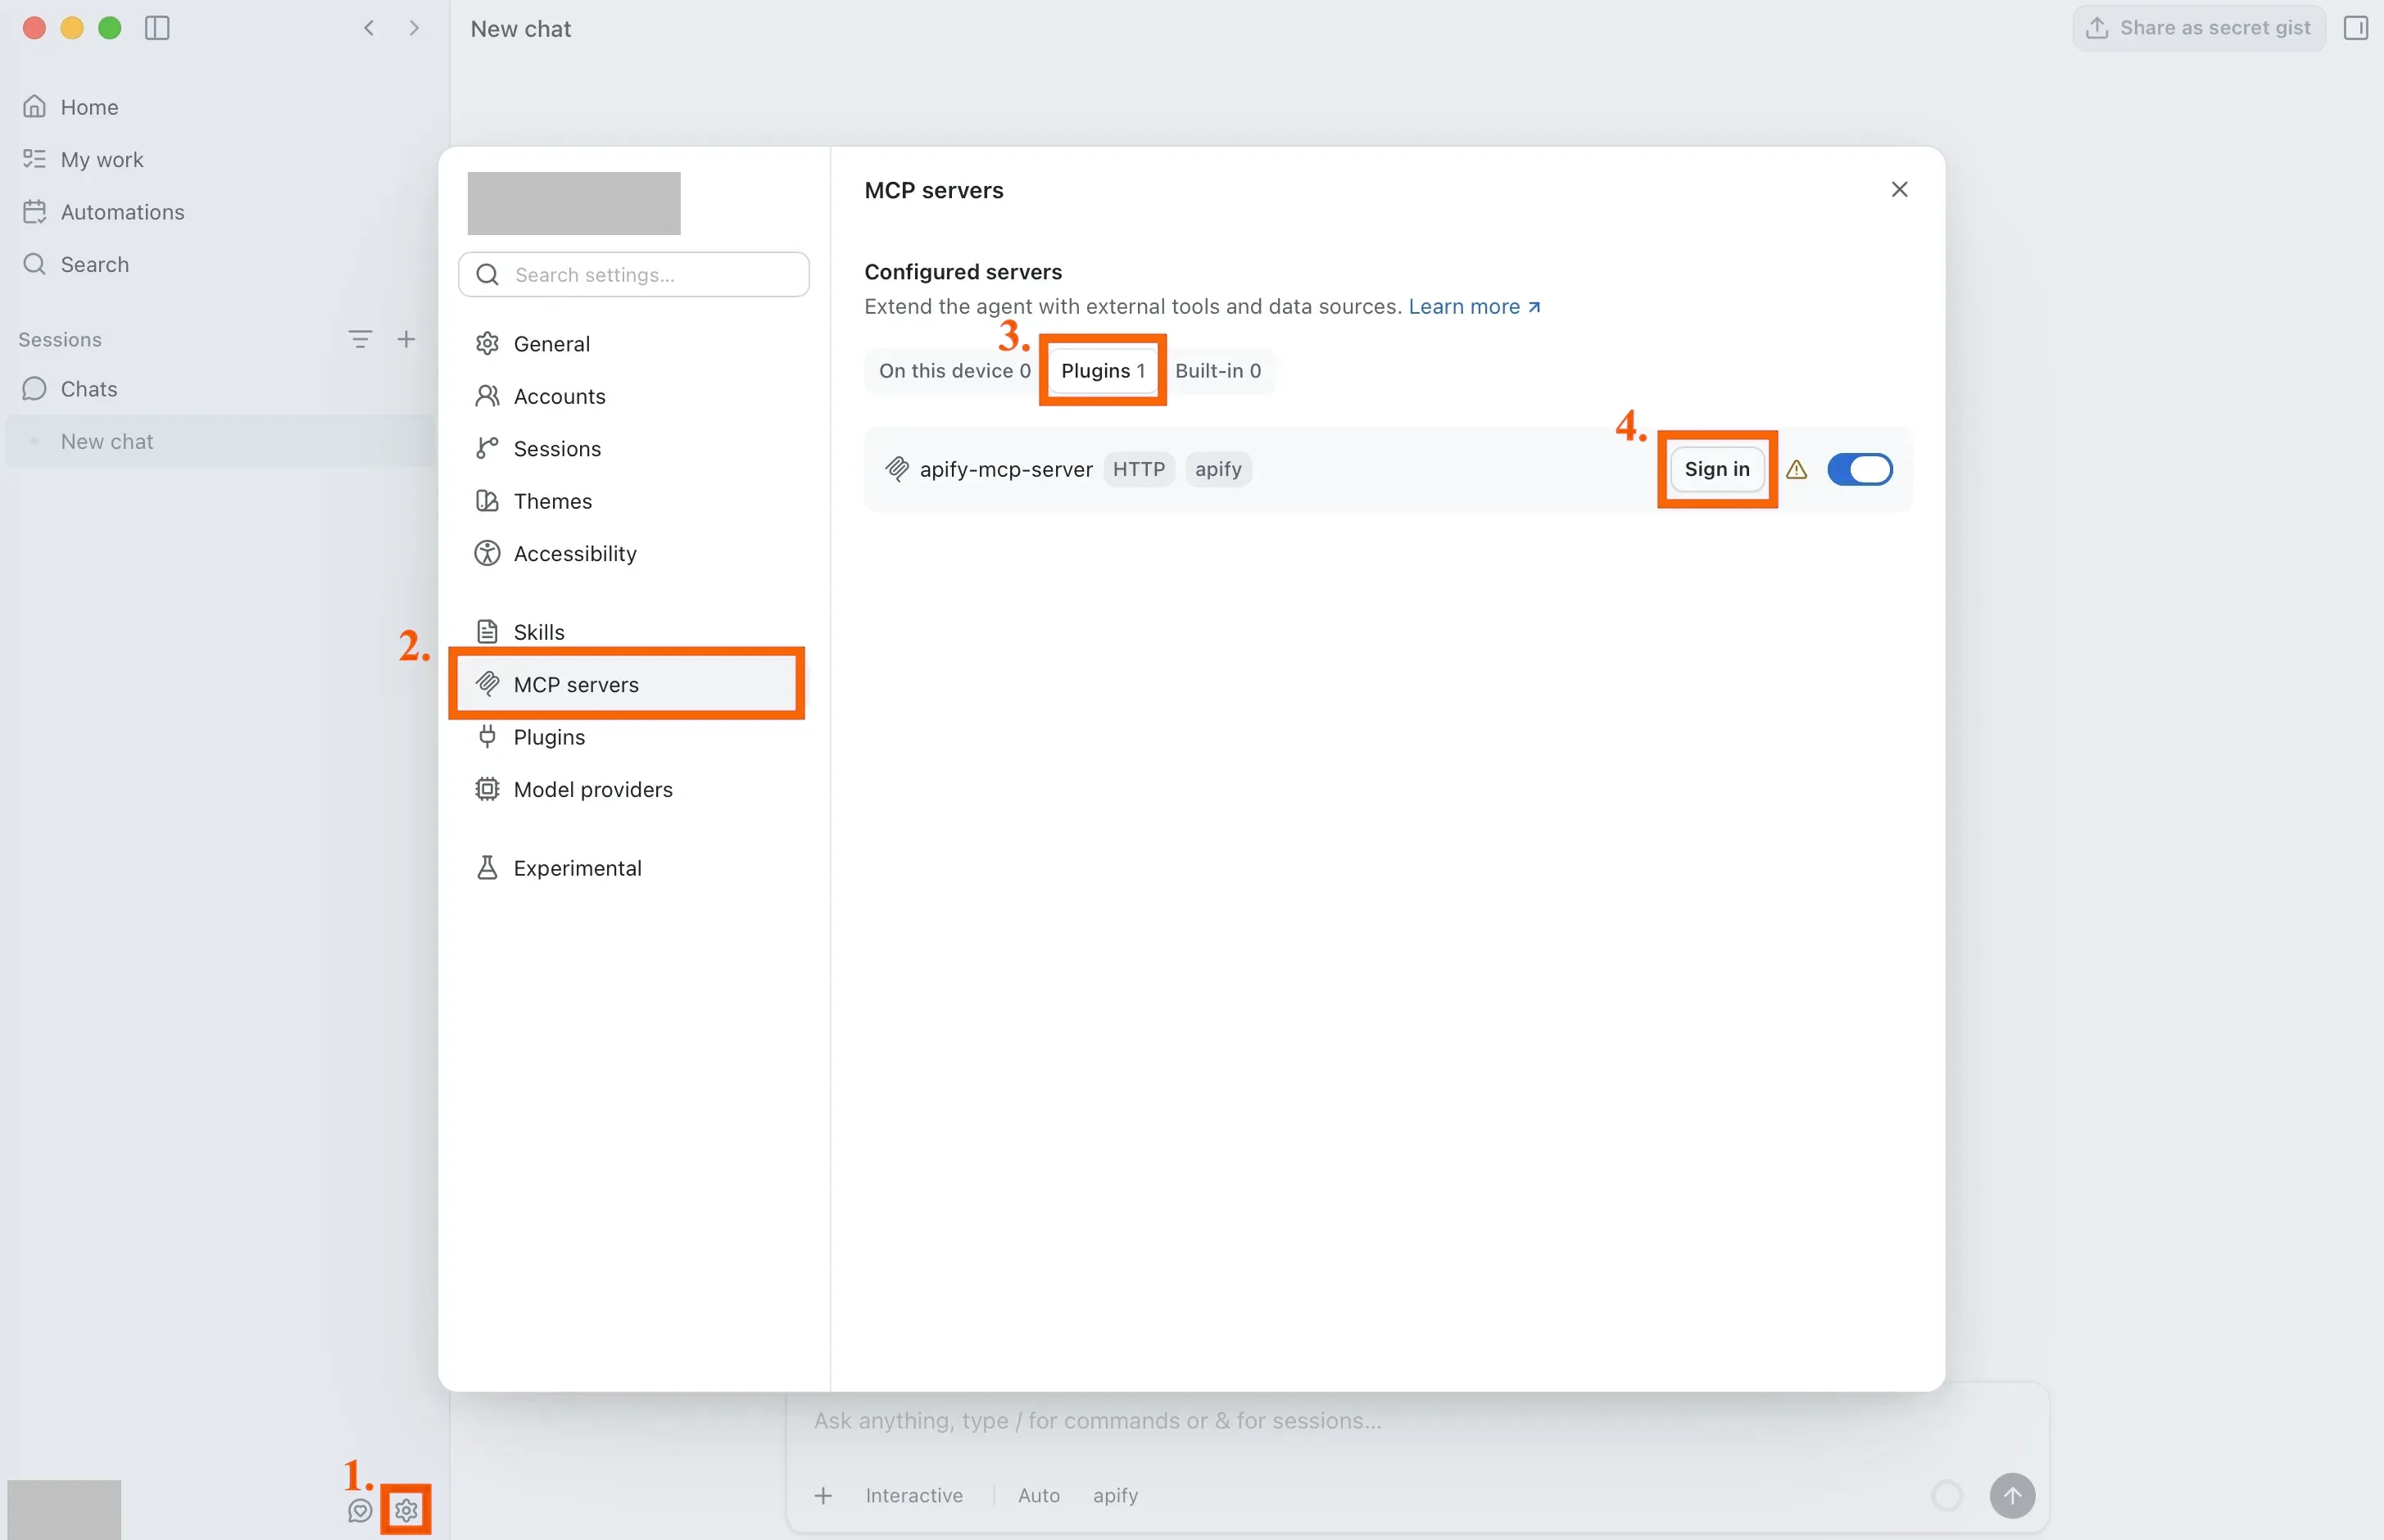
-
Complete the Apify OAuth flow in your browser and choose the account to connect. The browser confirms the authorization and prompts you to return to the desktop app.
The connection stays authenticated for future sessions. You can revoke access at any time in Apify Console > Settings > Integrations.
Select the apify agent
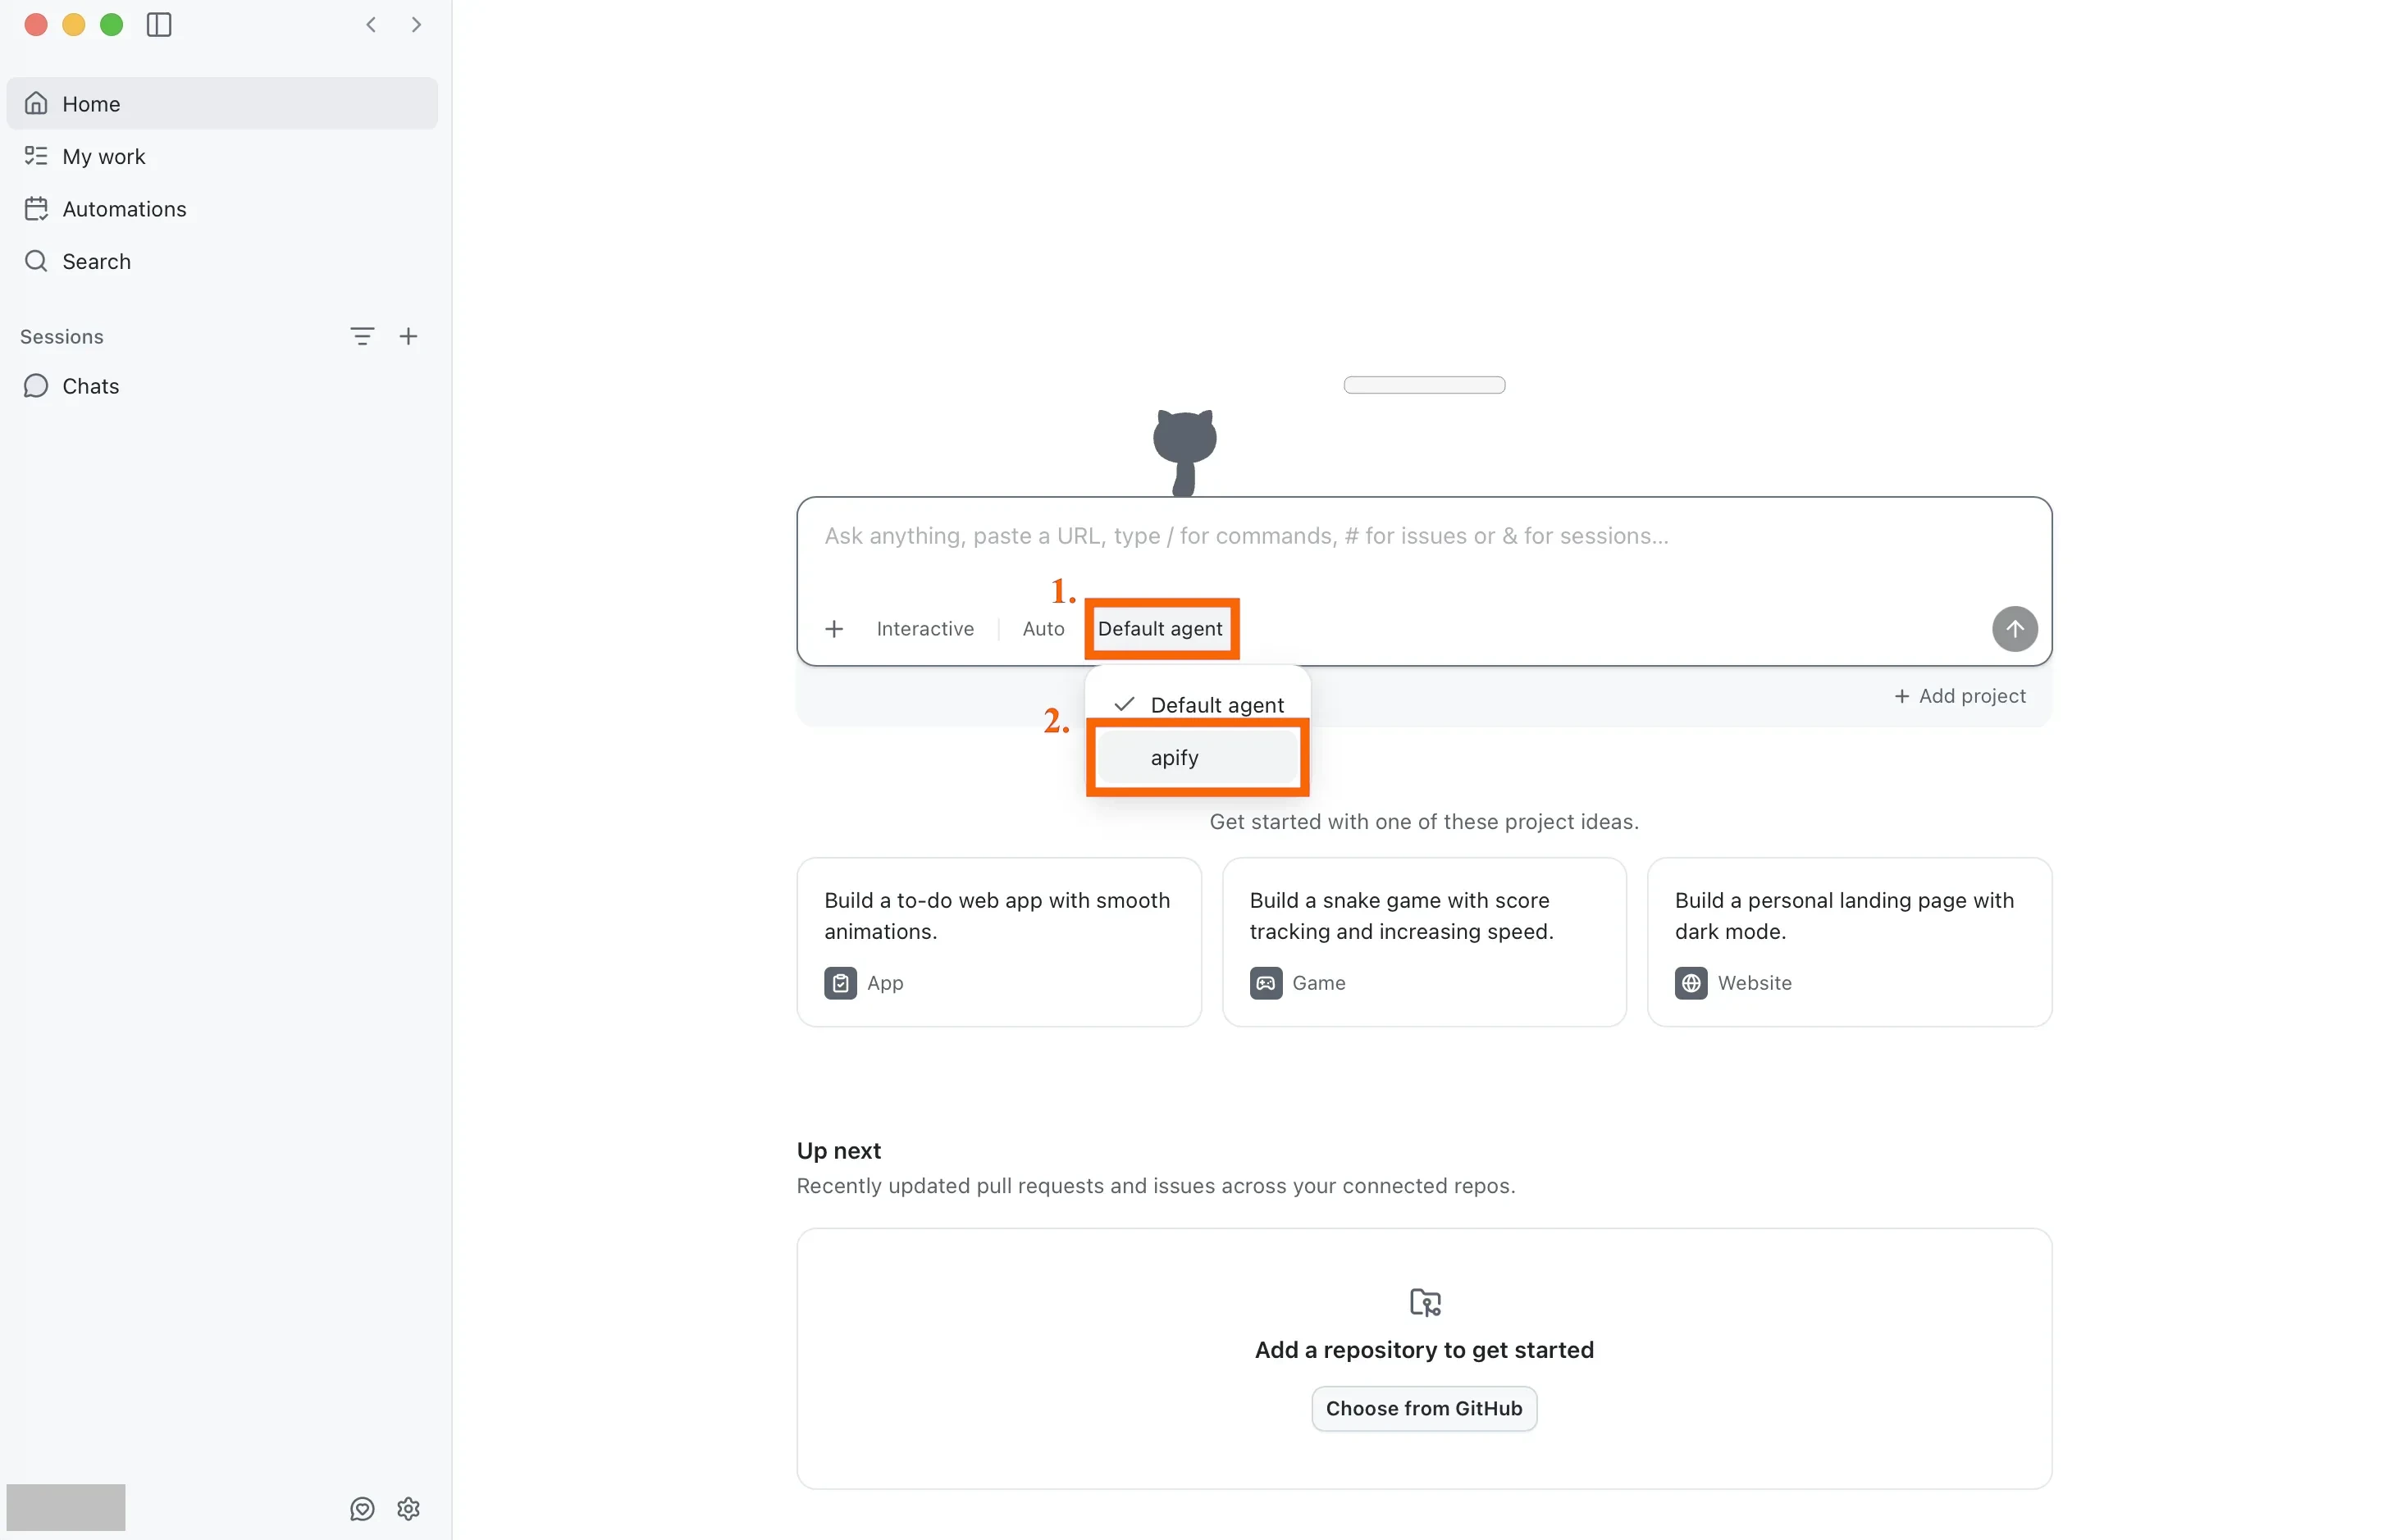
Open the agent picker in the chat composer and select the apify agent.
Run your first prompt
With the apify agent selected, describe what you want in plain language.
Use Apify to find a good Actor for scraping Google Maps places. Show me the best option, its input requirements, pricing model, and what kind of dataset output it returns. Do not run the Actor yet.
The agent searches Apify Store, fetches the top Actor's details, and summarizes its inputs, pricing, and output - without running the Actor.
To check what's available, ask the agent to list what it can do with the Apify plugin. It replies with the tools it can call and the skill behind each workflow.
Bundled skills
| Skill | Description |
|---|---|
apify-ultimate-scraper | Extraction using existing Actors for multi-step scraping and lead-generation workflows. |
apify-actor-development | Full Actor lifecycle - template selection, development, local testing, and deployment with apify push. |
apify-actorization | Converts existing JavaScript, TypeScript, Python, or CLI projects into Apify Actors. |
apify-generate-output-schema | Generates dataset and key-value store schemas for existing Actors. |
apify-sdk-integration | Integrates Actor execution into applications using the apify-client package. |
Example prompts that route to specific skills:
To run apify-ultimate-scraper:
Find 10 highly rated coffee shops in Seattle with name, address, rating, phone, and website.
To run apify-actor-development:
Create an Apify Actor that accepts a
startUrlandmaxPagesinput, crawls the site, and stores each page title and URL.
To run apify-sdk-integration:
Add Apify to this project. The Node.js API route should run an Actor and return dataset items as JSON.
Authentication paths
The apify agent picks the right transport for each task. Each transport authenticates differently:
- For MCP tools (search, run, retrieve data), authenticate with OAuth through the browser, as described in Connect the Apify MCP server. You don't need to set up a token.
- For the Apify CLI (building Actors, actorization, CLI fallback), run
apify loginonce, or setAPIFY_TOKENin headless environments. Get your token from Apify Console > Settings > Integrations. - For SDK integration with
apify-client, set theAPIFY_TOKENenvironment variable in your application's environment.
Troubleshooting
The apify plugin doesn't appear in search
If the apify plugin doesn't appear when you search for Apify:
-
Quit the desktop app, reopen it, and search again.
-
If the plugin still doesn't appear, add its marketplace manually. Open Settings > Plugins, select Install > Add marketplace, and enter the repository URL:
https://github.com/apify/apify-github-copilot-pluginThe
apifyplugin then appears in the Plugins list. Select Install and continue with Connect the Apify MCP server.
The Apify MCP server won't sign in
Open Settings > MCP servers, confirm apify-mcp-server uses the HTTP transport, and select Sign in to restart the OAuth flow. Read-only tools work without signing in, so run a search prompt first to confirm the server is connected.
The apify agent isn't available
Confirm the plugin is installed and enabled under Settings > Plugins, then reopen the agent picker in the chat composer. The apify agent appears once the plugin is active.
Limitations
- Long-running Actors may time out during a single tool call. Reduce the scope or split the work across multiple prompts.
- Each Actor run counts toward your Apify plan usage, on top of any usage your AI client bills separately. See Billing for details.
- Skills that edit files in your project (Actor development, actorization, SDK integration) make local changes - review them before deploying or committing.
Related integrations
- Visual Studio Code (VS Code) integration - Install the same plugin from the VS Code plugin marketplace
- GitHub Copilot CLI integration - Install the Apify plugin in the GitHub Copilot CLI
- MCP server integration - Use the Apify MCP server with other clients
Resources
- Apify plugin for GitHub Copilot - Source repository and full README with advanced setup notes
- GitHub Copilot documentation - Official GitHub Copilot docs
- Apify Store - Browse Actors you can run from Copilot