Publish your Actor task
Actor tasks are shareable, pre-configured inputs for your Actors. Publishing a task creates a public landing page that shows what it does, what inputs to provide, and what output to expect. Published tasks also appear in your Actor's Example tasks tab, which helps users discover your Actor through search engines and AI agents. For monetized Actors, more discoverability means more paid runs.
You can publish up to 10 tasks per Actor, and up to 100 tasks across your account.
Prerequisites
Before you publish a task, make sure you have:
- A published Actor that you own or maintain.
- A saved task with a complete input configuration.
- An input schema and at least one dataset schema view defined on the Actor.
If your Actor is missing an input schema or dataset schema, the Publishing tab shows what needs to be set up before you can publish.
What tasks to publish
Focus on tasks that represent a real use case someone would search for and that show your Actor solving a specific problem. Not every saved task needs a public landing page.
Focus on a real use case
The best tasks aim to solve a problem a user actually has. Instead of publishing a generic "default configuration" task, publish one that answers a question someone might type into a search engine or AI agent.
For example, if you maintain Google Maps, Amazon, and Yahoo Finance scraper Actors:
| Generic task | Specific task |
|---|---|
| Google Maps business task | Analyze San Francisco business competitors with AI |
| Yahoo Finance test | Monitor stock prices on Yahoo Finance |
| Amazon scraper | Track Amazon product prices for market research |
Each task focuses on a specific industry, location, or workflow. A user searching for "San Francisco business competitors" is more likely to land on a page with that exact framing.
Target search traffic and AI discovery
Each landing page shows up in Google search results. It also has a markdown (.md) version that AI agents can read directly.
Think of each task as a keyword-targeted landing page:
- Location-specific tasks: "Scrape real estate listings in Austin" rather than "Scrape real estate listings"
- Industry-specific tasks: "Monitor competitor pricing for electronics" rather than "Monitor competitor pricing"
- Workflow-specific tasks: "Export LinkedIn company data to Google Sheets" rather than "Export LinkedIn data"
The more specific the task, the less competition it has in search results and the more relevant it is to the person who finds it.
If your Actor supports multiple use cases, publish a task for each one. A web scraping Actor might have tasks for lead generation, price monitoring, and content aggregation. Each task demonstrates a different capability and attracts a different audience.
Publish your tasks
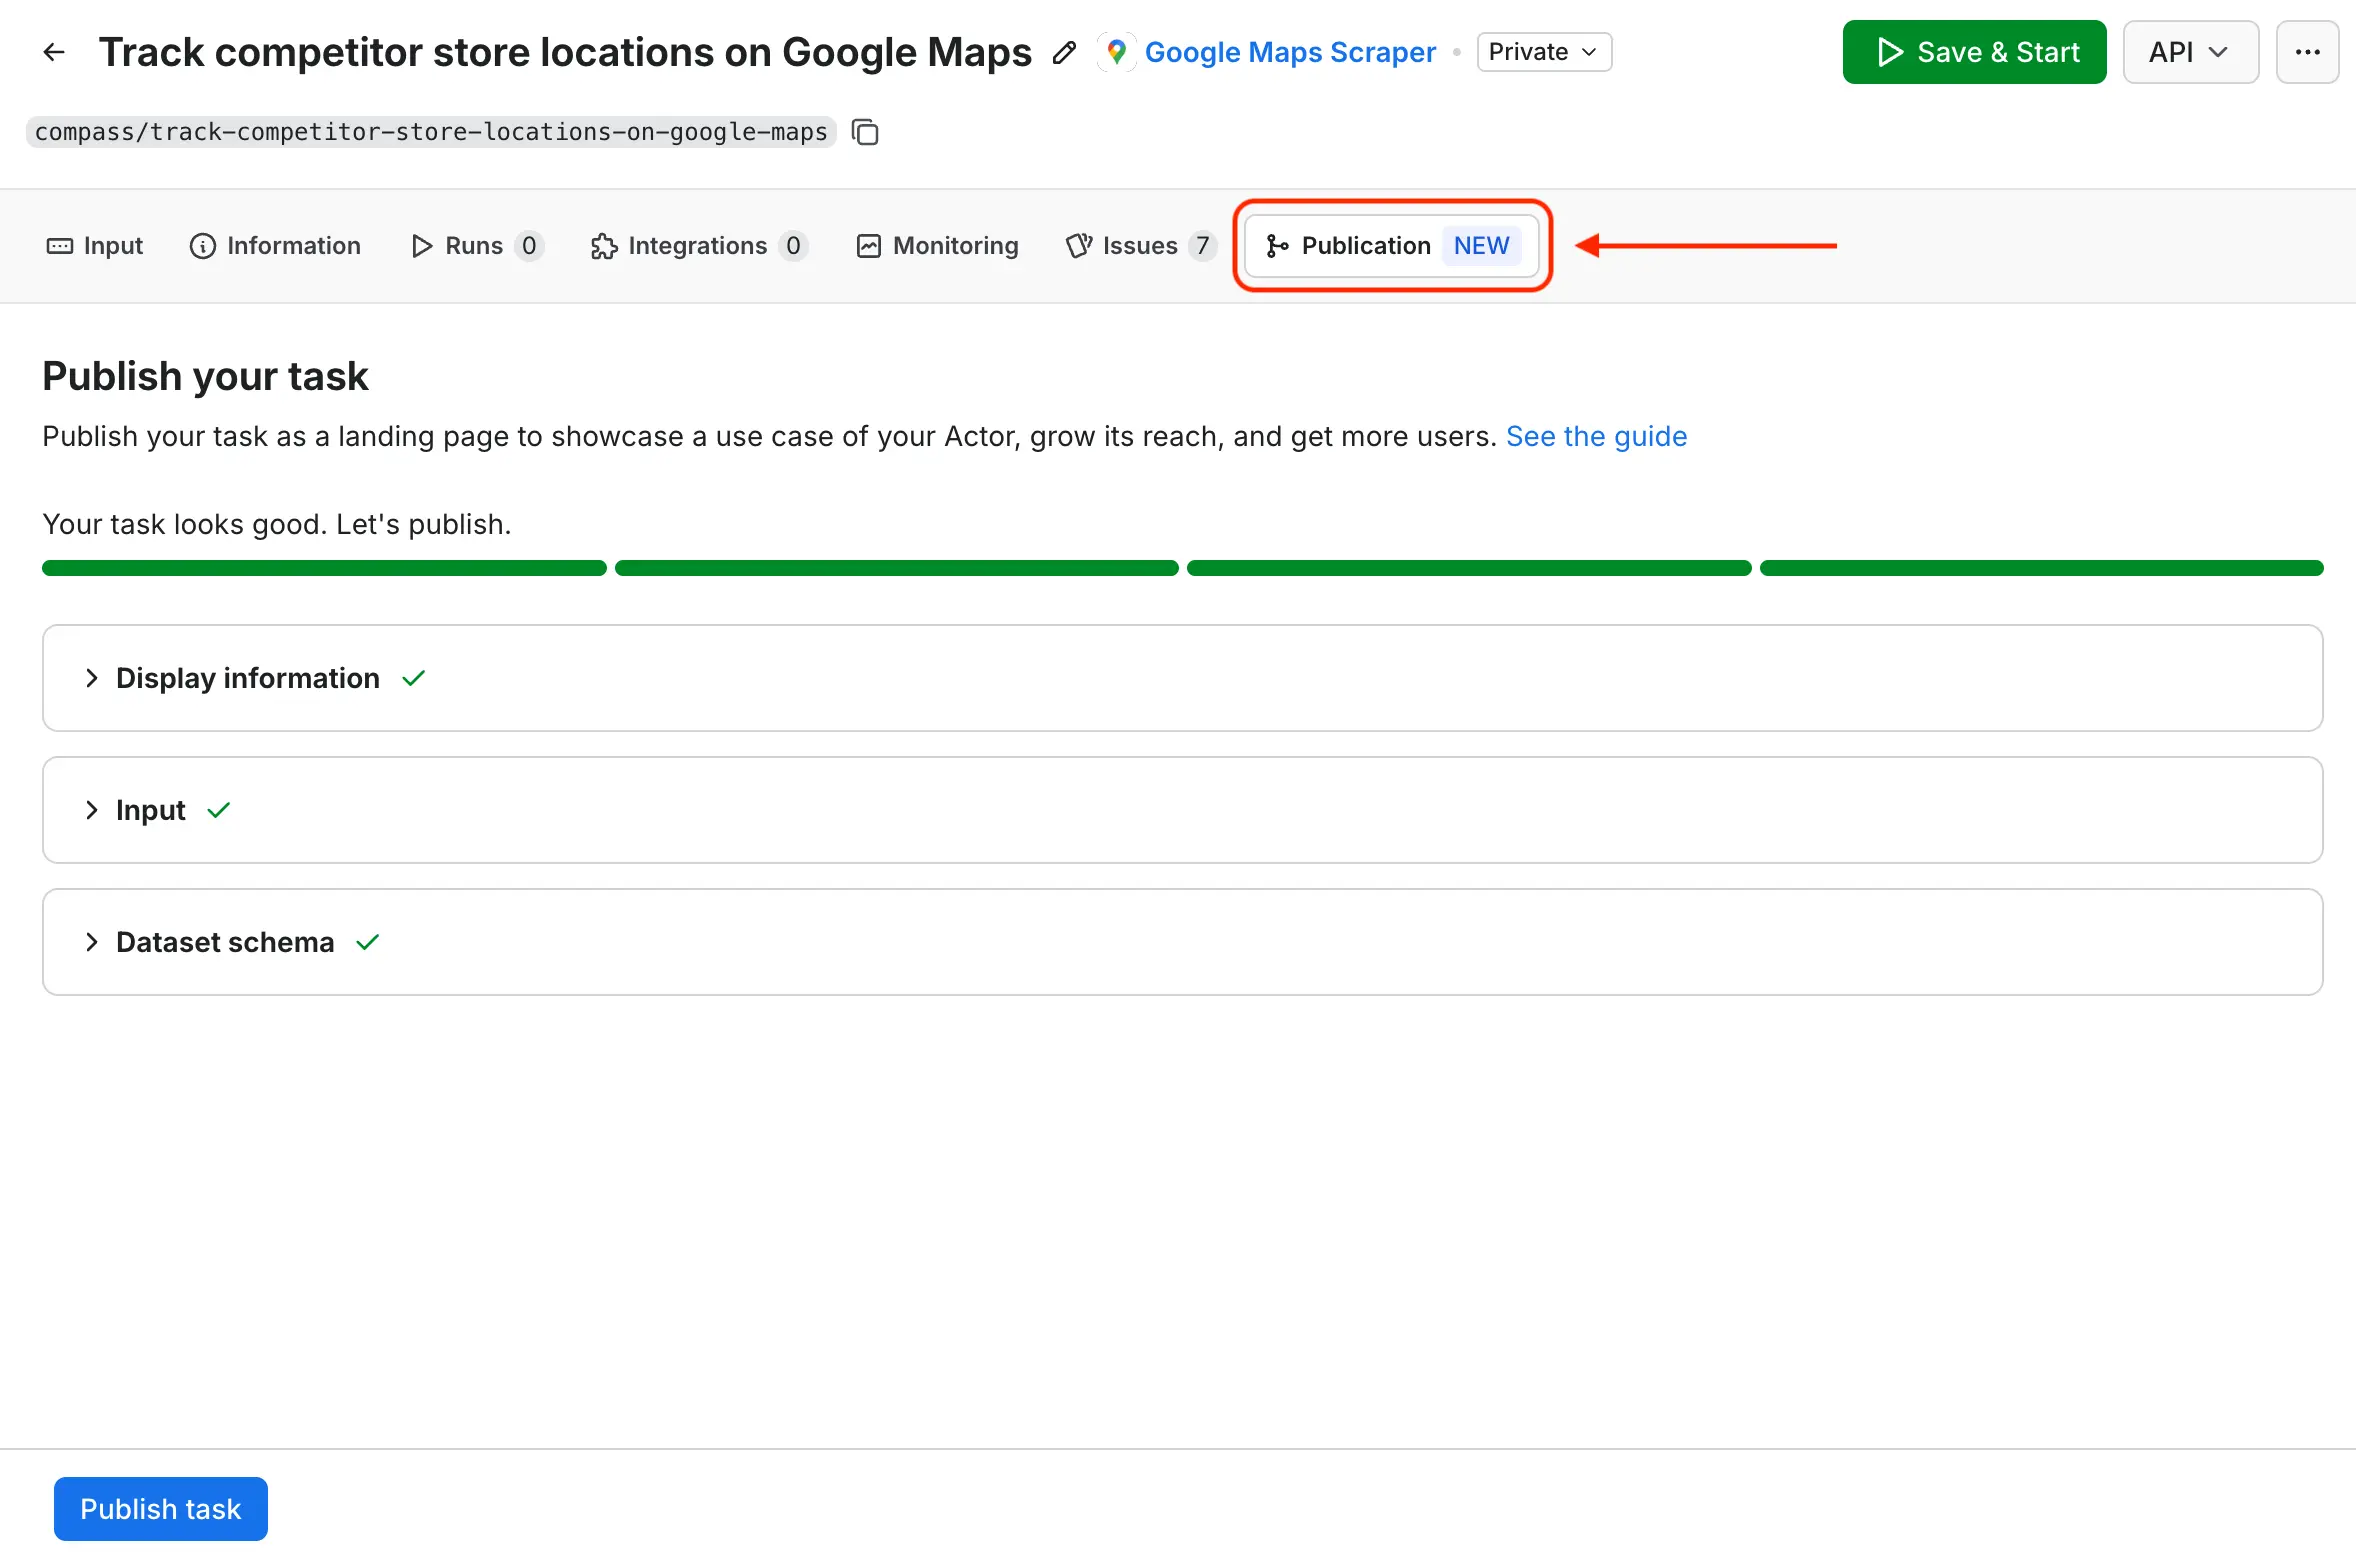
Once your task runs reliably and produces the output you want users to see, publish it from Apify Console. The Publishing tab guides you through each requirement.
- From your task's page in Apify Console, open the Publishing tab.
- Complete the three sections: Page details, Input, and Dataset schema.
- Select Publish task.
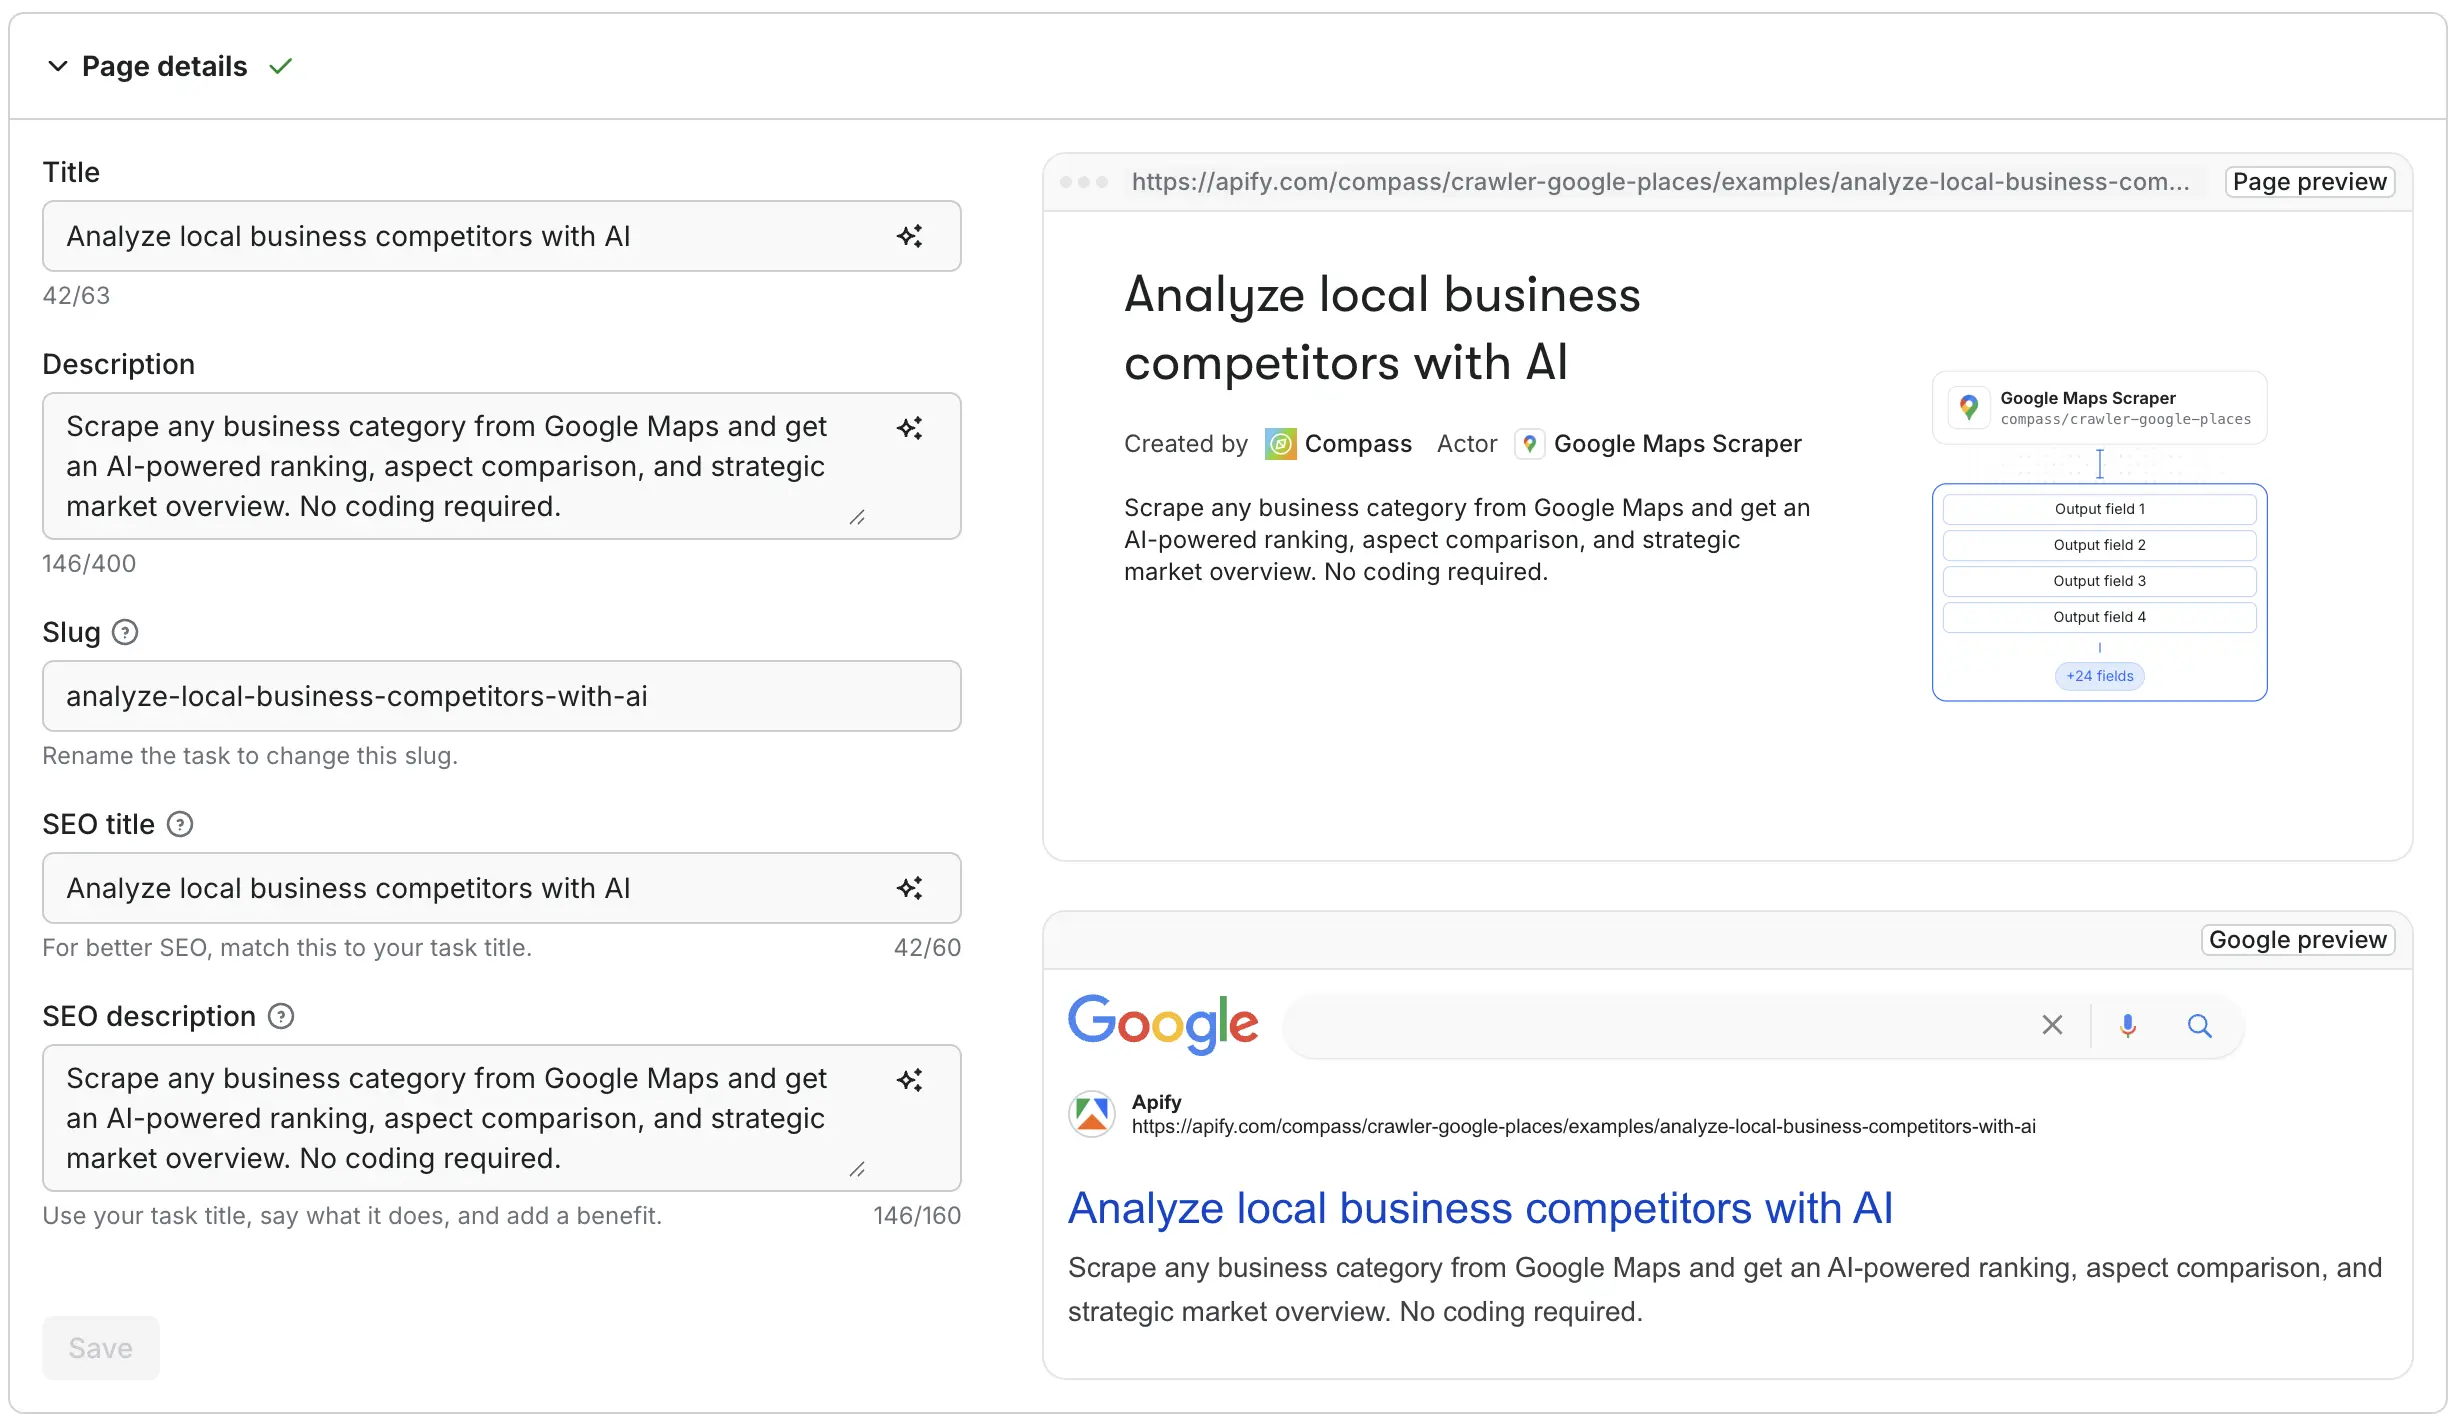
Page details
This section controls how your task appears on the landing page and in search results.
- Title: the heading shown on the landing page. Required to publish.
- Description: the summary shown under the heading on the landing page. Required to publish.
- Slug: the URL path for your task's landing page (lowercase, hyphens, no spaces).
- SEO title: the page title in search results. Falls back to the task title when empty.
- SEO description: the meta description in search results. Falls back to the task description when empty.
Use the AI icon next to each field to generate its copy from your task configuration.
The preview on the right updates as you type:
- Page preview: how the landing page will look to users.
- Google preview: how the page will appear in search results.
Frame the title as the user's goal, not as a description of the Actor's mechanics. A good title combines an action, a target, and a qualifier.
Good examples:
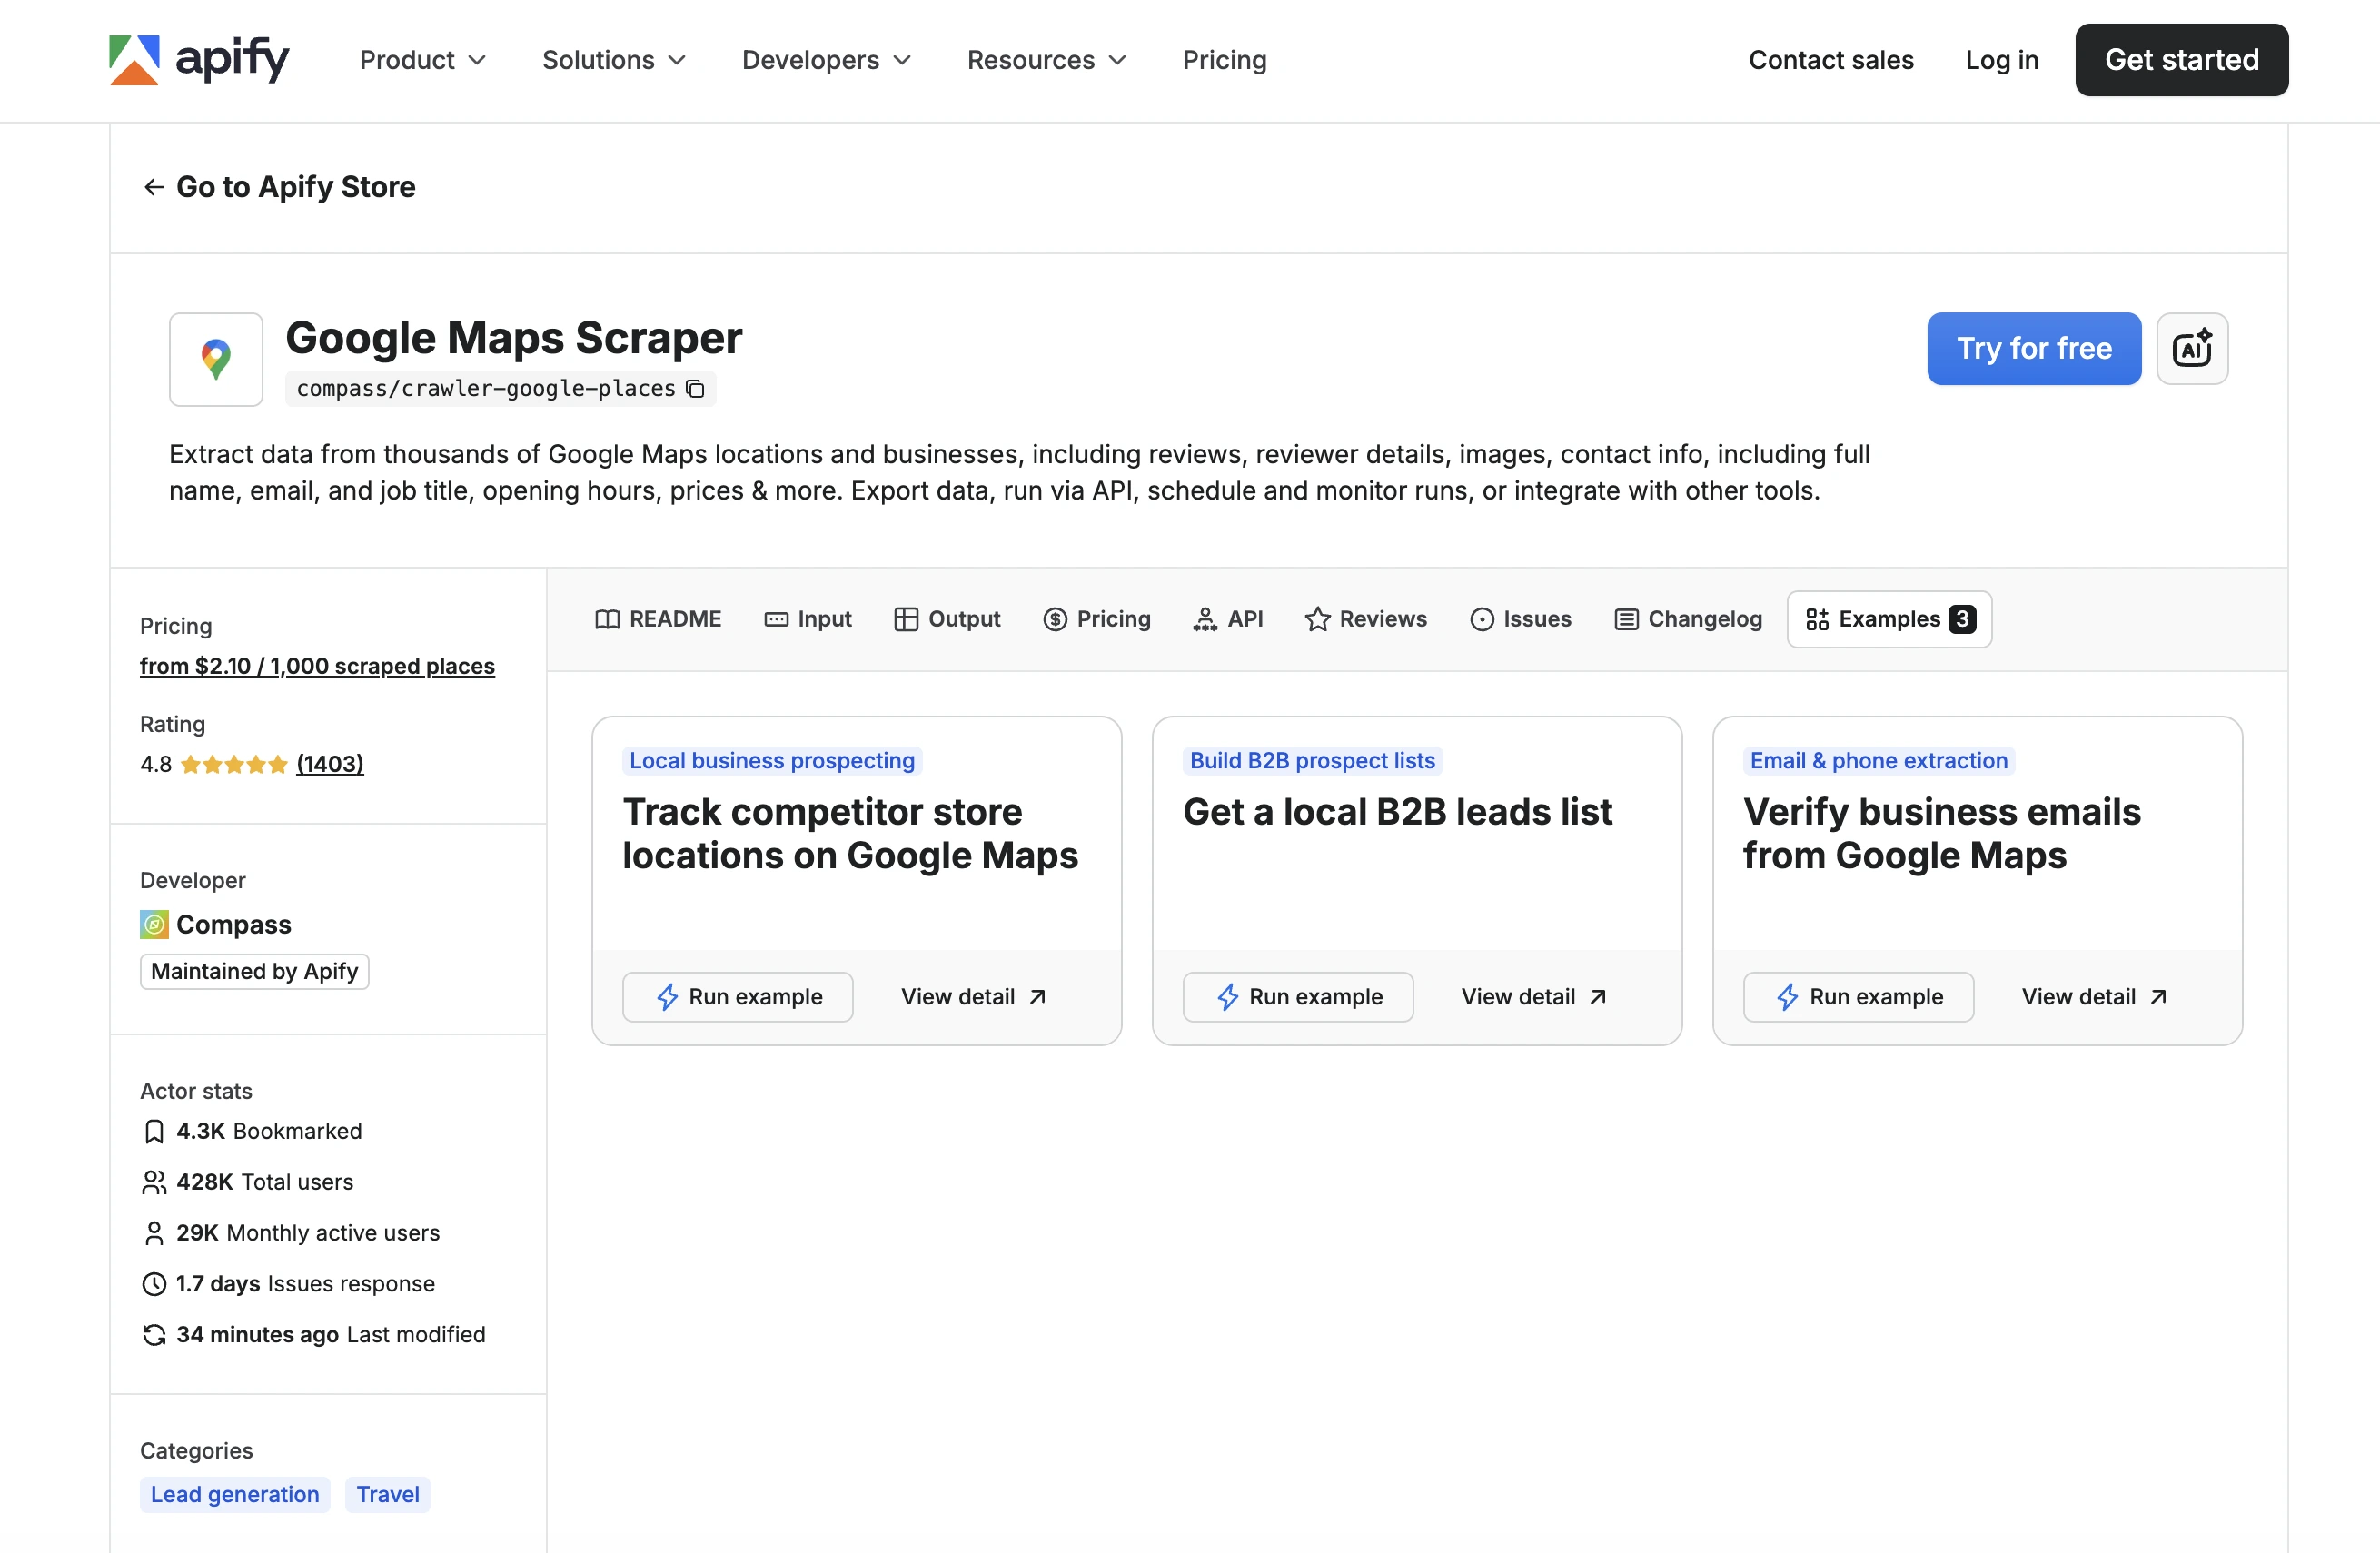
- Track competitors' store locations
- Get a local B2B leads list
- Verify business emails from Google Maps
Avoid titles like "Google Maps scraper - task 3" or "Test task" that describe the Actor instead of the user's goal.
Input
The Input section controls which fields from your task's input configuration appear on the landing page. Every input field is selected by default. Deselect any field that isn't relevant to this task's use case.
This control affects display only. The task itself always runs with the full input configuration, regardless of which fields are selected here.
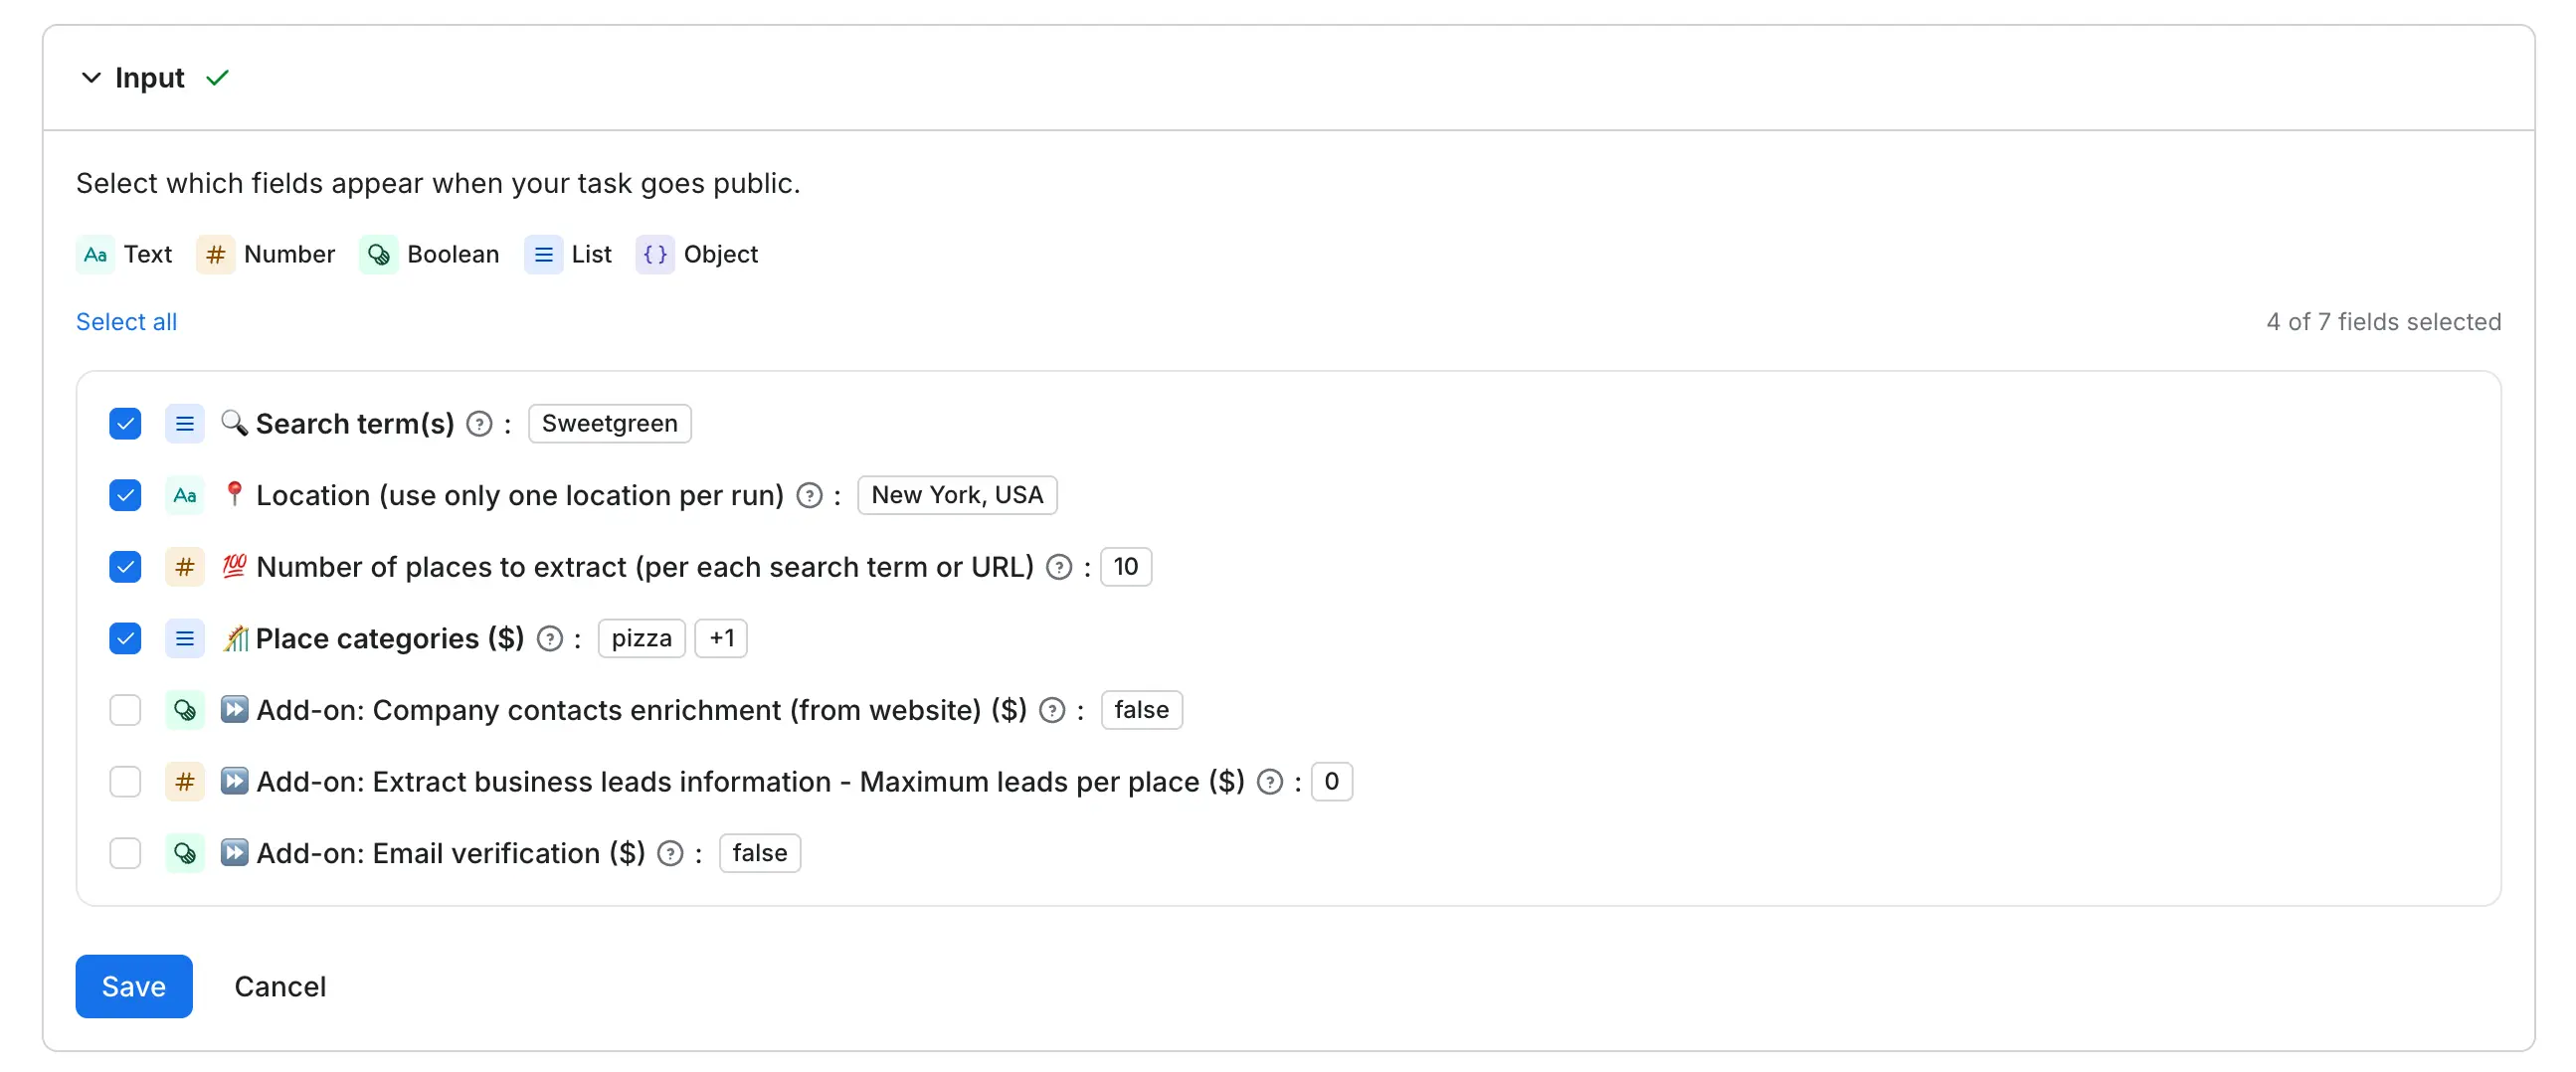
All input fields with "isSecret": true in the Actor's input schema are automatically masked and never shown on the landing page. Before publishing, confirm sensitive fields are marked as secret.
Dataset schema
The Dataset schema section selects which view of the Actor's dataset is rendered on the landing page. Each view organizes the output fields differently. Pick the one that best matches the task's use case.
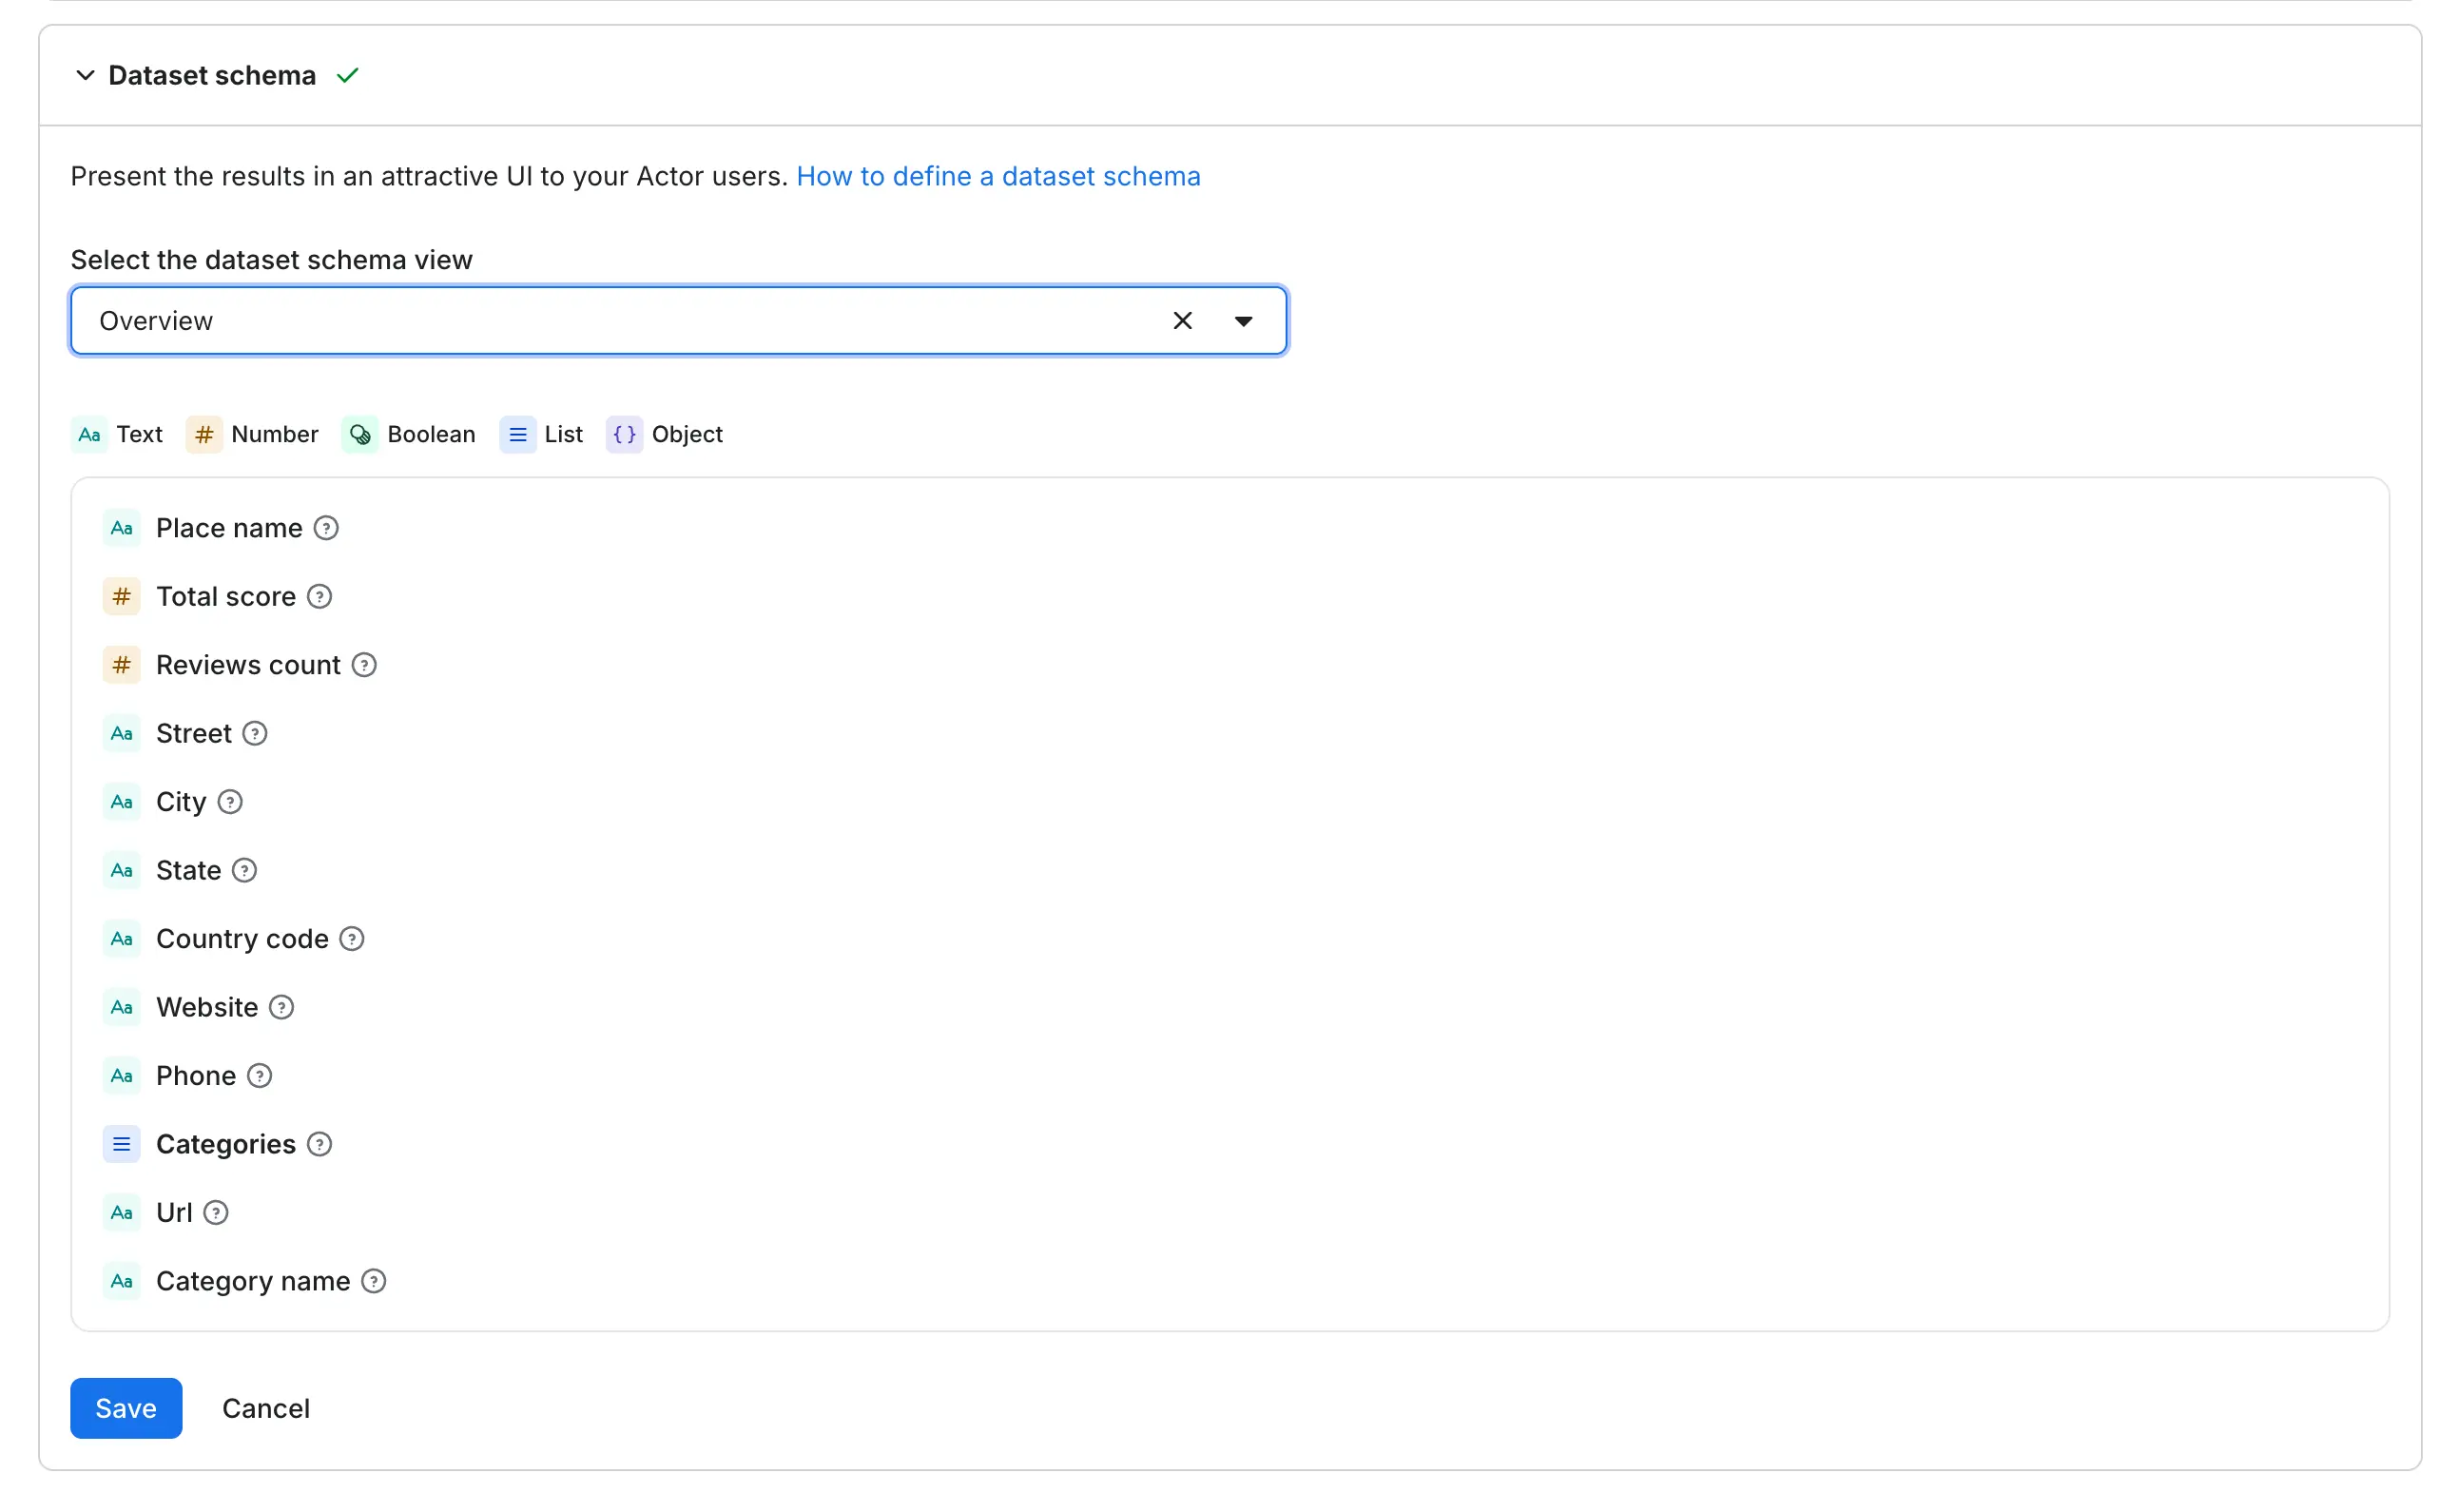
For more on configuring views, see Dataset schema.
Publish confirmation
When you select Publish task, a confirmation dialog reminds you that your runs and data stay private. Once published, anyone on Apify can duplicate and run your task with their own input.
A success dialog lets you share your task on social media. Use the View landing page button in the Publishing tab to preview it.
Unpublish a task
To remove a task's landing page, open the task's Publishing tab and select Unpublish task. Confirm to remove it.
Unpublishing removes the landing page, but your task and its configuration stay saved. Republish anytime.
To see which tasks are published, filter by Publish status in the Tasks list in the sidebar.
Publish tasks programmatically
Apify Console is the quickest way to publish your first task. If you maintain many tasks, you can do the same thing through the API, which lets you publish in bulk instead of completing the form for each task.
Creating a task never publishes it. There are three steps:
- Create the task with its input.
- Fill in the task's
titleanddescription, and its public display configuration (publicConfig). - Publish it by setting
isPublictotrue, or by callingpublish()in the API clients.
Requirements
A task can only be published when all of the following hold:
- The task's Actor is public.
- The task has a
title(3 to 63 characters) and adescription(up to 400 characters). The landing page renders these. publicConfig.inputSchemaFieldsnames at least one field that exists in the task's input. These are the input values shown on the page.publicConfig.datasetViewis one of the view keys declared in the Actor's dataset schema. SetpublicConfig.datasetNametoo if the Actor declares more than one dataset.- You have write access to both the task and its Actor.
- The Actor has fewer than 10 published tasks.
publicConfig.seoTitle (up to 60 characters) and publicConfig.seoDescription (up to 160 characters) are optional. They appear in search results only and fall back to the task's title and description when empty. Search engines display only that much text, so they cut a longer title or 400-character description if you leave these fields empty.
If any requirement is unmet, the request fails and none of the update is applied, so the task never ends up half-configured.
Publish with an AI agent
The Apify MCP server exposes task publishing as tools, so you can describe what you want in your AI client and let the agent do the work: create-actor-task, get-actor-task, update-actor-task, publish-actor-task, and unpublish-actor-task.
These tools are in the tasks category, which is not enabled by default. Include it in your connection URL:
https://mcp.apify.com?tools=actors,docs,tasks
The requirements above still apply. The agent fills in the display configuration with update-actor-task first, then publishes with publish-actor-task.
Publish with the API
Create the task with Create task API endpoint, then configure and publish it with Update task API endpoint:
PUT /v2/actor-tasks/{actorTaskId}
Content-Type: application/json

{
    "title": "Track competitors' store locations",
    "description": "Looks up each brand name you provide on Google Maps and collects its store addresses, opening hours, and coordinates. Use the results to compare competitor coverage in a city or region and to find gaps in your own network.",
    "isPublic": true,
    "publicConfig": {
        "seoDescription": "Get addresses and opening hours for any list of competitor brands.",
        "inputSchemaFields": ["searchStringsArray", "maxCrossedDistance"],
        "datasetView": "overview"
    }
}
The fields you send in publicConfig are merged into the stored configuration, so you only need to include what you are changing. To clear a field, set it to null. publicConfig.publishedAt is read-only: publish and unpublish by setting isPublic.
To unpublish, send isPublic: false. The display configuration is preserved, so you can republish later without re-entering it.
Publish with the CLI
The Apify CLI publishes and unpublishes an existing task by name, from version 1.9.0:
apify task publish my-task
apify task unpublish my-task
Pass username/my-task to target a task owned by someone else, provided you have write access to it and its Actor.
There is no dedicated command for the display configuration yet, so set it through the API with apify api. Unlike apify task publish, this passes the path straight to the API, which reads an unqualified value as a task ID. Use the username~task-name format so the task is found by name:
apify api PUT actor-tasks/username~my-task -d '{
    "publicConfig": {
        "inputSchemaFields": ["searchStringsArray"],
        "datasetView": "overview"
    }
}'
Publish with the JavaScript client
The JavaScript client wraps the same endpoints, with publish() and unpublish() for the publication state:
const client = new ApifyClient({ token: process.env.APIFY_TOKEN });

const task = await client.tasks().create({
    actId: 'nwua9Gu5YrADL7ZDj',
    name: 'competitor-store-locations',
    title: "Track competitors' store locations",
    description: 'Looks up each brand name you provide on Google Maps and collects its store addresses, opening hours, and coordinates. Use the results to compare competitor coverage in a city or region and to find gaps in your own network.',
    input: { searchStringsArray: ['coffee shop'], maxCrossedDistance: 1000 },
});

await client.task(task.id).update({
    publicConfig: {
        seoDescription: "Get addresses and opening hours for any list of competitor brands.",
        inputSchemaFields: ['searchStringsArray', 'maxCrossedDistance'],
        datasetView: 'overview',
    },
});

await client.task(task.id).publish();
The Python client has no publish() yet. Use the API directly from Python until it lands.
Once published, the task gets its landing page and appears in the Actor's Example tasks tab.
Task landing page
Each published task gets its own standalone landing page on the Apify website, indexed by Google and readable by AI agents. Published tasks also appear in the Example tasks tab of the Actor's detail page, linking users directly to the landing page.
URL structure
The landing page URL is built from your username, Actor name, and task name. For example:
https://apify.com/john/google-maps-scraper/examples/analyze-local-business-competitors
Keep the task name short, descriptive, and focused on the use case keyword.
Landing page content
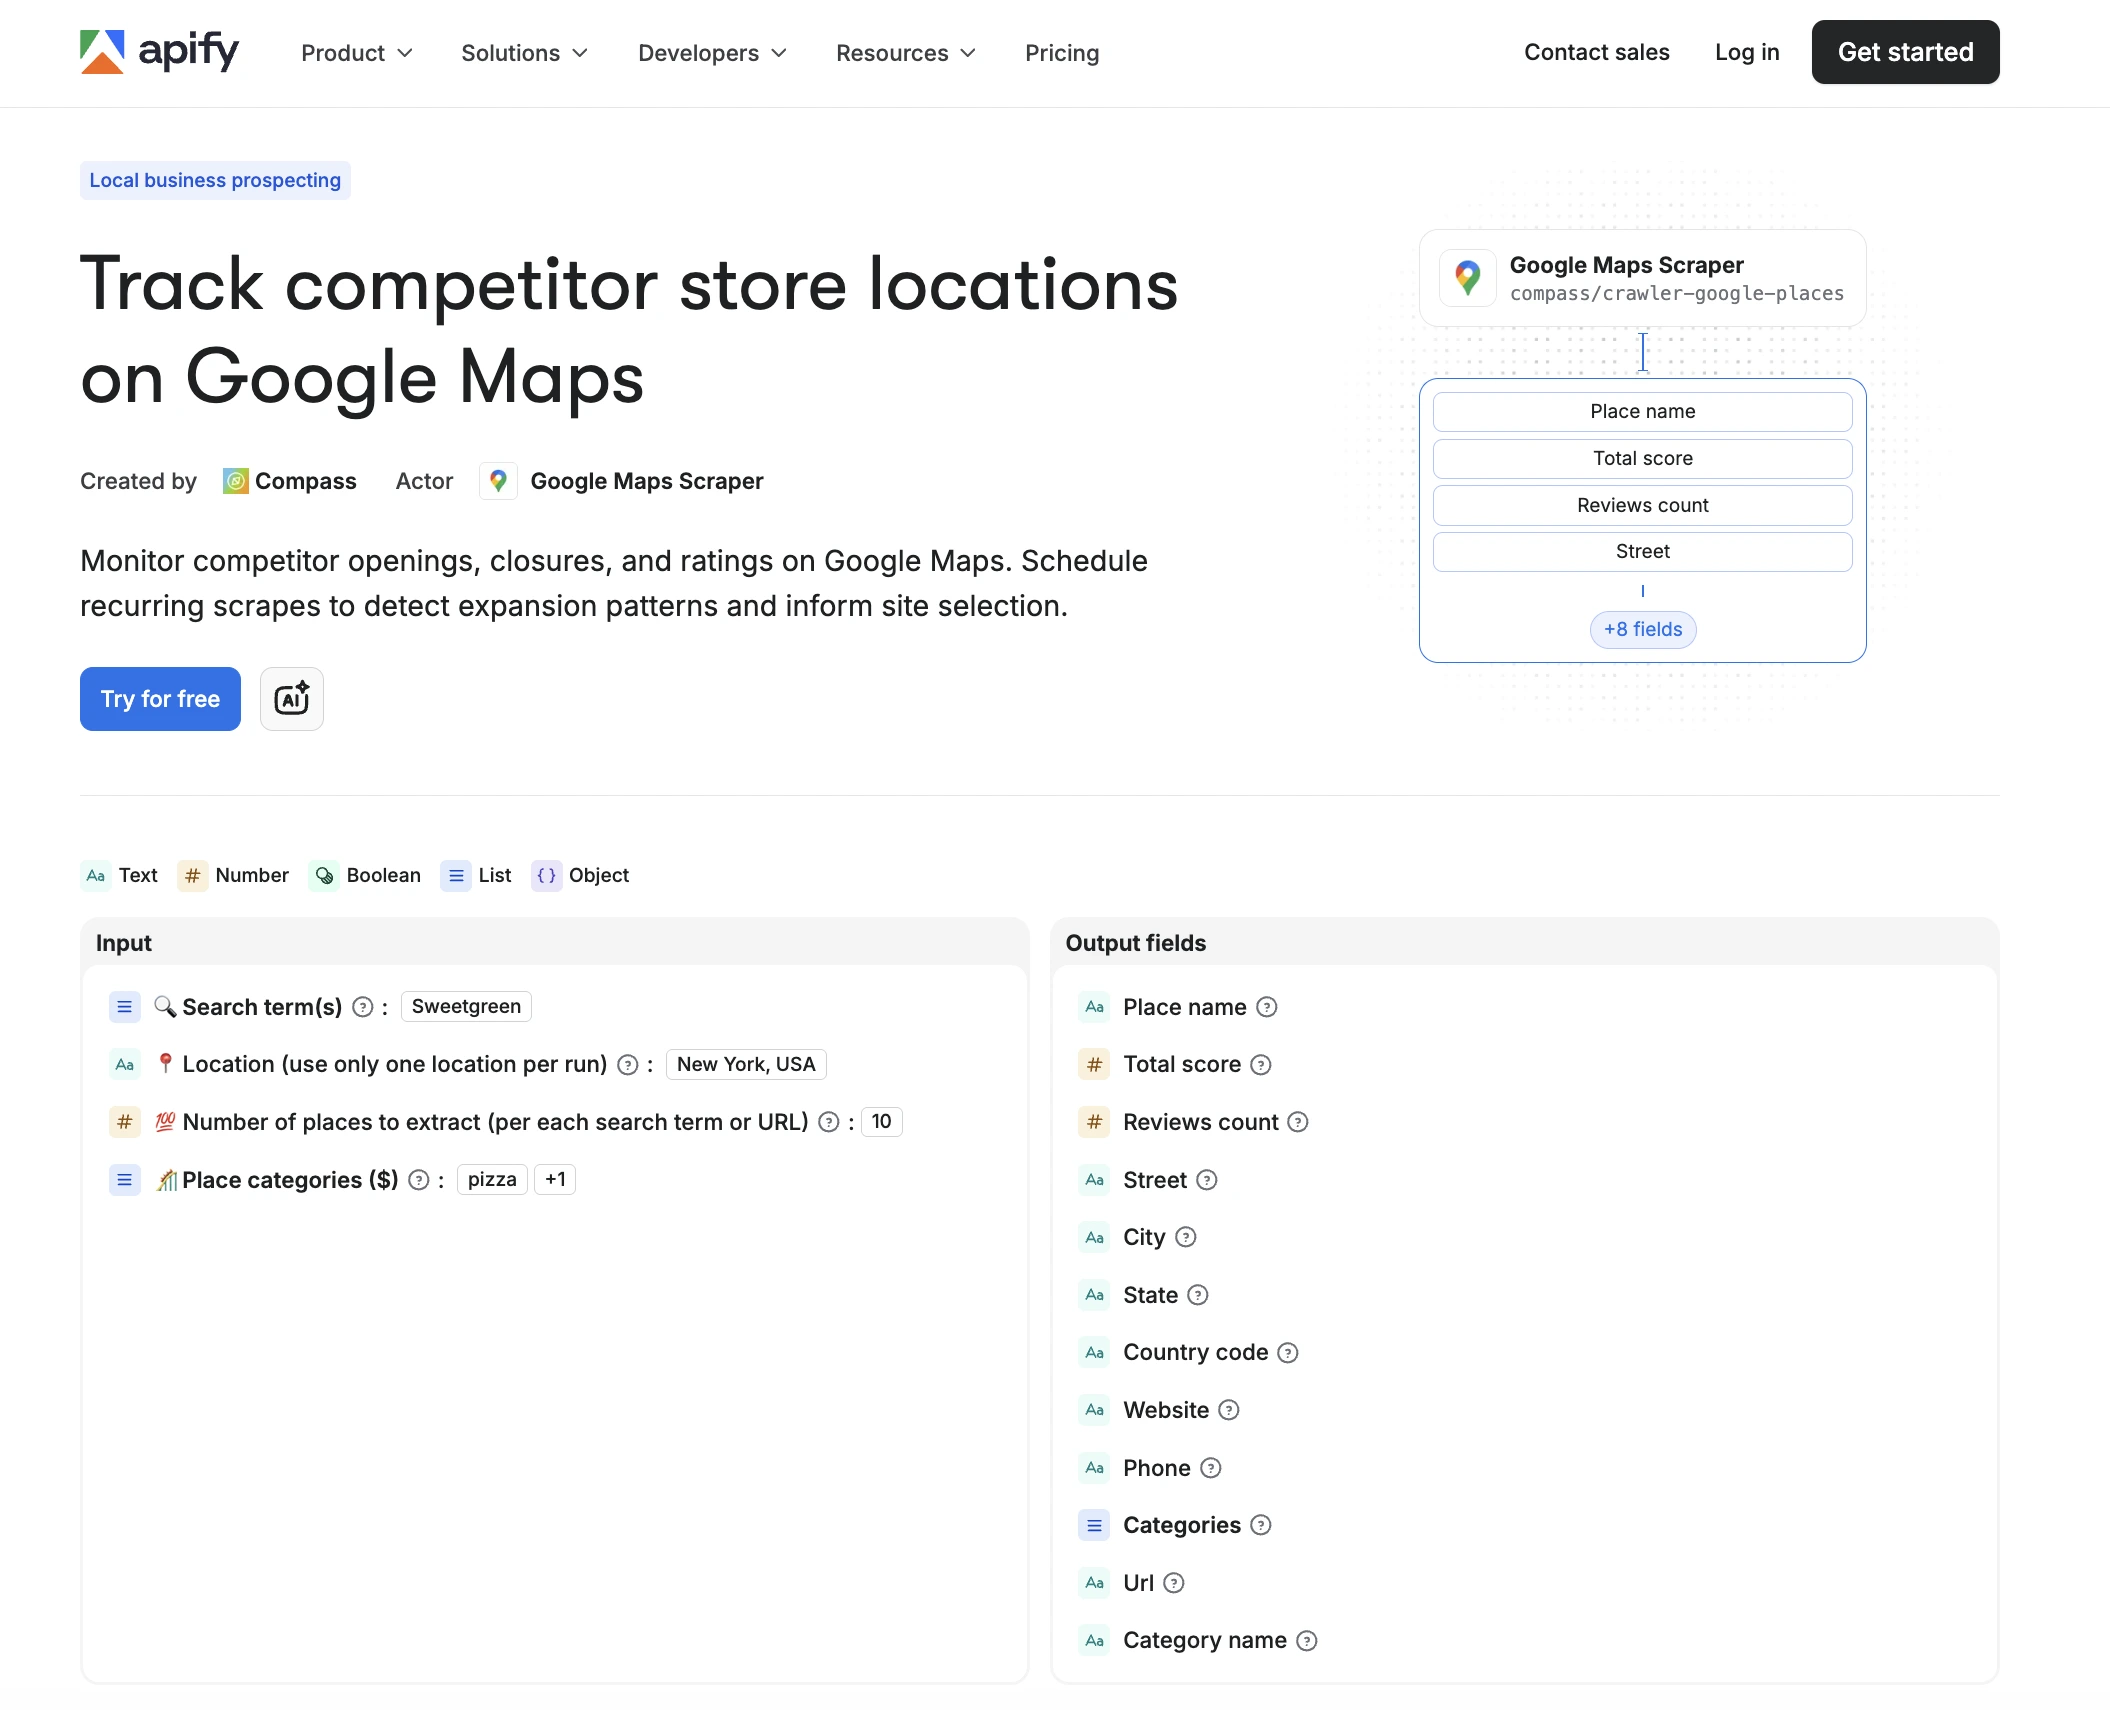
The landing page displays the information you configured in the Page details, Input, and Dataset schema sections:
- The SEO title and SEO description at the top of the page.
- The selected input fields with their exact configured values.
- A preview of the Dataset schema fields based on the dataset view you selected.
- A call-to-action button that lets users try the task right away.
After a user tries your task
When a user clicks the call-to-action button, Apify creates a new task under their account with the same input configuration. The user can change, run, and manage it without affecting your original task. Your runs, data, and configuration stay private.
Next steps
- Set up monetization for your Actor.
- Track quality with the Actor quality score.