Saving data with Node.js
In this lesson, we'll save the data we scraped in the popular formats, such as CSV or JSON. We'll use the json2csv library to export the files.
We managed to scrape data about products and print it, with each product separated by a new line and each field separated by the | character. This already produces structured text that can be parsed, i.e., read programmatically.
$ node index.js
JBL Flip 4 Waterproof Portable Bluetooth Speaker | 7495 | 7495
Sony XBR-950G BRAVIA 4K HDR Ultra HD TV | 139800 | null
...
However, the format of this text is rather ad hoc and does not adhere to any specific standard that others could follow. It's unclear what to do if a product title already contains the | character or how to represent multi-line product descriptions. No ready-made library can handle all the parsing.
We should use widely popular formats that have well-defined solutions for all the corner cases and that other programs can read without much effort. Two such formats are CSV (Comma-separated values) and JSON (JavaScript Object Notation).
Collecting data
Producing results line by line is an efficient approach to handling large datasets, but to simplify this lesson, we'll store all our data in one variable. This'll take four changes to our program:
import * as cheerio from 'cheerio';

const url = "https://warehouse-theme-metal.myshopify.com/collections/sales";
const response = await fetch(url);

if (response.ok) {
  const html = await response.text();
  const $ = cheerio.load(html);

  const data = $(".product-item").toArray().map(element => {
    const $productItem = $(element);

    const $title = $productItem.find(".product-item__title");
    const title = $title.text().trim();

    const $price = $productItem.find(".price").contents().last();
    const priceRange = { minPrice: null, price: null };
    const priceText = $price
      .text()
      .trim()
      .replace("$", "")
      .replace(".", "")
      .replace(",", "");

    if (priceText.startsWith("From ")) {
        priceRange.minPrice = parseInt(priceText.replace("From ", ""));
    } else {
        priceRange.minPrice = parseInt(priceText);
        priceRange.price = priceRange.minPrice;
    }

    return { title, ...priceRange };
  });
  console.log(data);
} else {
  throw new Error(`HTTP ${response.status}`);
}
Instead of printing each line, we now return the data for each product as a JavaScript object. We've replaced the for loop with .map(), which also iterates over the selection but, in addition, collects all the results and returns them as another array. Near the end of the program, we print this entire array.
When returning the item object, we use shorthand property syntax to set the title, and spread syntax to set the prices. It's the same as if we wrote the following:
{
  title: title,
  minPrice: priceRange.minPrice,
  price: priceRange.price,
}
The program should now print the results as a single large JavaScript array:
$ node index.js
[
  {
    title: 'JBL Flip 4 Waterproof Portable Bluetooth Speaker',
    minPrice: 7495,
    price: 7495
  },
  {
    title: 'Sony XBR-950G BRAVIA 4K HDR Ultra HD TV',
    minPrice: 139800,
    price: null
  },
  ...
]
Saving data as JSON
The JSON format is popular primarily among developers. We use it for storing data, configuration files, or as a way to transfer data between programs (e.g., APIs). Its origin stems from the syntax of JavaScript objects, but people now use it across programming languages.
We'll begin with importing the writeFile function from the Node.js standard library, so that we can, well, write files:
import * as cheerio from 'cheerio';
import { writeFile } from "fs/promises";
Next, instead of printing the data, we'll finish the program by exporting it to JSON. Let's replace the line console.log(data) with the following:
const jsonData = JSON.stringify(data);
await writeFile('products.json', jsonData);
That's it! If we run our scraper now, it won't display any output, but it will create a products.json file in the current working directory, which contains all the data about the listed products:
[{"title":"JBL Flip 4 Waterproof Portable Bluetooth Speaker","minPrice":7495,"price":7495},{"title":"Sony XBR-950G BRAVIA 4K HDR Ultra HD TV","minPrice":139800,"price":null},...]
If you skim through the data, you'll notice that the JSON.stringify() function handled some potential issues, such as escaping double quotes found in one of the titles by adding a backslash:
{"title":"Sony SACS9 10\" Active Subwoofer","minPrice":15800,"price":15800}
While a compact JSON file without any whitespace is efficient for computers, it can be difficult for humans to read. You can call JSON.stringify(data, null, 2) for prettier output. See documentation for explanation of the parameters and more examples.
Saving data as CSV
The CSV format is popular among data analysts because a wide range of tools can import it, including spreadsheets apps like LibreOffice Calc, Microsoft Excel, Apple Numbers, and Google Sheets.
Neither JavaScript itself nor Node.js offers anything built-in to read and write CSV, so we'll need to install a library. We'll use json2csv, a de facto standard for working with CSV in JavaScript:
$ npm install @json2csv/node --save

added 123 packages, and audited 123 packages in 0s
...
Once installed, we can add the following line to our imports:
import * as cheerio from 'cheerio';
import { writeFile } from "fs/promises";
import { AsyncParser } from '@json2csv/node';
Then, let's add one more data export near the end of the source code of our scraper:
const jsonData = JSON.stringify(data);
await writeFile('products.json', jsonData);

const parser = new AsyncParser();
const csvData = await parser.parse(data).promise();
await writeFile("products.csv", csvData);
The program should now also produce a data.csv file. When browsing the directory on macOS, we can see a nice preview of the file's contents, which proves that the file is correct and that other programs can read it. If you're using a different operating system, try opening the file with any spreadsheet program you have.
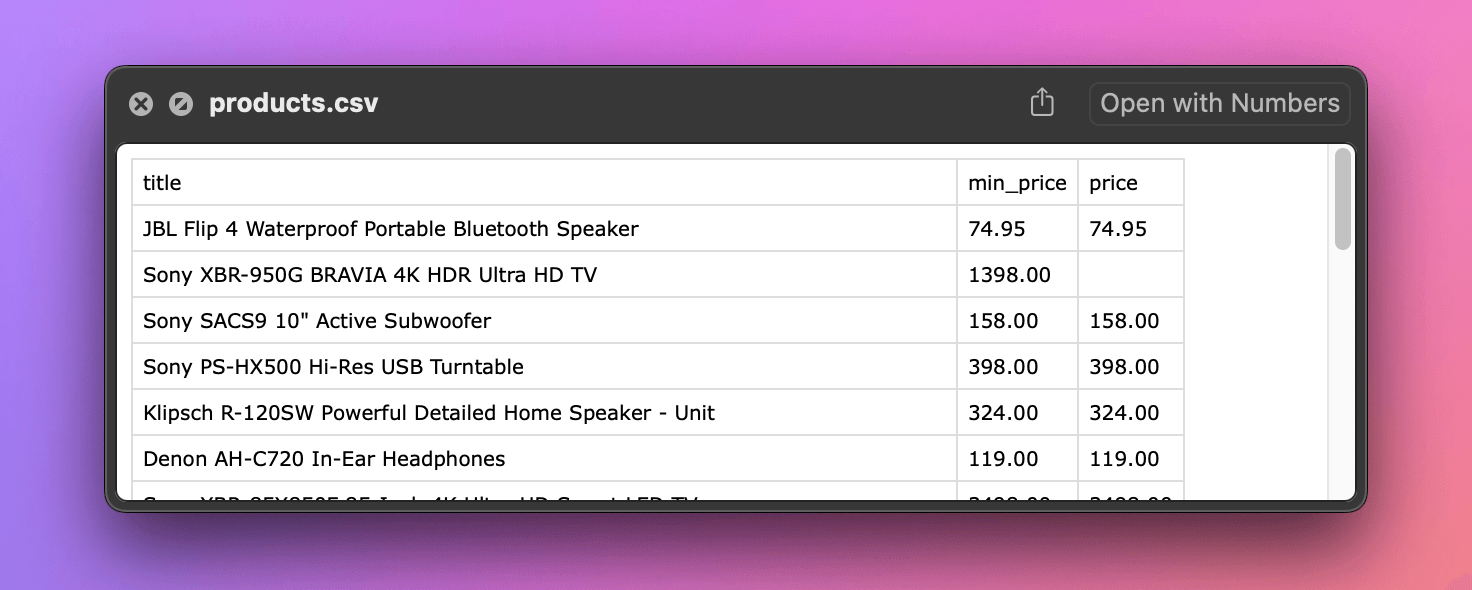
In the CSV format, if a value contains commas, we should enclose it in quotes. If it contains quotes, we should double them. When we open the file in a text editor of our choice, we can see that the library automatically handled this:
"title","minPrice","price"
"JBL Flip 4 Waterproof Portable Bluetooth Speaker",7495,7495
"Sony XBR-950G BRAVIA 4K HDR Ultra HD TV",139800,
"Sony SACS9 10"" Active Subwoofer",15800,15800
...
"Samsung Surround Sound Bar Home Speaker, Set of 7 (HW-NW700/ZA)",64799,64799
...
We've built a Node.js application that downloads a product listing, parses the data, and saves it in a structured format for further use. But the data still has gaps: for some products, we only have the min price, not the actual prices. In the next lesson, we'll attempt to scrape more details from all the product pages.
Exercises
In this lesson, we created export files in two formats. The following challenges are designed to help you empathize with the people who'd be working with them.
Process your JSON
Write a new Node.js program that reads the products.json file we created in this lesson, finds all products with a min price greater than $500, and prints each of them.
Solution
import { readFile } from 'node:fs/promises';

const jsonData = await readFile('products.json', 'utf8');
const data = JSON.parse(jsonData);

data
  .filter((row) => row.minPrice > 50000)
  .forEach((row) => console.log(row));
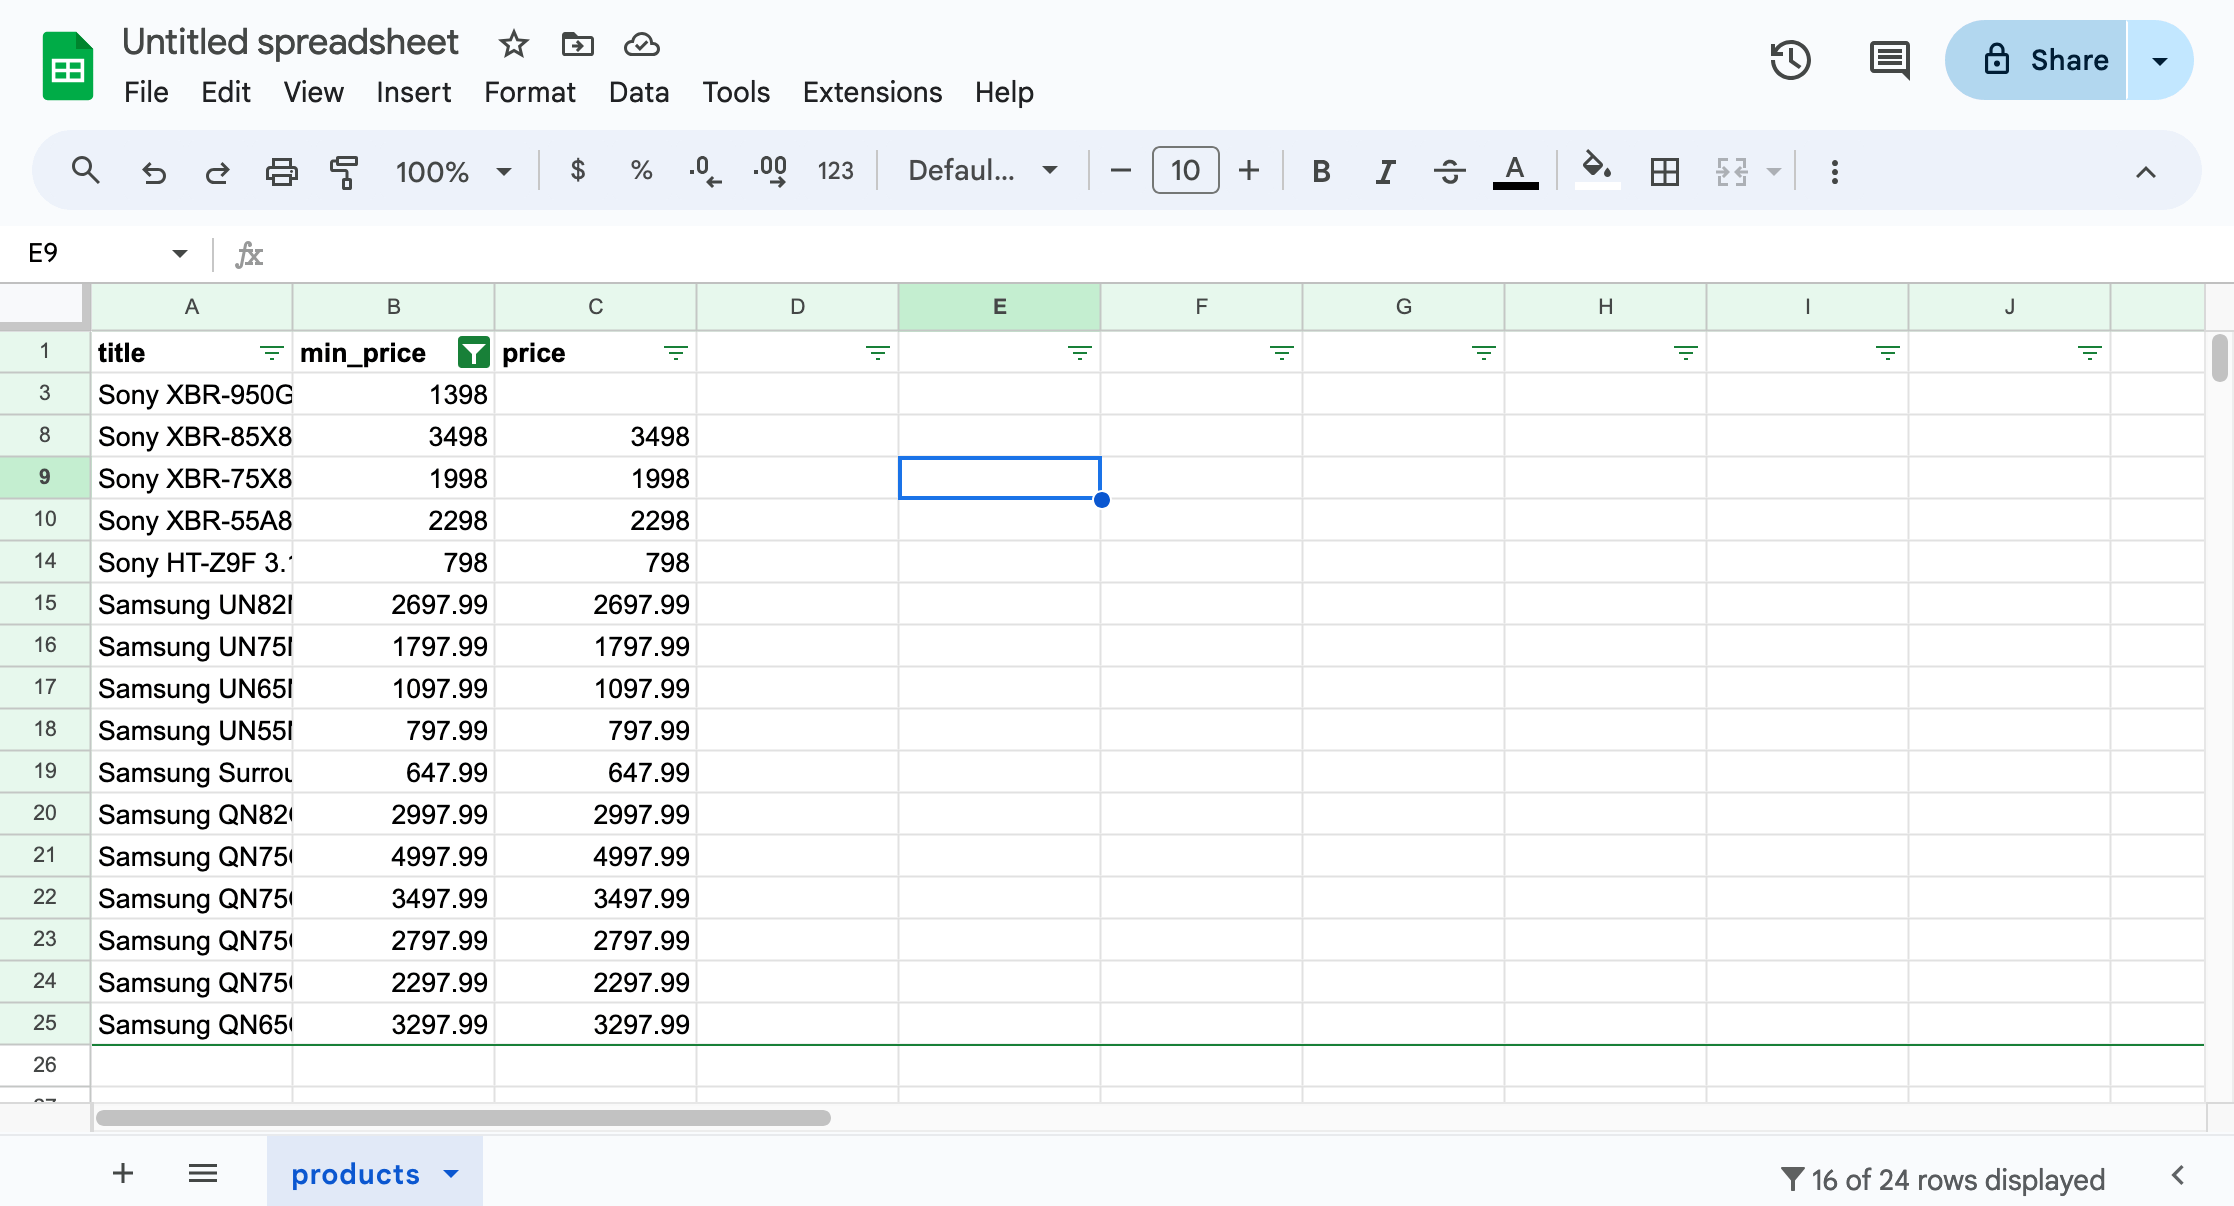
Process your CSV
Open the products.csv file we created in the lesson using a spreadsheet application. Then, in the app, find all products with a min price greater than $500.
Solution
Let's use Google Sheets, which is free to use. After logging in with a Google account:
- Go to File > Import, choose Upload, and select the file. Import the data using the default settings. You should see a table with all the data.
- Select the header row. Go to Data > Create filter.
- Use the filter icon that appears next to
minPrice. Choose Filter by condition, select Greater than, and enter 500 in the text field. Confirm the dialog. You should see only the filtered data.