The Apify CLI
Learn about, install, and log into the Apify CLI - your best friend for interacting with the Apify platform via your terminal.
The Apify CLI helps you create, develop, build and run Apify Actors, and manage the Apify cloud platform from any computer. It can be used to automatically generate the boilerplate for different types of projects, initialize projects, remotely call Actors on the platform, and run your own projects.
Installing
To install the Apify CLI, you'll first need npm, which comes preinstalled with Node.js. Additionally, make sure you've got an Apify account, as you will need to log in to the CLI to gain access to its full potential.
Open up a terminal instance and run the following command:
npm i -g apify-cli
This will install the CLI via npm.
Logging in
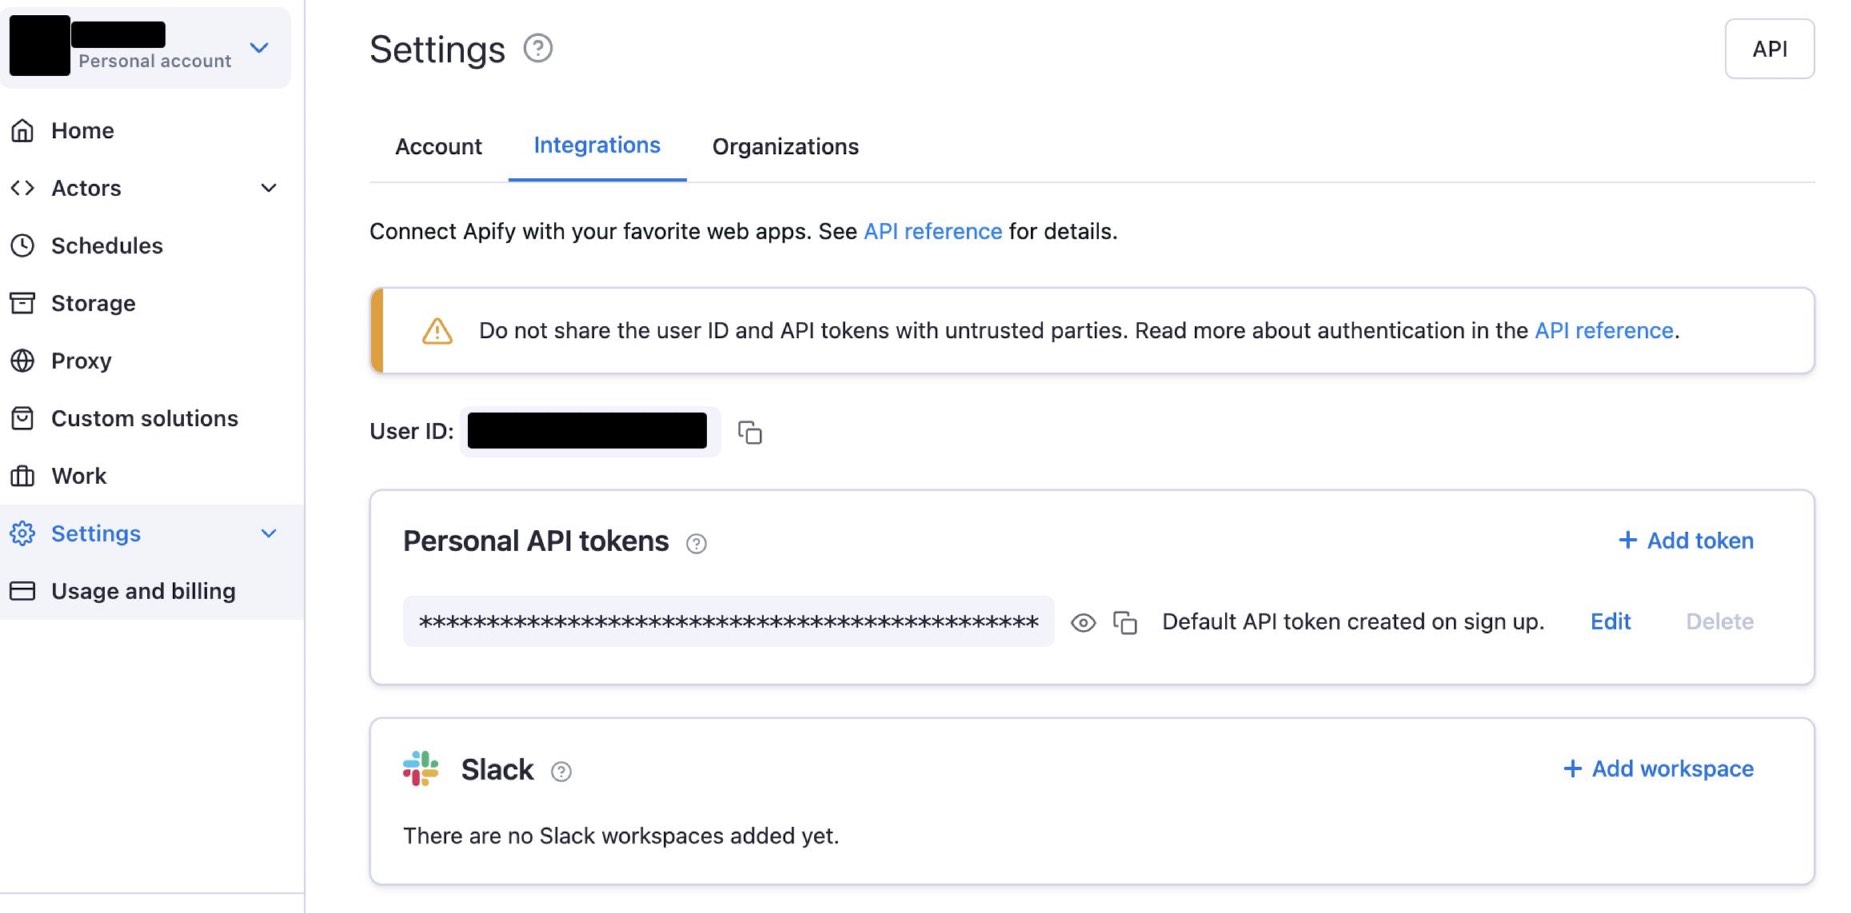
After the CLI has finished installing, navigate to the Apify Console and click on Settings. Then, within your account settings, click Integrations. The page should look like this:

We've censored out the User ID in the image because it is private information which should not be shared with anyone who is not trusted. The same goes for your Personal API Token.
Copy the Personal API Token and return to your terminal, entering this command:
apify login -t YOUR_TOKEN_HERE
If you see a log which looks like this,
Success: You are logged in to Apify as YOUR_USERNAME!
If you see a log which looks like Success: You are logged in to Apify as YOUR_USERNAME!, you're in!