III - Executing scripts
Understand the two different contexts which your code can be run in, and how to run custom scripts in the context of the browser.
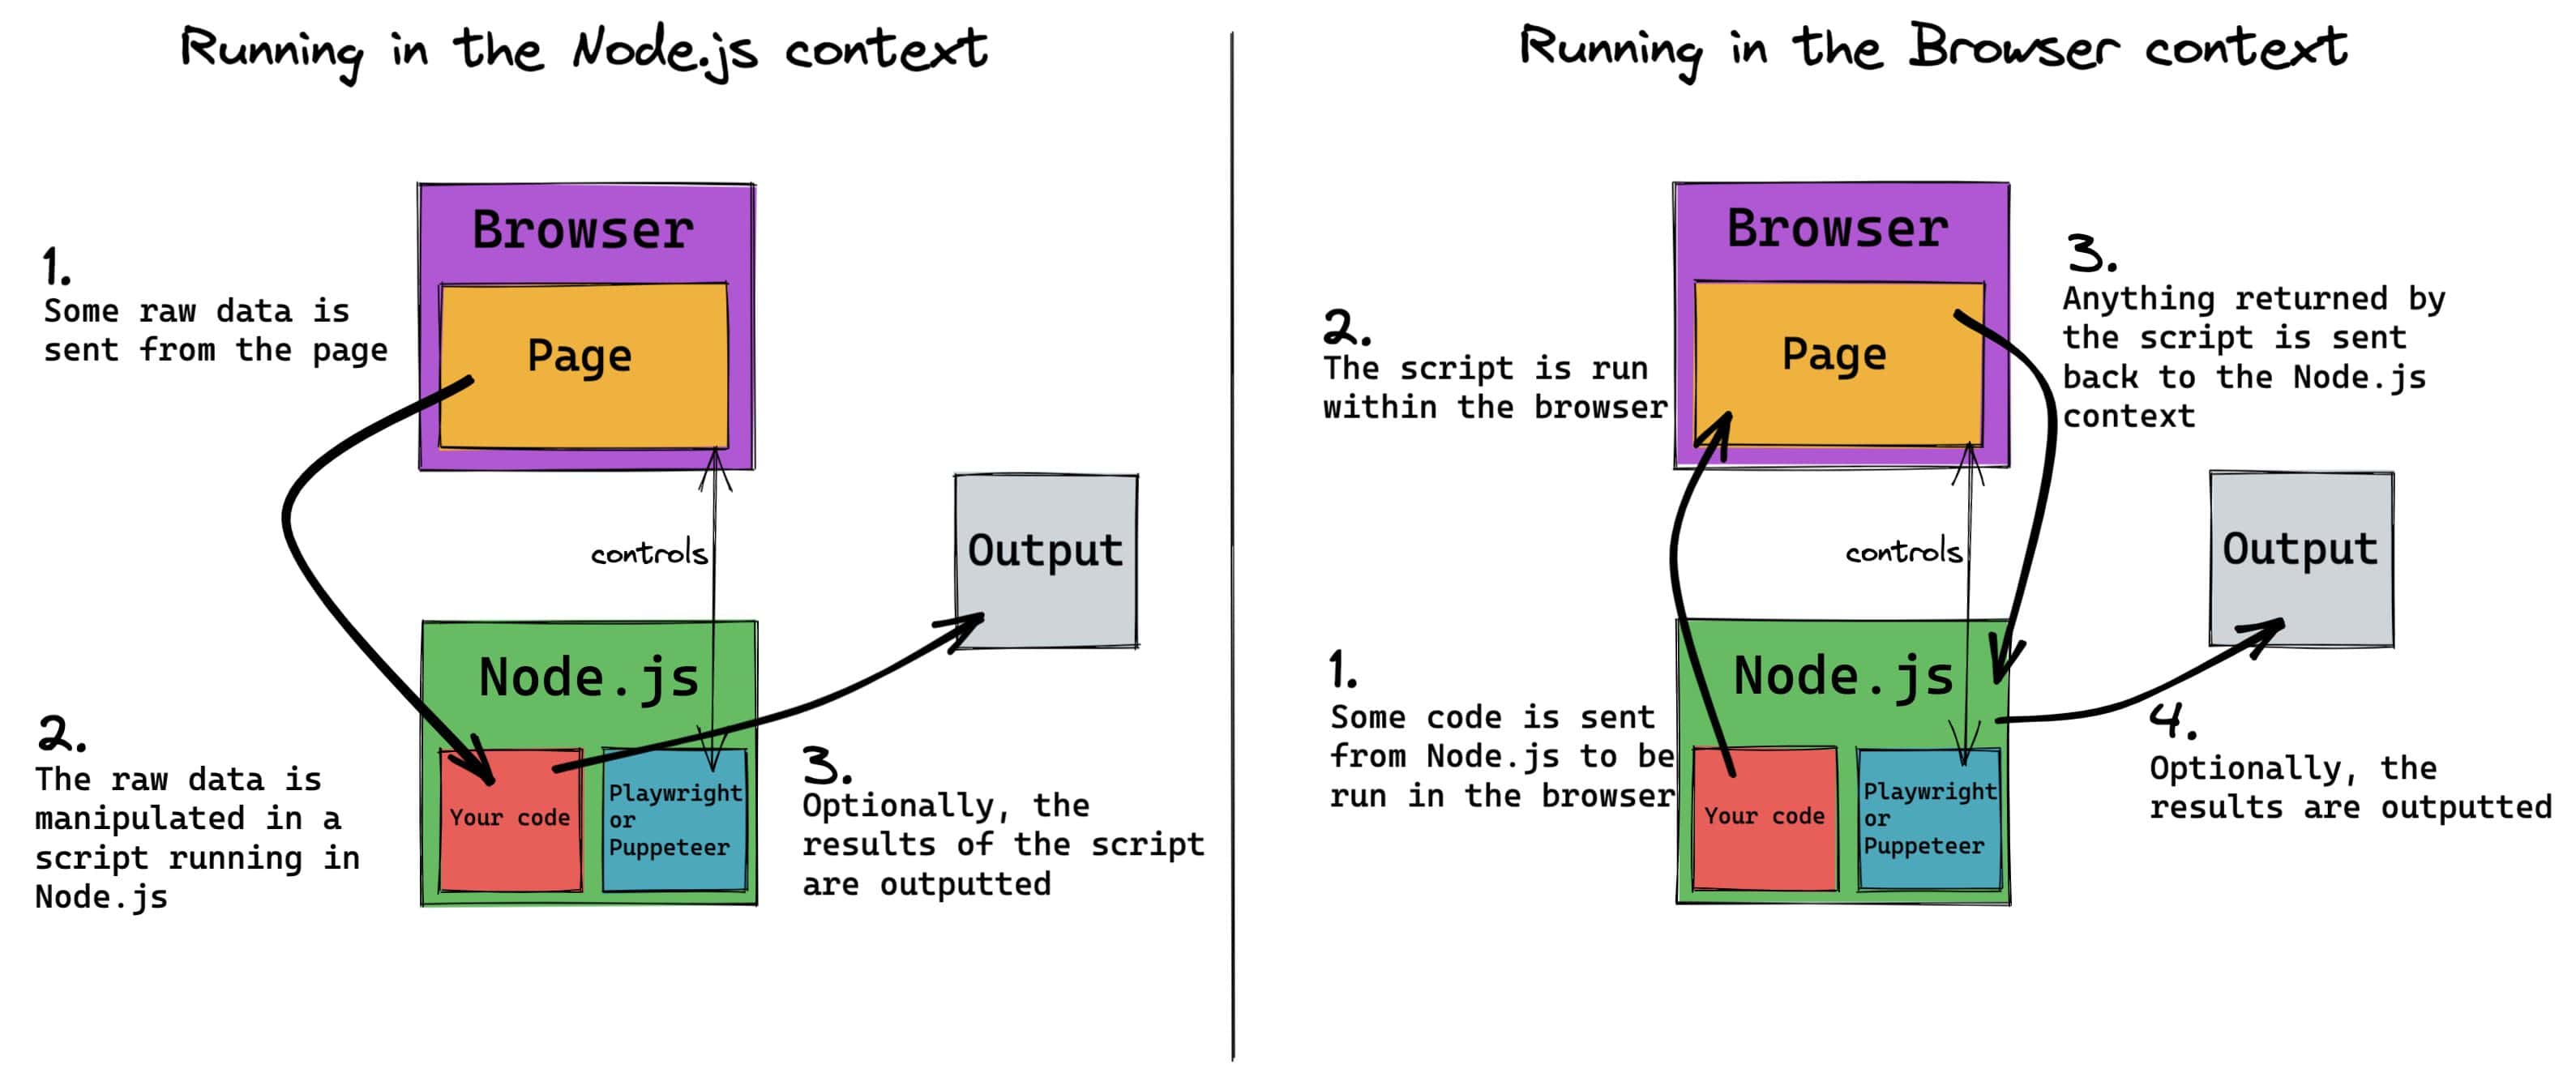
An important concept to understand when dealing with headless browsers is the context in which your code is being run. For example, if you try to use the native fs Node.js module (used in the previous lesson) while running code in the context of the browser, errors will be thrown saying that it is undefined. Similarly, if you are trying to use document.querySelector() or other browser-specific functions in the server-side Node.js context, errors will also be thrown.
Here is an example of a common mistake made by beginners to Puppeteer/Playwright:
// This code is incorrect!
import { chromium } from 'playwright';
const browser = await chromium.launch({ headless: false });
const page = await browser.newPage();
// visit google
await page.goto('https://www.google.com/');
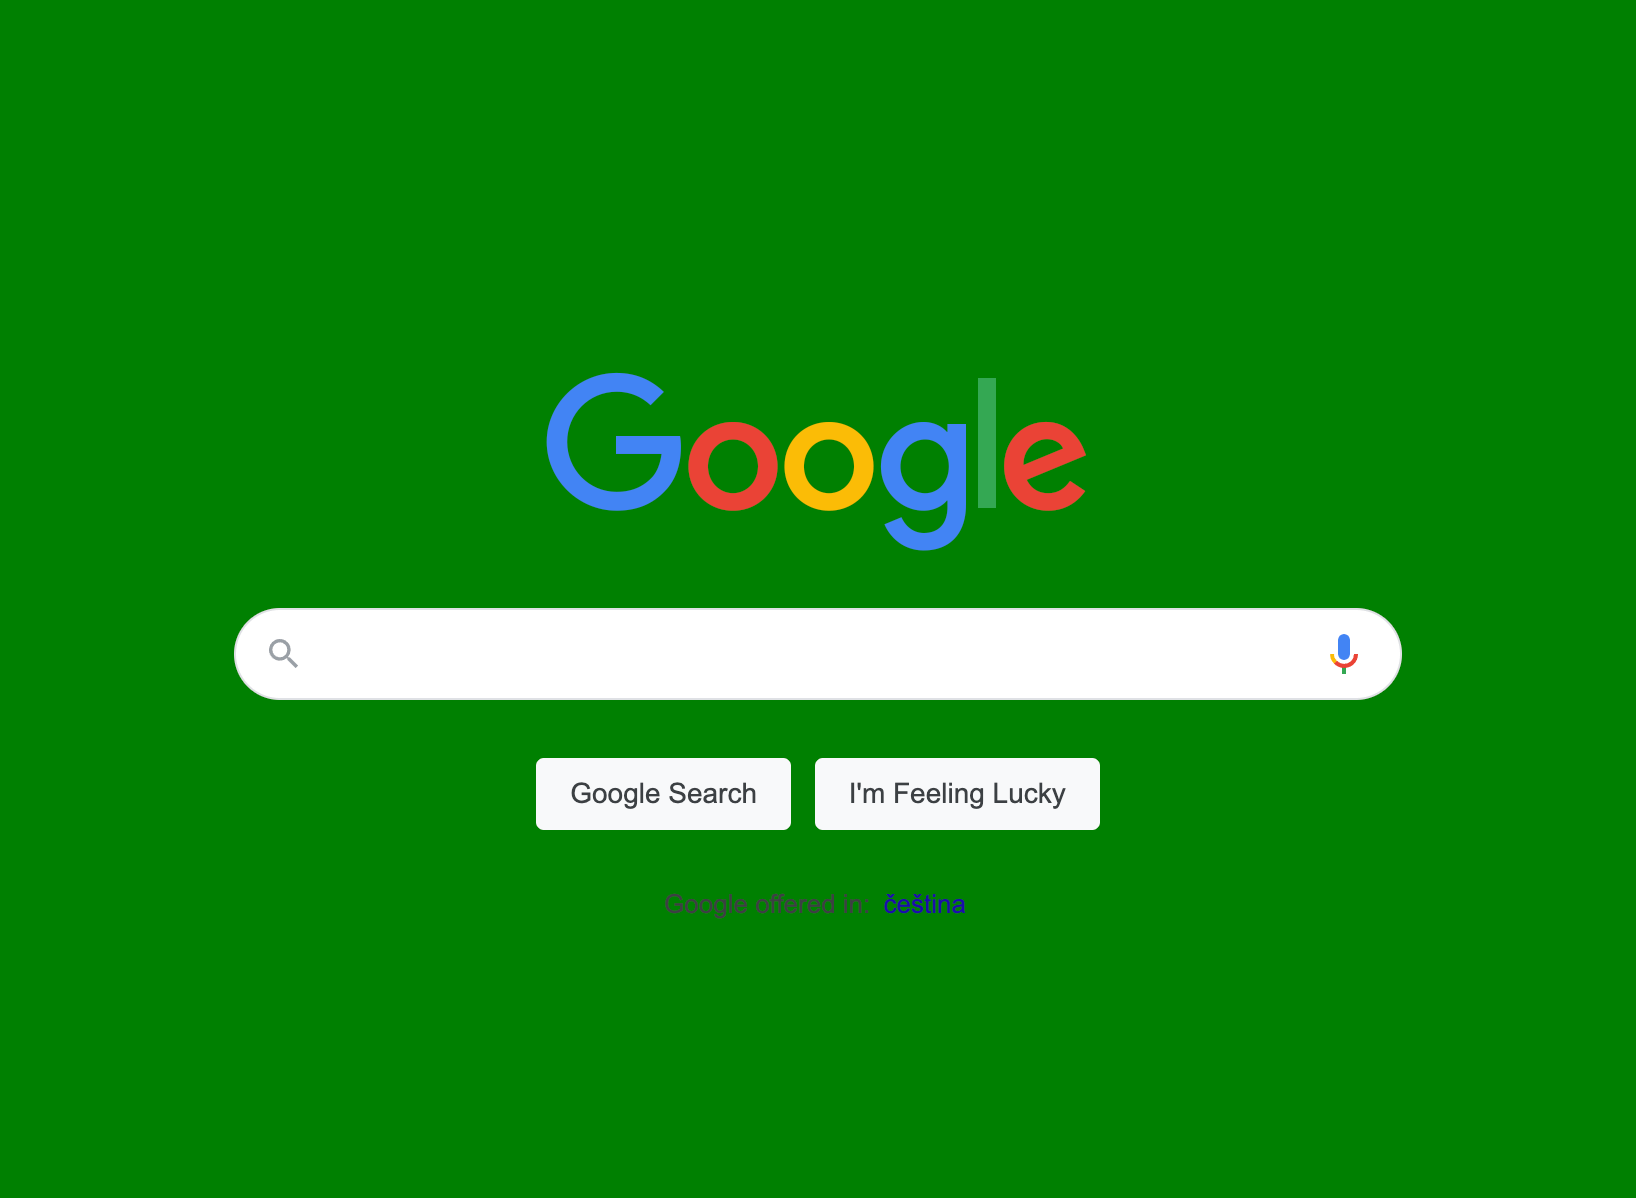
// change background to green
document.body.style.background = 'green';
await page.waitForTimeout(10000);
await browser.close();
When we try and run this, we get this error:
ReferenceError: document is not defined
The reason this is happening is because we're trying to run browser-side code on the server-side where it is not supported. document is a property of the browser Window instance that holds the rendered website; therefore, this API is not available in Node.js. How are we supposed to run code within the context of the browser?
Running code in the context of the browser
We will use page.evaluate() to run our code in the browser. This method takes a callback as its first parameter, which will be executed within the browser.
- Playwright
- Puppeteer
import { chromium } from 'playwright';

const browser = await chromium.launch({ headless: false });
const page = await browser.newPage();

await page.goto('https://www.google.com/');

await page.evaluate(() => {
    document.body.style.background = 'green';
});

await page.waitForTimeout(10000);

await browser.close();
import puppeteer from 'puppeteer';

const browser = await puppeteer.launch({ headless: false });
const page = await browser.newPage();

await page.goto('https://www.google.com/');

await page.evaluate(() => {
    document.body.style.background = 'green';
});

await page.waitForTimeout(10000);

await browser.close();
Here's what we see in the automated browser when we run this code:
Using variables in page.evaluate()
Within our code, we generate a randomString in the Node.js context:
const randomString = Math.random().toString(36).slice(2);
Now, let's say we want to change the title of the document to be this random string. To have the random string available in the callback of our page.evaluate(), we'll pass it in a second parameter. It's best practice to have this second parameter as an object, because in real world situations you often need to pass more than one value.
- Playwright
- Puppeteer
import { chromium } from 'playwright';

const browser = await chromium.launch({ headless: false });
const page = await browser.newPage();

await page.goto('https://www.google.com/');

const params = { randomString: Math.random().toString(36).slice(2) };

await page.evaluate(({ randomString }) => {
    document.querySelector('title').textContent = randomString;
}, params);

await page.waitForTimeout(10000);

await browser.close();
import puppeteer from 'puppeteer';

const browser = await puppeteer.launch({ headless: false });
const page = await browser.newPage();

await page.goto('https://www.google.com/');

const params = { randomString: Math.random().toString(36).slice(2) };

await page.evaluate(({ randomString }) => {
    document.querySelector('title').textContent = randomString;
}, params);

await page.waitForTimeout(10000);

await browser.close();
Now, when we run this code, we can see the title change on the page's tab:

Next up
The next lesson will be a short one discussing two different ways of executing scripts on a page.