Creating Actors
This lesson offers hands-on experience in building and running Actors in Apify Console using a template. By the end of it, you will be able to build and run your first Actor using an Actor template.
You can create an Actor in several ways. In this tutorial, we'll focus on the easiest method: selecting an Actor template. You don't need to install any special software, and you can complete the entire process directly in Apify Console using your Apify account.
Choose the source
To choose the source of your new Actor, go to Apify Console > Actors, and select Develop new.
You have two options:
- Create an Actor from existing source code by using Git providers or pushing the code from your local machine using Apify CLI.
- Create an Actor from a template.
Create Actor from existing source code
If you already have your code hosted by a Git provider, you can use it to create an Actor by linking the repository. If you use GitHub, you can use the GitHub integration to create an Actor from your public or private repository. You can also use GitLab, Bitbucket or other Git providers or external repositories. To see all available options, select Import from Git.
You can also push your existing code from your local machine using Apify CLI. This option is useful when you develop your code locally and then you want to push it to Apify Console to run the code as an Actor in the cloud. For details, see Quick start in the Apify CLI docs.
Create Actor from a template
Python, JavaScript, and TypeScript have several template options that you can use. To see all available templates, select Browse all templates.
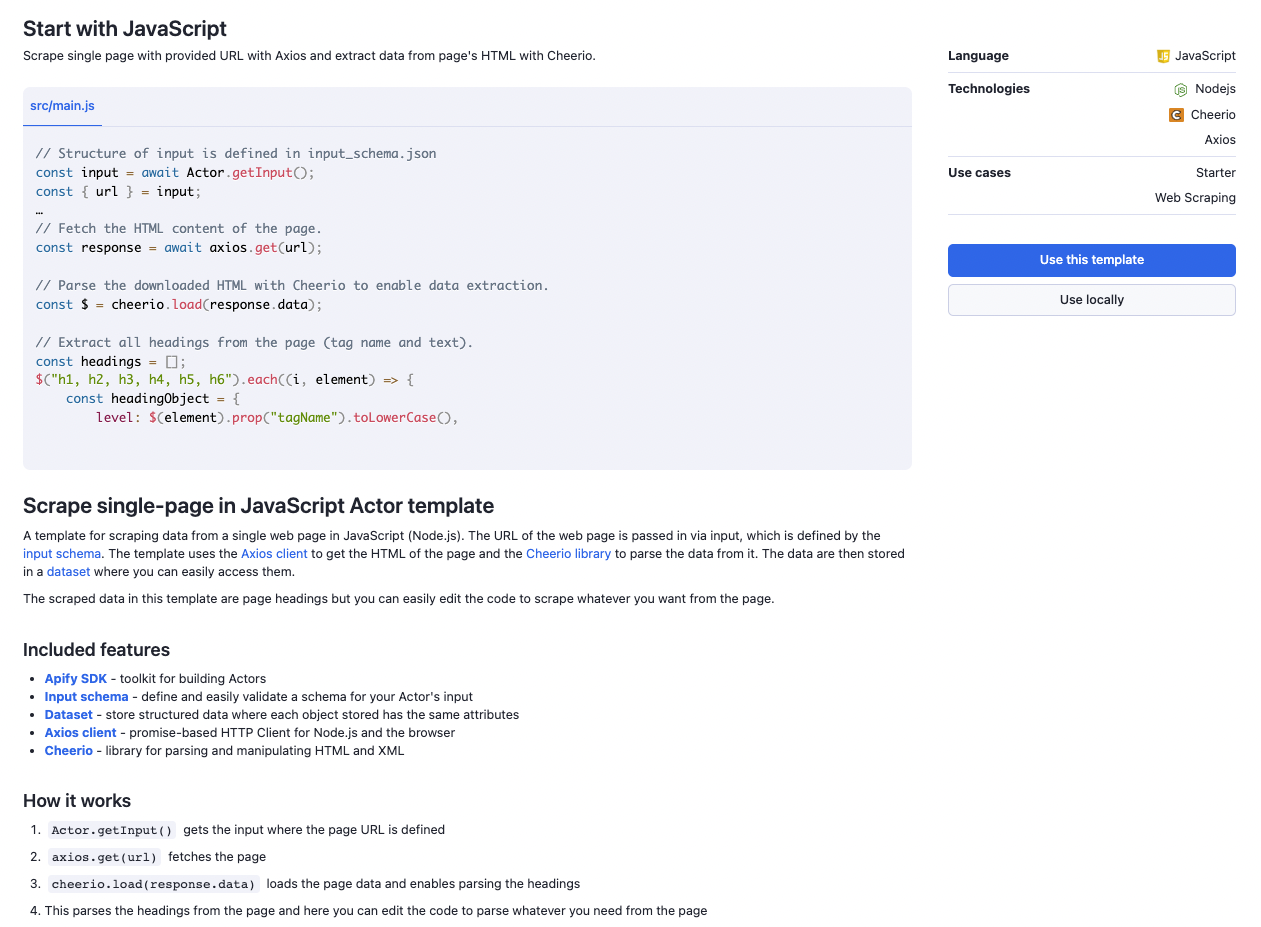
In this tutorial, let's choose the One-Page HTML Scraper with Cheerio template.
You will end up on a template detail page where you can see all the important information about the template - description, included features, used technologies, and what is the use-case of this template. More importantly, there is a code preview and also instructions for how the code works.
Use templates in Web IDE
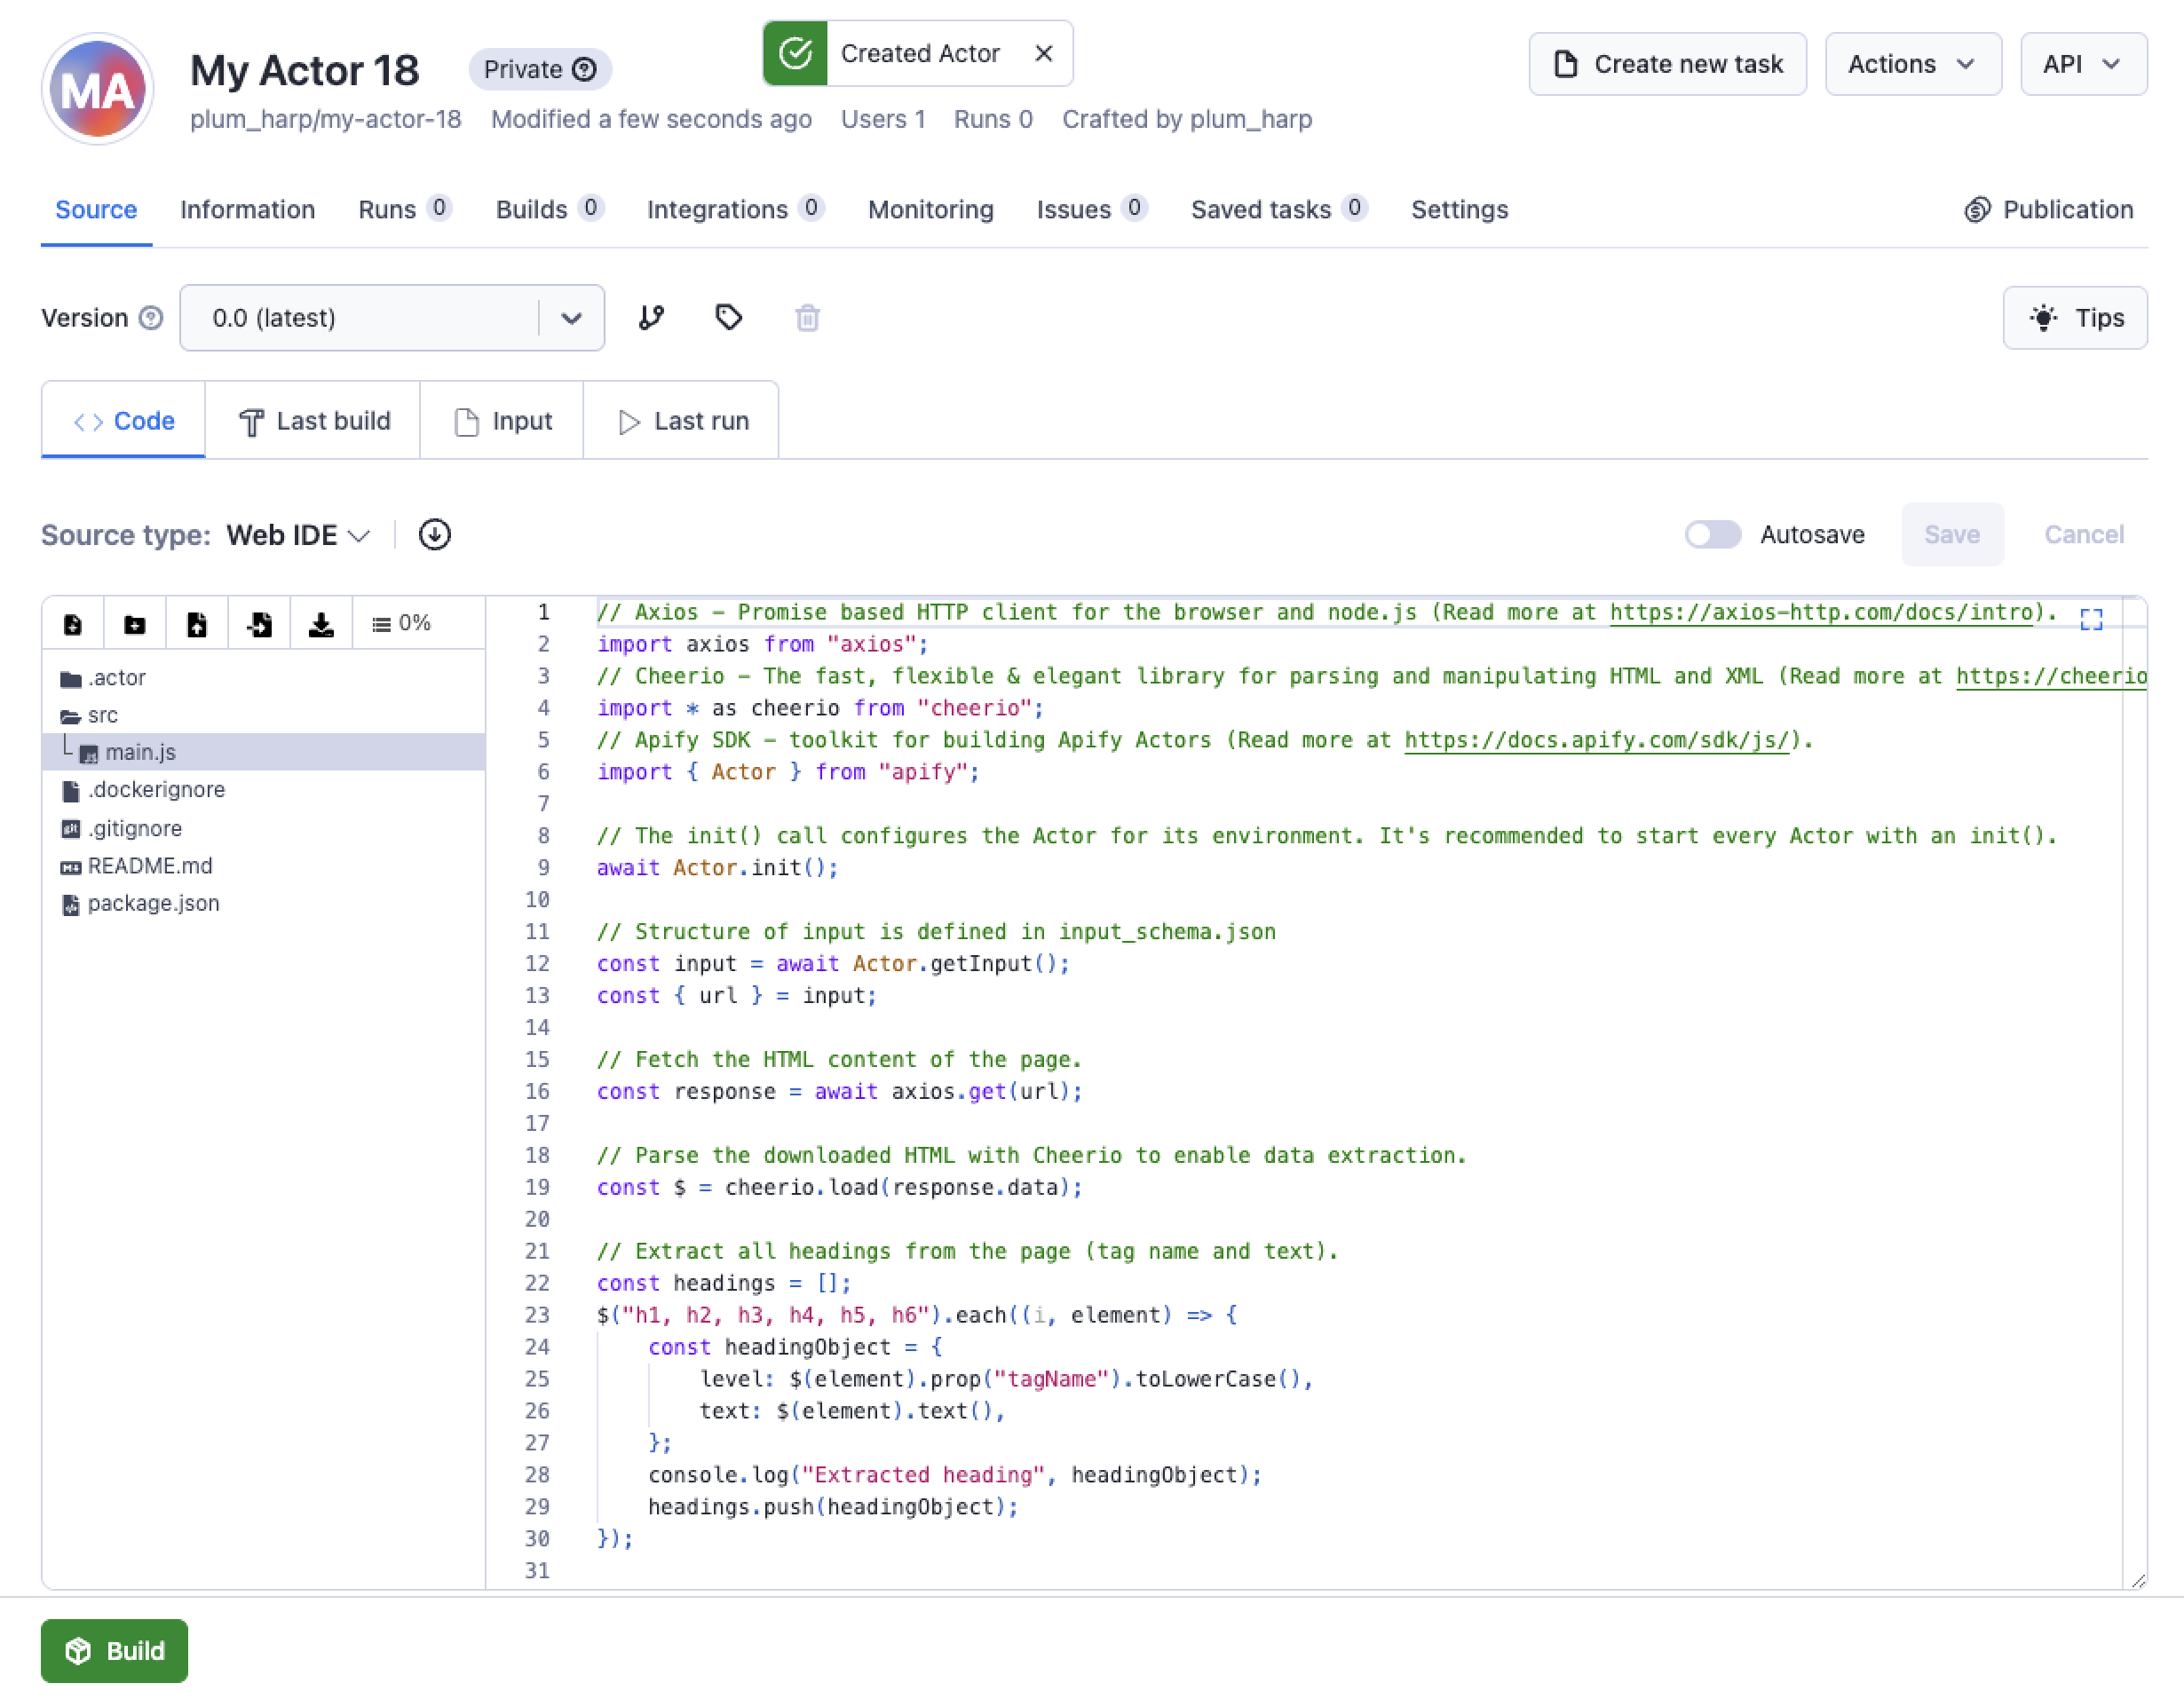
By clicking Use this template button you will create the Actor in Apify Console and you will be moved to the Code tab with the Web IDE where you can see the code of the template and start editing it.
The Web IDE is a great tool for developing your Actor directly in Apify Console without the need to install or use any other software.
Use templates locally
If you want to use the template locally, you can again use our Apify CLI to download the template to your local machine.
Creating an Actor from a template locally is a great option if you want to develop your code using your local environment and IDE and then push the final solution back to Apify Console.
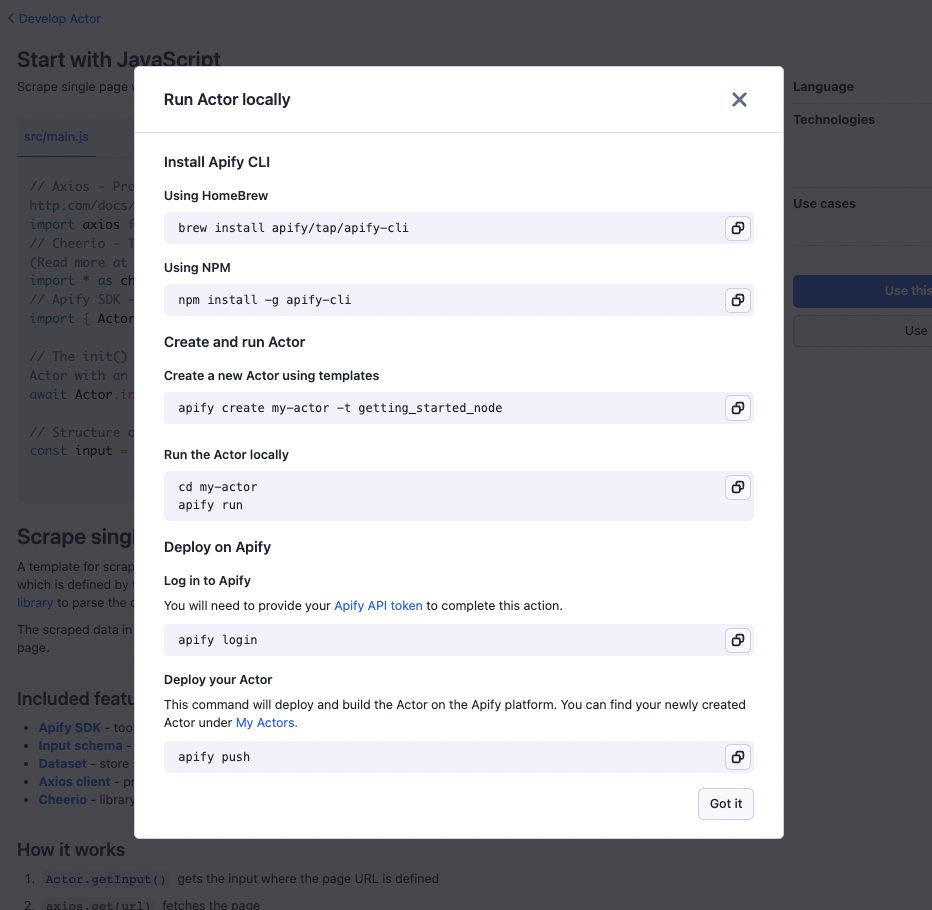
When you click on the Use locally button, you'll be presented with instructions on how to create an Actor from this template in your local environment.
With the Apify CLI installed, you can run the following commands in your terminal:
apify create my-actor -t getting_started_node
cd my-actor
apify run
Start with scraping single page
This template is a great starting point for web scraping as it extracts data from a single website. It uses Axios for downloading the page content and Cheerio for parsing the HTML from the content.
Let's see what's inside the Start with JavaScript template. The main logic of the template lives in the src/main.js file.
// Axios - Promise based HTTP client for the browser and node.js (Read more at https://axios-http.com/docs/intro).
import { Actor } from 'apify';
import axios from 'axios';
// Cheerio - The fast, flexible & elegant library for parsing and manipulating HTML and XML (Read more at https://cheerio.js.org/).
import * as cheerio from 'cheerio';
// Apify SDK - toolkit for building Apify Actors (Read more at https://docs.apify.com/sdk/js/).

// The init() call configures the Actor for its environment. It's recommended to start every Actor with an init().
await Actor.init();

// Structure of input is defined in input_schema.json
const input = await Actor.getInput();
const { url } = input;

// Fetch the HTML content of the page.
const response = await axios.get(url);

// Parse the downloaded HTML with Cheerio to enable data extraction.
const $ = cheerio.load(response.data);

// Extract all headings from the page (tag name and text).
const headings = [];
$('h1, h2, h3, h4, h5, h6').each((i, element) => {
    const headingObject = {
        level: $(element).prop('tagName').toLowerCase(),
        text: $(element).text(),
    };
    console.log('Extracted heading', headingObject);
    headings.push(headingObject);
});

// Save headings to Dataset - a table-like storage.
await Actor.pushData(headings);

// Gracefully exit the Actor process. It's recommended to quit all Actors with an exit().
await Actor.exit();
The Actor takes the url from the input and then:
- Sends a request to the URL.
- Downloads the page's HTML content.
- Extracts headings (H1 - H6) from the page.
- Stores the extracted data.
The extracted data is stored in the Dataset where you can preview it and download it. We'll show how to do that later in Run the Actor section.
Feel free to play around with the code and add some more features to it. For example, you can extract all the links from the page or extract all the images or completely change the logic of this template.
Keep in mind that this template uses input schema defined in the .actor/input_schema.json file and linked to the .actor/actor.json. If you want to change the input schema, you need to change it in those files as well.
Learn more about the Actor input and output in the next page.
Build the Actor
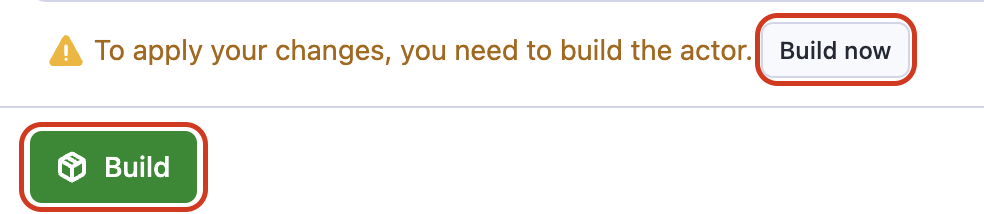
In order to run the Actor, you need to build it first. Click on the Build button at the bottom of the page or Build now button right under the code editor.
After you've clicked the Build button, it'll take around 5–10 seconds to complete the build. You'll know it's finished when you see a green Start button.

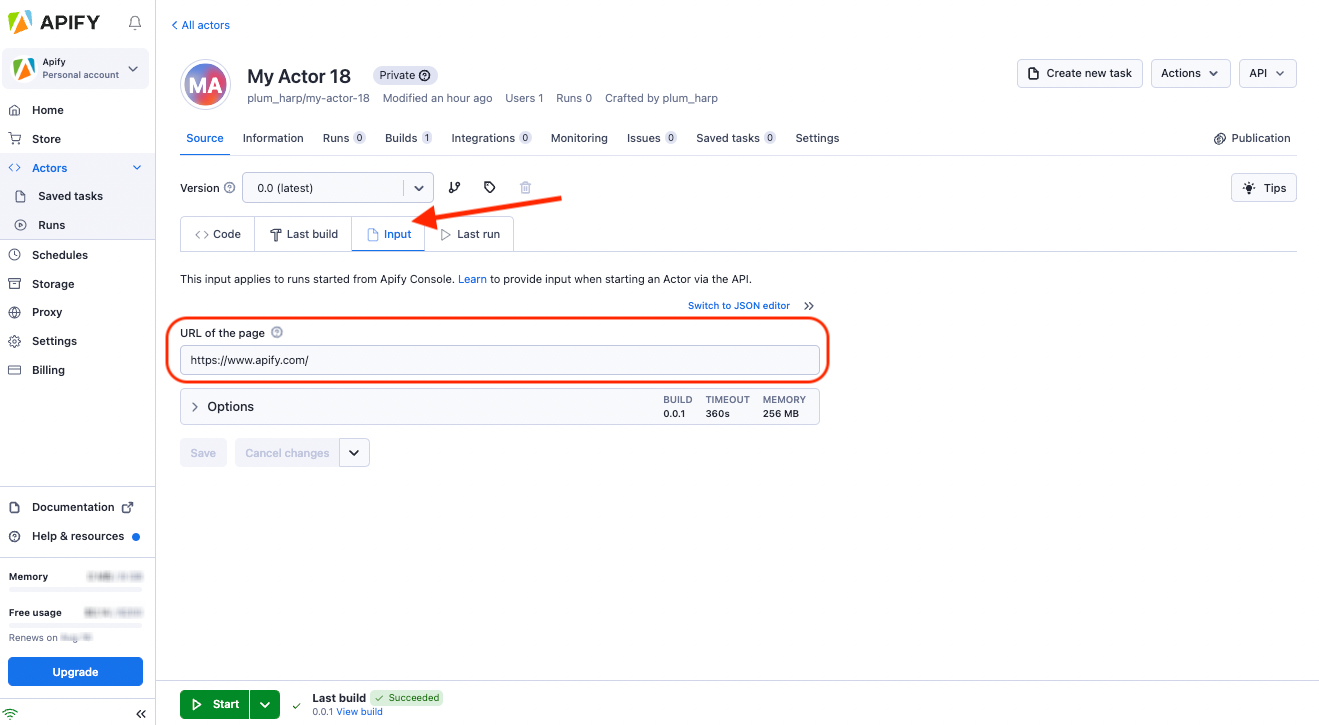
Fill the input
And now we are ready to run the Actor. But before we do that, let's give the Actor some input by going to the Input tab.
The input tab is where you can provide the Actor with some meaningful input. In this case, we'll be providing the Actor with a URL to scrape. For now, we'll use the prefilled value of Apify website (https://apify.com/).
You can change the website you want to extract the data from by changing the URL in the input field.
Run the Actor
Once you have provided the Actor with some URL you want to extract the data from, click Start button and wait a few seconds. You should see the Actor run logs in the Last run tab.
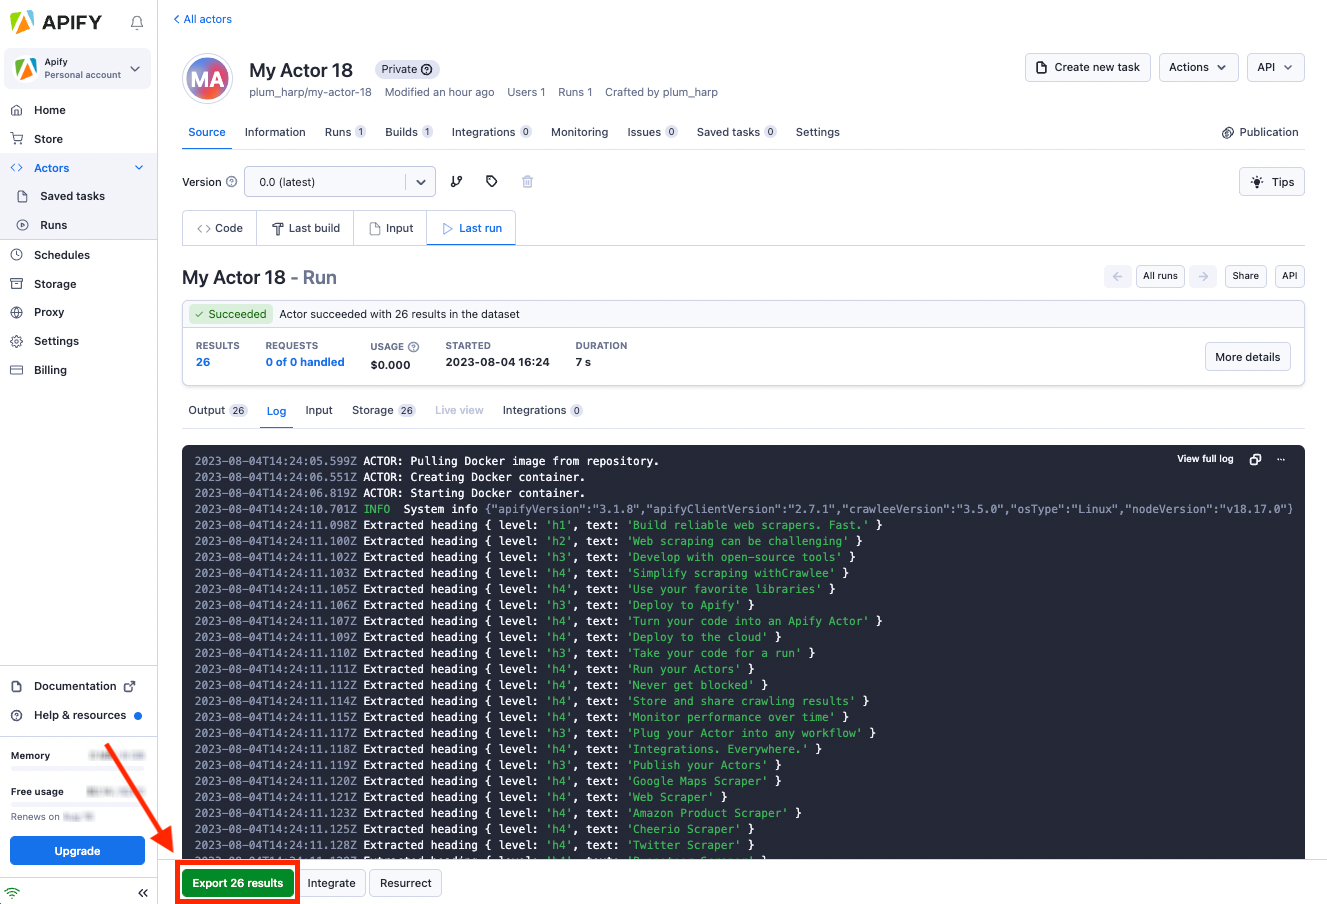
After the Actor finishes, you can preview or download the extracted data by clicking on the Export X results button.

And that's it! You've just created your first Actor and extracted data from a website 🎉.
Next up
We've created an Actor, but how can we give it more complex inputs and make it do stuff based on these inputs? This is exactly what we'll be discussing in the next lesson's activity.