Apify client
Interact with the Apify API in your code by using the apify-client package, which is available for both JavaScript and Python.
Now that you've gotten your toes wet with interacting with the Apify API through raw HTTP requests, you're ready to become familiar with the Apify client, which is a package available for both JavaScript and Python that allows you to interact with the API in your code without explicitly needing to make any GET or POST requests.
This lesson will provide code examples for both Node.js and Python, so regardless of the language you are using, you can follow along!
Examples
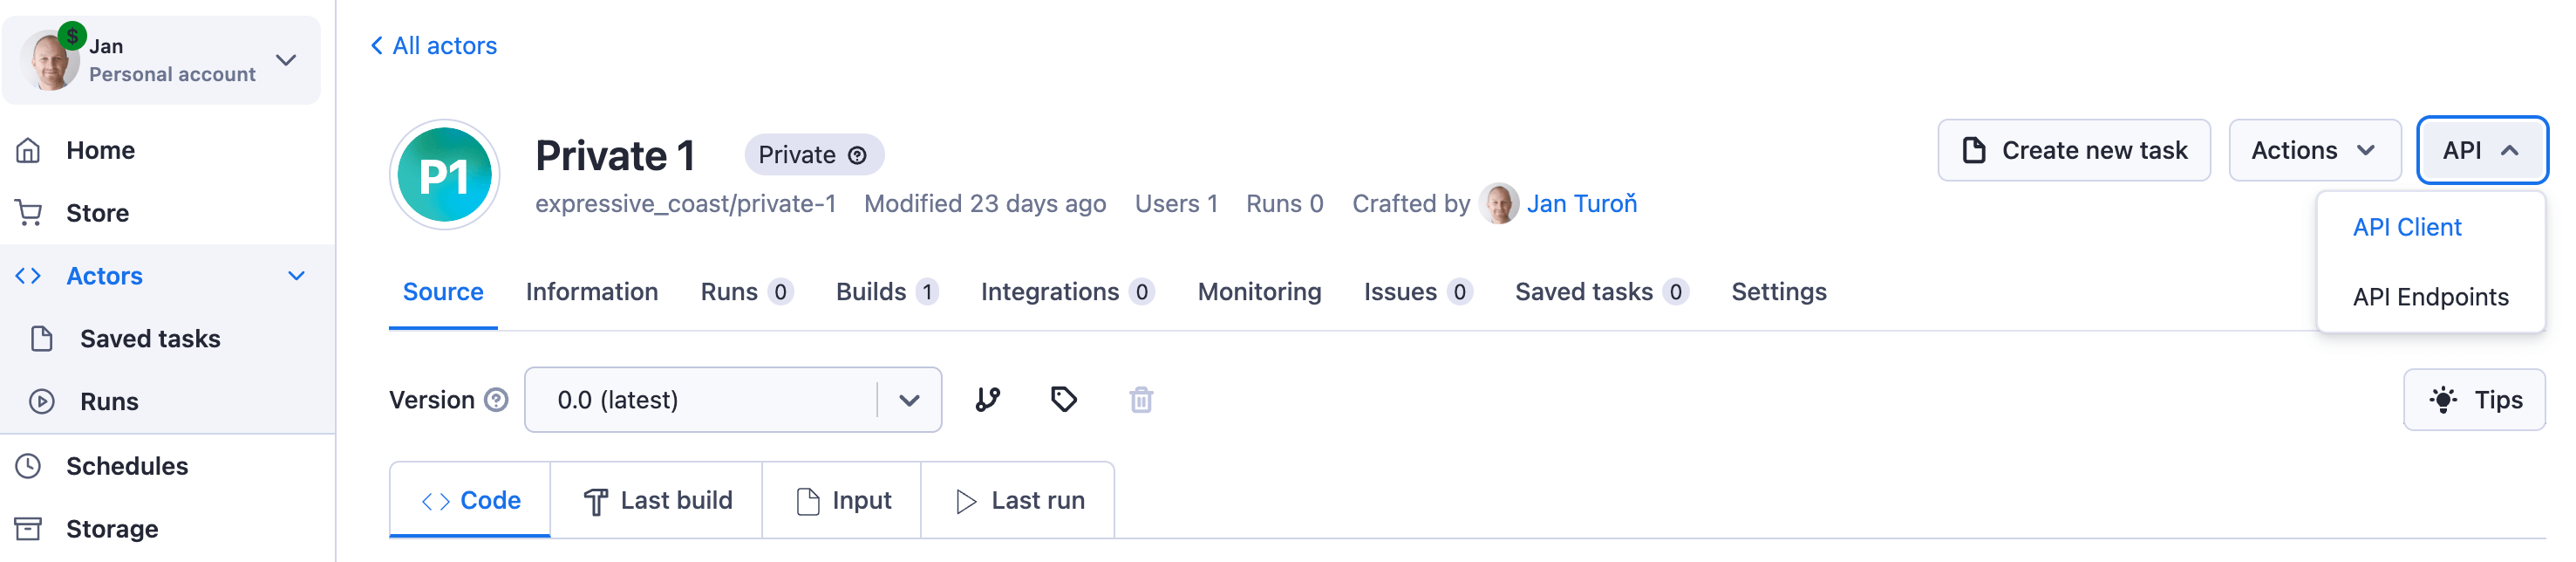
You can access apify-client examples in the Console Actor detail page. Click the API button and then the API Client dropdown button.
Installing and importing
If you are going to use the client in Node.js, use this command within one of your projects to install the package through npm:
npm install apify-client
In Python, you can install it from PyPI with this command:
pip install apify-client
After installing the package, let's make a file named client.js (or client.py for Python) and import the Apify client like so:
- Node.js
- Python
// client.js
import { ApifyClient } from 'apify-client';
# client.py
from apify_client import ApifyClient
Running an Actor
In the last lesson, we ran the adding-actor and retrieved its dataset items. That's exactly what we're going to do now; however, by using the Apify client instead.
Before we can use the client though, we must create a new instance of the ApifyClient class and pass it our API token from the API & Integrations page on Apify Console:
- Node.js
- Python
const client = new ApifyClient({
    token: 'YOUR_TOKEN',
});
client = ApifyClient(token='YOUR_TOKEN')
If you are planning on publishing your code to a public GitHub/Gitlab repository or anywhere else online, be sure to set your API token as en environment variable, and never hardcode it directly into your script.
Now that we've got our instance, we can point to an Actor using the client.actor() function, then call the Actor with some input with the .call() function - the first parameter of which is the input for the Actor.
- Node.js
- Python
const run = await client.actor('YOUR_USERNAME/adding-actor').call({
    num1: 4,
    num2: 2,
});
run = client.actor('YOUR_USERNAME/adding-actor').call(run_input={
    'num1': 4,
    'num2': 2
})
Learn more about the .call() function in our API documentation.
Downloading dataset items
Once an Actor's run has completed, it will return a run info object that looks something like this:
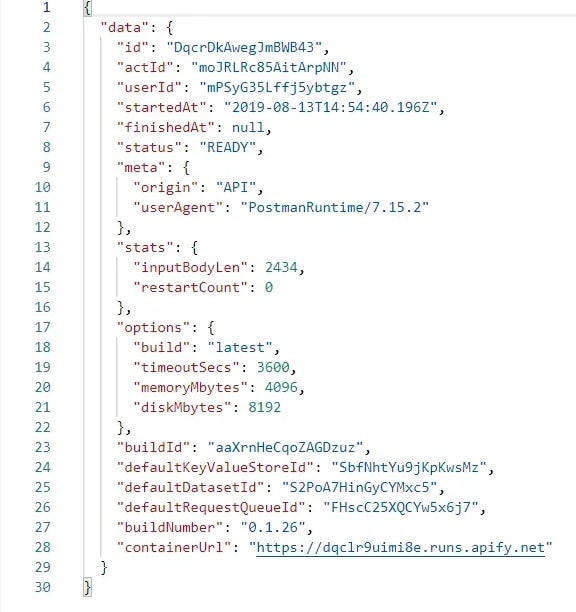
The run variable we created in the last section points to the run info object of the run we created with the .call() function, which means that through this variable, we can access the run's defaultDatasetId. This ID can then be passed into the client.dataset() function.
- Node.js
- Python
const dataset = client.dataset(run.defaultDatasetId);
dataset = client.dataset(run['defaultDatasetId'])
Finally, we can download the items in the dataset by using the list items function, then log them to the console.
- Node.js
- Python
const { items } = await dataset.listItems();

console.log(items);
items = dataset.list_items().items

print(items)
The final code for running the Actor and fetching its dataset items looks like this:
- Node.js
- Python
// client.js
import { ApifyClient } from 'apify-client';

const client = new ApifyClient({
    token: 'YOUR_TOKEN',
});

const run = await client.actor('YOUR_USERNAME/adding-actor').call({
    num1: 4,
    num2: 2,
});

const dataset = client.dataset(run.defaultDatasetId);

const { items } = await dataset.listItems();

console.log(items);
# client.py
from apify_client import ApifyClient

client = ApifyClient(token='YOUR_TOKEN')

actor = client.actor('YOUR_USERNAME/adding-actor').call(run_input={
    'num1': 4,
    'num2': 2
})

dataset = client.dataset(run['defaultDatasetId'])

items = dataset.list_items().items

print(items)
Updating an Actor
If you check the Settings tab within your adding-actor, you'll notice that the default timeout being set to the Actor is 360 seconds. This is a bit overkill considering the fact that the Actor is only adding two numbers together - the run should never take more than 20 seconds (even this is a generous number). The default memory being allocated to the Actor is 256 MB, which is reasonable for our purposes.
Let's change these two Actor settings via the Apify client using the actor.update() function. This function will call the update Actor endpoint, which can take defaultRunOptions as an input property. You can find the shape of the defaultRunOptions in the API documentation. Perfect!
First, we'll create a pointer to our Actor, similar to before (except this time, we won't be using .call() at the end):
- Node.js
- Python
const actor = client.actor('YOUR_USERNAME/adding-actor');
actor = client.actor('YOUR_USERNAME/adding-actor')
Then, we'll call the .update() method on the actor variable we created and pass in our new default run options:
- Node.js
- Python
await actor.update({
    defaultRunOptions: {
        build: 'latest',
        memoryMbytes: 256,
        timeoutSecs: 20,
    },
});
actor.update(default_run_build='latest', default_run_memory_mbytes=256, default_run_timeout_secs=20)
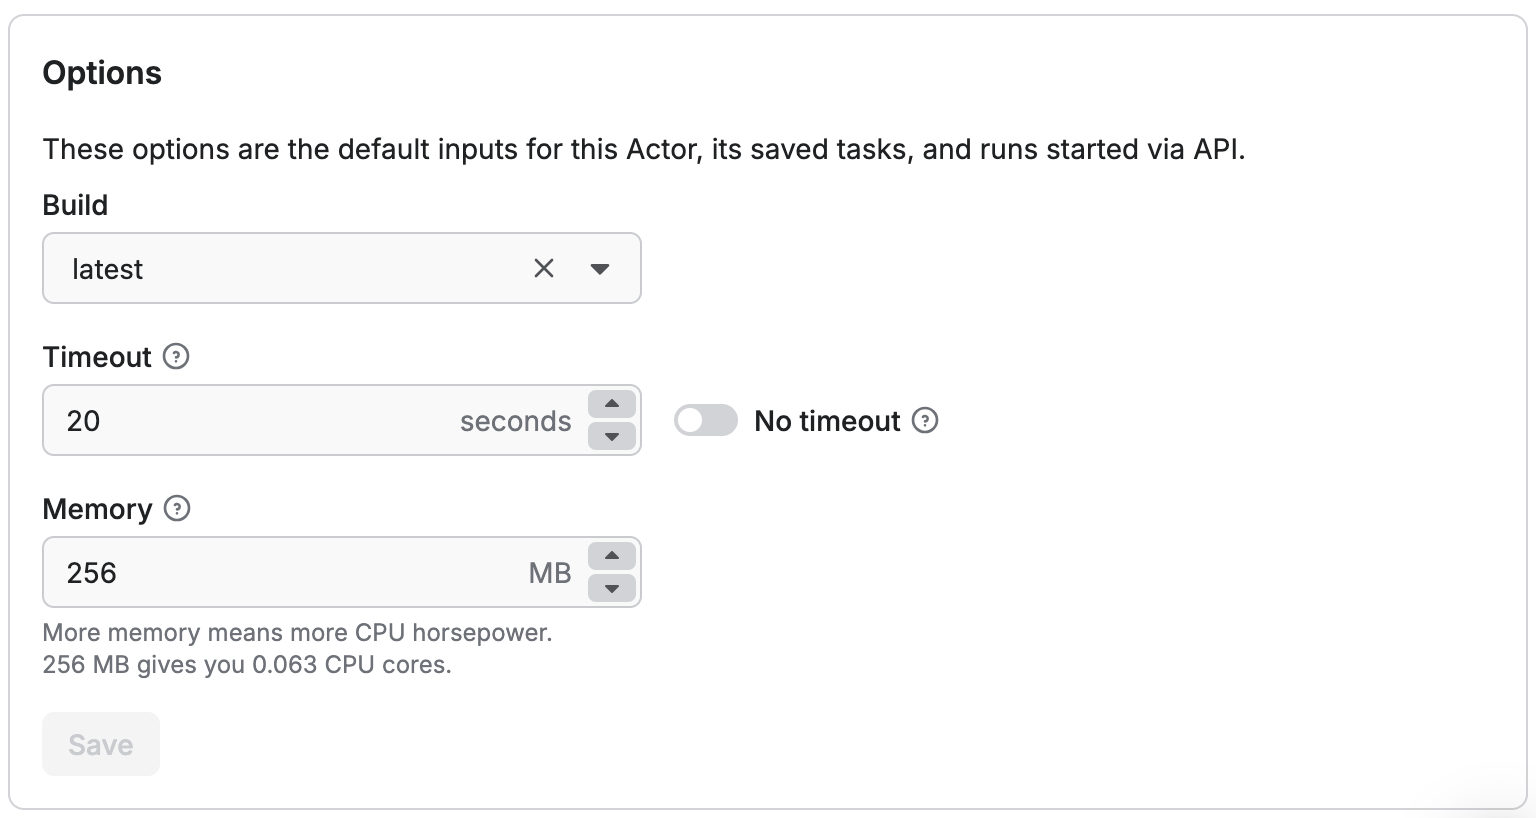
After running the code, go back to the Settings page of adding-actor. If your default options now look like this, then it worked!:
Overview
You can do so much more with the Apify client than running Actors, updating Actors, and downloading dataset items. The purpose of this lesson was to get you comfortable using the client in your own projects, as it's the absolute best developer tool for integrating the Apify platform with an external system.
For a more in-depth understanding of the Apify API client, give these a quick lookover:
Next up
Now that you're familiar and a bit more comfortable with the Apify platform, you're ready to start deploying your code to Apify! In the next section, you'll learn how to take any project written in any programming language and turn it into an Actor.